Overview #
The Schedule Module is used to manage and maintain employee work schedules within the ERPat System. Schedules define assigned working days, work hours, break periods, and rest days, serving as a core reference for attendance tracking, timekeeping, payroll computation, and workforce planning.
Each schedule record contains structured daily work and break details, ensuring consistent application of work rules across employees, departments, and establishments.
Key Features #
- Centralized management of employee work schedules
- Support for fixed and recurring weekly schedules
- Day-by-day work and break configuration
- Assignment tracking per schedule
- Integration with Attendance, Time Tracking, and Payroll modules
- Excel export for reporting and backup
- Secure role-based access control
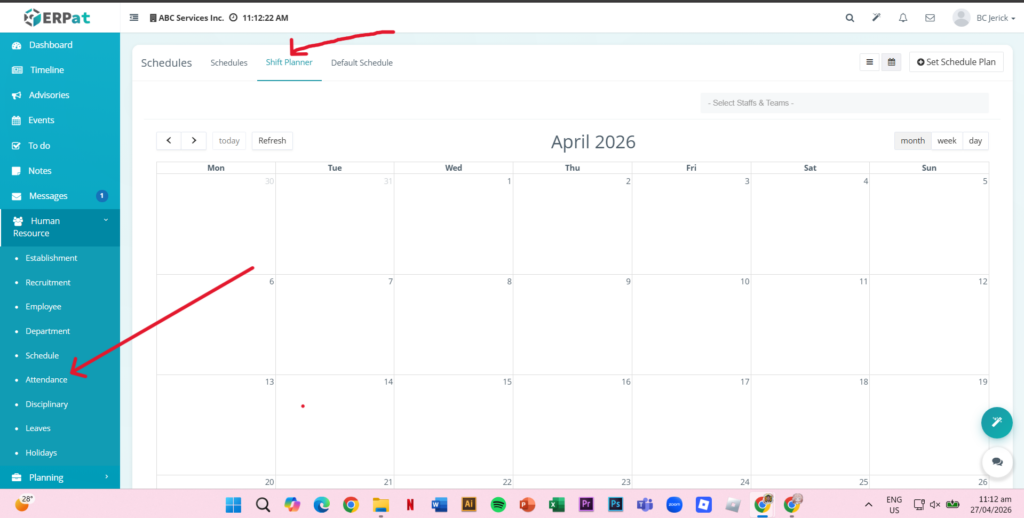
Accessing the Schedule Module #
- Log in to the ERPat System.
- Navigate to Human Resource from the main sidebar.
- Select Schedules.
- You will be directed to the Schedules listing page displaying all exisiting schedule records.
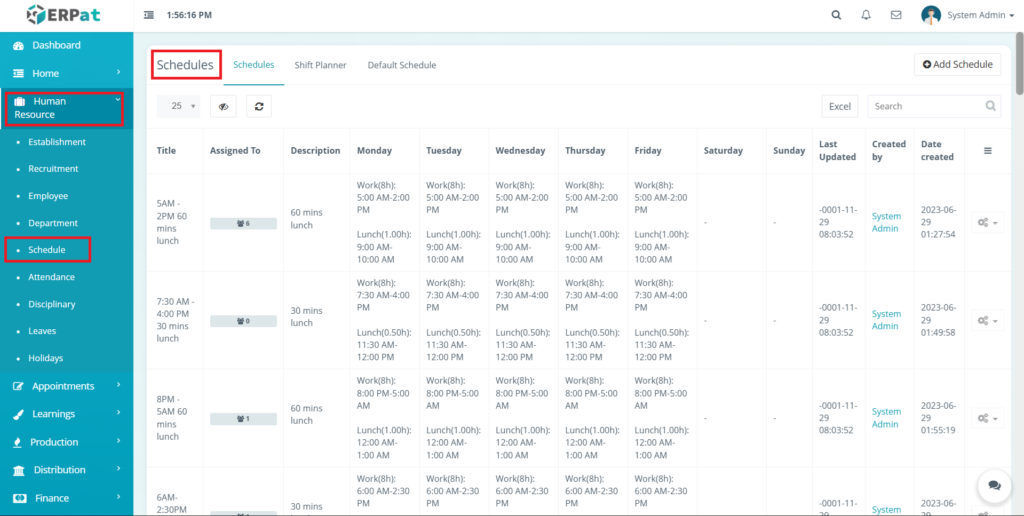
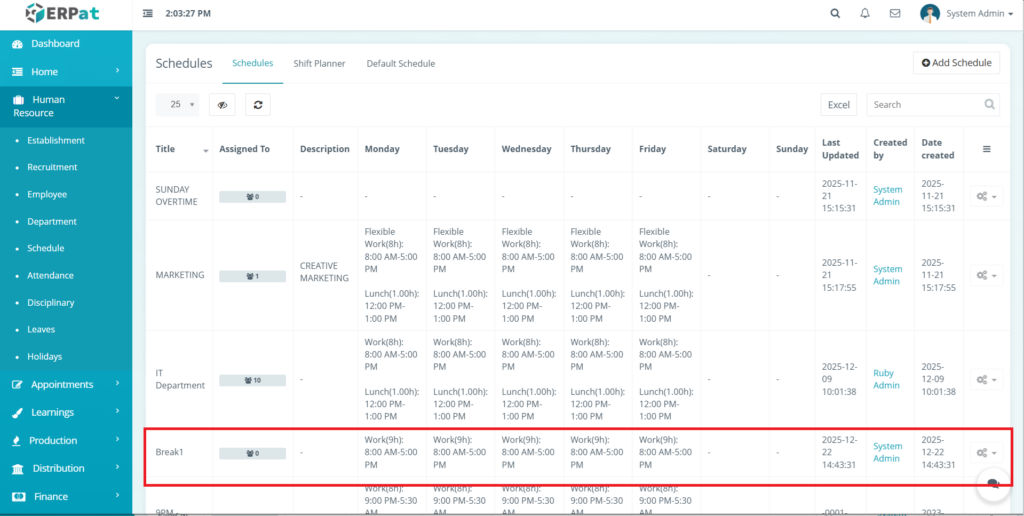
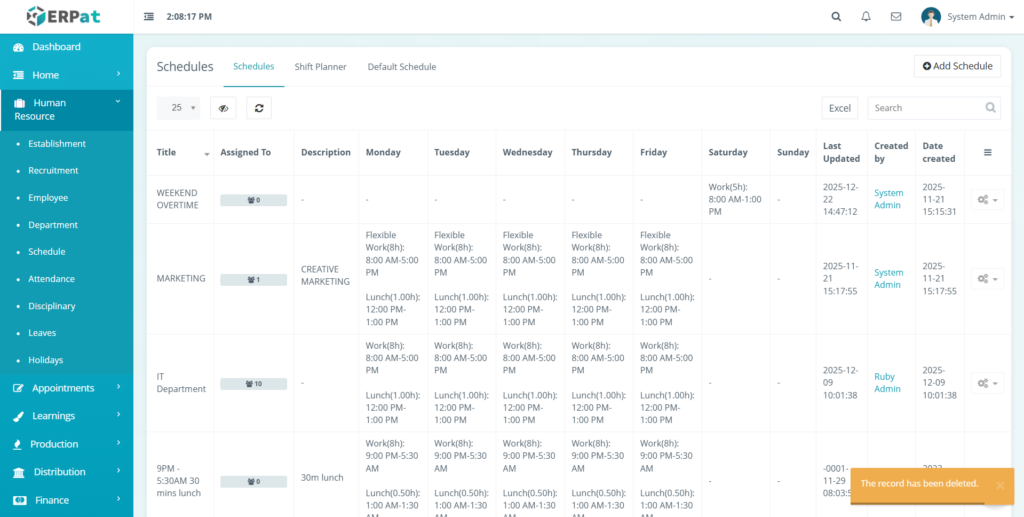
Schedule Listing Page #
The listing page provides an overview of all schedules with the following information:
- Title- Schedule name or shift label.
- Assigned To- Number of employees assigned to the schedule.
- Description- Notes such as break duration or special rules.
- Monday-Sunday- Daily work hours and break details.
- Last Updates- Most recent modification timestamp.
- Created by- User who created the schedule.
- Date Created- Record creation timestamp.
- Actions- Edit, Delete, or additional controls.

Additional Controls #
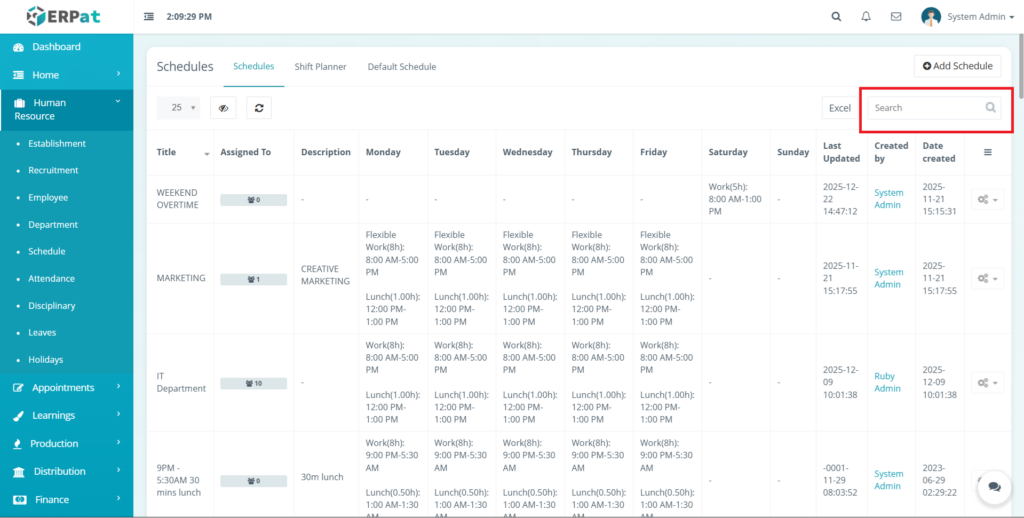
- Search bar for quick schedule lookup.
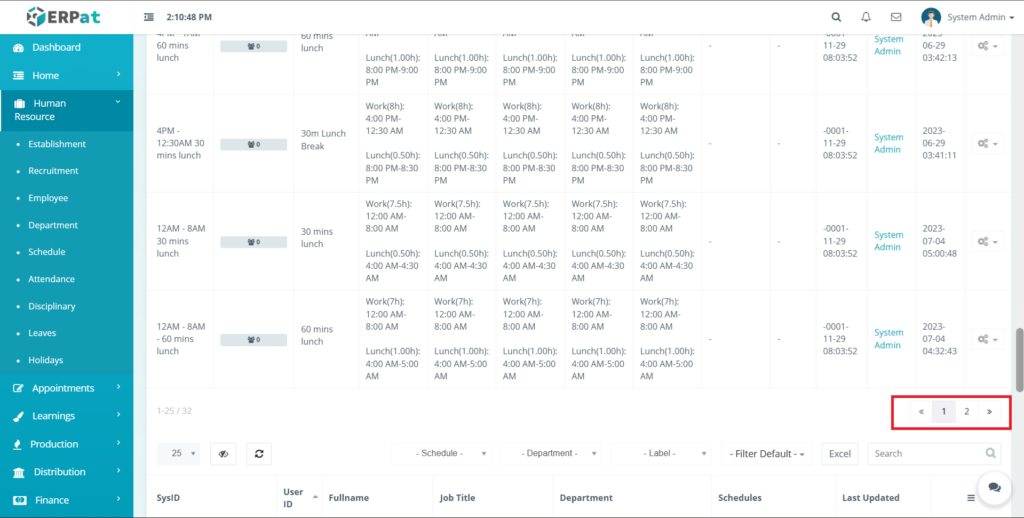
- Pagination for managing large datasets.
- Refresh and visibility toggle controls.
- Excel export option.
- Add Schedule button for creating new schedules.

Schedule Structure #
Each schedule may include:
- Work Hours- Star and end time per day.
- Break Duration- Lunch or rest break length.
- Break Time- Scheduled break start and end.
- Rest Days- Days marked as non-working.
- Weekly Pattern- Repeating schedule configuration.
Steps for Adding a New Schedule #
Steps #
- Click the Add Schedule button at the top-right of the page.
- Fill in the required fields:
- Schedule Title
- Description (e.g., break duration)
- Daily work hours (Monday to Sunday)
- Break time and duration
- Review all details for accuracy.
- Click Save to create the schedule.

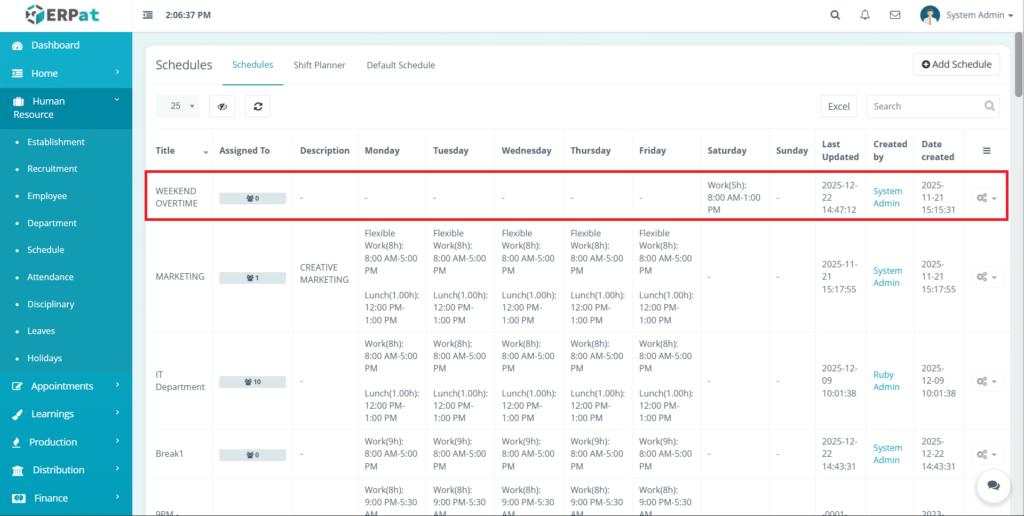
Result #
The newly added schedule will appear in the listing and can be assigned to employees for attendance tracking and payroll computation.
Steps for Editing a Schedule #
Steps #
- Locate the schedule from the listing page.
- Click the Edit icon under the Actins column.
- Update the necessary schedule details.
- Click Save to apply the changes.
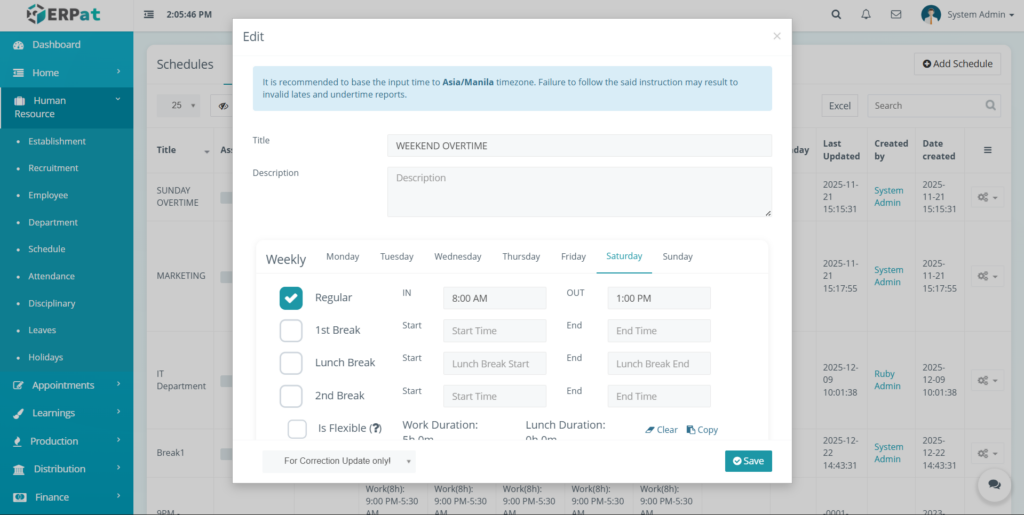
Notes #
Change will apply to future attendance records and payroll calculations based on system rules.
Steps to Delete a Schedule #
Steps #
- Locate the schedule to be removed.
- Click the Delete icon under the Actions column.
- Confirm the deletion when prompted.

Notes #
Deleting a schedule does not remove historical attendance records already generated.
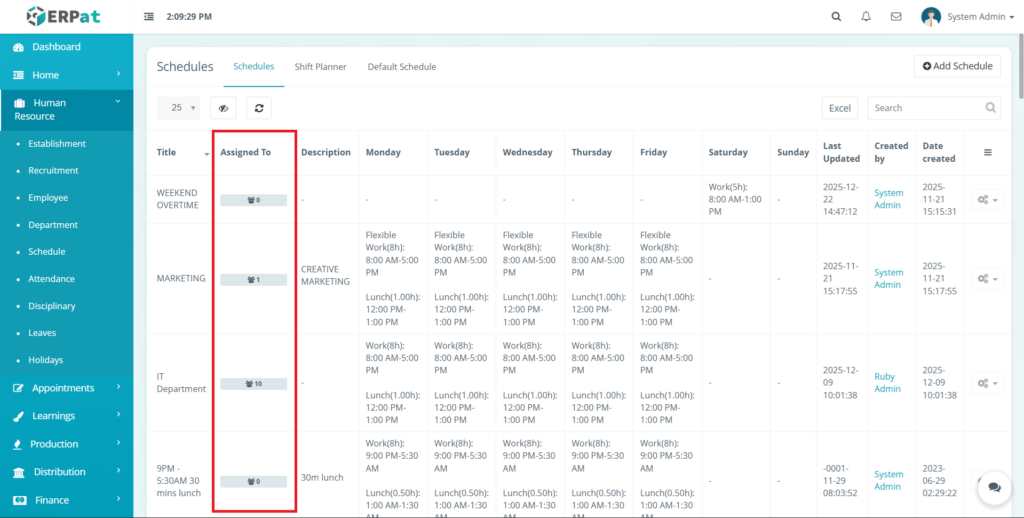
Assigned to Indicator #
Displays the number of employees currently using the schedule.
Helps administrators identify active and unused schedules.
Search and Navigation #
Use the Search field to find schedules by title.
Pagination controls allow efficient navigation across multiple schedule records.
Shift Planner Tab #
The Shift Planner tab is used to assign schedules to employees using a calendar-based interface. It allows administrators to plan and manage shifts on specific dates.
This tab focuses on short-term and operational scheduling, enabling real-time workforce planning.
Attributes #
- Calendar-based scheduling interface
- Date-specific shift assignment
- Employee and team-based scheduling
- Real-time schedule visualization
- Editable and removable assignments
- Filtering and search functionality
- Integration with attendance tracking
- Secure role-based access
Accessing the Shift Planner Tab #
- Navigate to Human Resource → Schedules.
- Click the Shift Planner tab.
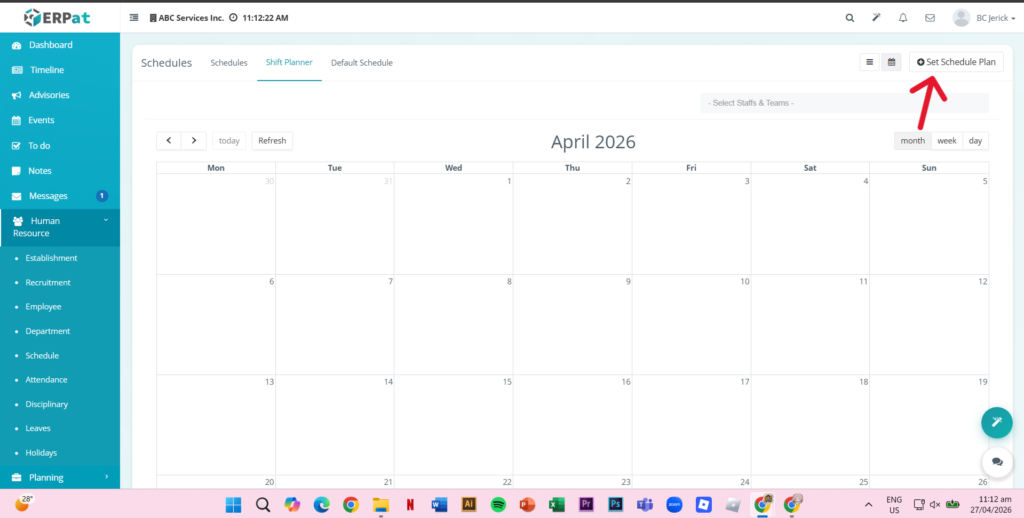
Shift Planner Interface #
Calendar View #
- Displays employee schedules across selected dates.
Controls #
- Set Schedule Plan Button – Assign schedules
- Navigation Buttons – Move between dates
- View Toggle – Month, Week, Day view
- Refresh Button – Reload planner
Filters #
- Staff & Team filter
- Department filter
- Search bar

Steps for Assigning a Schedule #
STEPS #
- Click Set Schedule Plan.
- Select assignment type.
- Choose employee.
- Select schedule template.
- Set date range.
- Click Save.
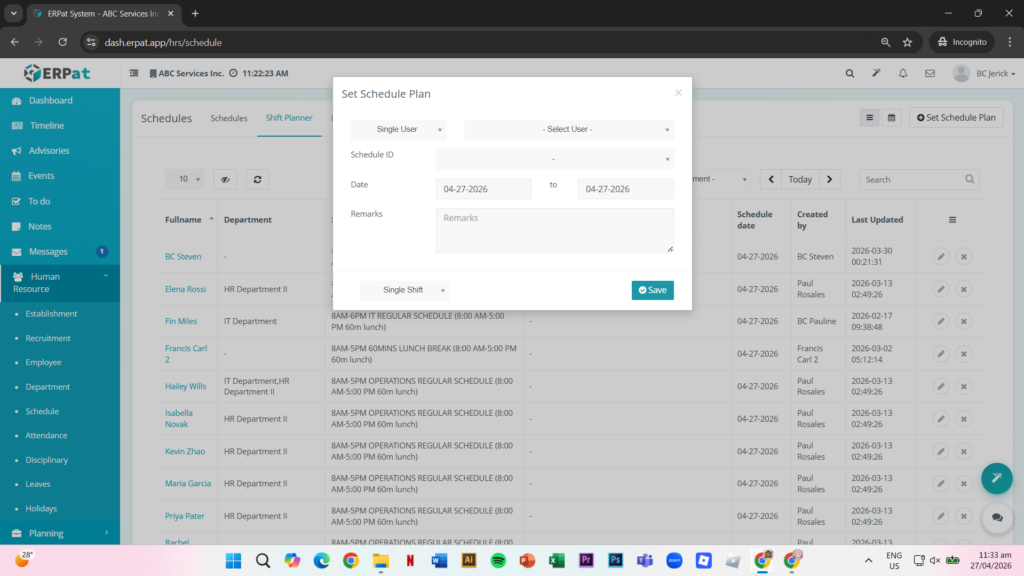
Result #
The assigned schedule will be displayed in the calendar and applied to the selected employee..
Shift Listing Table #
- Full Name – Employee name
- Department – Assigned department
- Schedules – Assigned schedule
- Remarks – Notes
- Schedule Date – Assignment date
- Created By – Assigned by
- Last Updated – Latest update
- Actions – Edit or Delete

Steps for Editing or Deleting a Shift #
STEPS #
- Locate the assigned schedule.
- Click Edit (✏️) or Delete (✖).
- Apply changes or confirm deletion.
Default Schedule Tab #
The Default Schedule tab is used to assign predefined schedules to employees on a long-term or ongoing basis. It ensures that employees have a consistent default working schedule without requiring date-specific assignments. This tab simplifies bulk updates and supports consistent workforce scheduling.
Attributes #
- Bulk schedule assignment
- Individual schedule updates
- Employee schedule mapping
- Real-time assignment tracking
- Filtering by schedule, department, and labels
- Excel export functionality
- Search and pagination tools
- Secure role-based access
Accessing the Default Schedule Tab #
- Navigate to Human Resource → Schedules.
- Click the Default Schedule tab.
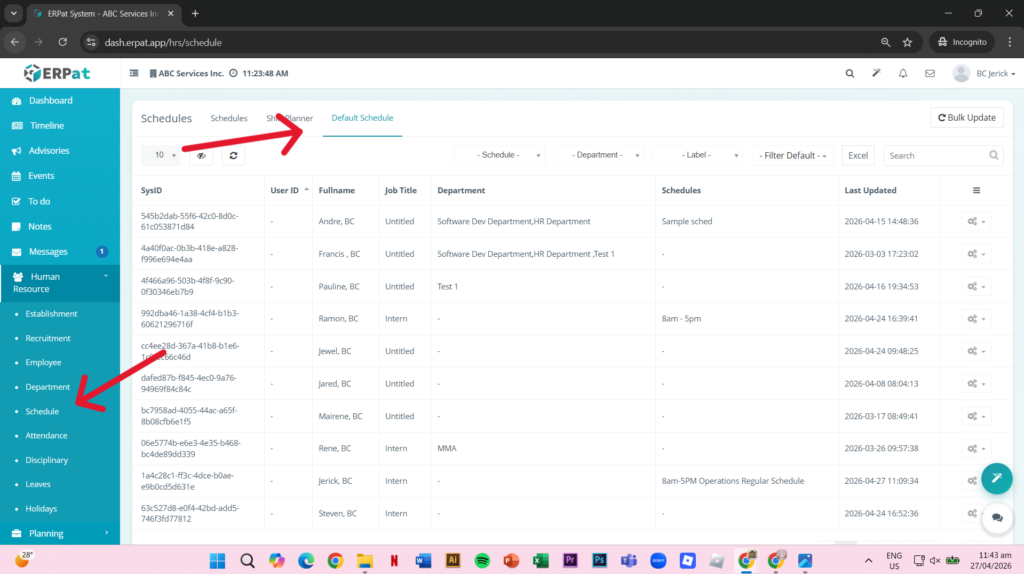
Default Schedule Listing Page #
- SysID – Unique identifier
- User ID – Employee ID
- Fullname – Employee name
- Job Title – Position
- Department – Assigned department
- Schedules – Default schedule
- Last Updated – Latest update
- Actions – Update options
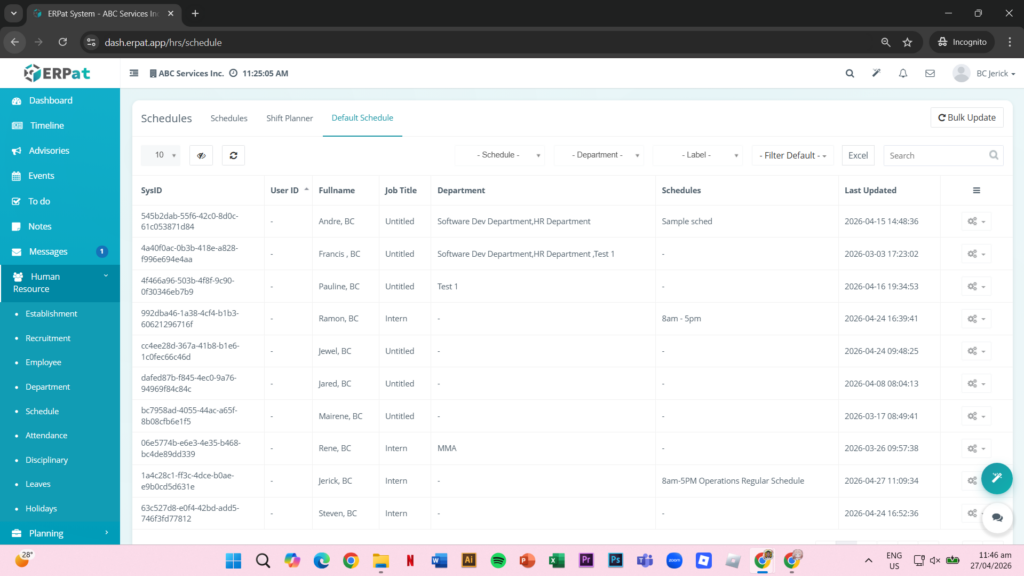
Additional Controls #
- Bulk Update Button – Assign schedules to multiple users
- Schedule Filter – Filter by schedule
- Department Filter – Filter by department
- Label Filter – Filter by labels
- Search Bar – Find employees
- Pagination Controls – Navigate records
- Excel Export – Download data
Steps for Bulk Updating Schedules #
STEPS #
- Click Bulk Update.
- Select users.
- Choose a schedule.
- Click Save.

Result #
The selected schedule is applied to all chosen users.
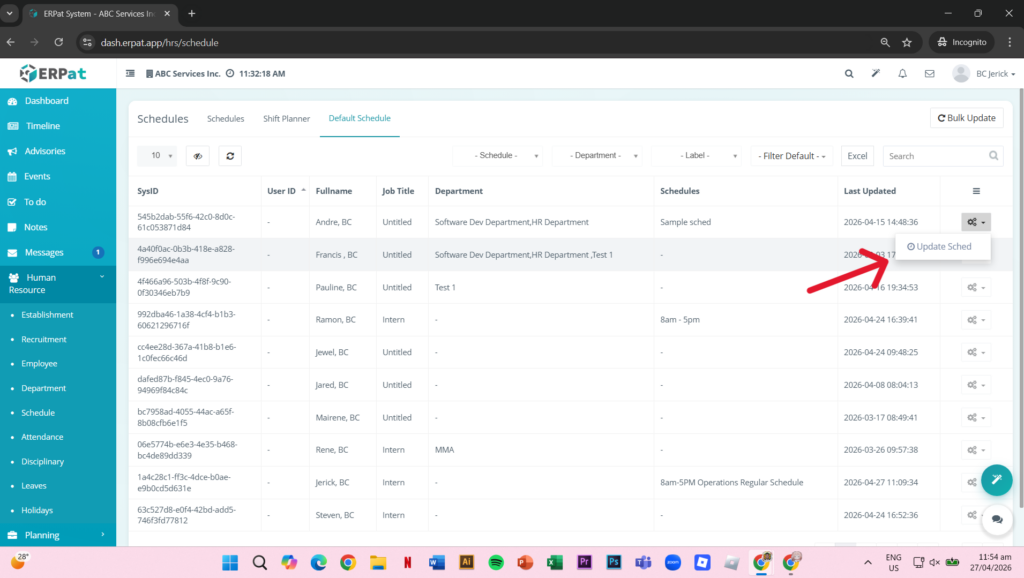
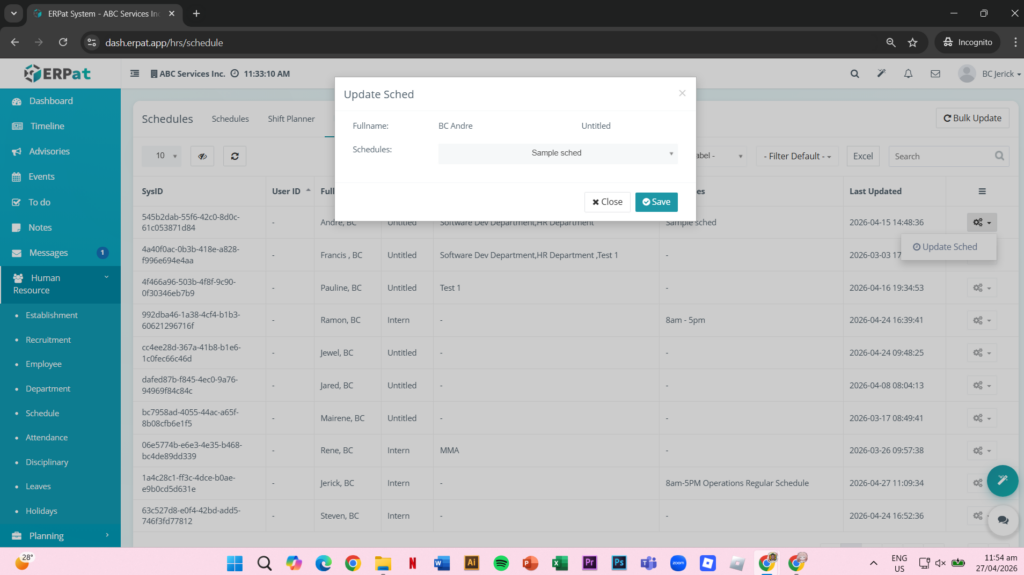
Steps for Updating Individual Schedule #
STEPS #
- Locate the employee.
- Click the Settings (⚙) icon.
- Select Update Sched.
- Choose a schedule.
- Click Save.
Search and Filtering #
The module provides tools to efficiently locate records:
- Search by schedule name or employee
- Filter by department, schedule, or labels
- Use calendar navigation in Shift Planner
- Apply sorting options for better organization
- Use pagination for large datasets
Permissions and Access Control #
- Authorized users can create and manage schedules.
- Shift assignments are typically handled by HR or Admin roles.
- Default schedule updates may require administrative access.
- Role-based permissions control visibility and actions.
Best Practices #
- Use clear and consistent schedule naming
- Verify work hours and break durations
- Plan schedules in advance
- Use bulk updates carefully
- Review employee schedules regularly
- Avoid editing schedules during payroll periods
Audit & Logs #
All create, update, delete, and assignment actions within the Schedule Module are logged to ensure transparency, traceability, and compliance.
Last Updated: April 27, 2026 Module Owner: Schedule Module – ERPat System


