Overview #
The Warehouse Module is used to manage and maintain records of company storage facilities, distribution centers, or inventory sites. These warehouses serve as primary reference points for logistics, inventory tracking, pallet management, and overall distribution workflows within the ERPat system.
Each warehouse record contains essential geographic and administrative data, including addresses, zip codes, and designated heads of operations, ensuring centralized control over the company’s physical inventory locations.
Key Features #
- Centralized Location Management – Create and catalog various types of storage facilities, from regional warehouses to specialized sites.
- Administrative Assignment – Designate a specific “Head” for each facility to ensure clear accountability for site operations.
- Detailed Information Storage – Maintain comprehensive records for each site, including physical addresses, contact emails, and zip codes.
- Operational Integration – Serves as a foundational data source for related modules such as Pallets and Distribution.
- Creation Tracking – Automatically logs who created the record and the exact timestamp of its entry for audit purposes.
- Actionable Controls – Utilize functional icons to quickly Edit existing warehouse details or Delete outdated facility records.
- Advanced Data Retrieval – Integrated search and Excel export tools for efficient record management and external reporting.
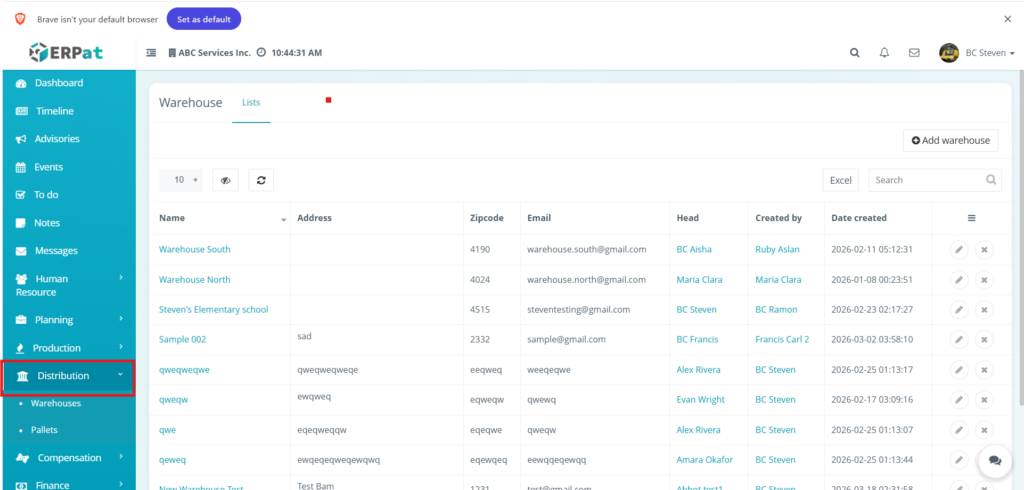
Accessing the Warehouse Module #
- Log in to the ERPat System.
- Navigate to Distribution from the main sidebar.
- Select Warehouses.
- You will be directed to the Warehouse – Lists page displaying all existing facility records.
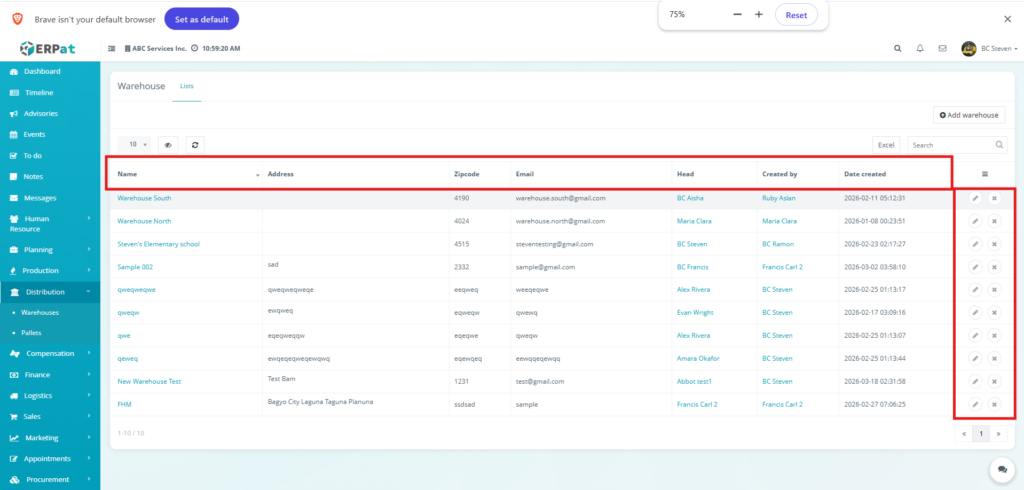
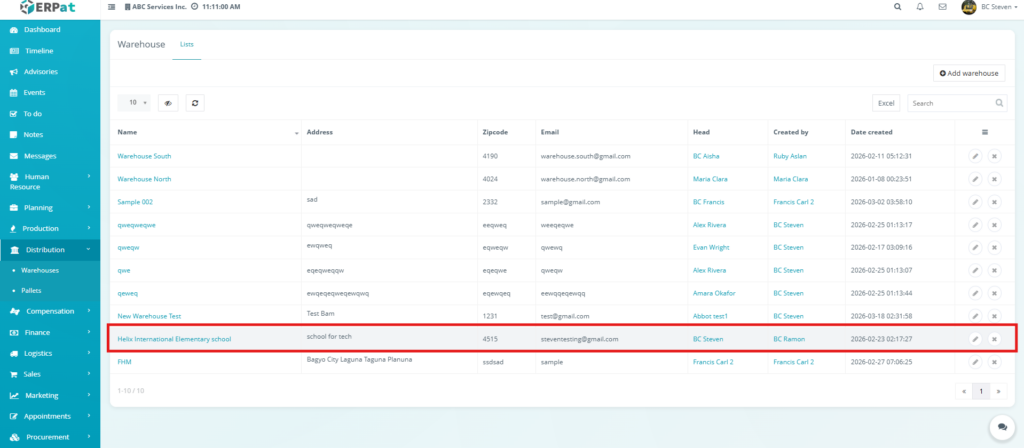
Warehouse: Lists Page #
The Warehouse Lists page provides a comprehensive overview of all registered storage facilities and distribution centers within the ERPat system. This interface allows logistics managers to monitor facility data, identify site leadership, and track the administrative history of each location.
Displays the following details:
- Name – The formal designation assigned to the storage facility.
- Address – The physical geographic location or descriptive address of the warehouse site.
- Zipcode – The specific postal code associated with the facility’s location.
- Email – The primary contact email address for site-specific communications or inquiries.
- Head – The name of the designated personnel or administrator in charge of the facility’s operations.
- Created by – The name of the system user who initially registered the warehouse record.
- Date created – The exact timestamp (date and time) when the warehouse was added to the system.
- Actions – Functional icons used to Edit (pencil icon) the warehouse details or Delete (x icon) the record from the list.
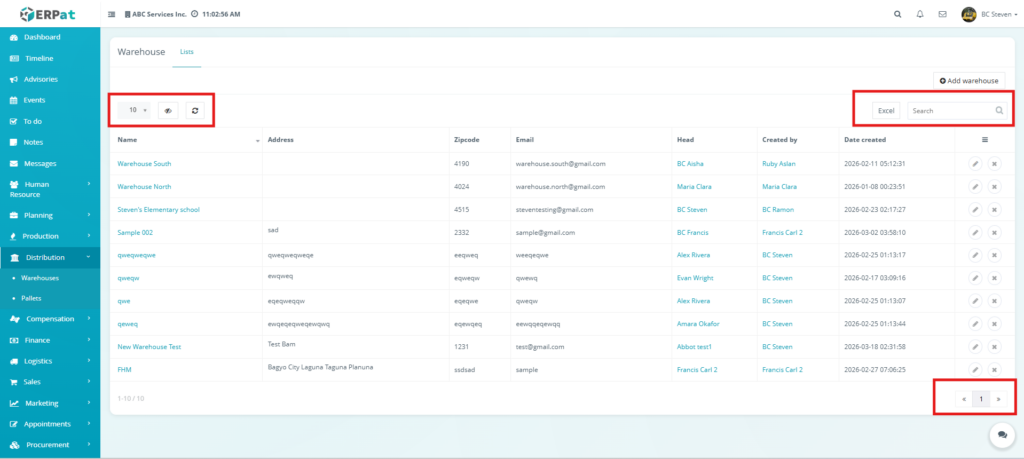
Additional Management Controls #
- Visibility Control – An icon that allows users to toggle the visibility of specific data columns in the table for a customized view.
- Row Display – A dropdown menu used to adjust how many warehouse records are visible on a single page.
- Refresh – A button used to manually update the list to ensure all recently added or edited data is current.
- Add warehouse – A primary action button located at the top-right used to register a new storage location.
- Excel Export – A button that allows users to download the full warehouse list into an Excel spreadsheet for external reporting.
- Search Bar – A text input field used to quickly filter the list by warehouse name, head, or other identifying details.
- Pagination – Controls at the bottom-right used to navigate through multiple pages of warehouse records.
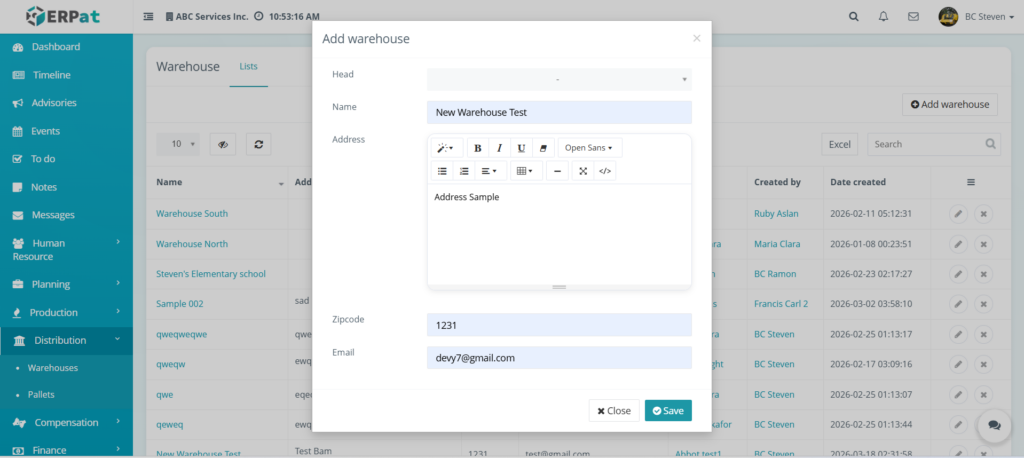
Steps for Adding a Warehouse #
STEPS
The Add warehouse form is used to register new storage facilities, distribution centers, or inventory sites within the ERPat system. This ensures all logistical hubs are properly cataloged with their respective administrative and contact details.
- Navigate to the Distribution module from the main sidebar and select Warehouses.
- Click the Add warehouse button located at the top-right of the Warehouse – Lists page.
- Fill in the required information in the Add warehouse modal:
- Head – Select the designated person in charge of the facility from the dropdown menu.
- Name – Enter the official name of the facility.
- Address – Use the rich-text editor to provide the full physical location of the site.
- Zipcode – Input the specific postal code for the area.
- Email – Provide the primary contact email for warehouse-related inquiries.
- Review the entered data for accuracy, ensuring the correct head of operations and contact details are assigned.
- Click Save to add the new facility to the listing table, or click Close to discard the entry.
Steps for Editing a Warehouse #
The Edit warehouse form allows administrators to modify the administrative, contact, and geographic details of an existing storage facility. This ensures that the ERPat system remains updated as site leadership or physical location information changes.
STEPS
- Navigate to the Distribution module from the main sidebar and select Warehouses.
- Locate the specific facility you wish to update in the warehouse listing table.
- Click the Edit (pencil) icon located under the Actions column at the far right of the record row.
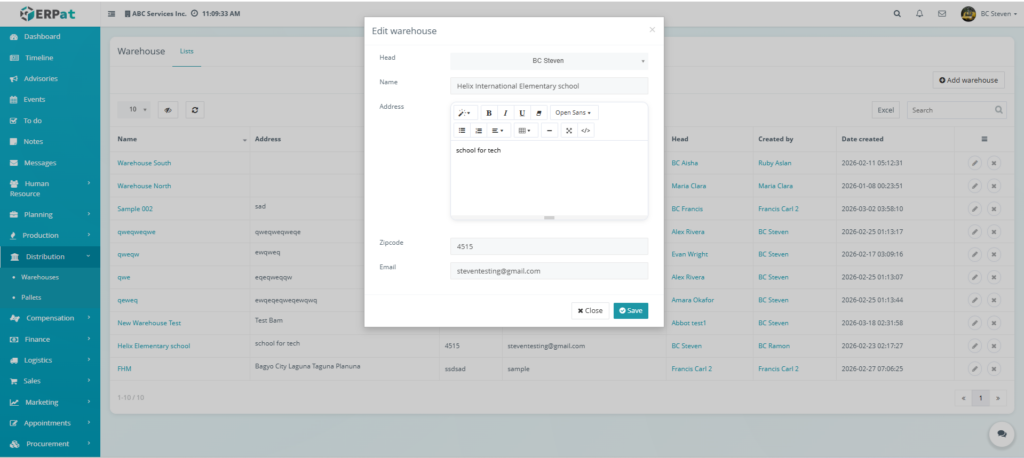
- Update the necessary information in the Edit warehouse modal:
- Head – Use the dropdown menu to select a different designated personnel or administrator in charge of the site.
- Name – Refine the formal designation of the facility.
- Address – Update the physical location details within the text field.
- Zipcode – Modify the postal code associated with the warehouse.
- Email – Update the primary contact email for the facility.
- Review all changes to ensure the accuracy of the logistical and contact data.
- Click Save to apply the updates, or click Close to discard the modifications and return to the list.
RESULT
Steps for Deleting a Warehouse #
The Delete function in the Warehouse module allows administrators to remove outdated or decommissioned facility records from the system. This action includes a confirmation step to prevent accidental data loss.
STEPS #
- Navigate to the Distribution module from the main sidebar and select Warehouses.
- Locate the specific warehouse record you wish to remove from the Warehouse – Lists page.
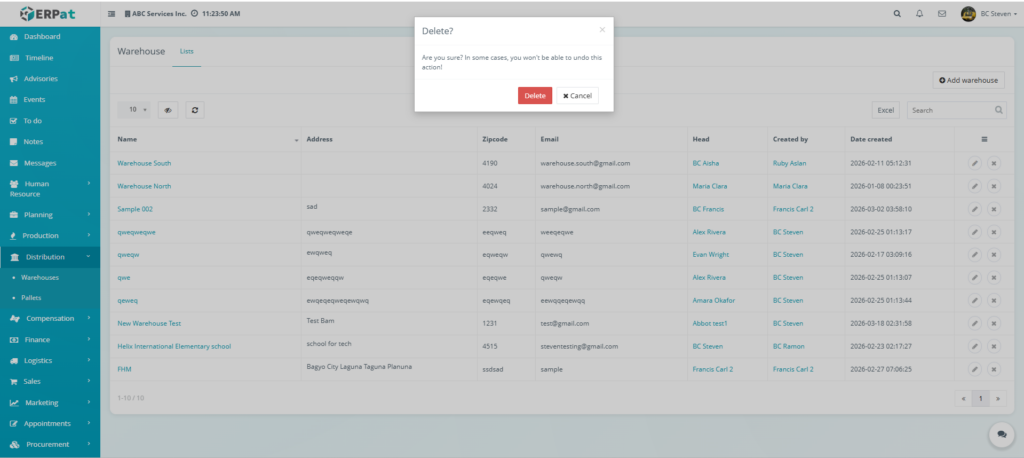
- Click the X icon located under the Actions column at the far right of the record row.
- A Delete? confirmation modal will appear on the screen with the message:
- Review the request and take the appropriate action:
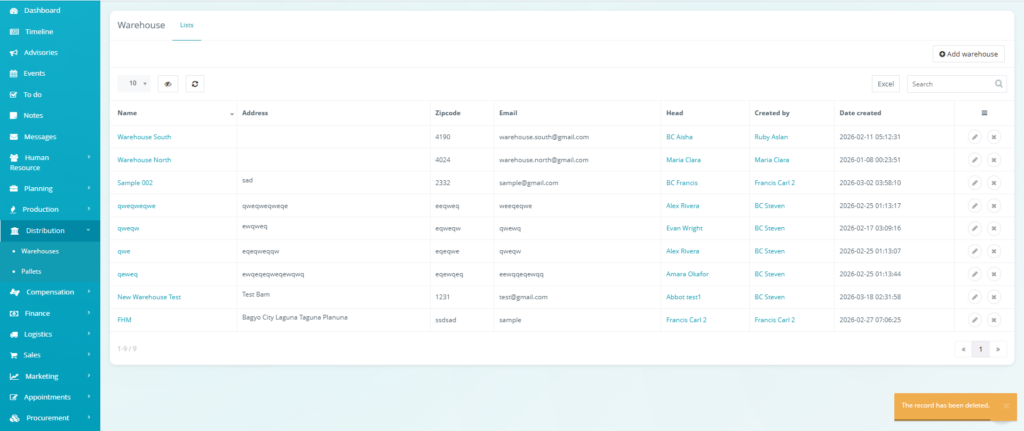
- Delete – Click the red button to permanently remove the warehouse record from the system.
- Cancel – Click the white button to close the modal and retain the record.
RESULT
Permissions and Access Control #
- Warehouse management is typically available to roles involved in logistics and supply chain operations, such as Administrators and Logistics Managers.
- Administrators hold full access to create, edit, and delete warehouse records, as well as the authority to export data to Excel.
- Logistics Managers generally have access to view lists and designate a Head for a specific facility.
- Permissions can be configured to strictly control who has the functional ability to add new warehouses, modify existing site data, or remove facilities from the distribution network.
Best Practices #
- Standardize Naming Conventions: Use clear and consistent titles to ensure the Search Bar and filters remain efficient.
- Keep Contact Data Current: Promptly update the Email and Zipcode fields to prevent communication gaps with site leadership.
- Verify Dependencies Before Deleting: Always confirm a warehouse is not linked to active Pallets or distribution tasks before using the delete function, as some actions may be permanent.
- Perform Regular Data Audits: Use the Excel Export feature periodically to review the accuracy of assigned Warehouse Heads and facility addresses.
- Utilize the Refresh Tool: Click the Refresh button manually to ensure you are viewing the most recent updates to financial or logistical totals.
Audit & Logs #
- Automated Attribution: Every warehouse record automatically captures the Created by user and a precise Date created timestamp.
- Status Tracking: Actions such as editing site details or designating a new Head are reflected in the listing table, providing a clear history of facility configurations.
- Deletion Safety Measures: The system triggers a Delete? confirmation modal, creating a manual check-point in the audit process before data is removed.
- System Accountability: All modifications within the Warehouse Module are tracked to ensure a reliable audit trail for logistical oversight and operational review.
Last Updated: [March 18, 2026] Module Owner: Distribution IS – ERPat System


