Overview #
The Estimates Module is used to create, manage, and track financial quotes and service proposals for clients within the ERPat system. It serves as a comprehensive portal where sales teams can generate detailed estimates, manage client requests, and monitor the status of proposals from initial draft to final estimation.
Each estimate record tracks essential transactional data, including unique Estimate IDs, client information, specific service titles, and total amounts, ensuring accurate financial forecasting and clear communication between the company and its customers.
Key Features #
- Multi-View Tracking – Organize and view estimates by Monthly or Yearly intervals to monitor sales performance over time.
- Estimate Request Management – Centralized portal to receive and manage incoming client requests, with clear “Assigned To” personnel and real-time status updates such as “Canceled” or “Estimated”.
- Customizable Forms – Build and manage public-facing forms to capture lead information, with options to embed forms directly into external sites.
- Real-Time Financial Totals – Automatic calculation of individual record amounts and total sums across all pages for accurate budget tracking.
- Status Monitoring – Visual indicators for estimate stages, allowing teams to quickly identify “Draft” proposals versus finalized requests.
- Data Export & Search – Integrated tools to export estimate records to Excel and a search bar for rapid retrieval of specific client or project data.
- Actionable Controls – Quick-access icons to Edit existing estimates or Delete outdated records directly from the listing table.
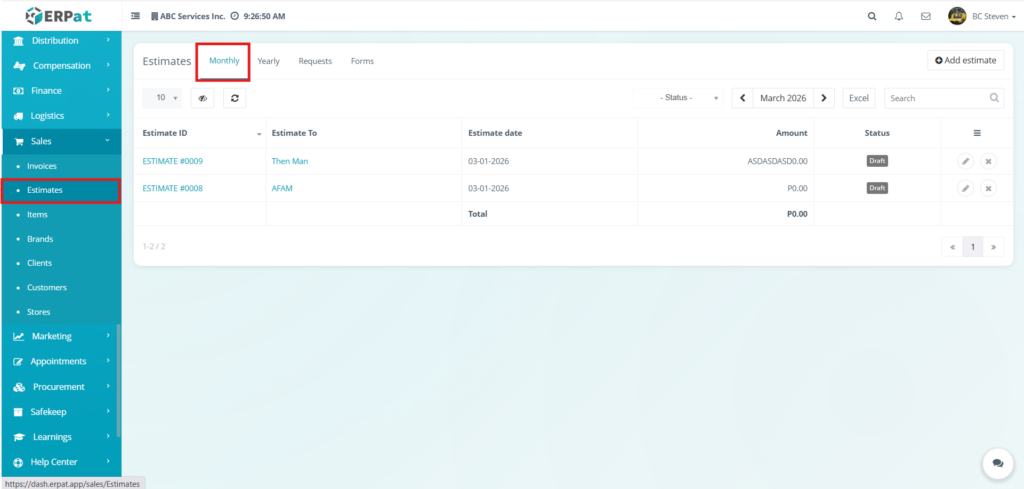
Accessing the Estimate Module #
- Log in to the ERPat System.
- Navigate to Sales from the main sidebar.
- Select Estimates.
- You will be directed to the Estimates – Monthly page displaying all current month estimate records.
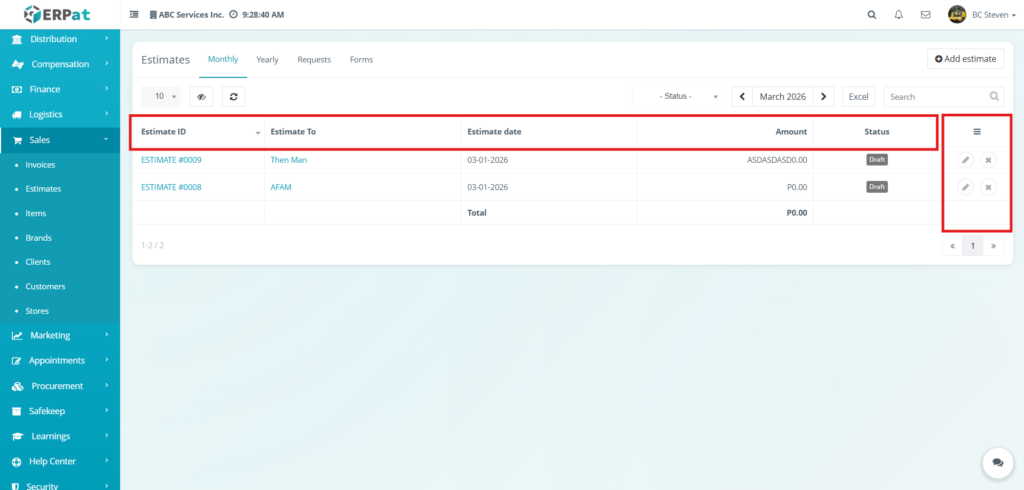
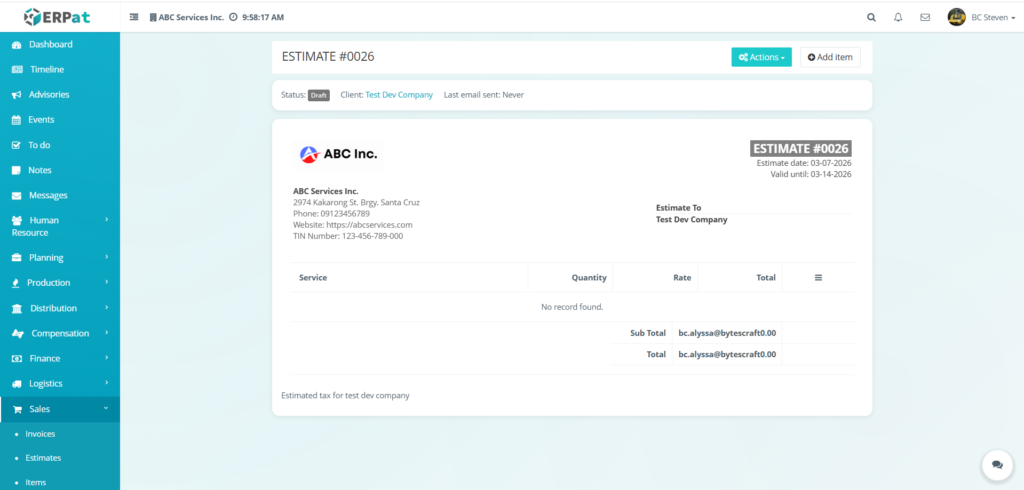
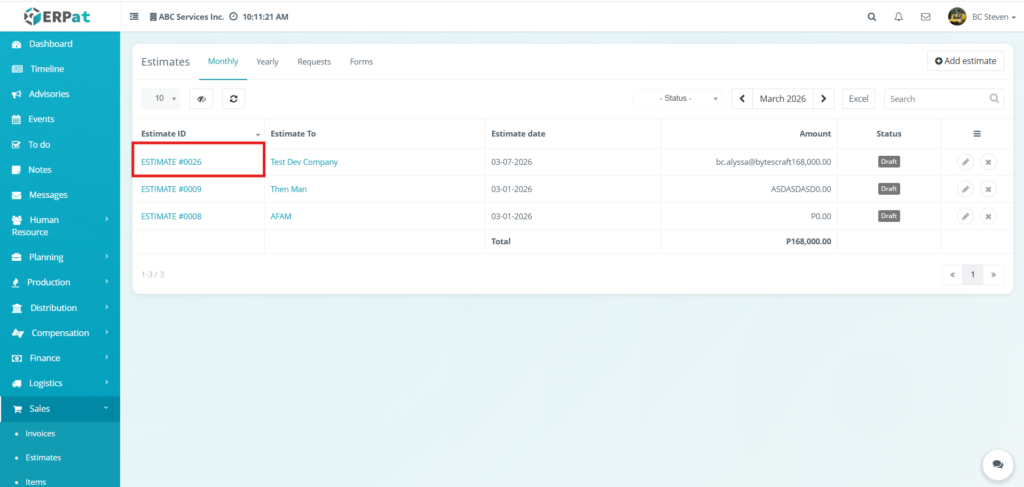
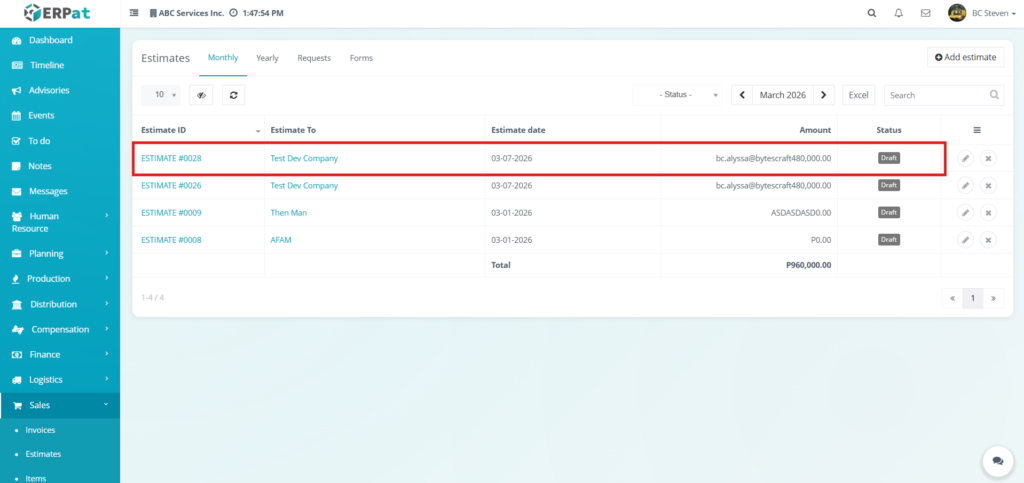
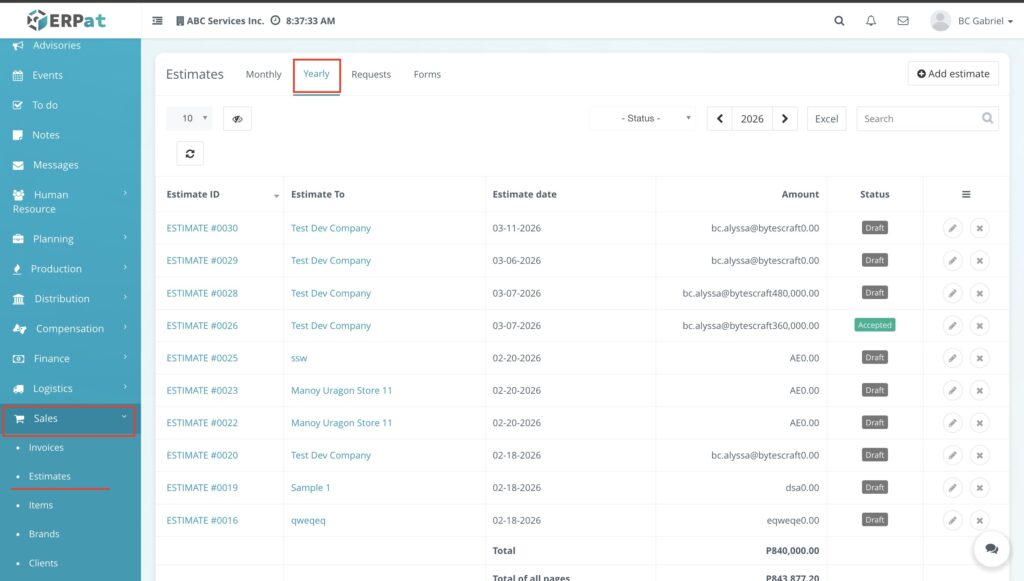
Estimates Listing Page #
Displays the following details:
- Estimate ID – The unique identification number assigned to each estimate record (e.g., ESTIMATE #0009).
- Estimate To – The name of the client or company to whom the proposal is addressed.
- Estimate date – The specific date the estimate was created or issued.
- Amount – The total monetary value calculated for the specific estimate record.
- Status – Indicates the current stage of the estimate, such as Draft, Canceled, or Estimated.
- Total – A summary row at the bottom of the table that calculates the sum of all amounts visible on the current page.
- Total of all pages – A global calculation showing the cumulative amount of all estimate records across the entire module.
- Actions – Functional icons used to Edit (pencil icon) the estimate details or Delete (x icon) the record from the system.
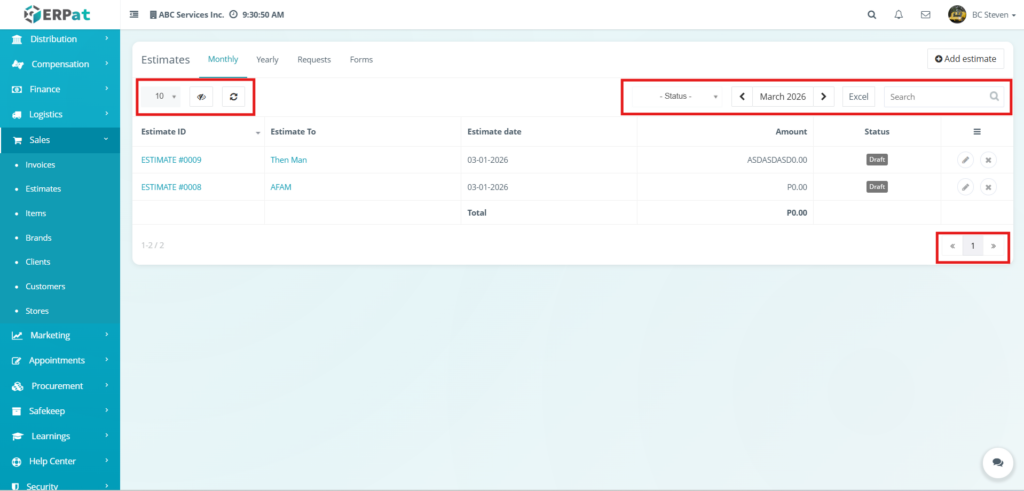
Additional Controls:
- Row Display – Adjusts the number of estimate records shown in the table view (e.g., 10, 25, 50) to manage data density.
- Visibility Control – Toggles the visibility of specific columns in the table, allowing users to customize which metadata is displayed.
- Refresh – Manually updates the data table to ensure the most recent financial totals and estimate statuses are shown.
- Status Filter – A dropdown menu used to narrow the list of records based on their current stage, such as Draft, Canceled, or Estimated.
- Date Navigator – Allows users to browse estimate records by specific months and years using the left and right arrow toggles.
- Excel – A button used to export and download the current list of estimate records into an Excel spreadsheet for external reporting and analysis.
- Search Bar – Facilitates quick lookup of specific records by entering estimate IDs, client names, or service titles.
- Pagination – Navigation controls located at the bottom-right used to browse through multiple pages of estimate records within the module.
Steps for Adding an Estimate #
STEPS #
- Navigate to the Sales module from the main sidebar and select Estimates.
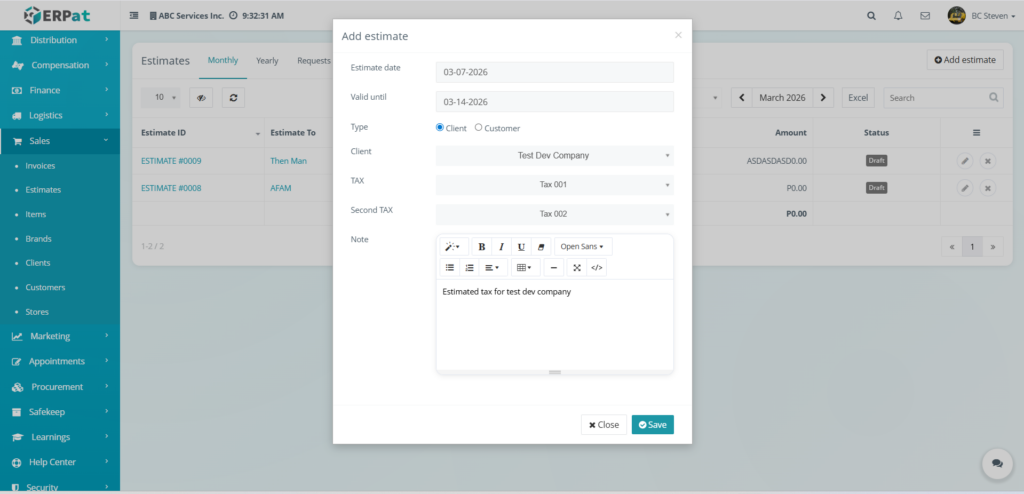
- Click the Add estimate button located at the top-right of the Monthly management page.
- Fill in the required information in the Add estimate modal:
- Estimate date – Select the date the proposal is being issued.
- Valid until – Set an expiration date for the quote to encourage timely client decisions.
- Type – Choose between the Client or Customer radio buttons to define the recipient category.
- Client/Customer Dropdown – Select the specific recipient from the pre-populated system list .
- TAX / Second TAX – Apply the relevant tax classifications from the dropdown menus.
- Note – Use the rich-text editor to include specific details, terms, or descriptions for the estimate.
- Review all entered data for accuracy, ensuring the selected dates and tax types are correct.
- Click Save to publish the new estimate to the management table.
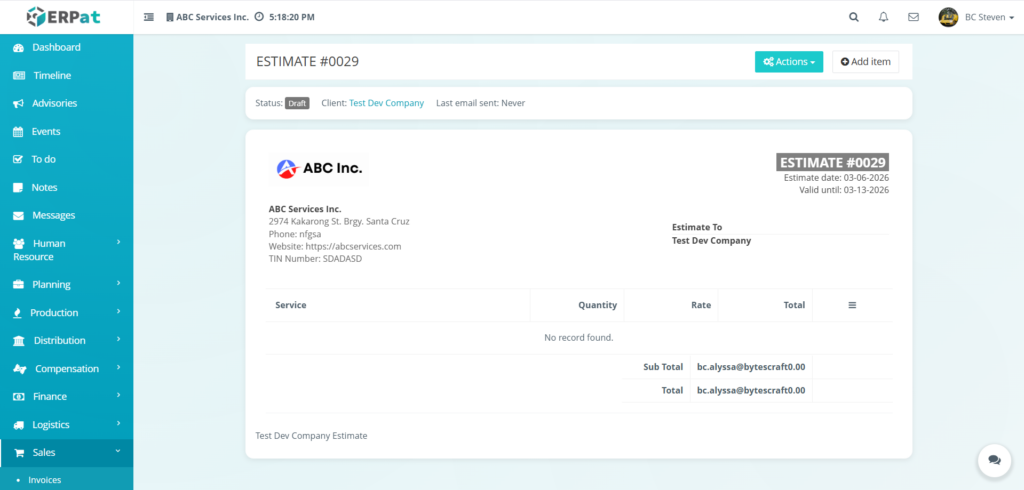
Result #
The newly added estimate will appear in a view and will become available in the monthly estimate listing page.
Steps to Edit an Estimate #
STEPS #
- Navigate to the Sales module from the main sidebar and select Estimates.
- Locate the specific record you wish to modify:
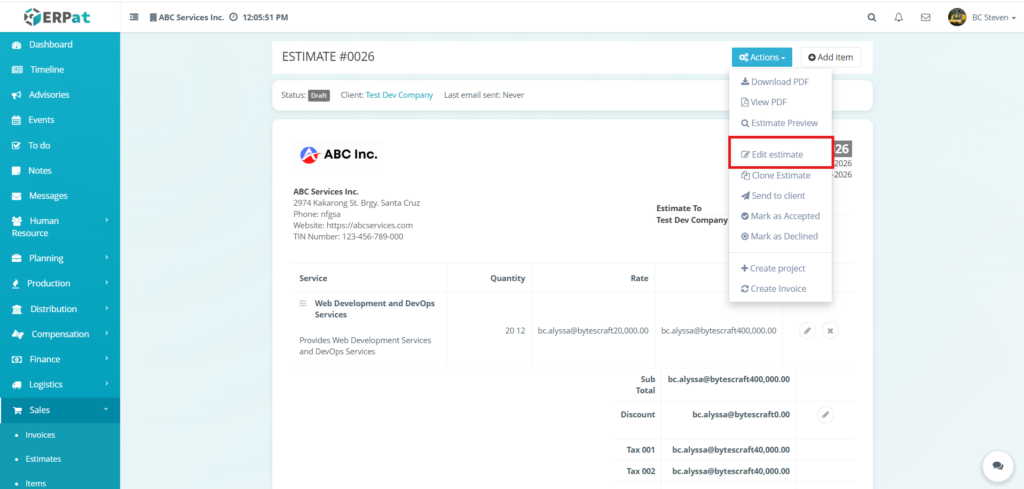
- From the Listing Page: Click the Edit (pencil) icon under the Actions column for that specific estimate.
- From the Details View: Click on the Estimate ID to open the record, click the Actions dropdown button at the top-right, and select Edit estimate.
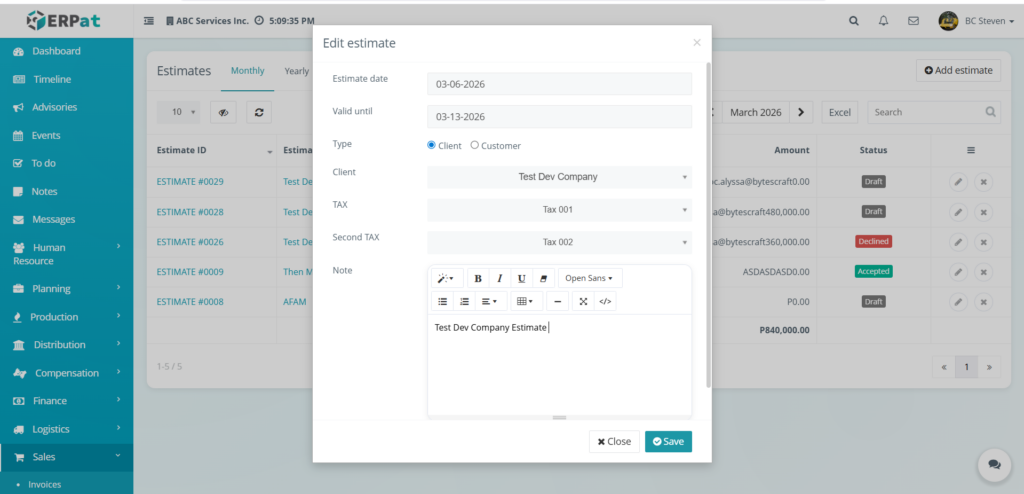
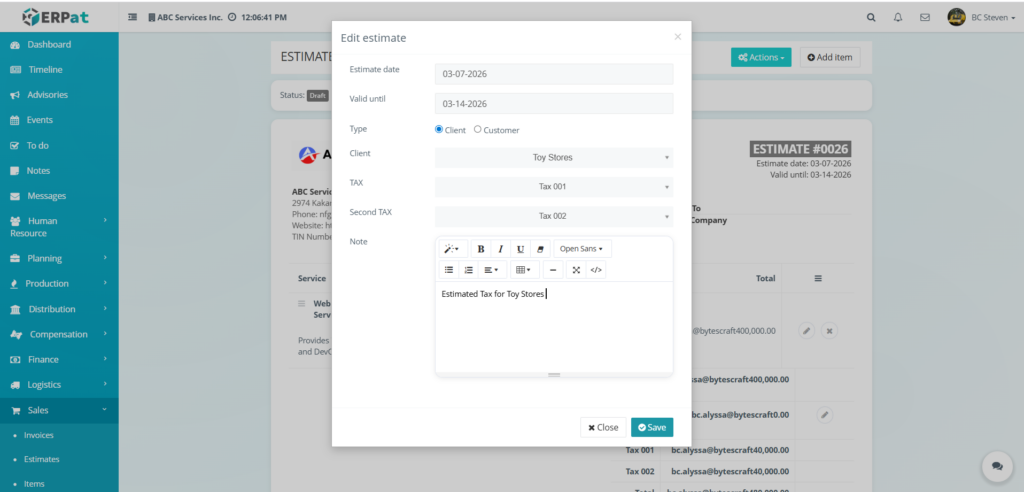
- Update the necessary information in the Edit estimate modal:
- Estimate date – Adjust the date the proposal was issued.
- Valid until – Modify the expiration date for the quote.
- Type – Switch the recipient category between Client or Customer if necessary.
- Client/Customer – Use the dropdown menu to select a different recipient.
- TAX / Second TAX – Update the tax classifications applied to the overall estimate (e.g., Tax 001 and Tax 002).
- Note – Use the rich-text editor to refine the internal notes or terms displayed on the document.
- Click Save to apply the changes to the estimate record, or click Close to discard the updates.

RESULT #
Steps to Delete an Estimate #
STEPS #
- Navigate to the Sales module from the main sidebar and select Estimates.
- Ensure you are on the Monthly or Yearly listing page where the record is located.
- Locate the specific estimate record you wish to remove from the table.
- Click the X icon located under the Actions column at the far right of the record row.
- The record will be immediately removed from the listing table.

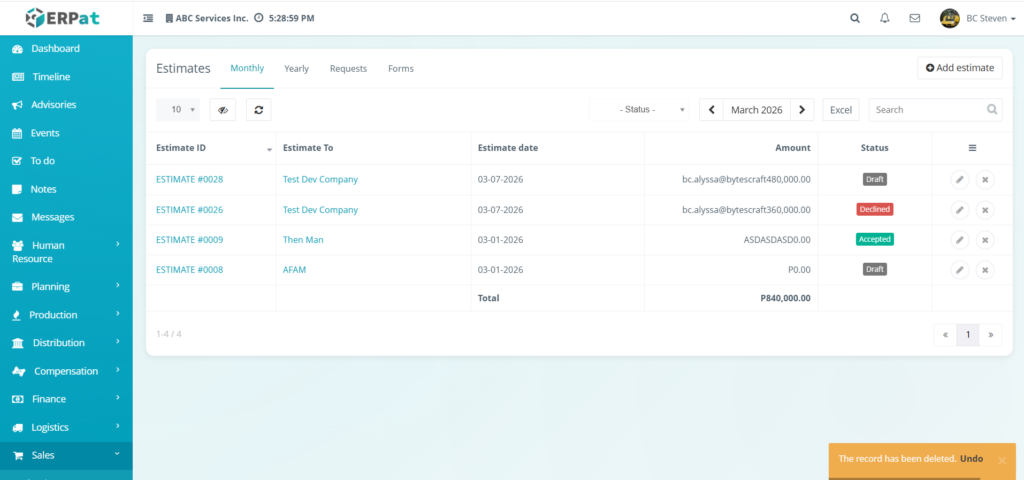
Steps to Undo Deleted Estimate #
STEPS #
- Immediately after clicking delete, look for the orange notification toast that appears at the bottom-right of the screen.
- Click the Undo link within that notification box.
- The deleted estimate will be instantly restored to the listing table with all its original data, including the Estimate ID, Client, and Amount, intact.
Notes: #
Estimates that was recently deleted can be the only one that can be undo
Steps for Adding a Service to an Estimate #
STEPS #
- Navigate to the Sales module and select Estimates.
- Click the Estimate ID of the record you wish to modify.
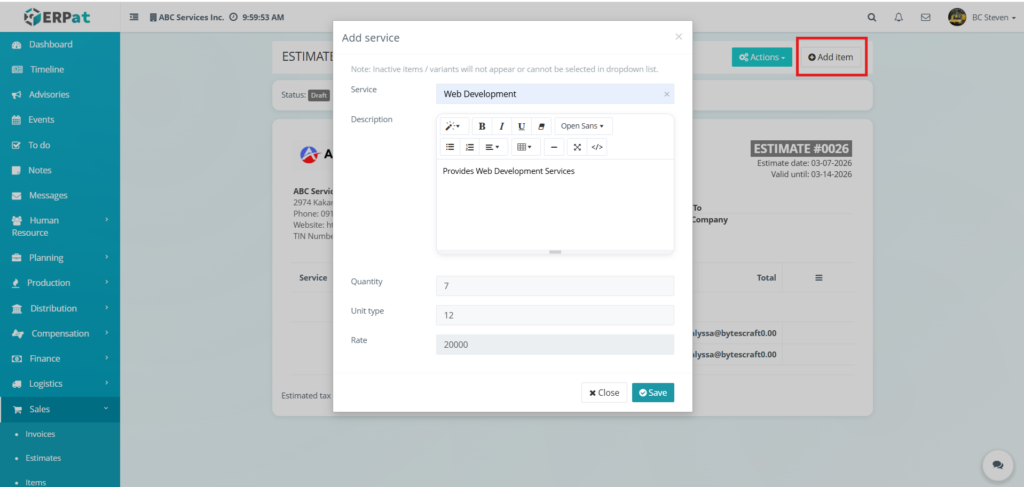
- Click the Add item button located at the top-right of the estimate details page.
- Fill in the required service details in the Add service modal:
- Service – Select the specific work category from the dropdown menu .
- Description – Use the rich-text editor to provide a detailed scope of work for that specific item.
- Quantity – Enter the number of units or hours required for the service.
- Unit type – Specify the unit of measurement for the quantity.
- Rate – Enter the price per unit or hourly rate for the service.
5. Click Save to apply changes.
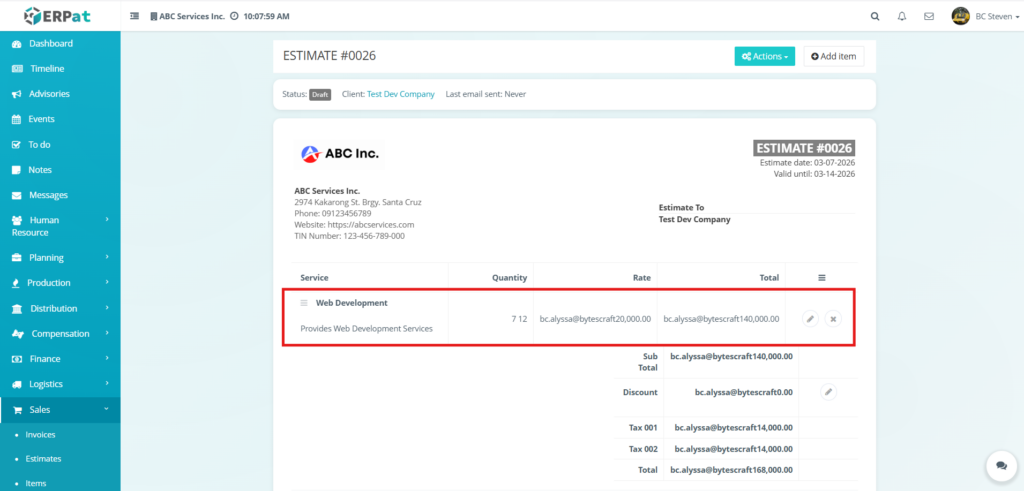
Result #
Steps for Editing a Service in an Estimate #
STEPS #
- Navigate to the Sales module from the main sidebar and select Estimates.
- Click the Estimate ID to open the detailed view of the specific proposal.
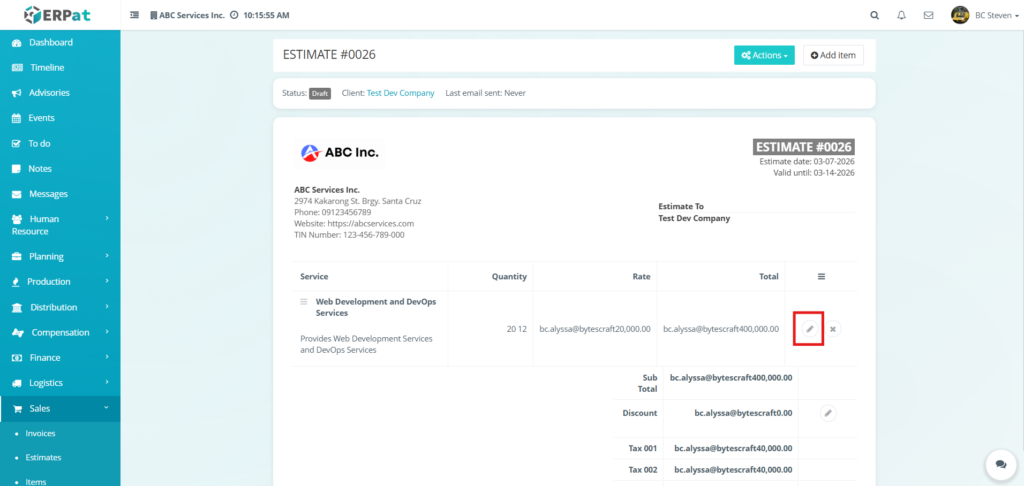
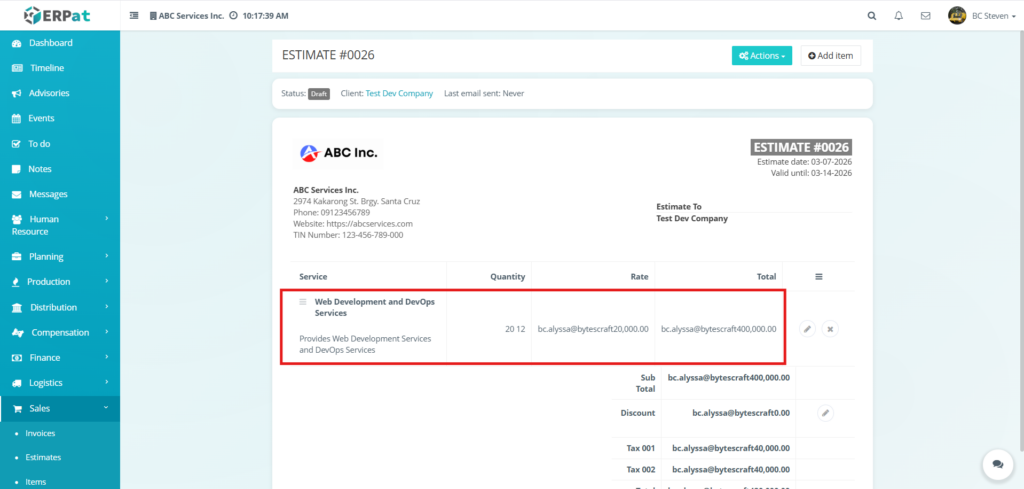
- Locate the service you wish to modify in the service listing table.
- Click the Edit (pencil) icon located at the far right of the specific service row.
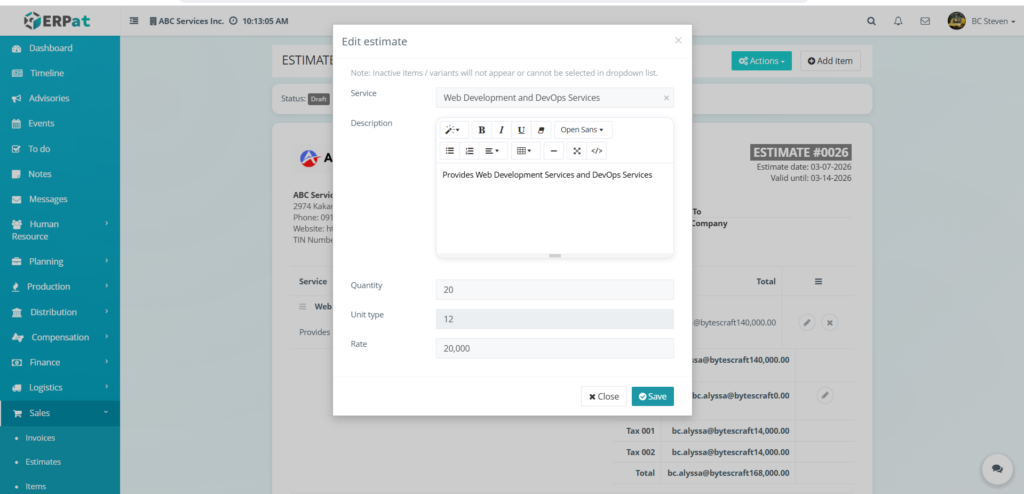
- Update the information in the Edit estimate modal as needed:
- Service – Select a different service or variant from the dropdown menu if the work type has changed.
- Description – Refine the scope of work in the rich-text editor.
- Quantity – Adjust the number of units or hours.
- Unit type – Change the measurement unit if necessary.
- Rate – Update the price per unit or hourly rate.
- Review the updated data to ensure the new values reflect the revised project requirements.
- Click Save to apply the changes.
Result #
Steps to Delete a Service #
STEPS #
- Navigate to the Sales module and select Estimates.
- Click the Estimate ID to open the specific estimate details.
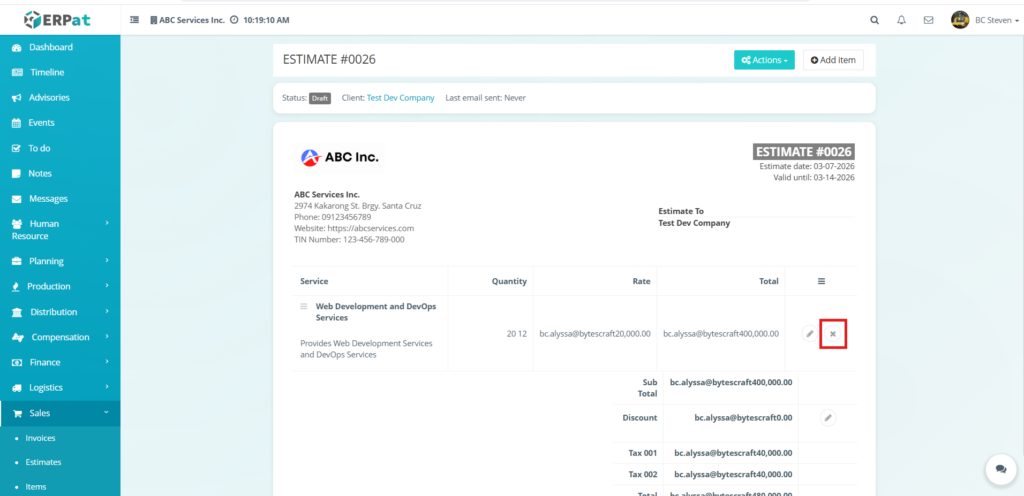
- Locate the service line item you wish to remove in the service table.
- Click the X icon located at the far right of the service row.
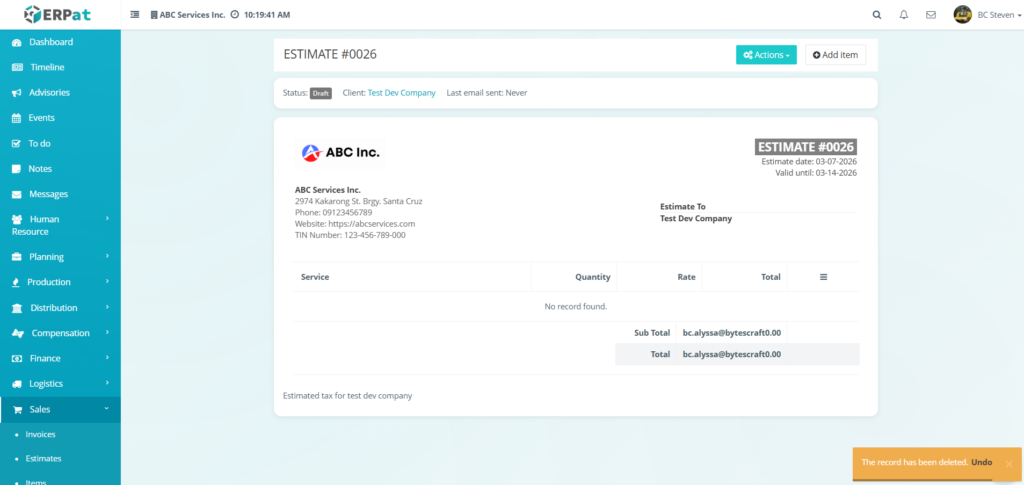
- The service will be immediately removed, and the table will display “No record found” if it was the only item.
Steps to Undo Deleted Service #
STEPS #
- Locate the orange notification toast that appears at the bottom-right of the screen immediately after deletion.
- Click the Undo link within the notification box.
- The deleted service will be restored to the estimate table with its original description, quantity, and rate intact.
Notes on Deleting Services #
- Applicability – The Undo functionality is applicable only to the recently deleted services; once the notification expires or a new action is taken, the data cannot be restored through this method.
- Financial Impact – Deleting a service automatically recalculates the Sub Total, Tax, and final Total for the entire estimate in real-time.
- Confirmation – A confirmation message (“The record has been deleted”) provides visual feedback that the removal was successful.
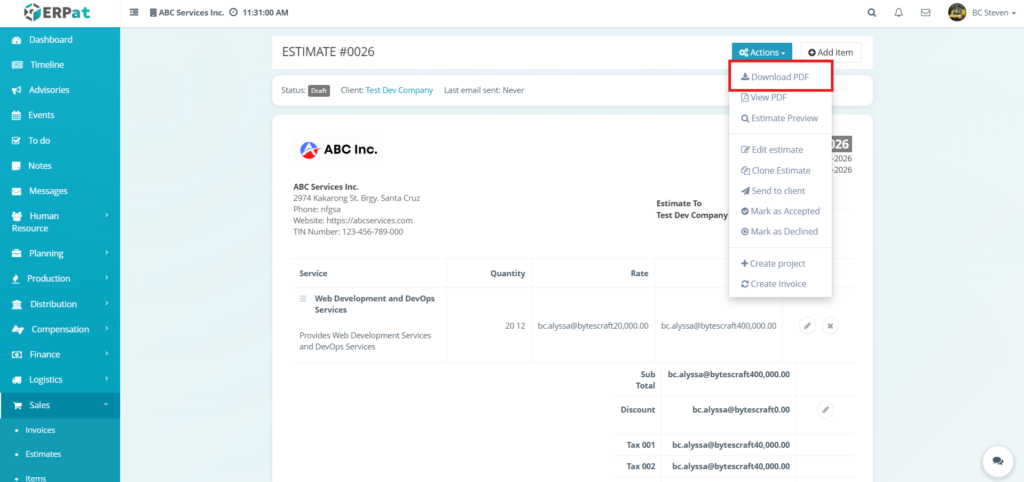
Steps to Download PDF of Estimate #
STEPS #
- Navigate to the Sales module from the main sidebar and select Estimates.
- Locate the specific record you wish to download and click on the Estimate ID to open the details page.
- Click the Actions dropdown button located at the top-right of the estimate view.
- Select Download PDF from the list of available options.
- The system will generate the document, and the file will be saved directly to your device’s default download folder.
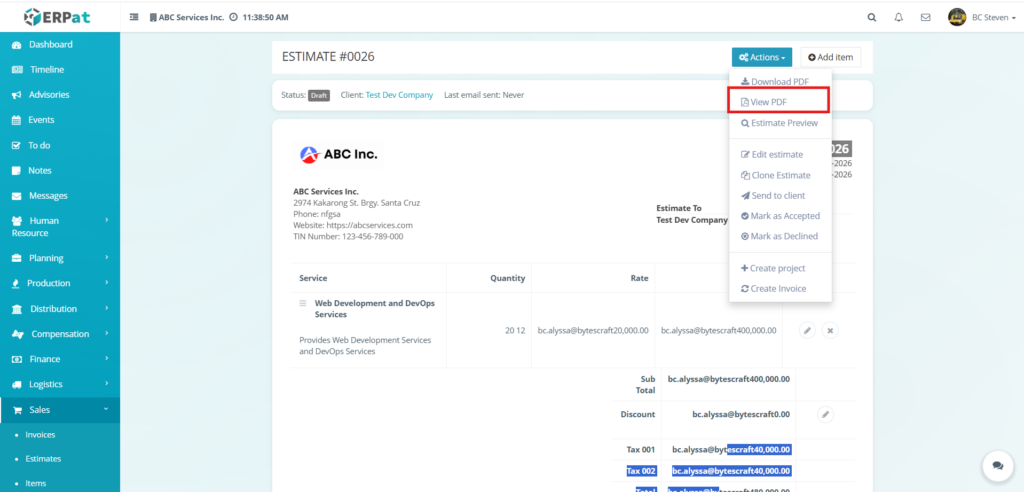
Steps to View PDF of Estimate #
STEPS #
- Navigate to the Sales module from the main sidebar and select Estimates.
- Locate the specific record you wish to review and click on the Estimate ID to open the details page.
- Click the Actions dropdown button located at the top-right of the estimate view.
- Select View PDF from the list of available options.
- A new browser tab will open, displaying the PDF Preview of the estimate.
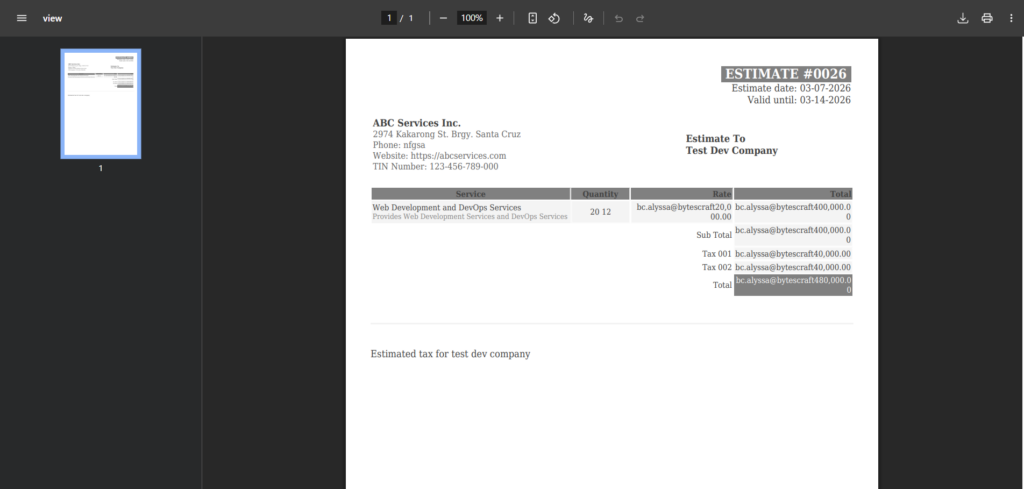
- Use the top toolbar in the viewer to interact with the document:
- Zoom – Adjust the magnification level using the plus (+) or minus (-) icons.
- Rotate – Change the orientation of the document if needed.
- Download – Click the tray icon at the top-right if you decide to save the file after viewing.
- Print – Click the printer icon to send the document to a connected printing device.
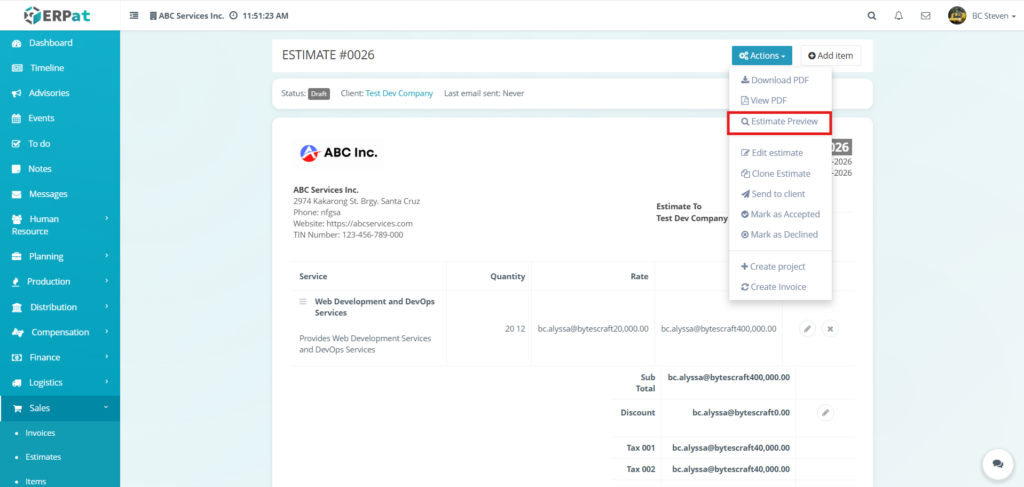
Steps to Preview Estimate #
STEPS #
- Navigate to the Sales module from the main sidebar and select Estimates.
- Locate the specific record you wish to review and click on the Estimate ID to open the details page.
- Click the Actions dropdown button located at the top-right of the estimate view.
- Select Estimate Preview from the list of available options.
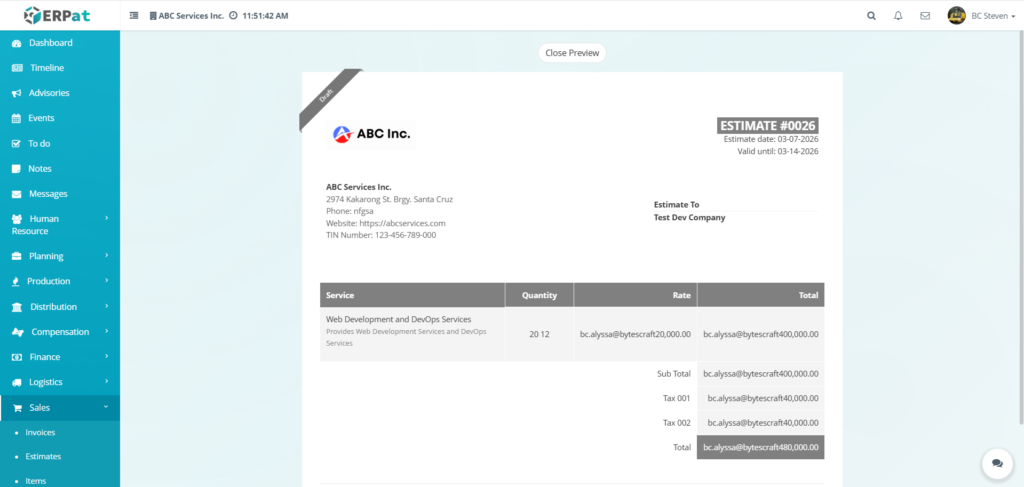
- An overlay will appear on the current page displaying the document:
- Header Information – Displays company branding, contact details, and the recipient information.
- Service Table – Shows a structured list of all services, quantities, rates, and individual totals.
- Financial Summary – Lists the Sub Total, applied taxes, and the final Total amount.
- Status Ribbon – A diagonal ribbon in the top-left corner indicates the current state of the document.
- Click the Close Preview button at the top of the overlay to return to the estimate management screen.
Steps to Edit Estimate in a View #
STEPS #
- Navigate to the Sales module from the main sidebar and select Estimates.
- Locate the specific record you wish to modify and click on the Estimate ID to open the details page.
- Click the Actions dropdown button located at the top-right of the estimate view.
- Select Edit estimate from the list of available options.
- Update the necessary information in the Edit estimate modal:
- Estimate date – Adjust the date the proposal was issued.
- Valid until – Modify the expiration date for the quote.
- Type – Switch the recipient category between Client or Customer if necessary.
- Client/Customer – Use the dropdown menu to select a different recipient.
- TAX / Second TAX – Update the tax classifications applied to the overall estimate.
- Note – Use the rich-text editor to refine the internal notes or terms displayed on the document.
- Click Save to apply the changes to the estimate record, or click Close to discard the updates.
Steps to Clone an Estimate #
STEPS #
- Navigate to the Sales module from the main sidebar and select Estimates.
- Locate the specific record you wish to duplicate and click on the Estimate ID to open the details page.
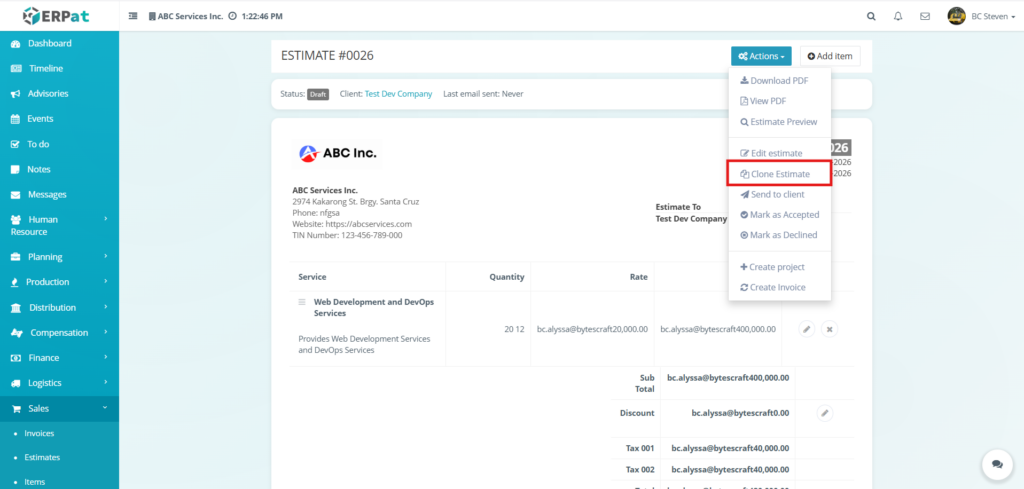
- Click the Actions dropdown button located at the top-right of the estimate view.
- Select Clone Estimate from the list of available options.
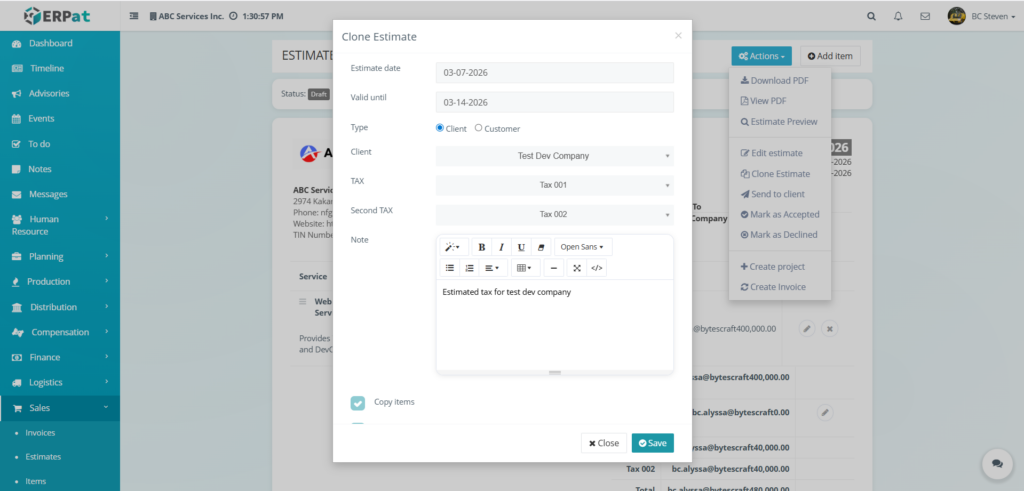
- Review and update the information in the Clone Estimate modal:
- Estimate date – Set the issuance date for the new duplicate record.
- Valid until – Define the new expiration date for this specific proposal.
- Type & Client/Customer – Keep the original recipient or use the dropdown to assign the cloned estimate to a different client (e.g., Test Dev Company).
- TAX / Second TAX – Confirm or adjust the tax classifications for the new record.
- Note – Modify the internal notes or terms as needed using the rich-text editor.
- Copy Items Checkbox – Ensure this is checked if you want to bring over all service line items, quantities, and rates from the original estimate.
- Click Save to generate the new estimate record, or click Close to cancel the process.
Result #
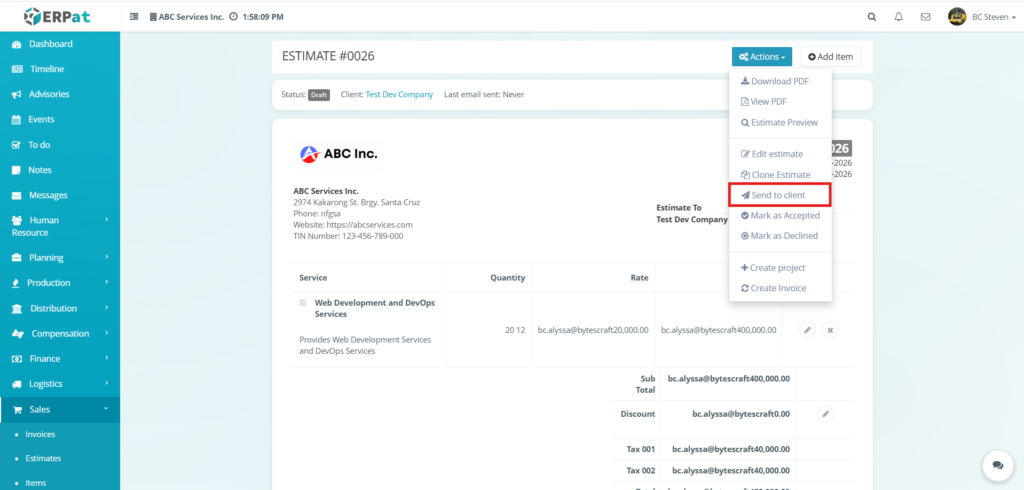
Steps to Send an Estimate to a Client #
Steps #
- Navigate to the Sales module from the main sidebar and select Estimates.
- Click on the specific Estimate ID to open the details view.
- Click the Actions dropdown button located at the top-right of the interface.
- Select Send to client from the available options.
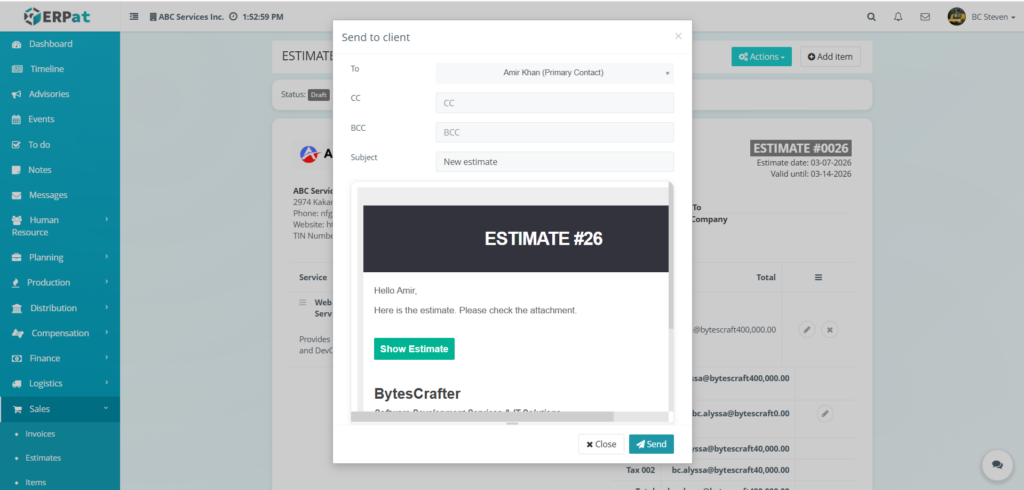
- Fill in the required information in the Send to client modal:
- To – Select the recipient from the dropdown menu.
- CC / BCC – Enter additional email addresses if other stakeholders need to be copied on the proposal.
- Subject – Provide a clear subject line for the email.
- Email Preview – Review the automated message body which includes a “Show Estimate” button and the professional branding of BytesCrafter.
- Click Send to transmit the email to the client, or click Close to cancel the action.
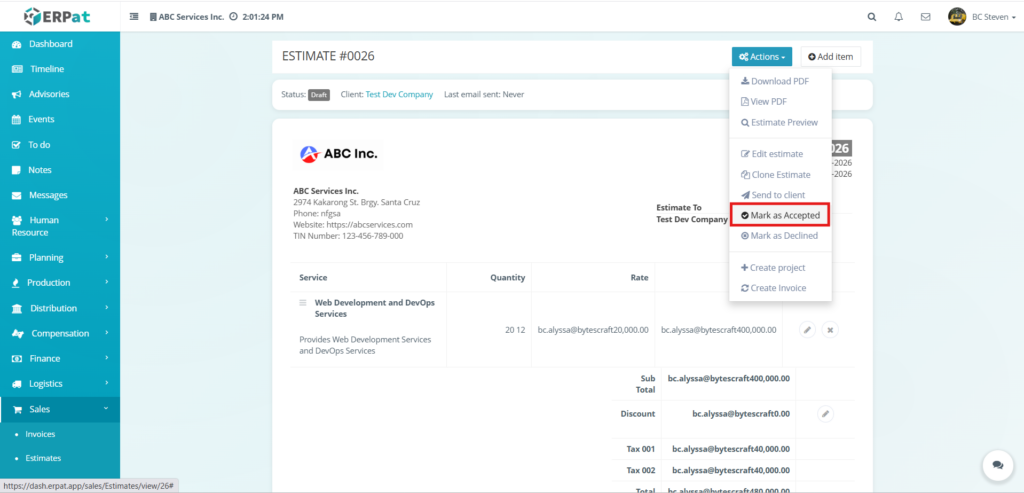
Steps to Marking an Estimate as Accepted #
STEPS #
- Navigate to the Sales module from the main sidebar and select Estimates.
- Locate the specific record the client approved and click on the Estimate ID to open the details page.
- Ensure all service line items, quantities, and tax calculations are finalized.
- Click the Actions dropdown button located at the top-right of the interface.
- Select Mark as Accepted from the available options.
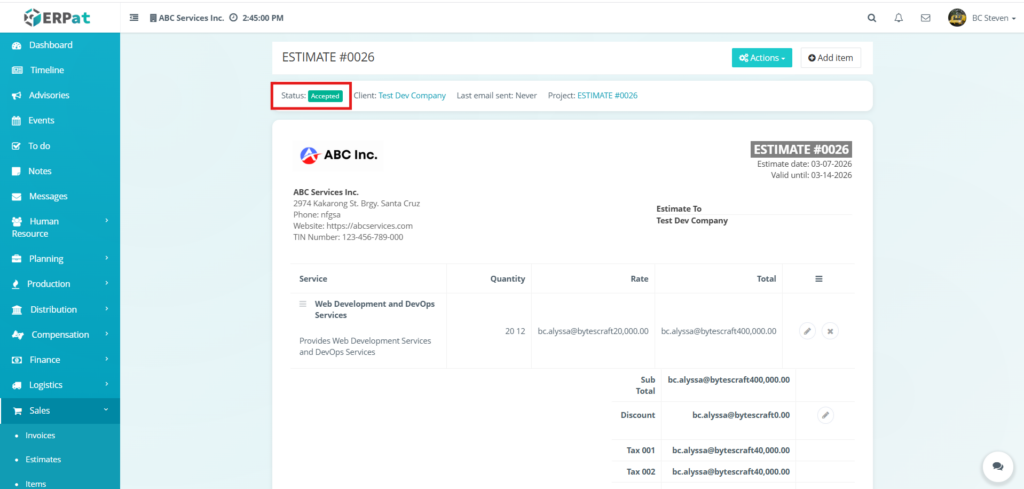
- The system will immediately update the record, and you will see the Status: Accepted badge appear in a green box at the top-left of the estimate header.
RESULT #
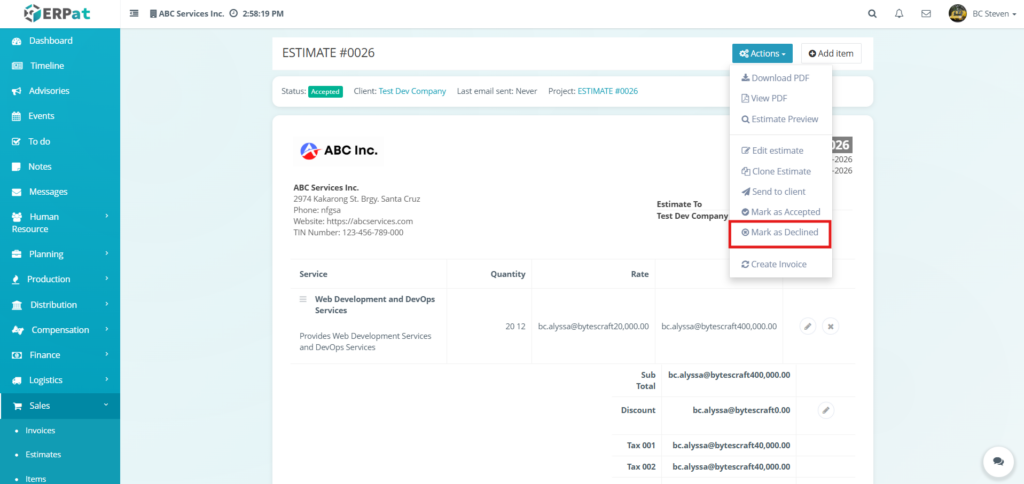
Steps to Marking an Estimate as Declined #
STEPS #
- Navigate to the Sales module from the main sidebar and select Estimates.
- Locate the specific record the client has rejected and click on the Estimate ID to open the details view.
- Click the Actions dropdown button located at the top-right of the interface.
- Select Mark as Declined from the available options.
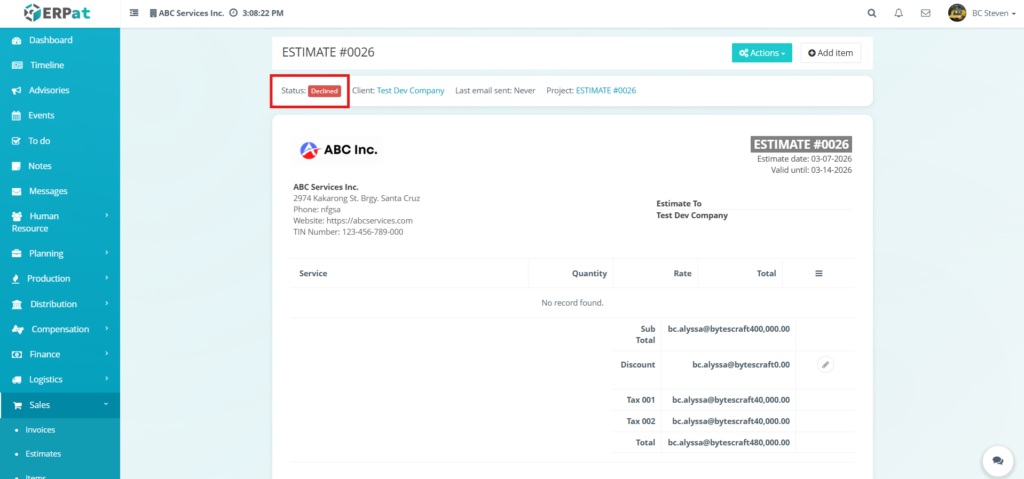
- The system will immediately update the record, and you will see the Status: Declined badge appear in a red box at the top-left of the estimate header.
RESULT #
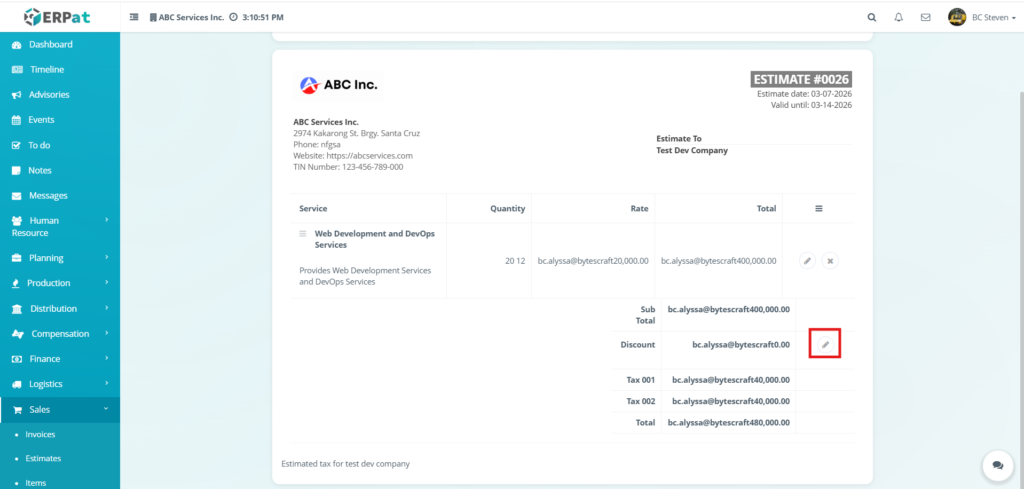
Steps to Editing a Discount in an Estimate #
STEPS #
- Navigate to the Sales module and select Estimates.
- Click on the specific Estimate ID to open the details view.
- Locate the Discount row in the financial summary section at the bottom-right of the service table.
- Click the Edit (pencil) icon next to the current discount value.
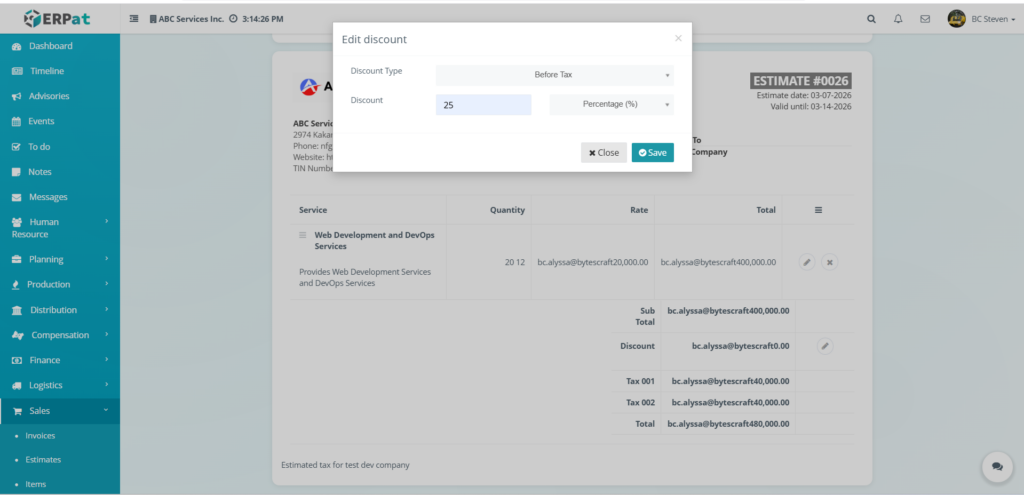
- Configure the discount details in the Edit discount modal:
- Discount Type – Use the first dropdown to select when the discount is applied: Before Tax or After Tax.
- Calculation Method – Use the second dropdown to choose how the discount is measured: Percentage (%) or Fixed Amount.
- Discount Value – Enter the numerical value (percentage or amount) in the designated input field.
- Click Save to apply the deduction to the estimate, or Close to discard the changes.
Steps in Creating an Invoice from an Estimate #
STEPS #
- Navigate to the Sales module from the main sidebar and select Estimates.
- Locate the specific record you wish to bill and click on the Estimate ID to open the details page.
- Click the Actions dropdown button located at the top-right of the interface.
- Select Create Invoice from the available options.
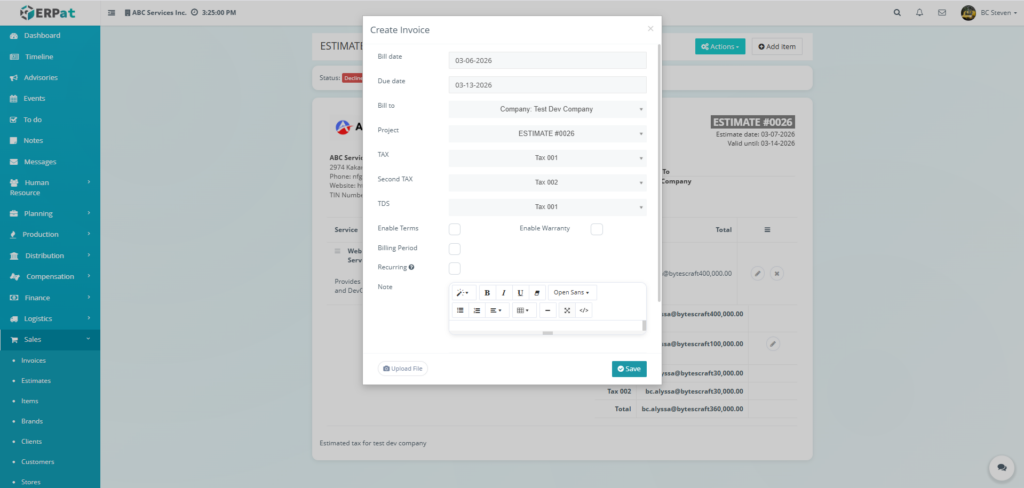
- Configure the billing details in the Create Invoice modal:
- Bill date – Select the issuance date for the invoice .
- Due date – Set the deadline for client payment.
- Bill to – Confirm the recipient.
- Project – Verify the linked project reference.
- Tax / Second TAX / TDS – Review and adjust tax or withholding classifications as needed.
- Enable Terms/Warranty – Toggle these checkboxes to include standard terms or warranty periods on the invoice.
- Labels – Add relevant tags to categorize the invoice record.
- Include all items of this estimate – Ensure this checkbox is marked to carry over all service line items from the original proposal.
- Click Save to generate the invoice record, or Close to discard the action.
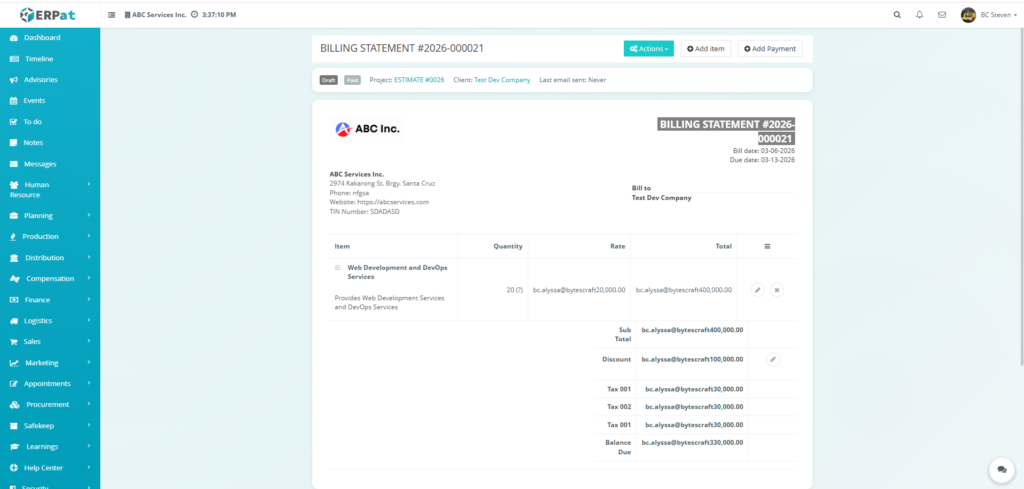
RESULT #
Accessing the Yearly Estimate Page #
To access and manage estimate requests submitted by clients or users, navigate to the Estimate Requests page within the Sales module.
STEPS #
- Navigate to Sales from the left sidebar menu.
- Click Estimates.
- Select the Yearly tab located at the top of the Estimates page.
Result #
The Yearly Estimates page will be displayed, showing estimate records grouped by year instead of monthly records.
Notes #
- Functional Parity: The Yearly Estimates view functions the same as the Monthly Estimates view. All features such as adding, editing, deleting, sorting, filtering, exporting, and searching estimates operate in the same way as described in the Monthly section.
- Scope Difference: The only difference is that the Yearly view displays estimate records for the entire year, allowing users to review and manage annual estimate data, while the Monthly view displays estimate records within a specific month.
Accessing the Estimate Request Page #
To access and manage estimate requests submitted by clients or users, navigate to the Estimate Requests page within the Sales module.
STEPS #
- Navigate to Sales from the main sidebar.
- Select Estimates.
- Click the Requests tab located at the top of the Estimates page.
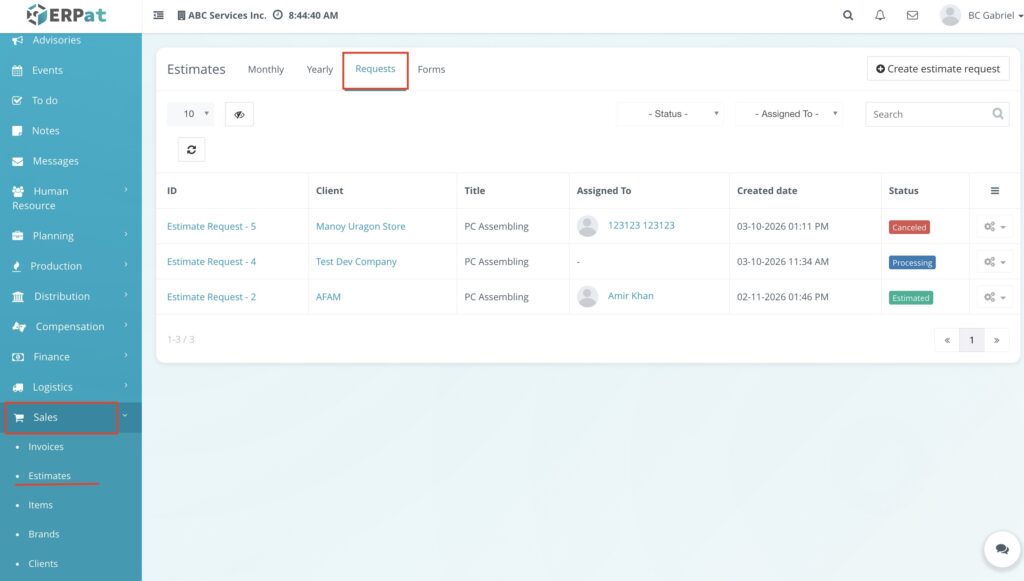
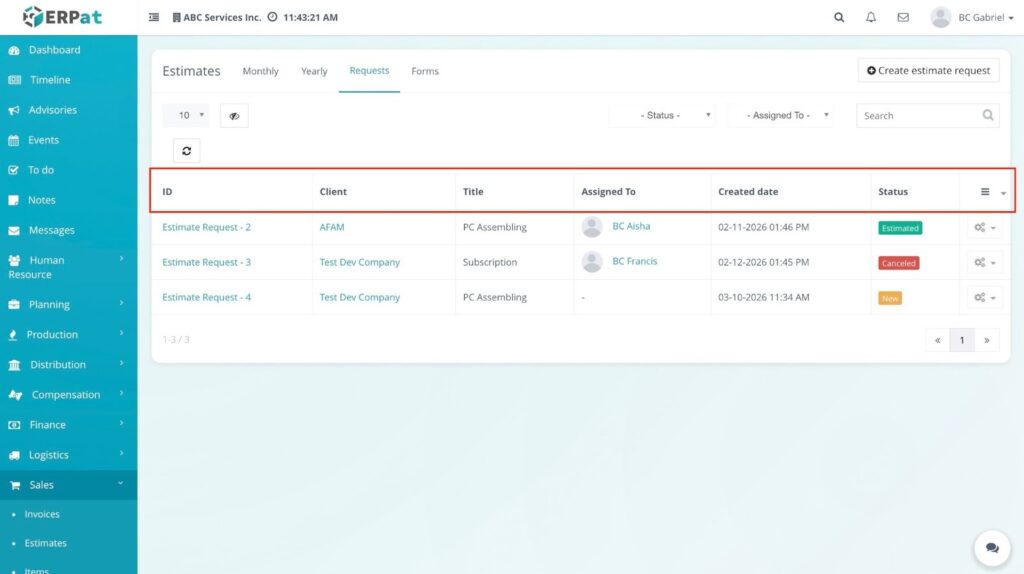
Result #
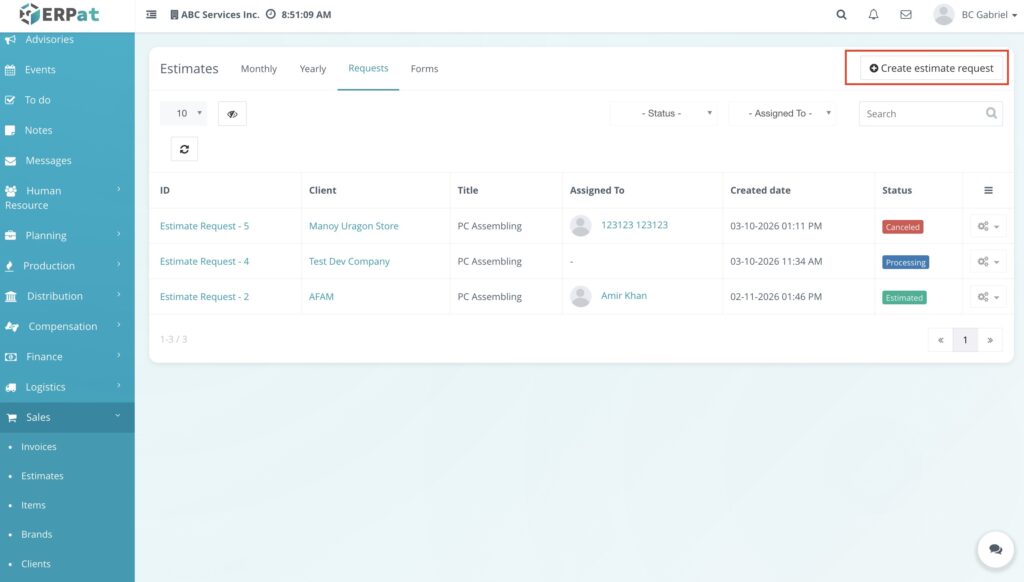
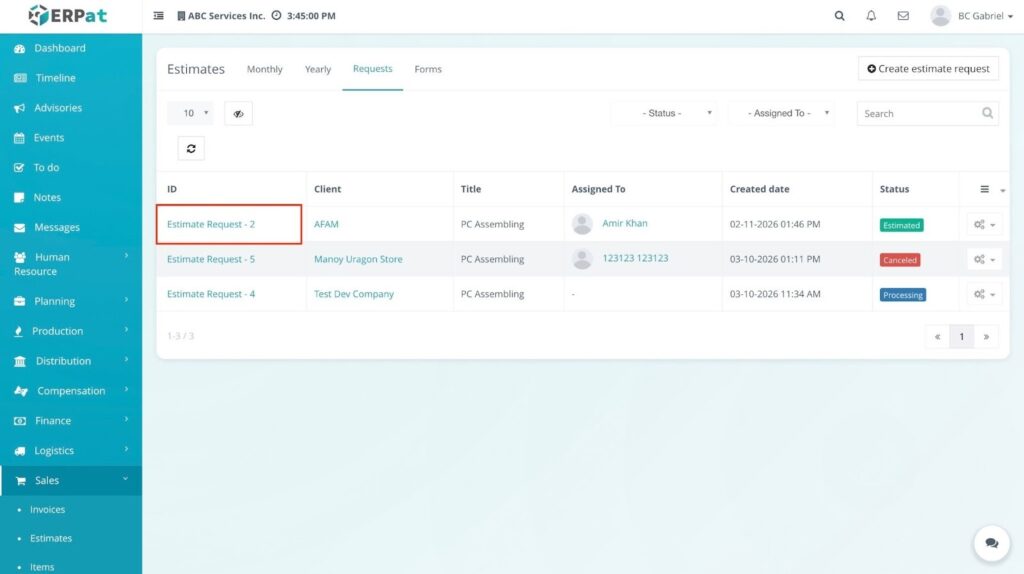
The Estimate Requests page will open and display a list of all submitted estimate requests. The listing page provides key request information including:
- ID – Unique identifier for the estimate request
- Client – Name of the client requesting the estimate
- Title – The type or subject of the request
- Assigned To – The user responsible for processing the request
- Created Date – The date and time the request was submitted
- Status – Current state of the request (New, Processing, Estimated, Hold, or Canceled)
- Actions – Options to manage the request such as editing, updating status, adding an estimate, or deleting the request
Additional controls available on the page include:
- Status Filter – Filter requests by their current status
- Assigned To Filter – Filter requests by assigned user
- Search Bar – Quickly locate specific requests
- Create Estimate Request Button – Used to submit a new estimate request
- Pagination Controls – Navigate through multiple request records
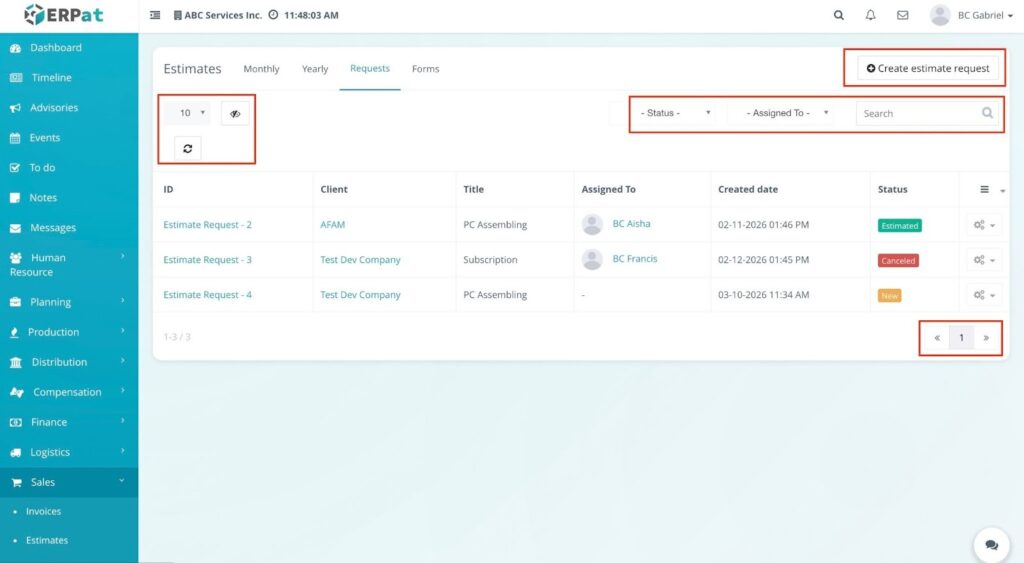
These features allow users to organize, monitor, and manage estimate requests efficiently before converting them into formal estimates.
Steps for Creating an Estimate Request #
Users can create an estimate request by selecting a request form available in the system. These forms allow clients or internal users to submit details needed for generating an estimate.
STEPS #
- Navigate to Sales from the main sidebar.
- Click Estimates.
- Select the Requests tab.
- Click the Create Estimate Request button located in the upper-right corner of the page.
- A Create Estimate Request window will appear.
- Select the appropriate request form from the list (e.g., PC Assembling or Subscription).
- The selected form will open, allowing the user to fill out the request details.
RESULT #
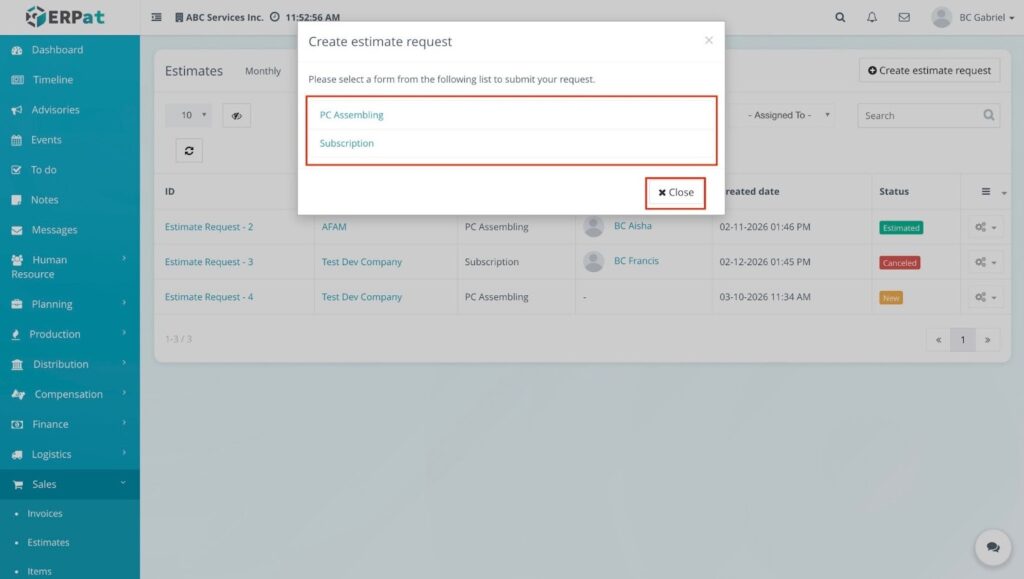
The system will display the available estimate request forms that users can choose from when submitting a request. Once a form is selected, the corresponding request form page will open where users can provide the necessary information required for the estimate. These forms ensure that all relevant details are collected before the request is processed and converted into an official estimate.
Steps for Selecting and Submitting an Estimate Request Form #
After selecting a request form, users will be redirected to the form page where they can provide the necessary details required for the estimate.
STEPS #
- Click Estimates.
- Select the Requests tab.
- Click Create Estimate Request.
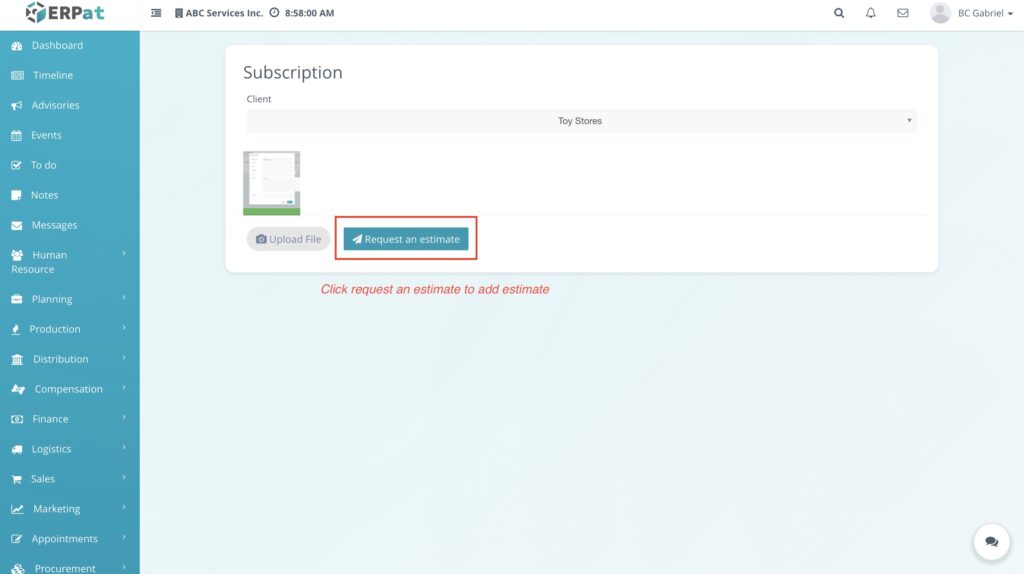
- Choose a request form from the list (e.g., PC Assembling or Subscription).
- On the request form page, select the Client from the dropdown field.
- (Optional) Click Upload File to attach supporting documents or files related to the request.
- Click Request an Estimate to submit the request.
RESULT #
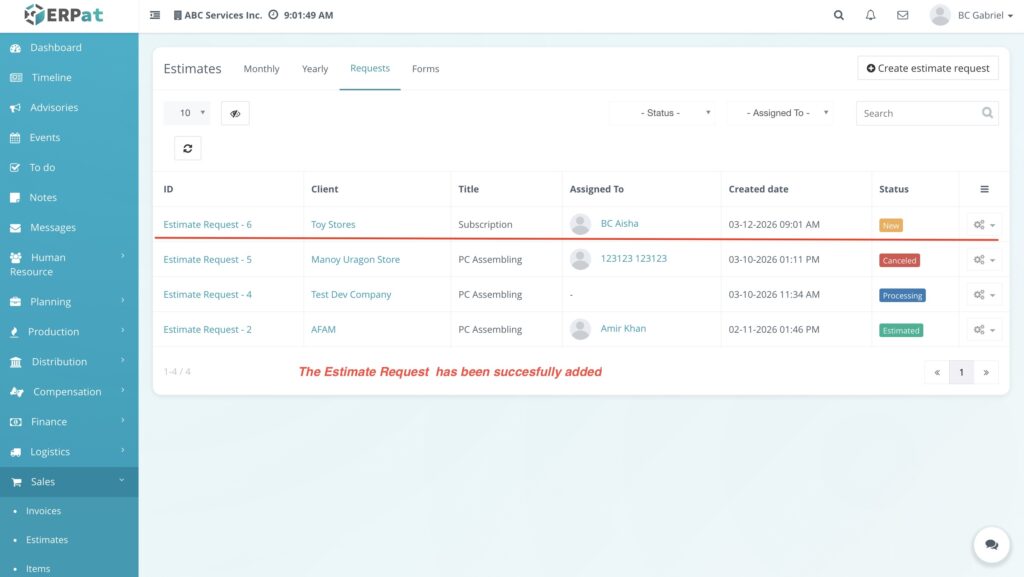
The estimate request will be submitted and recorded in the Estimate Requests list. The request will appear in the Requests table with details such as the client name, request title, assigned user (if applicable), creation date, and current request status. The request can then be reviewed, updated, or converted into an official estimate by authorized users.
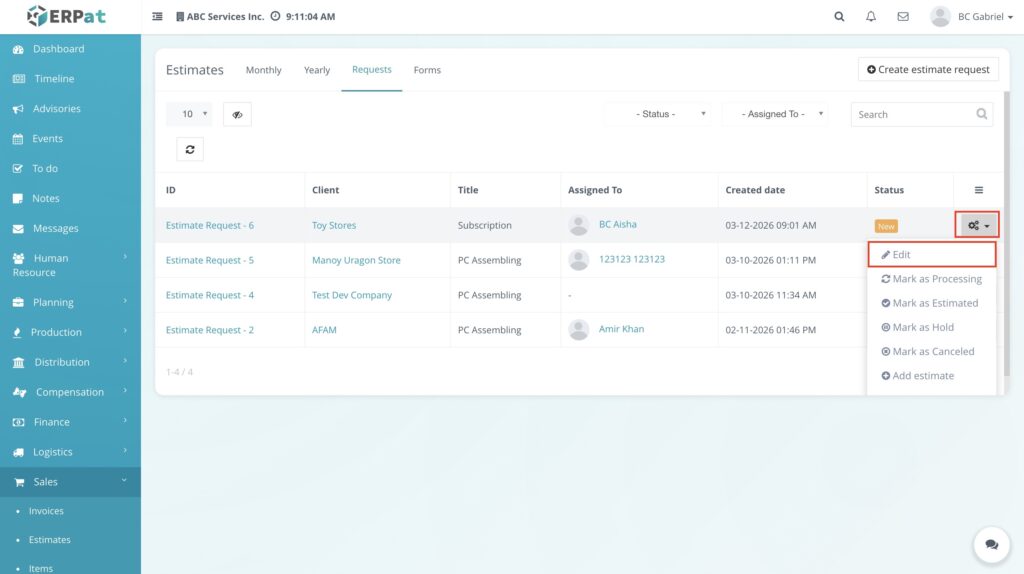
Steps for Editing an Estimate Request #
Users can edit an estimate request to update the assigned user responsible for processing the request.
Steps #
- Click Estimates.
- Select the Requests tab.
- Locate the estimate request you want to modify in the requests table.
- Click the Action Menu (gear icon) on the right side of the request row.
- Select Edit from the dropdown menu.
- The Estimate Request edit window will appear.
- In the Assign to field, choose the user you want to assign the request to.
Click Save to apply the changes.
RESULT
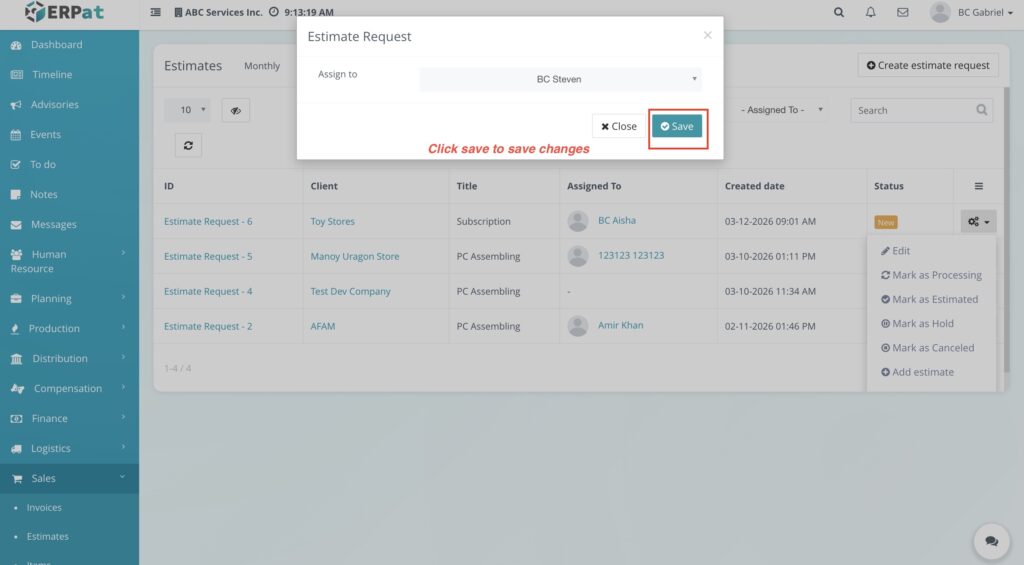
The system will update the assigned user for the selected estimate request. The changes will be reflected in the Assigned To column in the requests table, confirming that the request has been successfully updated.
Steps for Updating Request Status to Processing #
Users can update the status of an estimate request to Processing when the request is currently being reviewed or worked on.
STEPS #
- Click Estimates.
- Select the Requests tab.
- Locate the estimate request you want to update in the requests table.
- Click the Action Menu (gear icon) located on the right side of the request row.
- Select Mark as Processing from the dropdown menu.

RESULT #
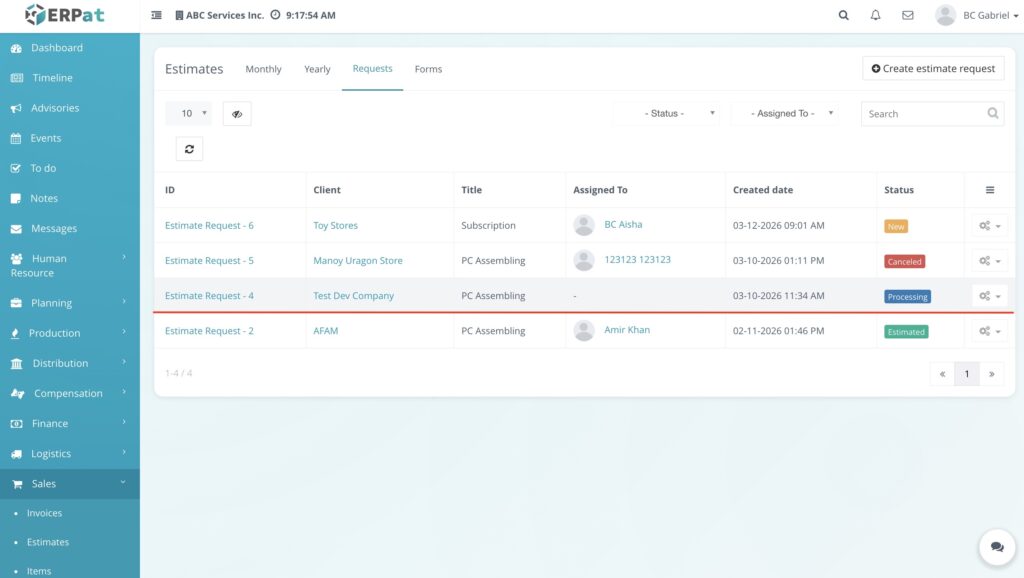
The system will update the status of the selected estimate request to Processing. The updated status will be displayed in the Status column of the requests table, indicating that the request is currently being reviewed or processed by the assigned user.
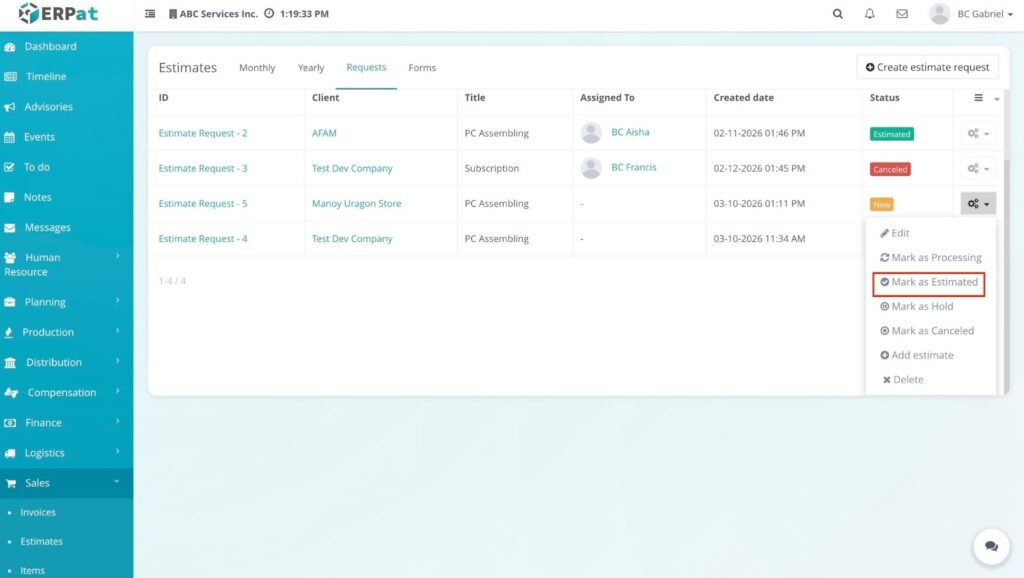
Steps For Updating Request Status to Estimated #
Users can update the status of an estimate request to Estimated once the estimate for the request has been prepared or completed.
STEPS #
- Click Estimates.
- Select the Requests tab.
- Locate the estimate request you want to update in the requests table.
- Click the Action Menu (gear icon) located on the right side of the request row.
- Select Mark as Estimated from the dropdown menu.
RESULT #

The system will update the status of the selected estimate request to Estimated. The updated status will appear in the Status column of the requests table, indicating that an estimate has already been prepared for the request.
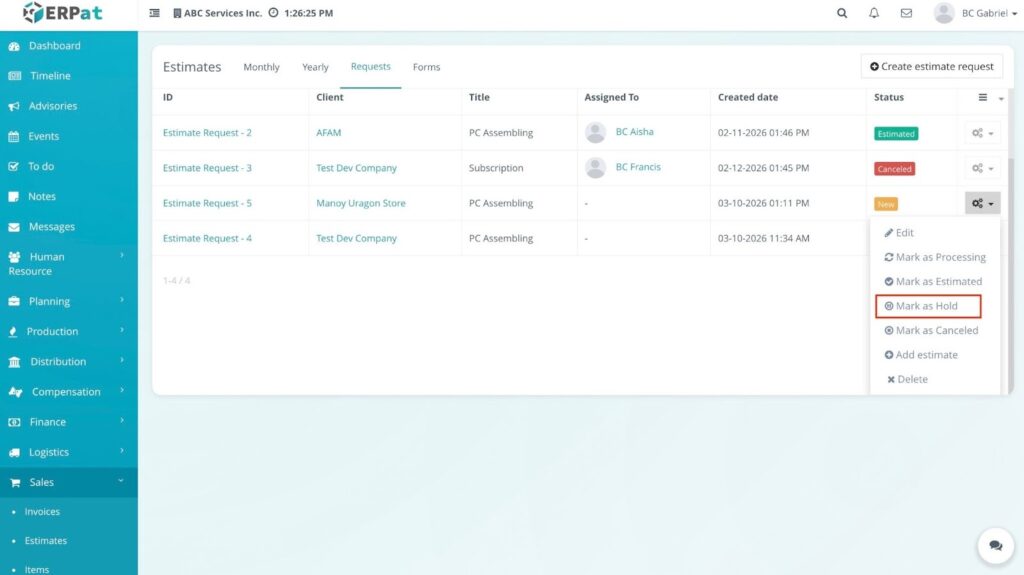
Steps for Updating Request Status to Hold #
Users can change the status of an estimate request to Hold when the request needs to be temporarily paused or delayed. This allows the request to remain in the system while indicating that it is not currently being processed.
STEPS #
- Click Estimates.
- Select the Requests tab.
- Locate the estimate request you want to update in the requests table.
- Click the Action Menu (gear icon) located on the right side of the request row.
- From the dropdown menu, select Mark as Hold.
RESULT #
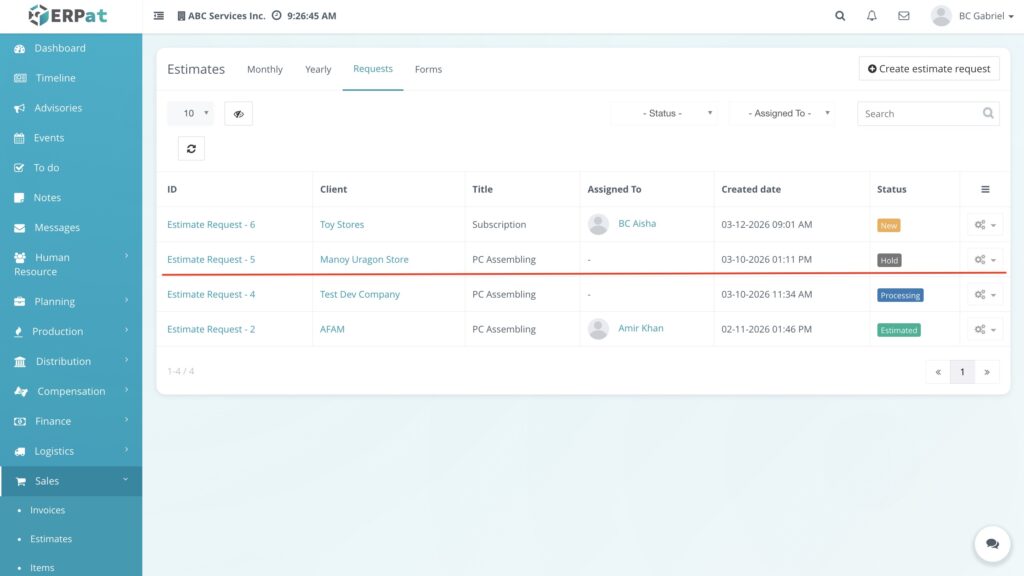
The system will update the status of the selected estimate request to Hold. The updated status will appear in the Status column of the requests table, indicating that the request is temporarily paused and not currently being processed.
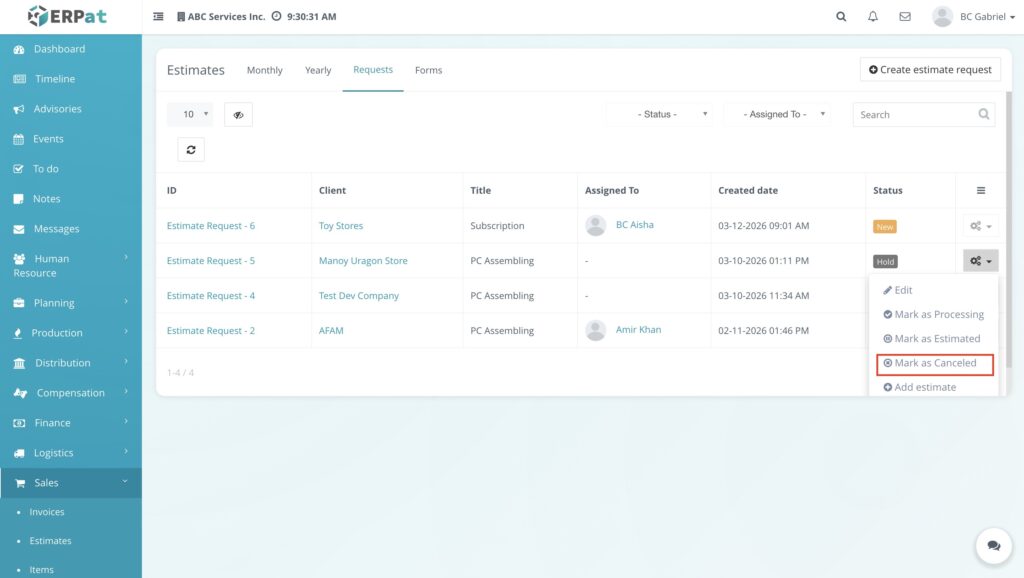
Steps for Canceling an Estimate Request #
Users can cancel an estimate request when the request is no longer needed or will not proceed to the estimation process.
STEPS #
- Click Estimates from the Sales module.
- Select the Requests tab.
- Locate the estimate request you want to cancel in the requests table.
- Click the Action Menu (gear icon) on the right side of the request row.
- Select Mark as Canceled from the dropdown menu.
RESULT #
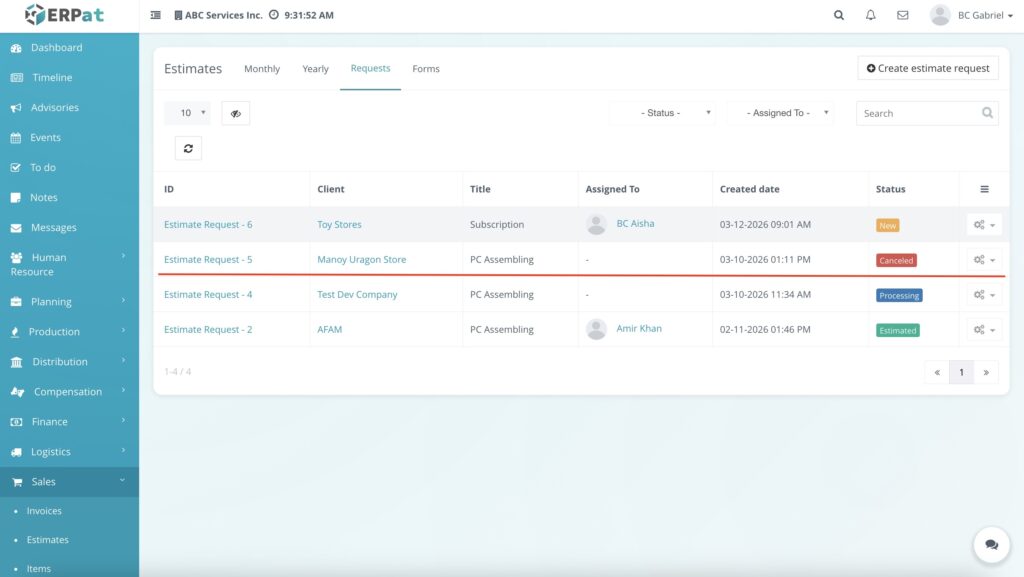
The system will update the request status to Canceled. The updated status will appear in the Status column of the requests table, confirming that the estimate request has been successfully canceled. The request will remain visible in the list for reference but will no longer proceed to the estimation process.
Steps for Adding an Estimate from a Request #
Users can create an estimate directly from an estimate request. This converts the request into a formal estimate that can later include services, pricing, and other billing details.
STEPS #
- Click Estimates.
- Select the Requests tab.
- Locate the estimate request you want to convert into an estimate.
- Click the Action Menu (gear icon) located on the right side of the request row.
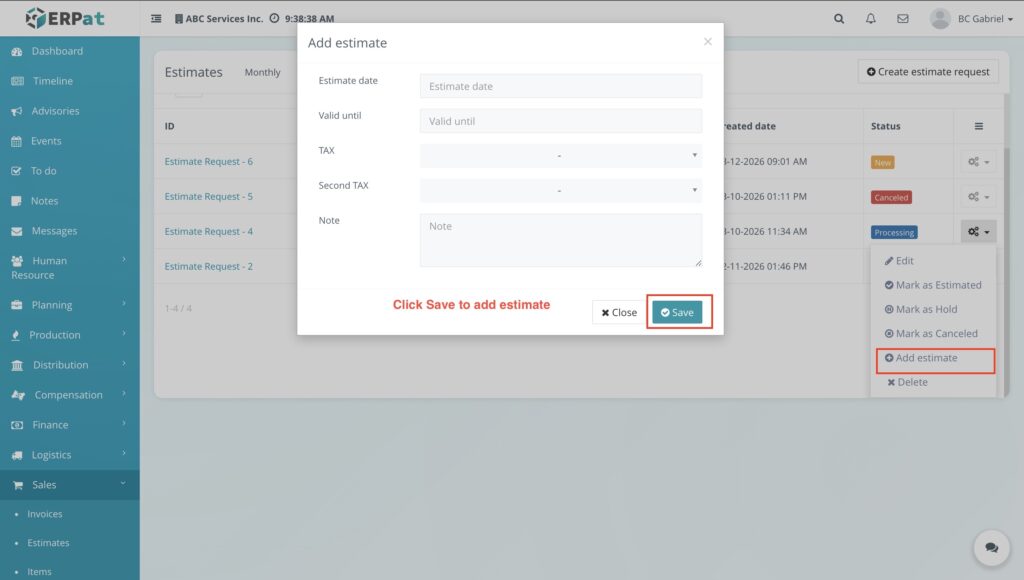
- Select Add estimate from the dropdown menu.
- In the Add Estimate window, enter the required details:
- Estimate date
- Valid until
- TAX
- Second TAX
- Note (optional)
- Click Save to create the estimate.
RESULT #
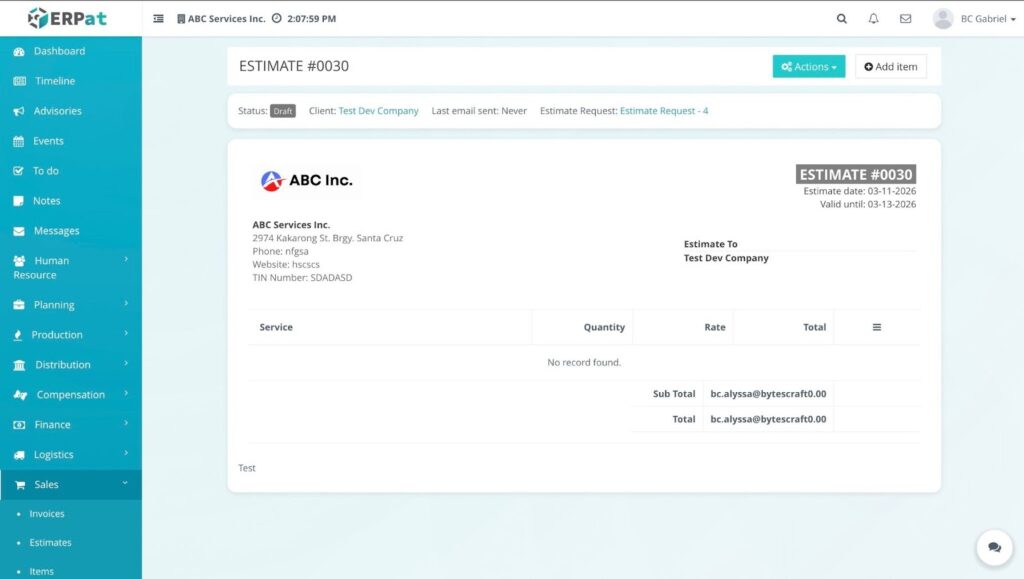
The system will generate a new Estimate page linked to the selected estimate request. The estimate will initially appear with no services added.
To add services or items to the estimate, refer to the “Steps for Adding a Service to an Estimate” section of the documentation for further instructions.
Steps for Deleting an Estimate Request #
Users can delete an estimate request if it is no longer needed or was created by mistake. Deleting a request permanently removes it from the system.
STEPS #
- Click Estimates.
- Select the Requests tab.
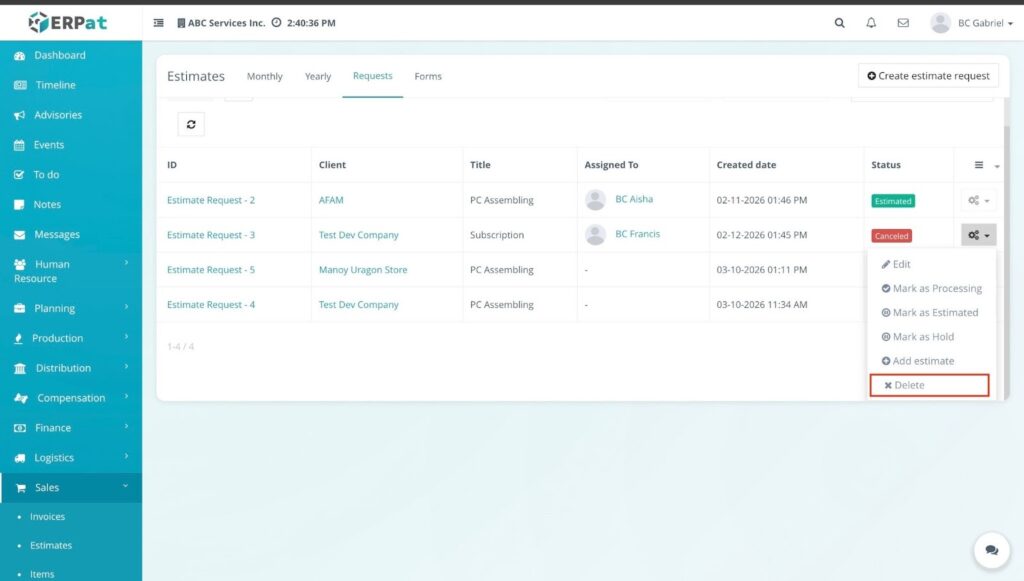
- Locate the estimate request you want to remove from the requests table.
- Click the Action Menu (gear icon) located on the right side of the request row.
- Select Delete from the dropdown menu.
RESULT #
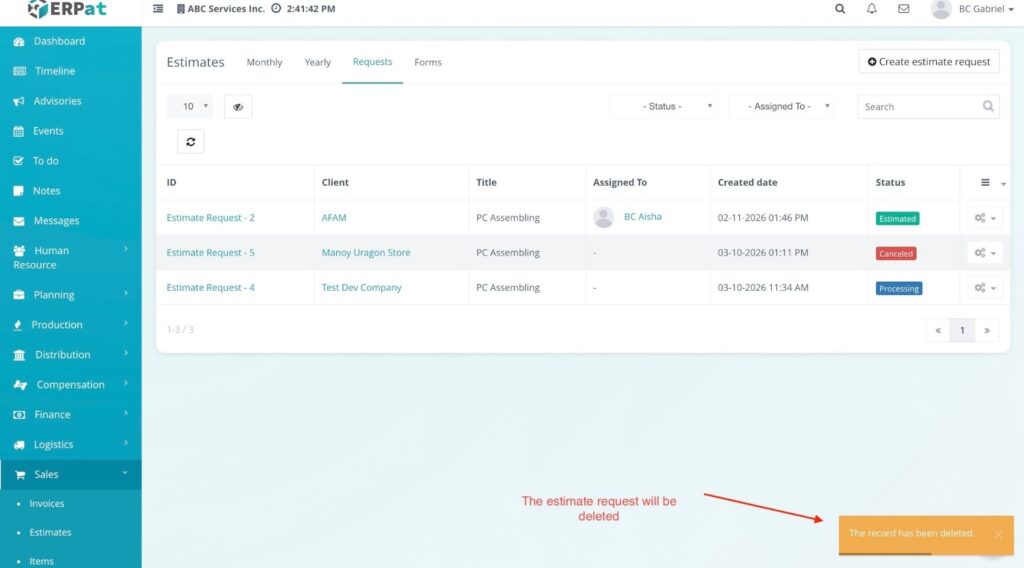
The system will remove the selected estimate request from the requests table. A notification message will appear confirming that the record has been deleted, and the request will no longer be visible in the list.
Steps for Viewing an Estimate Request #
Users can open and view the full details of an estimate request to review the request information, attached content, status, and available actions.
STEPS #
- Navigate to Sales from the main sidebar.
- Click Estimates.
- Select the Requests tab.
- Locate the estimate request you want to view in the requests table.
- Click the Estimate Request ID (for example, Estimate Request – 2).
RESULT #
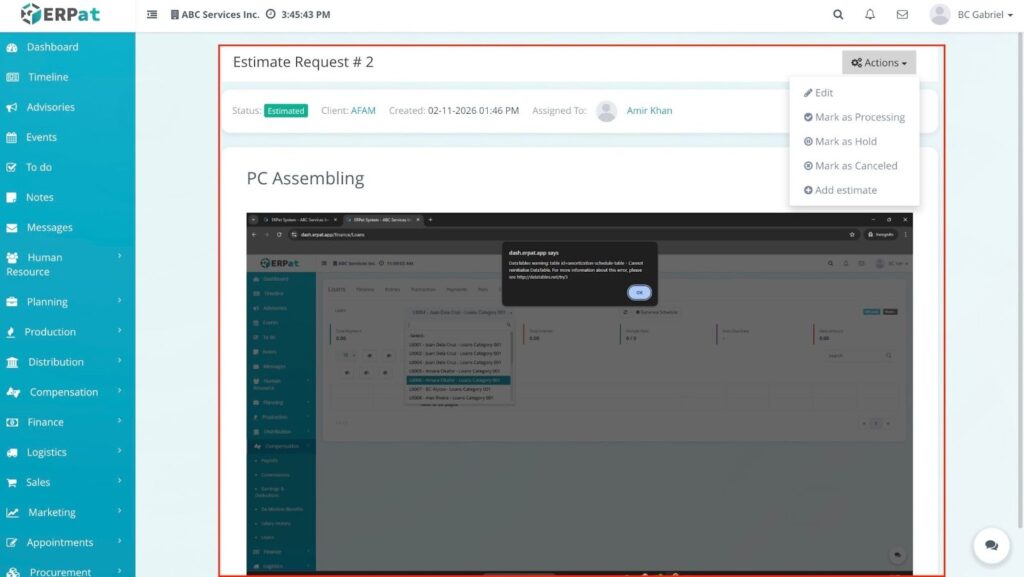
The system will open the Estimate Request details page. This page displays the request information including the status, client name, creation date, assigned user, and request title or content. Users can also access additional options through the Actions menu, such as editing the request, updating its status, or adding an estimate.
Steps for Viewing Client and Assigned User Profiles #
Users can quickly access the client profile and the assigned user’s profile directly from the Estimate Requests table. This allows users to review additional information about the client or the staff member handling the request.
STEPS #
- Navigate to Sales from the main sidebar.
- Click Estimates.
- Select the Requests tab.
- Locate the estimate request in the requests table.
- Click the Client name in the Client column to open the client’s profile.
- Click the Assigned user name in the Assigned To column to open the assigned user’s profile.
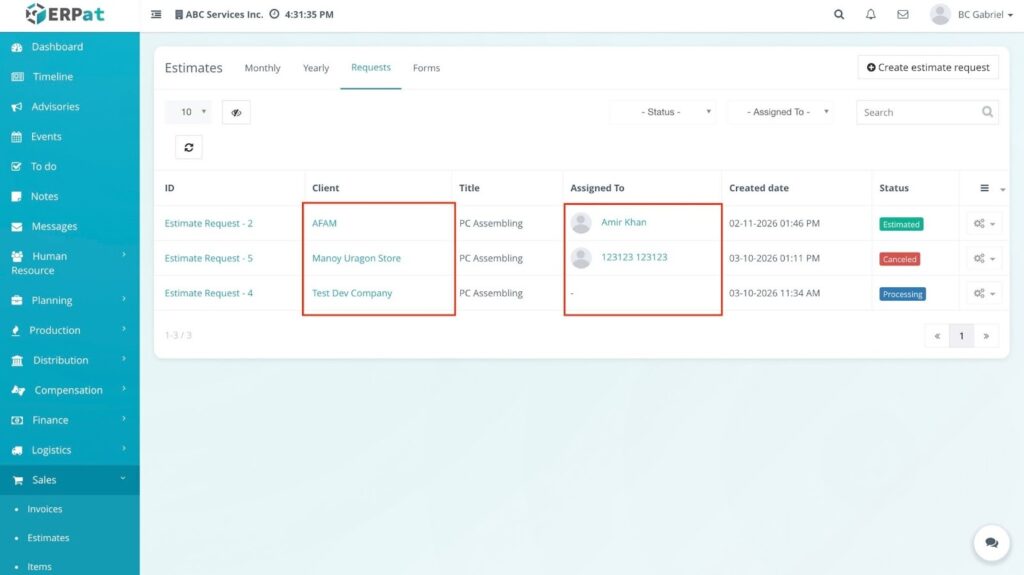
RESULT #
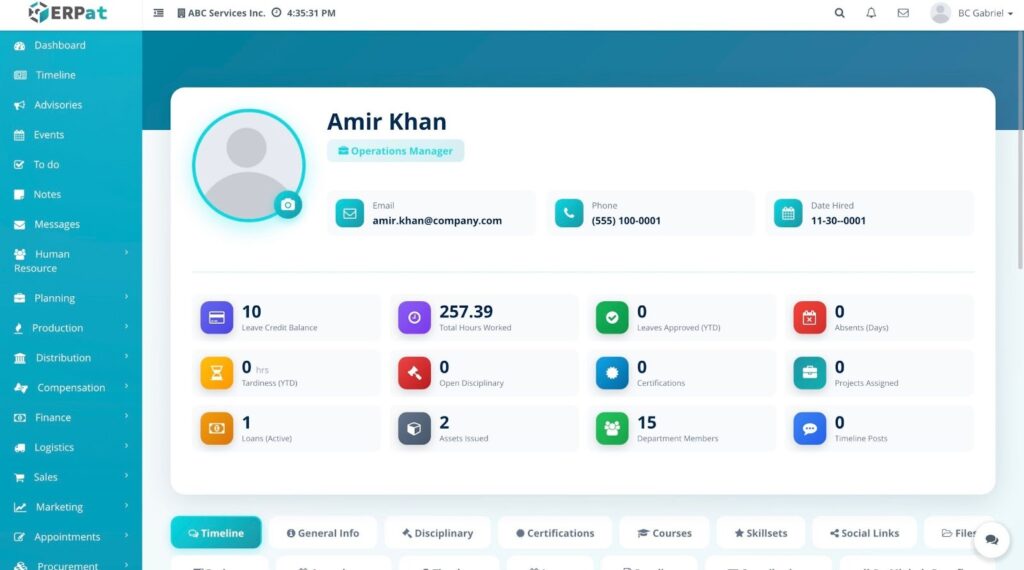
The system will redirect the user to the selected Client Profile or User Profile page, where detailed information about the client or assigned staff member can be viewed. This allows users to quickly review related information without manually searching for the client or employee in other modules of the system.
Accessing the Forms Page #
The Forms page allows users to manage estimate request forms that clients can use when submitting an estimate request.
STEPS #
- Click Sales from the left sidebar.
- Select Estimates.
- Click the Forms tab at the top of the Estimates page.
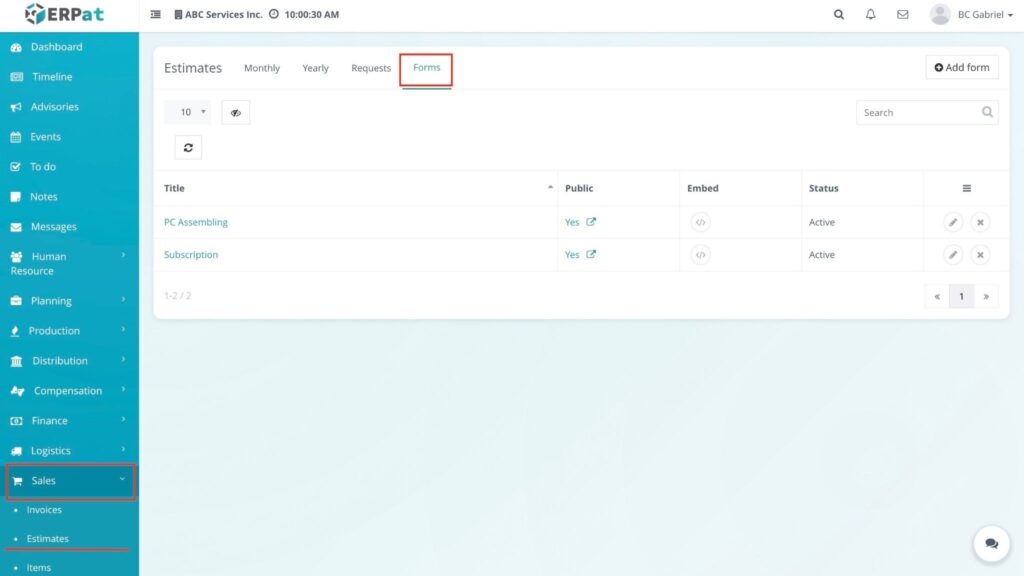
RESULT #
The Forms page will open and display a list of available estimate request forms. The table shows information such as the Form Title, Public availability, Embed option, and Status. From this page, users can manage existing forms and create new ones for estimate requests.
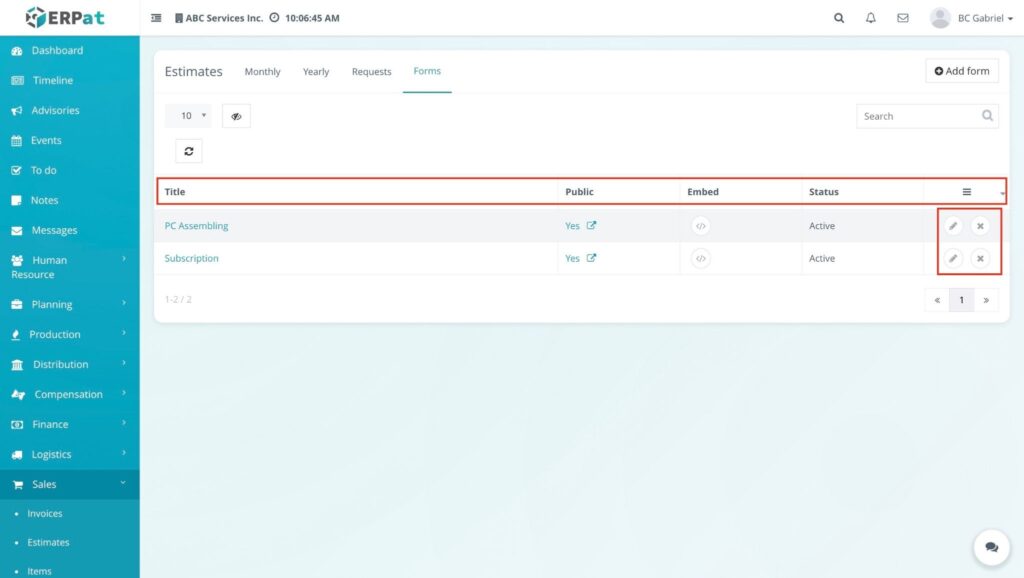
Forms Listing Page #
The Forms page displays all available estimate request forms that can be used when submitting estimate requests.
Fields in the Forms Table #
The forms table displays the following information:
- Title – Shows the name of the estimate request form. Clicking the title opens the form details.
- Public – Indicates whether the form is publicly accessible. If enabled, users can open the public link to view the form.
- Embed – Provides an embed option that allows the form to be integrated into an external website.
- Status – Displays the current status of the form (e.g., Active or Inactive).
- Edit (Pencil Icon) – Allows users to modify the form details, questions, or settings.
- Delete (X Icon) – Removes the form from the system.
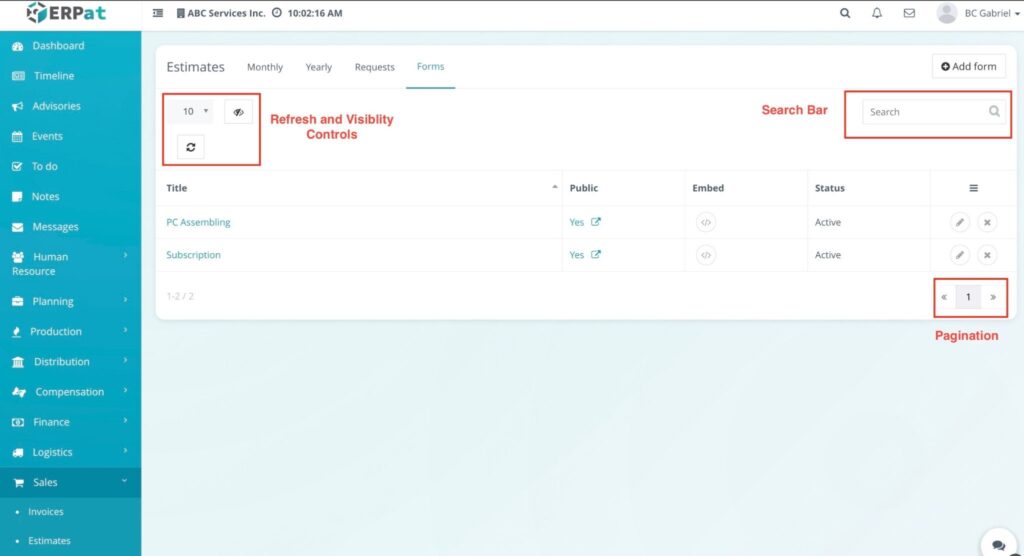
Additional Controls #
The Forms page includes several controls that help users manage and navigate the list of forms.
- Search Bar – Allows users to quickly find forms by typing keywords related to the form title.
- Refresh Button – Reloads the forms table to display the most recent data.
- Column Visibility – Allows users to show or hide specific columns in the forms table.
- Pagination – Located at the bottom of the page and allows users to navigate between multiple pages of form records.
Steps for Adding a Form #
STEPS #
- Click Estimates from the Sales module.
- Select the Forms tab.
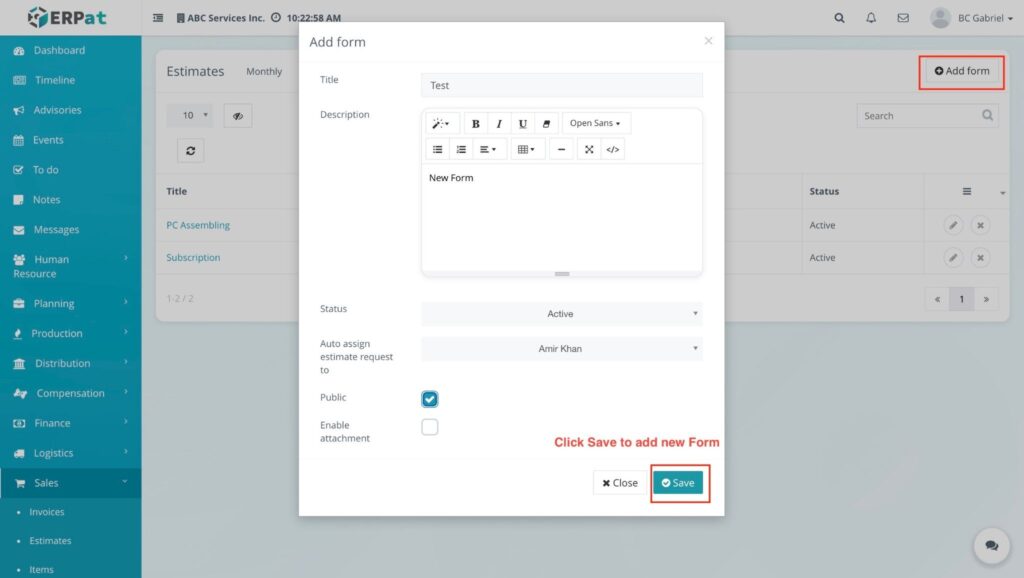
- Click the Add Form button located at the top right of the page.
- Enter the required information in the following fields:
- Title – Enter the name of the form.
- Description – Provide a short description of the form.
- Status – Select Active or Inactive.
- Auto Assign Estimate Request To – Choose the user who will automatically receive the estimate requests submitted through this form.
- (Optional) Enable the following checkboxes if needed:
- Public – Allows the form to be publicly accessible.
- Enable Attachment – Allows users to attach files when submitting the form.
- Click Save.
RESULT #

The system will save the new form and add it to the Forms listing page. If the form status is set to Active, it will be available for use when submitting estimate requests. If the Public option is enabled, the form can also be accessed through a public link or embedded externally.
Steps for Editing a Form #
STEPS #
- Click Estimates from the Sales module.
- Select the Forms tab.
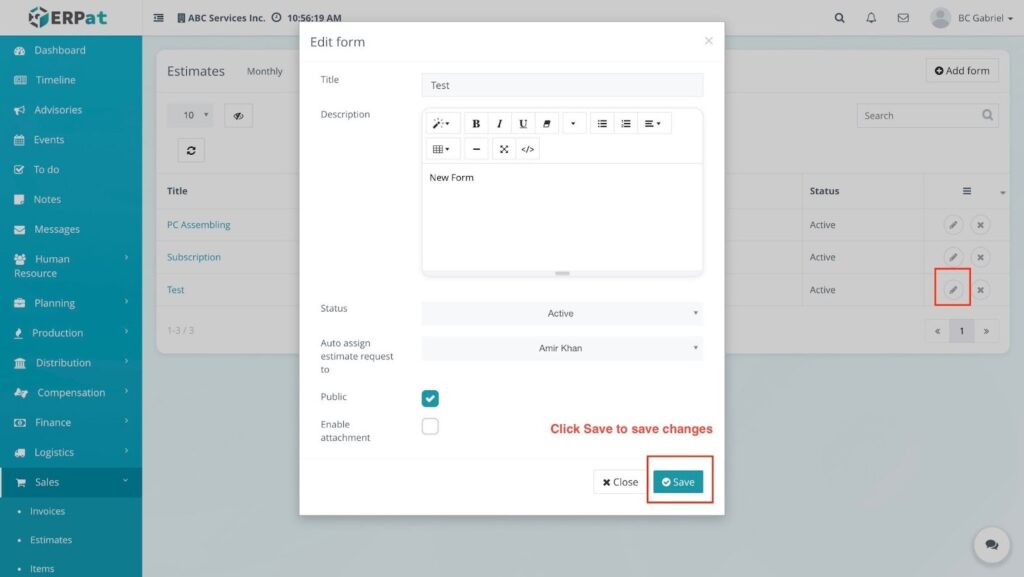
- Locate the form you want to modify in the forms listing table.
- Click the Edit (pencil icon) under the Actions column.
- Update the necessary fields such as Title, Description, Status, or Auto Assign Estimate Request To.
- Modify optional settings such as Public or Enable Attachment if needed.
- Click Save to apply the changes.
RESULT #
The system will update the selected form with the new information. The updated form details will appear in the Forms listing page.
Steps for Deleting a Form #
STEPS #
- Click Estimates from the Sales module.
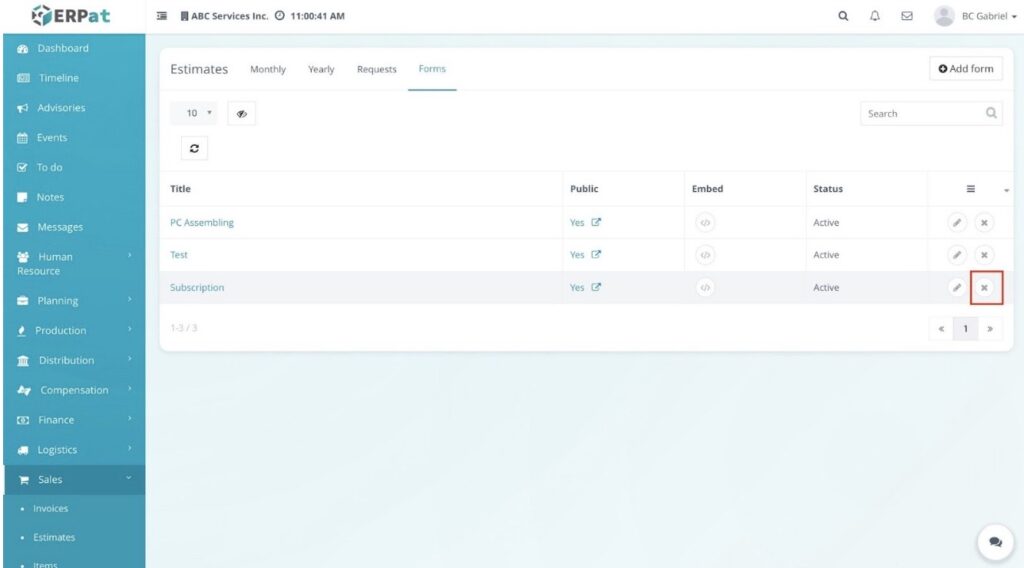
- Select the Forms tab.
- Locate the form you want to remove in the forms table.
- Click the Delete (X icon) under the Actions column.
RESULT #
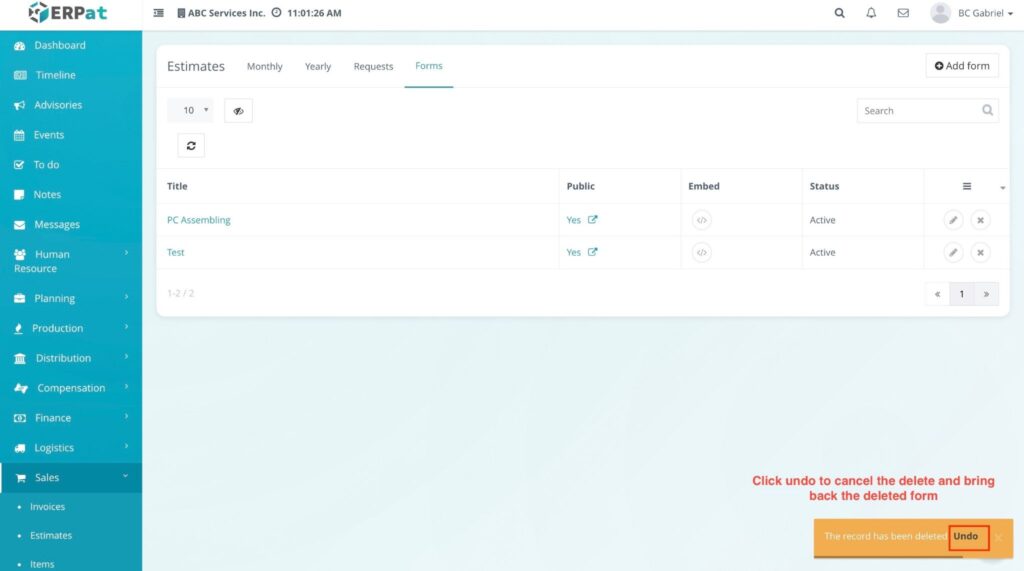
The selected form will be removed from the system and will no longer appear in the Forms listing page, but if you click the undo button before its gone then the deleted form will be back.
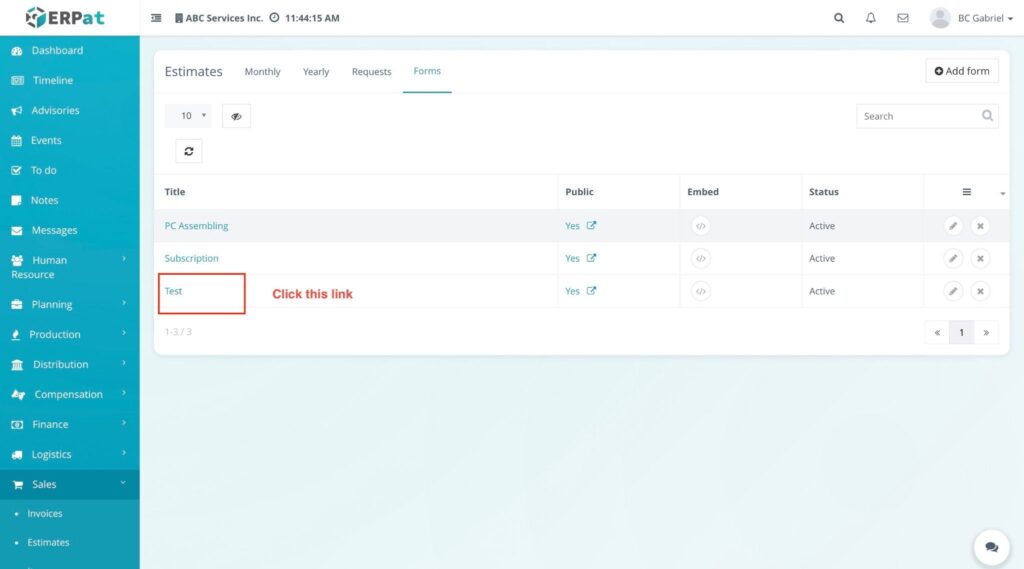
Steps for Adding a Field to a Form #
STEPS #
- Click Estimates from the Sales module.
- Select the Forms tab.
- Locate the form in the list.
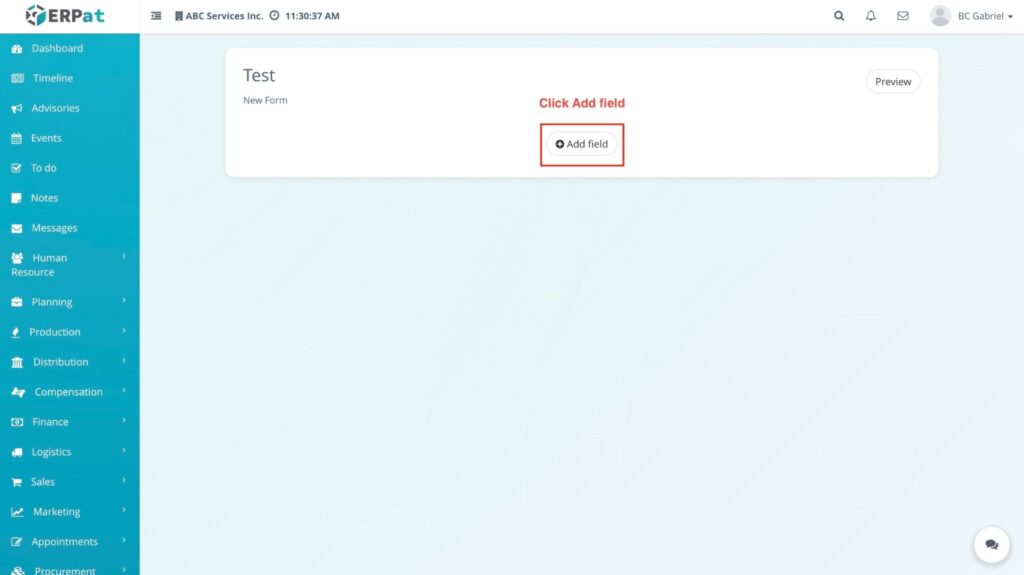
- Click the Form Title link to open the form configuration page.
- Click the Add Field button.
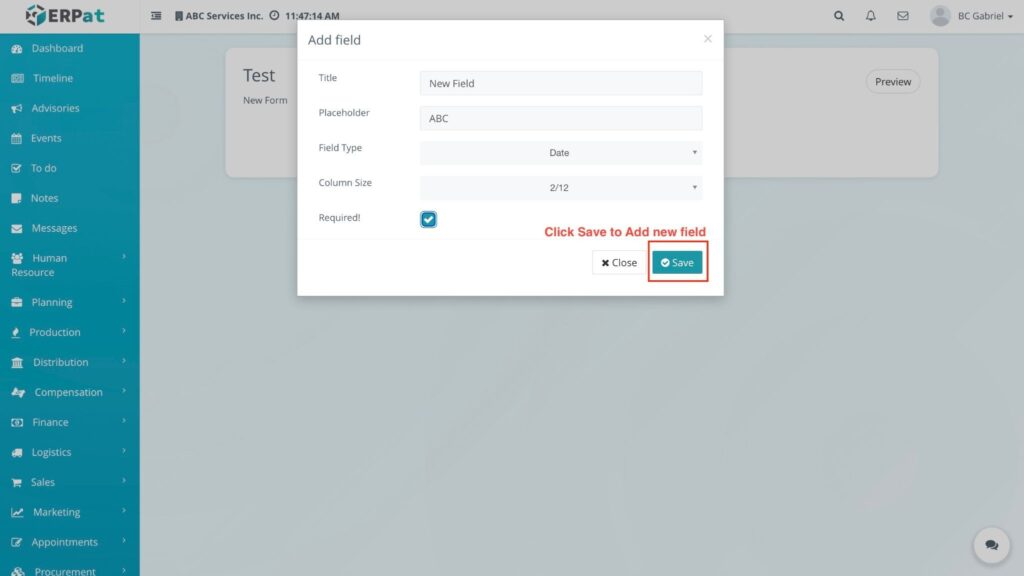
- Fill in the required field details:
- Title – Name of the field.
- Placeholder – Guide text that appears inside the input field.
- Field Type – Select the type of field (e.g., textarea, email, etc.).
- Column Size – Select the column width for the field layout.
- Required – Enable the checkbox if the field must be filled out before submission.
- Click Save.
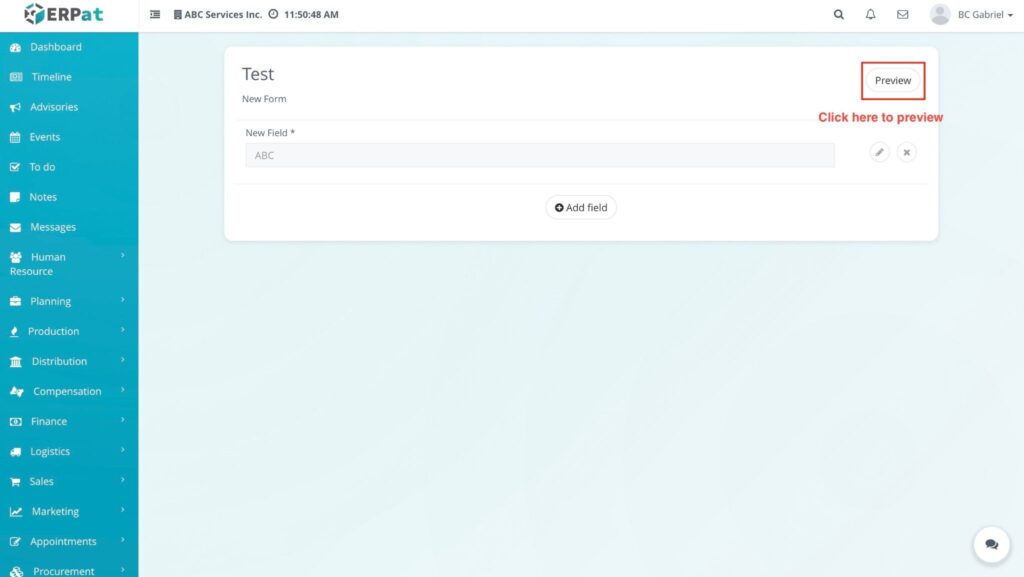
RESULT #

The new field will be added to the form and will appear in the field list. Users can also edit or delete the field using the available action options.
Steps for Previewing a Form #
STEPS #
- Click Estimates from the Sales module.
- Select the Forms tab.
- Click the Form Title to open the form configuration page.
- Click the Preview option.
RESULT #
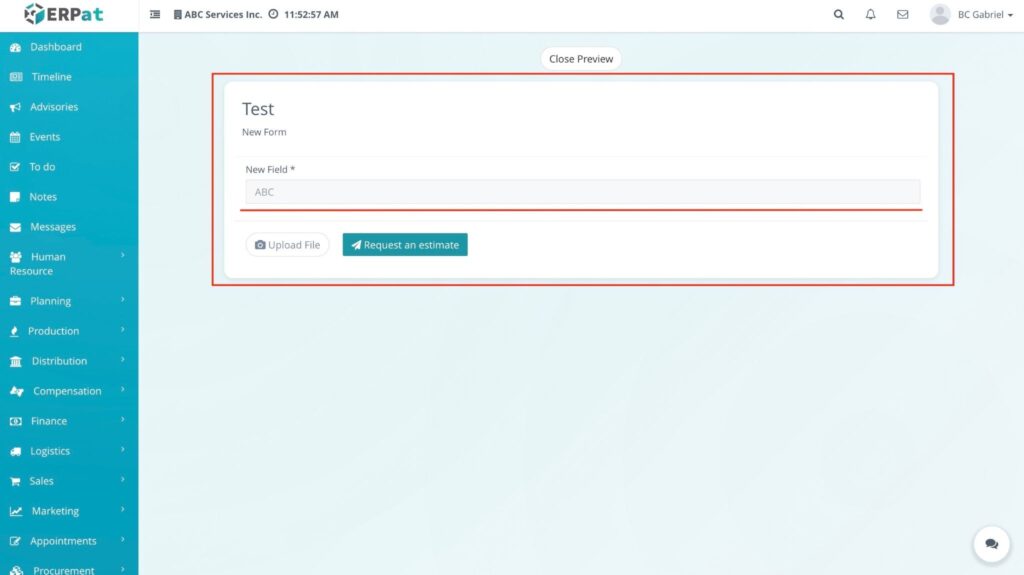
The system will display a preview of the form as it will appear to users. The preview includes available fields, an Upload File button, and a Request an Estimate button.
Steps for Accessing the Public Form #
STEPS #
- Click Estimates from the Sales module.
- Select the Forms tab.
- Locate the form with the Public option enabled.
- Click the Public link.
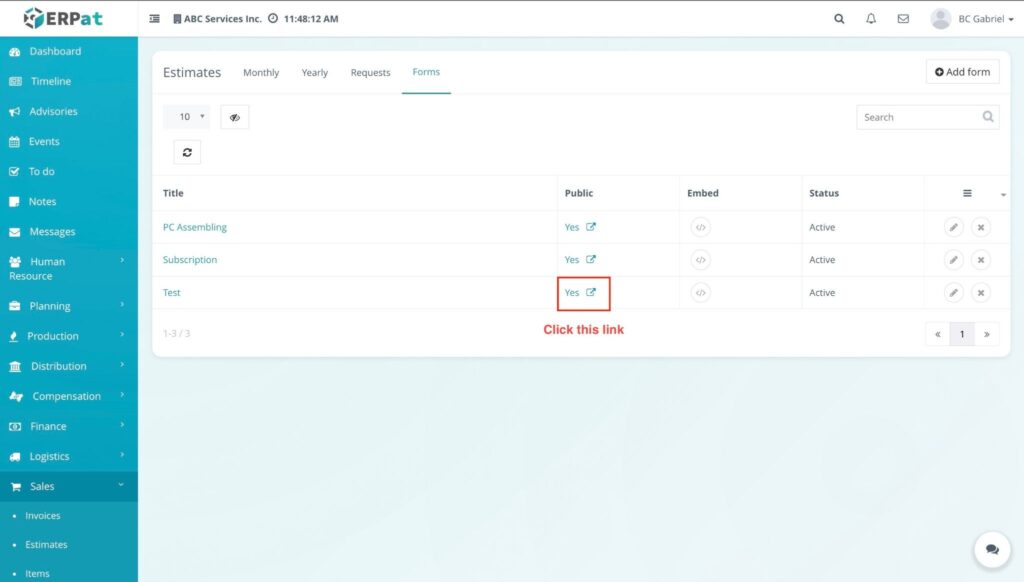
RESULT #
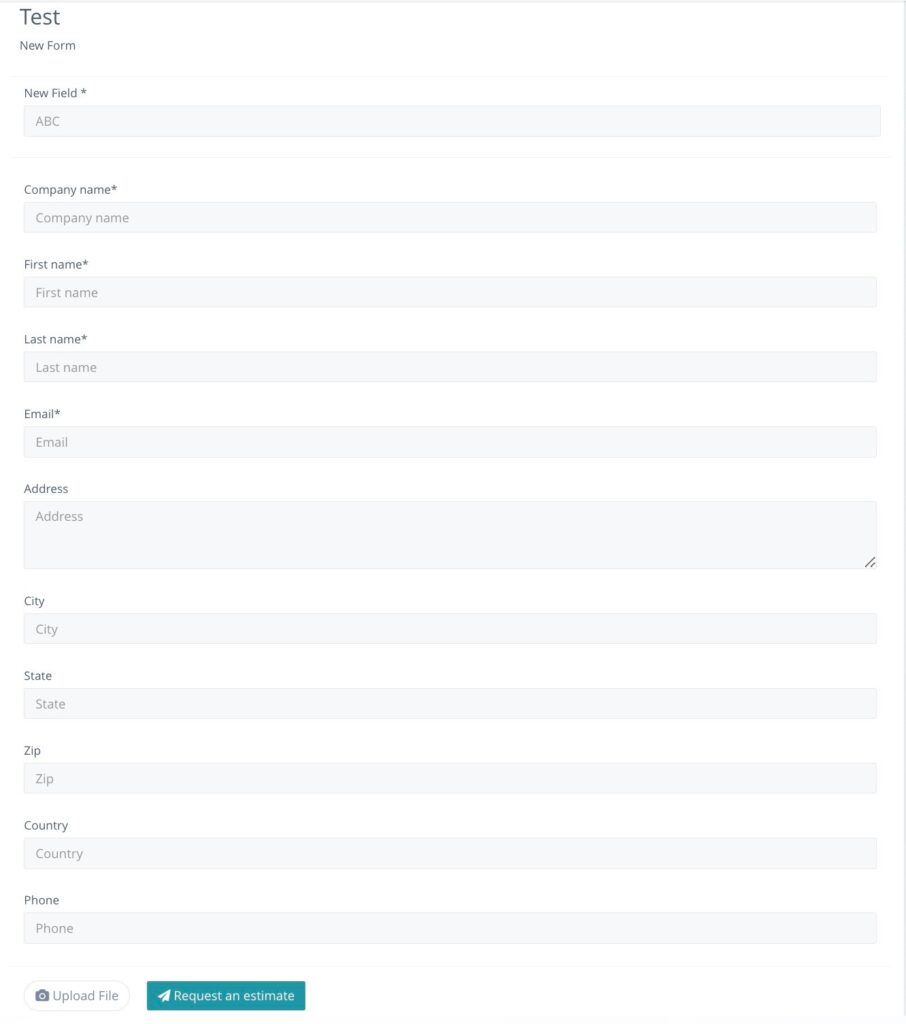
The system will open the public version of the form, where users can fill in the following information:
- Company Name
- First Name
- Last Name
- Complete Address
- Phone Number
Users can also upload a file and click Request an Estimate to submit the form.
Steps for Copying the Embedded Form Code #
STEPS #
- Click Estimates from the Sales module.
- Select the Forms tab.
- Locate the form you want to embed.
- Click the Embed option in the table.
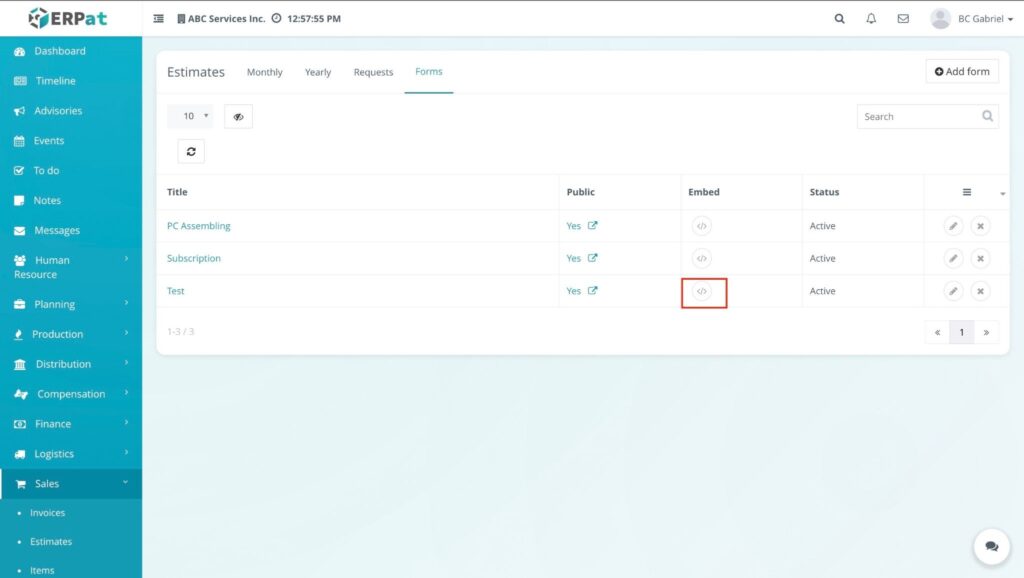
RESULT #
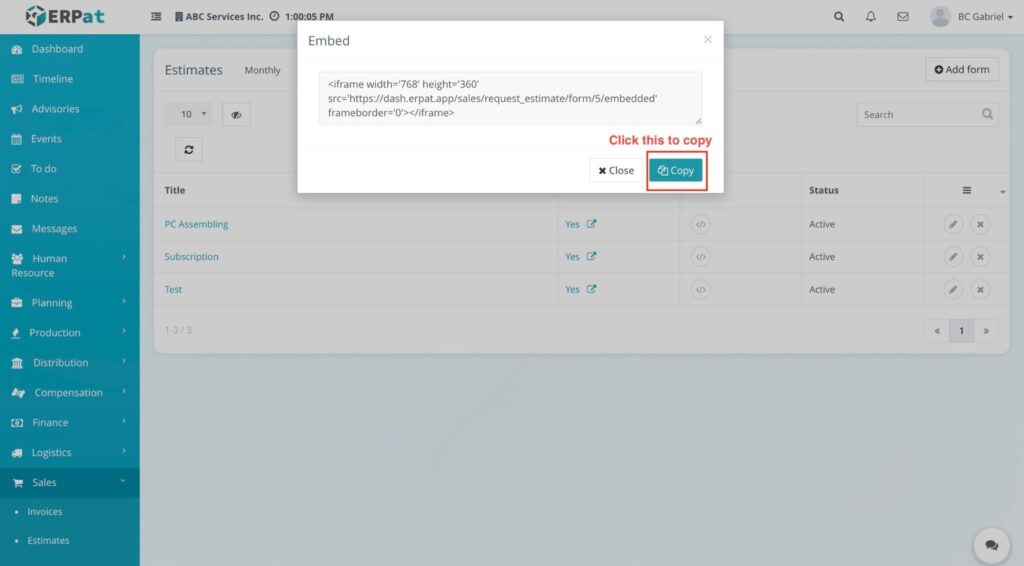
The system will provide an iframe embed code that can be copied and used to embed the form on an external website.
Example embed code:
<iframe width=’768′ height=’360′ src=’https://dash.erpat.app/sales/request_estimate/form/1/embedded’ frameborder=’0′></iframe>
This code allows the estimate request form to be embedded and displayed on external websites or pages.
Permissions and Access Control #
Only authorized Sales or Admin roles can create, edit, or delete estimates, estimate requests, and estimate forms.
View-only access may be granted to users who only need to monitor estimate activities without making changes.
Best Practices #
- Use clear and consistent titles when creating estimate forms and requests to ensure easy identification.
- Verify that all estimate details—including client information, services, and pricing—are accurate before saving or submitting.
- Avoid deleting estimates or request forms that are still in use or referenced in ongoing transactions.
Audit & Logs #
All create, update, and delete actions related to estimates, estimate requests, and estimate forms are recorded within the ERPat System for monitoring, audit, and compliance purposes.
Last Updated: [March 12, 2026] Module Owner: Human Resource IS – ERPat System


