Overview #
The Settings – Components Module is used to configure different system components that affect how specific modules behave across the system. It allows administrators to manage settings related to the public footer, GDPR compliance, widgets, payroll, attendance, leave, kiosk, tasks, projects, recruitment, sessions, disciplinary, courses, campaigns, messages, system logs, asset entries, leads, events, tickets, and timesheets. This module helps centralize module-specific configurations so the system can be customized based on organizational policies, workflows, and operational requirements.
Components – Footer #
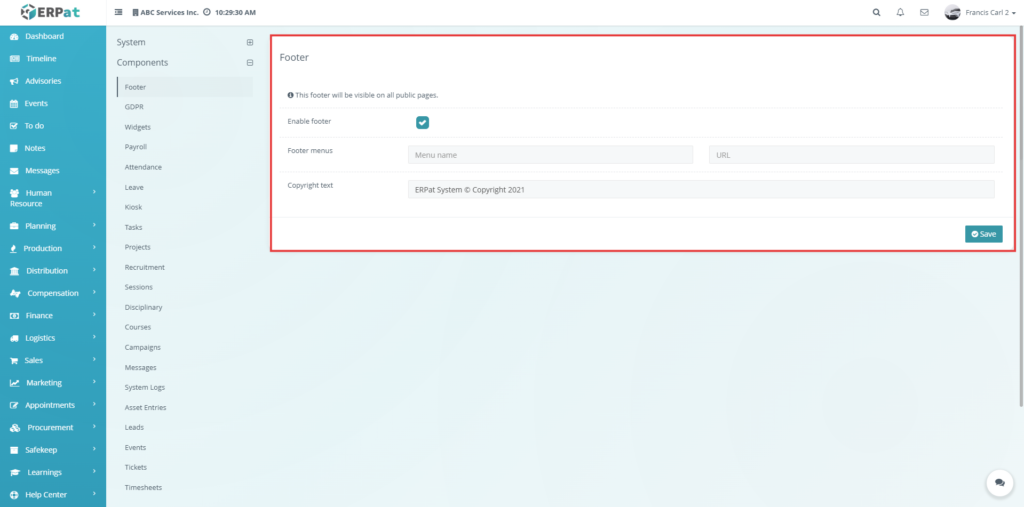
This page is used to manage the footer that appears on the public pages of the system. It helps the administrator control whether the footer is shown, what menu links appear in it, and what copyright text is displayed. This is useful when the organization wants to provide quick links at the bottom of public pages, such as links to important pages or external websites.
If the user wants to add footer links, this is the correct page to use. In this page, the administrator can enable the footer, enter the footer menu details, and save the changes. Based on the system note, when the user clicks the Footer menus area, the Menu name and URL inputs will show action buttons such as Add or Cancel. This means the page is not only for viewing footer settings but also for adding individual footer menu entries directly from the same section.
Components – GDPR #
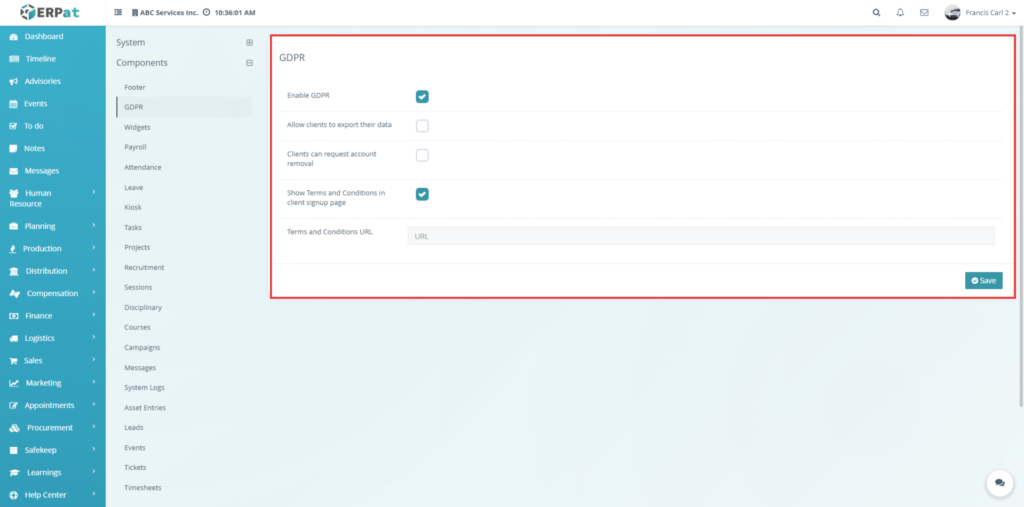
This page is used to configure GDPR-related options for client data privacy and account protection. Administrators should use this page when they want to control whether clients are allowed to export their data, request account removal, or see Terms and Conditions during signup. This page is important for organizations that want to implement privacy-related options in the client area of the system.
When Enable GDPR is turned on, additional settings become visible. These include Allow clients to export their data, Clients can request account removal, and Show Terms and Conditions in client signup page. If the Terms and Conditions option is enabled, the system also displays the Terms and Conditions URL field, where the administrator can enter the link that customers or clients should view during signup. This page should be used whenever the organization wants to manage client privacy features in a more controlled and compliant way.
Components – Widgets #
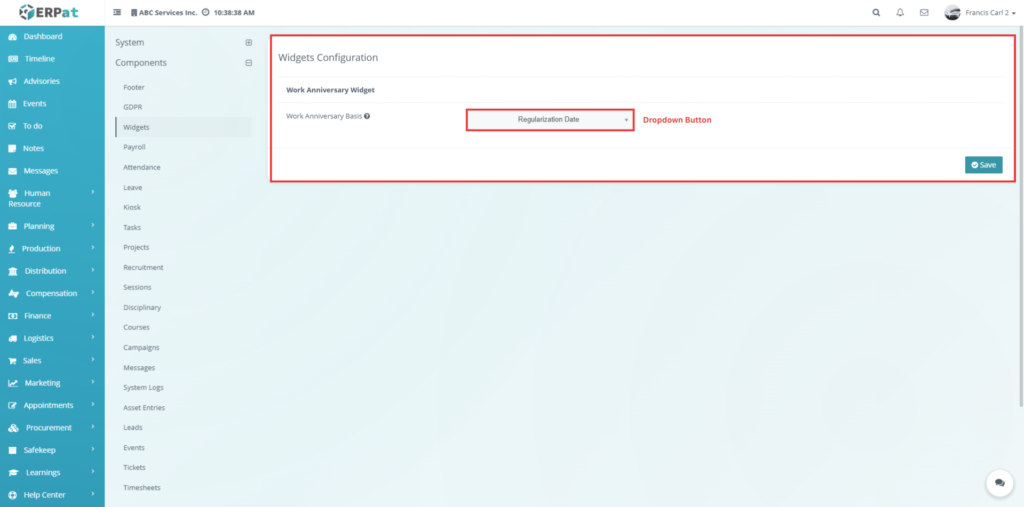
This page is used to configure system widgets, particularly the Work Anniversary Widget shown in your file. It should be used when the administrator wants to define how work anniversaries are calculated in the system. This is useful because the anniversary displayed to users may depend on whether the company counts from the employee’s hiring date or regularization date.
In this page, the administrator can choose the Work Anniversary Basis. The help icon explains that the basis for calculating work anniversaries may come either from the Date Hire or from the Date of Regularization. This means the page is used not only to select a value but also to define the rule the system follows when displaying or computing employee work anniversaries.
Components – Payroll #
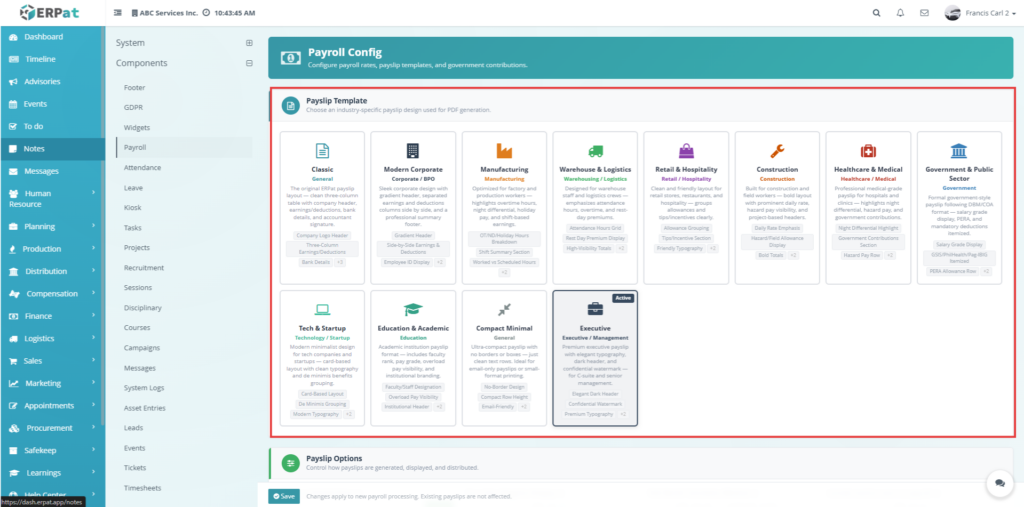
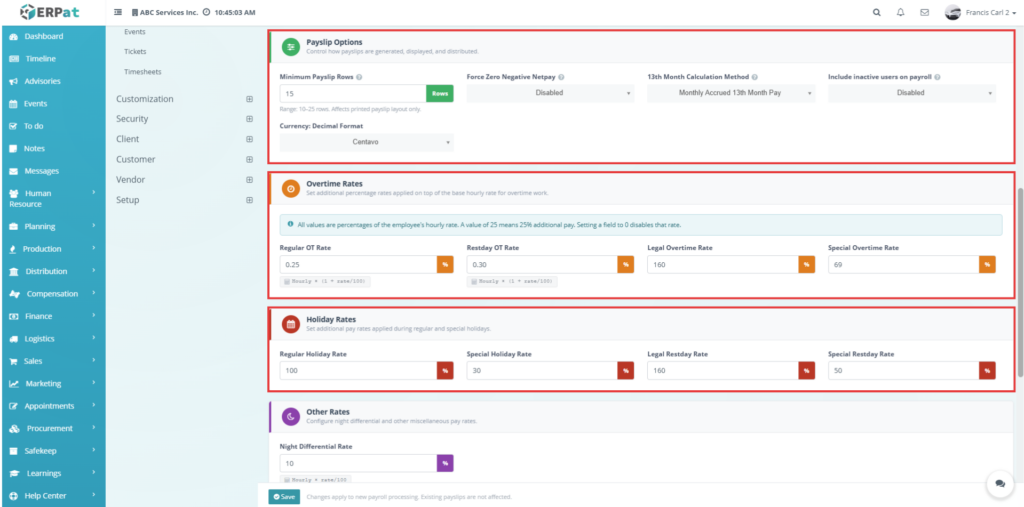
This page is used to manage payroll-related configuration in the system. It is one of the most important settings pages because it affects how payslips are displayed, how overtime and other rates are computed, how adjustments are identified, what government contributions are included, and how payslip emails are handled. Administrators should use this page when setting up the payroll rules of the organization or when updating payroll behavior to match company policy.
The system includes a Payslip Template section where the administrator can choose the style or design used for generated payslips. It also includes Payslip Options, which contain settings such as Minimum Payslip Rows, Force Zero Negative Netpay, 13th Month Calculation Method, Include inactive users on payroll, and Currency Decimal Format. The note for Minimum Payslip Rows explains that it controls the minimum number of rows shown in the earnings and deductions table on printed payslips. The 13th Month Calculation Method note explains how the system calculates 13th month pay based on the selected method, including how unpaid absences or undertime may affect the result. Another note explains that Include inactive users on payroll can be enabled when recently separated or temporarily inactive users still need payroll processing.
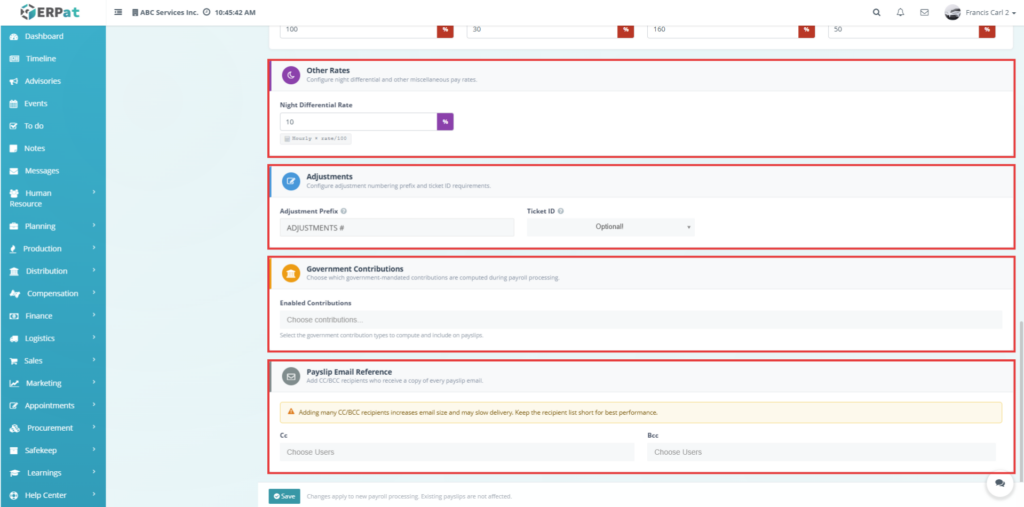
The page also contains Overtime Rates, Holiday Rates, and Other Rates, where the administrator can set additional percentages applied to pay. The system notes shown in the file explain formulas such as Hourly × (1 + rate/100) for regular and rest day overtime. In the Adjustments section, the Adjustment Prefix note explains that it sets a custom prefix for each adjustment ID, while the Ticket ID setting lets the administrator choose whether entering a ticket ID is required or optional. The Government Contributions section allows the administrator to choose enabled contributions such as SSS, PhilHealth, Pag-IBIG, and GSIS. The Payslip Email Reference section includes CC and BCC, where users can be selected to receive copies of payslip emails. This page should be used whenever payroll computation, display, email distribution, or government contribution settings need to be updated.
Components – Attendance #
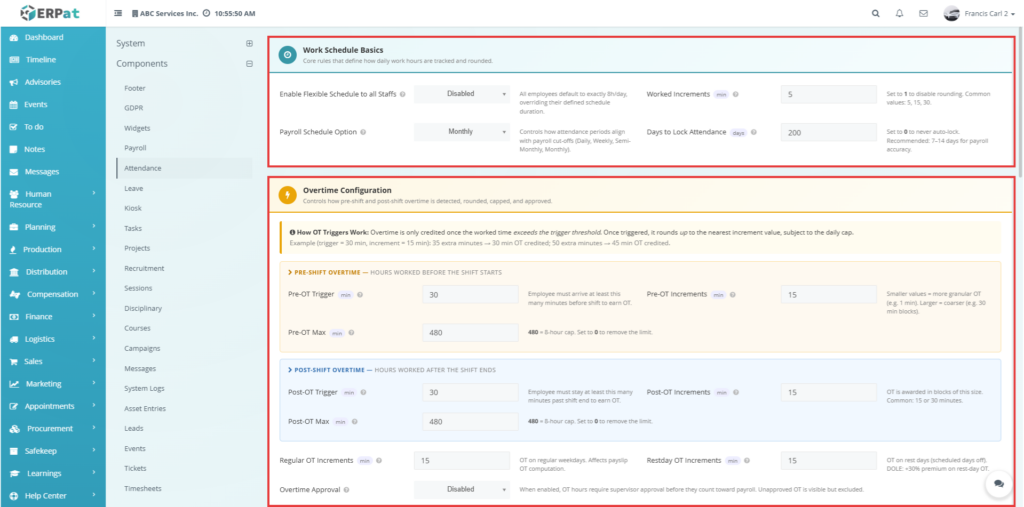
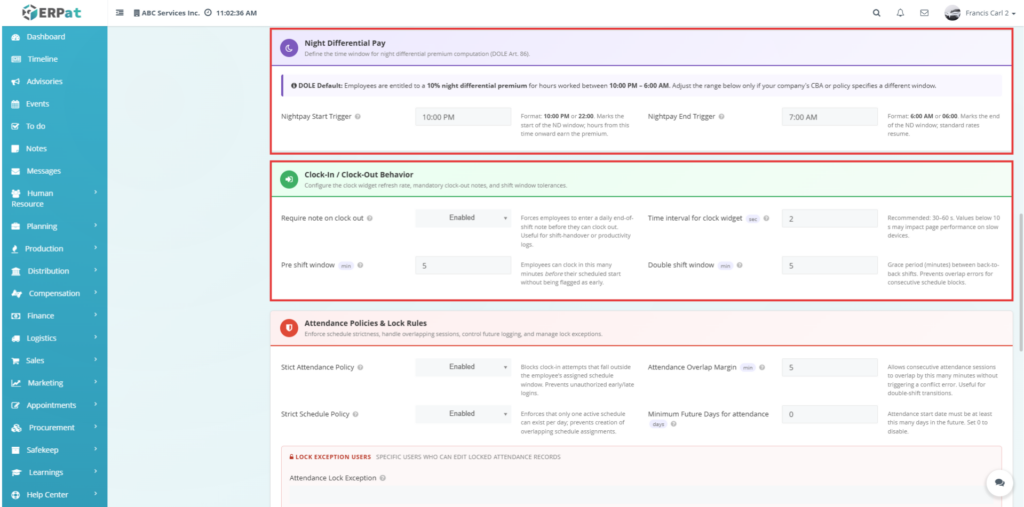
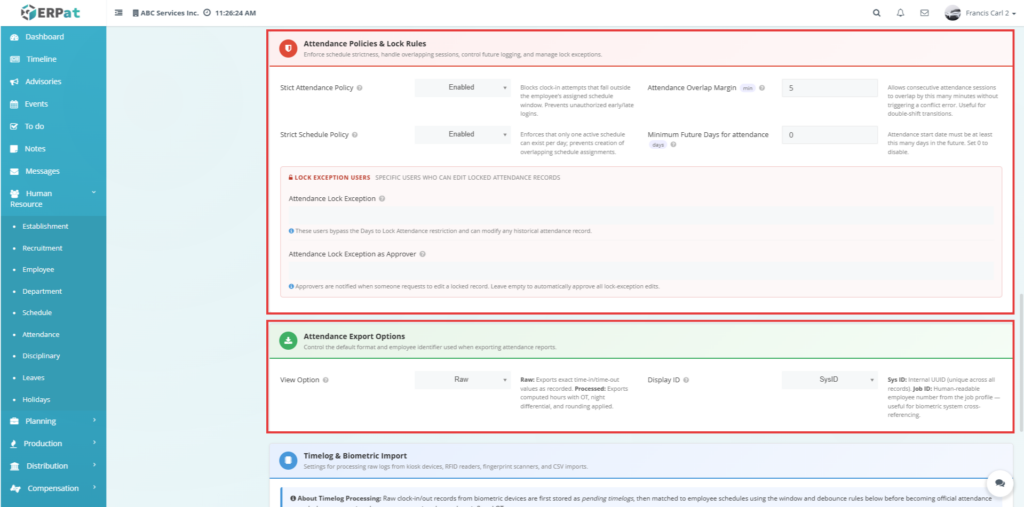
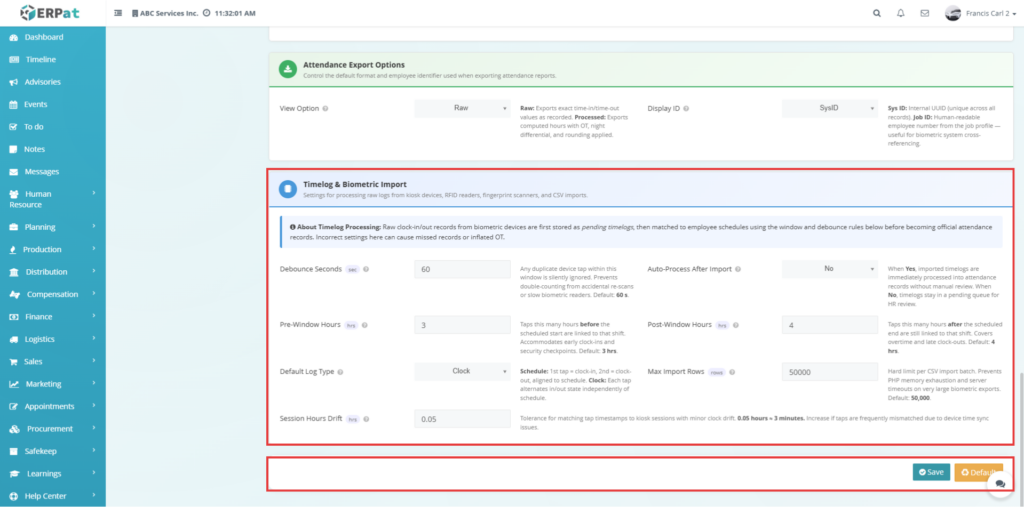
This page is used to configure attendance rules and computations in the system. It should be used when the administrator wants to define how attendance is interpreted, how overtime is credited, how night differential works, how attendance records are locked, and how biometric or imported timelogs are processed. This page is important because its settings directly affect attendance calculations and can also influence payroll results.
In the Work Schedule Basics section, the setting Enable Flexible Schedule to all Staffs has a note explaining that attendance may be based on total time logged instead of fixed start and end schedule. This means late arrivals, undertime, or long breaks that were calculated using a fixed schedule may be ignored if the total required work hours are still completed. The Worked Increments note explains that it defines the smallest rounding unit for worked time, such as rounding to the nearest 5 minutes. The Payroll Schedule Option determines how attendance is grouped during payroll generation, while Days to Lock Attendance controls how many days pass before attendance records are automatically locked from normal editing.
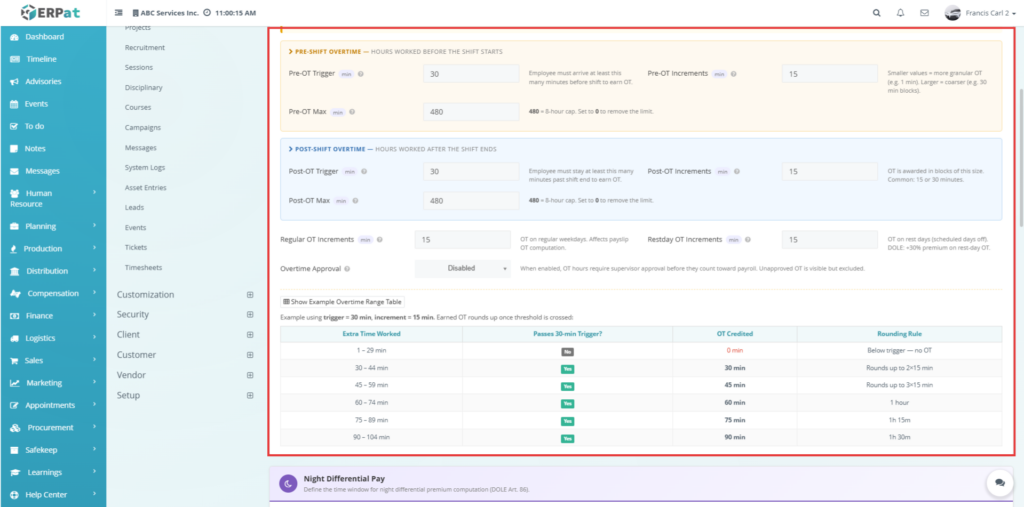
The page also contains detailed overtime controls. Under Pre-Shift Overtime, the administrator can configure Pre-OT Trigger, Pre-OT Increments, and Pre-OT Max. These settings decide how much early time before a shift counts as overtime, how the system rounds that time, and the daily maximum that can be credited. Under Post-Shift Overtime, similar settings control overtime after the shift ends. There are also settings for Regular OT Increments and Restday OT Increments, which determine how overtime is rounded and applied. Other sections include Night Differential Pay, Clock-In / Clock-Out Behavior, Attendance Policies & Lock Rules, Attendance Export Options, and Timelog & Biometric Import. Together, these settings define the full behavior of attendance recording, validation, rounding, export formatting, and device import processing in the system.
Components – Leave #
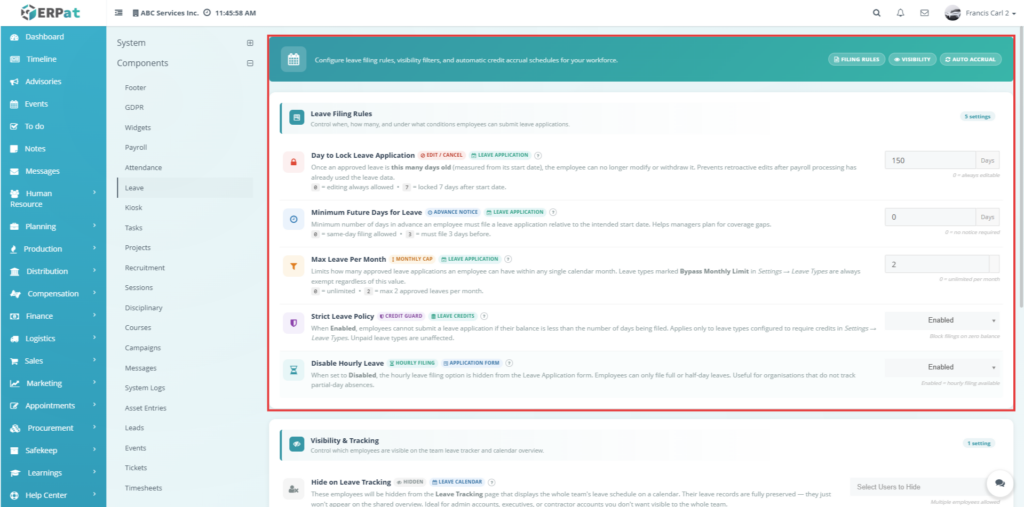

This page is used to configure leave rules and automatic leave credit settings in the system. It should be used when the administrator wants to define how leave applications are filed, how far in advance they must be submitted, whether hourly leave is allowed, whether leave records are shown in tracking, and how leave credits are automatically added. This page is important for organizations that want to standardize leave rules and automate leave crediting.
The page includes Leave Filing Rules, where settings such as Day to Lock Leave Application, Minimum Future Days for Leave, Max Leave Per Month, Strict Leave Policy, and Disable Hourly Leave are shown. These settings define how many days after a leave request it can still be edited, how early leave must be filed, the monthly limit, and whether leave application rules should be strictly enforced. Another section, Visibility & Tracking, allows the administrator to control whether some users are hidden from leave tracking. The Automatic Leave Accrual section lets the administrator create schedules such as Monthly Accrual and Annual Accrual, and assign which group receives credits, where the credits are placed, and how many days are added. This page should be used whenever the organization needs to adjust leave filing policy or leave credit automation.
Components – Kiosk #
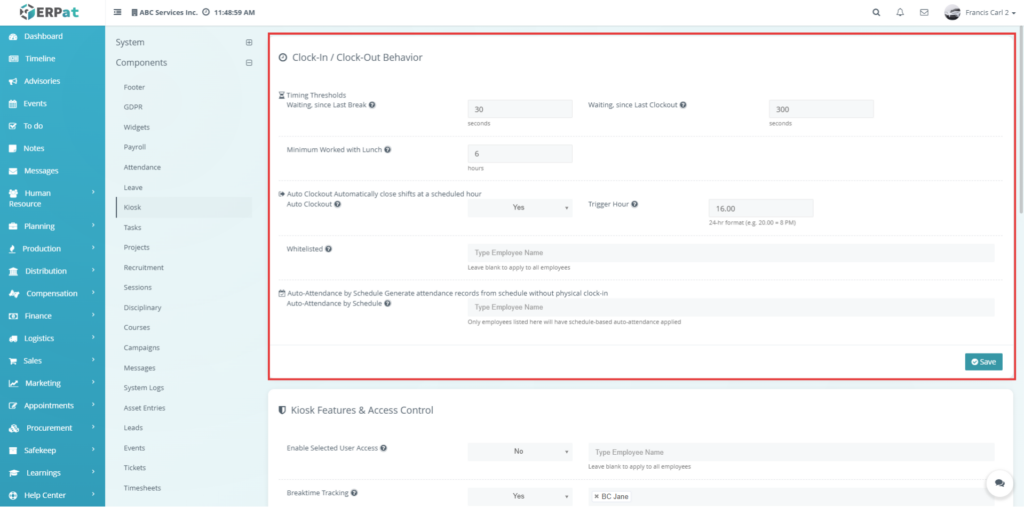
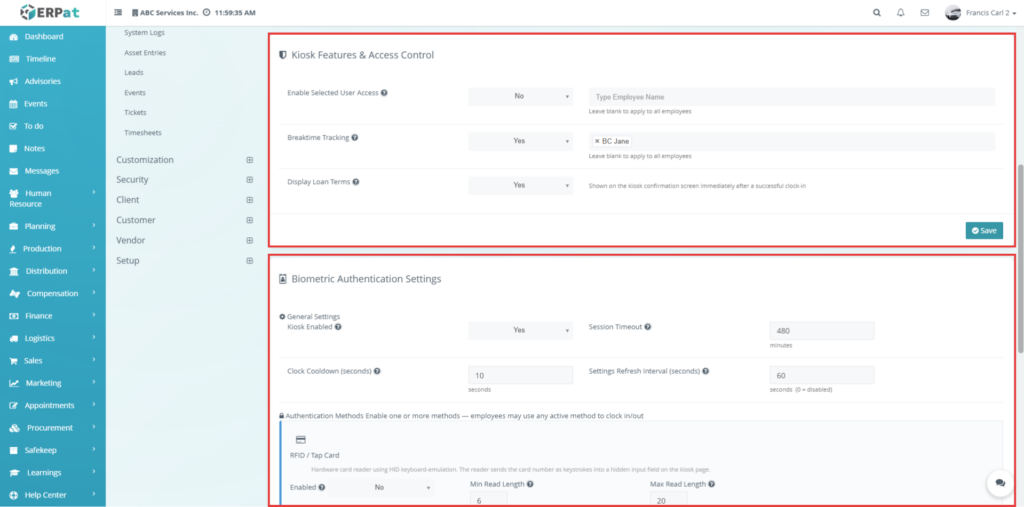
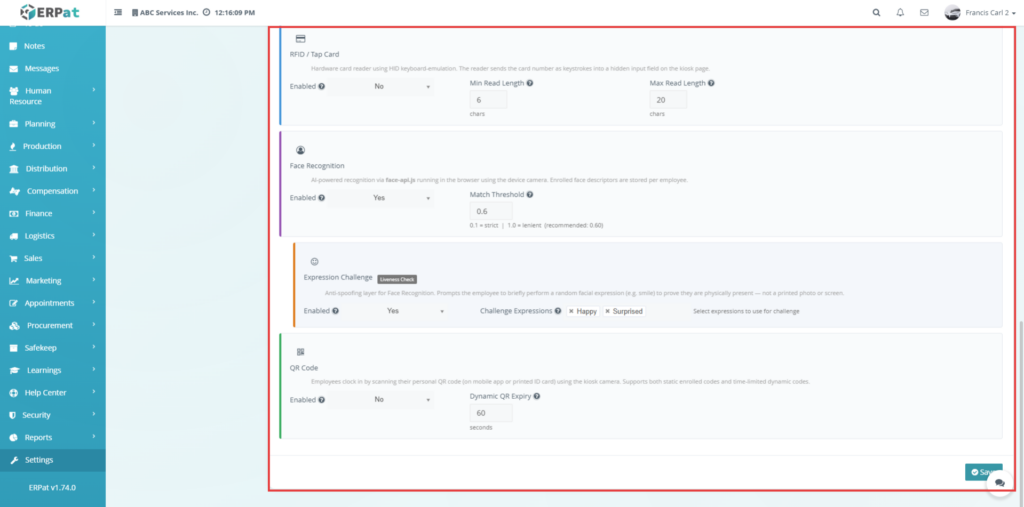
This page is used to configure kiosk-based attendance and biometric access settings. It should be used when the organization allows employees to clock in and out using a kiosk, card, face recognition, expression challenge, or QR code. This page helps the administrator control how the kiosk behaves, what methods are available, and what restrictions apply.
The page includes settings for Clock-In / Clock-Out Behavior, such as timing thresholds, lunch-related work minimums, auto clockout, trigger hour, whitelisted users, and auto-attendance by schedule. It also includes Kiosk Features & Access Control, where the administrator can define selected user access, breaktime tracking, and display of loan terms. Under Biometric Authentication Settings, the administrator can enable the kiosk, set session timeout, cooldown, and refresh intervals. Additional sections show RFID / Tap Card, Face Recognition, Expression Challenge, and QR Code options. These settings are used when the administrator needs to decide how users authenticate and how clocking activity is processed in the kiosk environment.
Components – Tasks – Task Status #
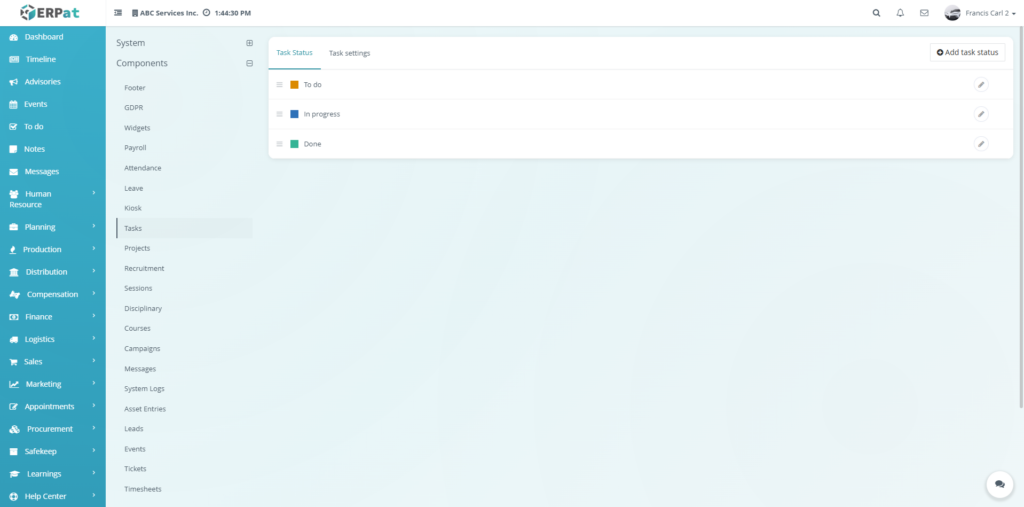
This page is used to manage the status labels used in the Tasks module. When the user opens Settings > Components > Tasks > Task Status, the system displays the current list of task statuses such as To do, In progress, and Done. This page is used when the administrator wants to review or update the status labels used for task tracking.
Each status entry is shown in a list and includes an action button for editing. The page also includes an Add task status button, which is used to create a new custom task status. This allows the organization to customize the status flow used in its task management process.
Components – Tasks – Task Settings #
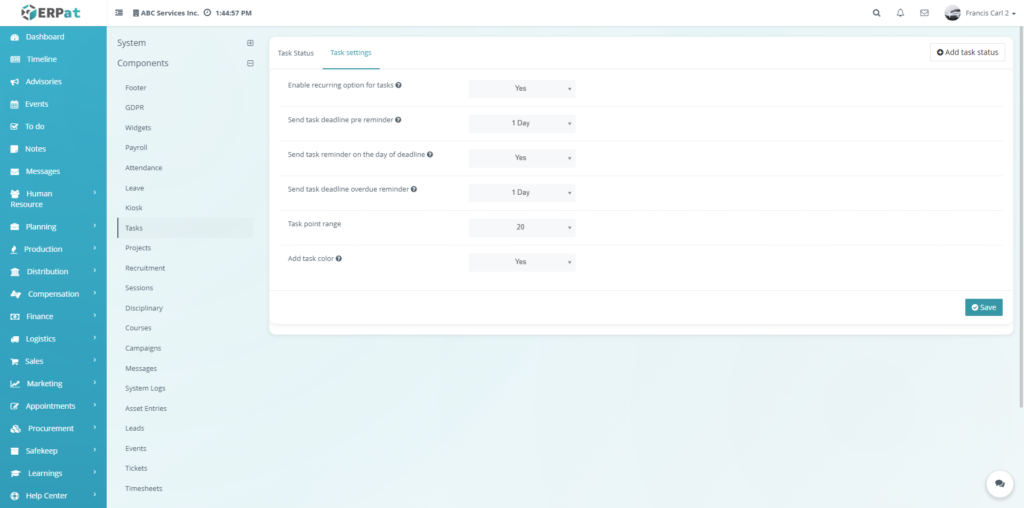
This page is used to configure general task-related settings. When the user opens Settings > Components > Tasks > Task Settings, the system displays options such as enabling recurring tasks, sending deadline reminders, sending same-day reminders, sending overdue reminders, setting the task point range, and enabling task colors. This page is used when the administrator wants to define how the Tasks module behaves in terms of reminders and scoring-related settings.
Each option affects how task notifications or settings work in the system. For example, reminder-related settings determine when the system will notify users about deadlines, while Task point range affects task point behavior, and Add task color controls whether tasks can use color-based visual identification. After adjusting these settings, the user clicks Save.
Components – Tasks – Add Task Status #
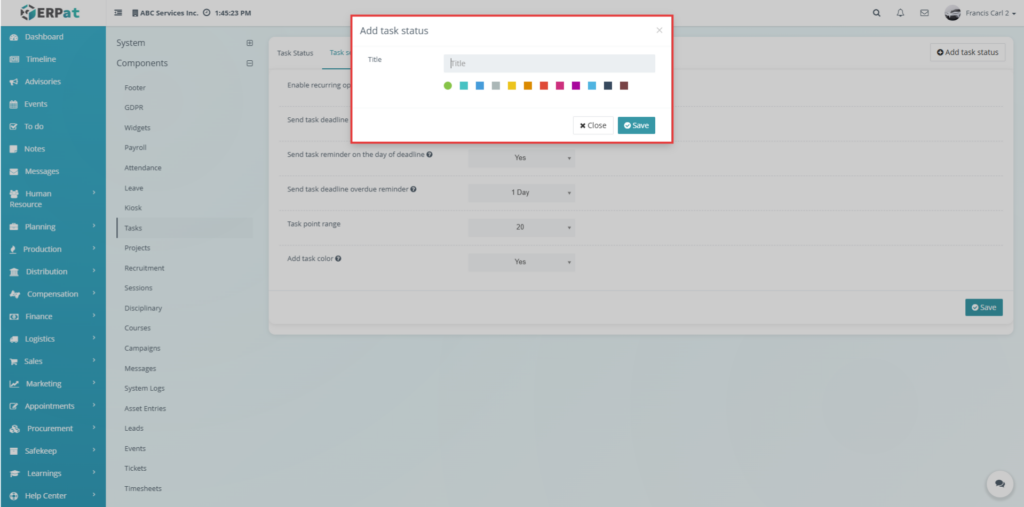
This form is used to add a new task status to the Tasks module. When the user clicks Add task status, the system opens a modal where the user can enter the status title, choose a color, and save the new status. This form is used when the administrator wants to create a new custom task stage for task progress tracking.
Components – Projects #
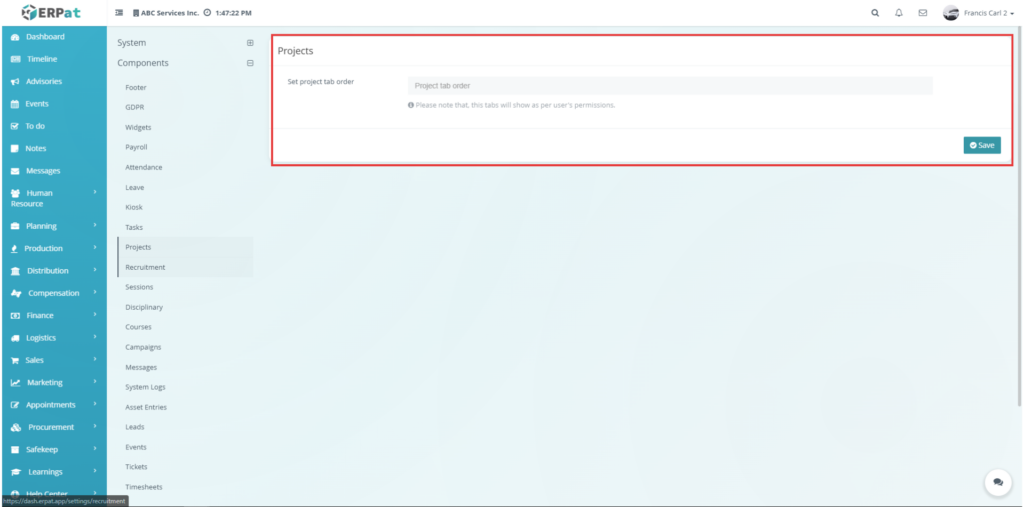
This page is used to configure the tab order in the Projects module. When the user opens Settings > Components > Projects, the system displays a field for Set project tab order. This page is used when the administrator wants to control the order in which project tabs appear in the interface.
The note shown on the page also explains that the displayed tabs depend on user permissions. This means tab visibility is not only based on configuration, but also on the access rights of the current user. After entering or adjusting the preferred tab order, the user clicks Save.
Components – Recruitment – General #
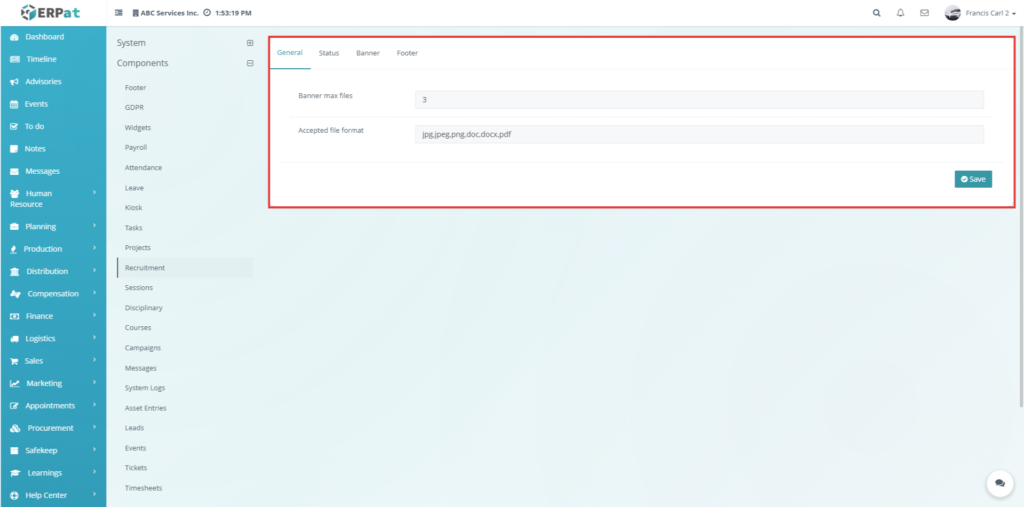
This page is used to configure general settings for the Recruitment module. When the user opens Settings > Components > Recruitment > General, the system displays fields such as Banner max files and Accepted file format. This page is used when the administrator wants to control file upload limits and allowed file types used in recruitment-related pages.
Components – Recruitment – Status #
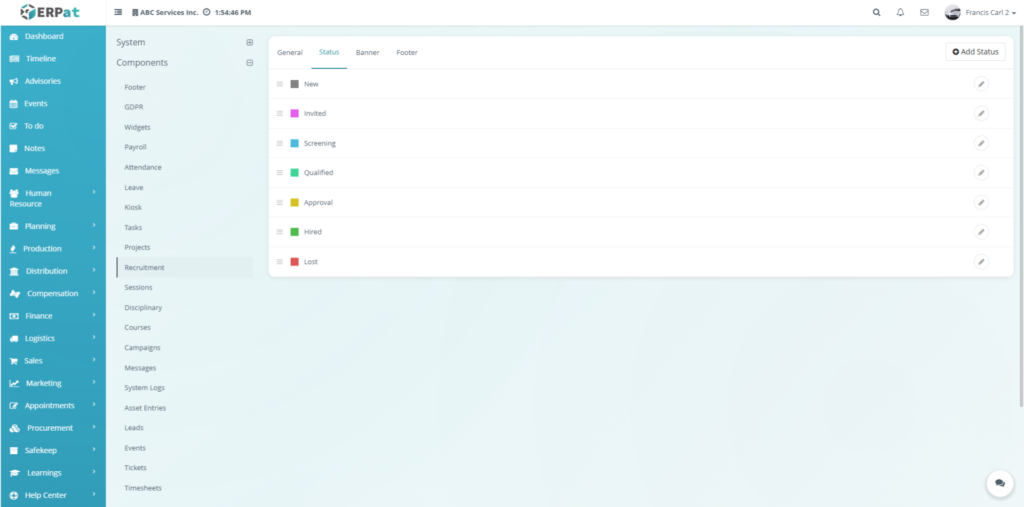
This page is used to manage recruitment status labels used in the recruitment process. When the user opens Settings > Components > Recruitment > Status, the system displays the list of statuses used to track applicants, such as New, Invited, Screening, Qualified, Approval, Hired, and Lost. This page is used when the administrator wants to view, add, or update applicant progress statuses.
Each status in the list includes an edit action. The page also includes an Add Status button for creating a new recruitment status. This makes the status flow customizable according to the company’s recruitment process.
Components – Recruitment – Status – Add Status #

This form is used to add a new recruitment status in the system. When the user clicks Add Status from the Recruitment Status page, the system opens a modal where the user can type the status title, choose a color, and save the new status. This form is used when the administrator wants to add a new applicant status that is not yet included in the current recruitment workflow.
Components – Recruitment – Status – Update Status #
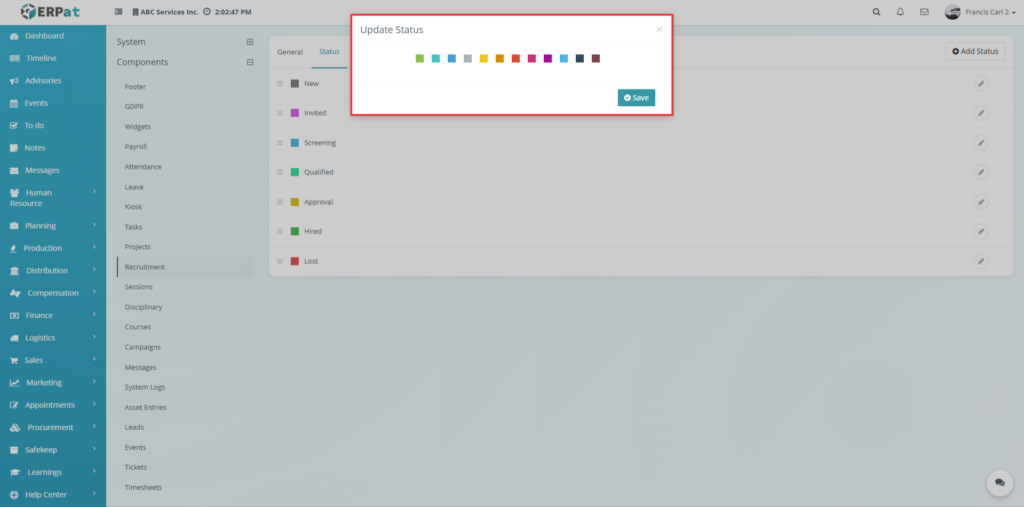
This form is used to update an existing recruitment status. When the user clicks the edit action beside a status, the system opens an update modal where the color or status details can be modified. This form is used when the administrator wants to revise how a recruitment status appears in the system.
Components – Recruitment – Banner #
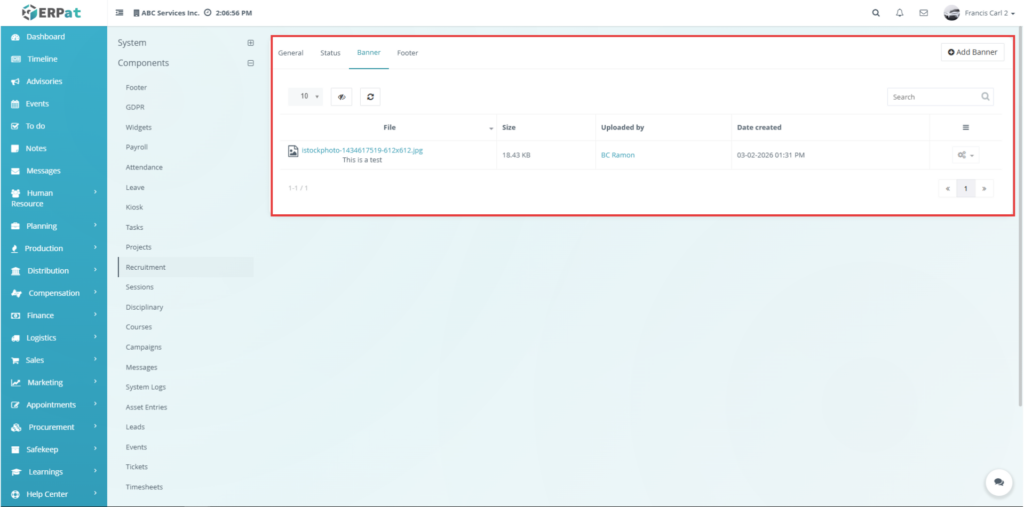
This page is used to manage recruitment banner files. When the user opens Settings > Components > Recruitment > Banner, the system displays a file list containing uploaded recruitment banners along with file details such as file name, size, uploaded by, and date created. This page is used when the administrator wants to review or manage the images used in recruitment pages.
The page also contains an Add Banner button and an action button for each file. This allows the administrator to upload new banner files or manage existing ones.
Components – Recruitment – Banner – Action Button #
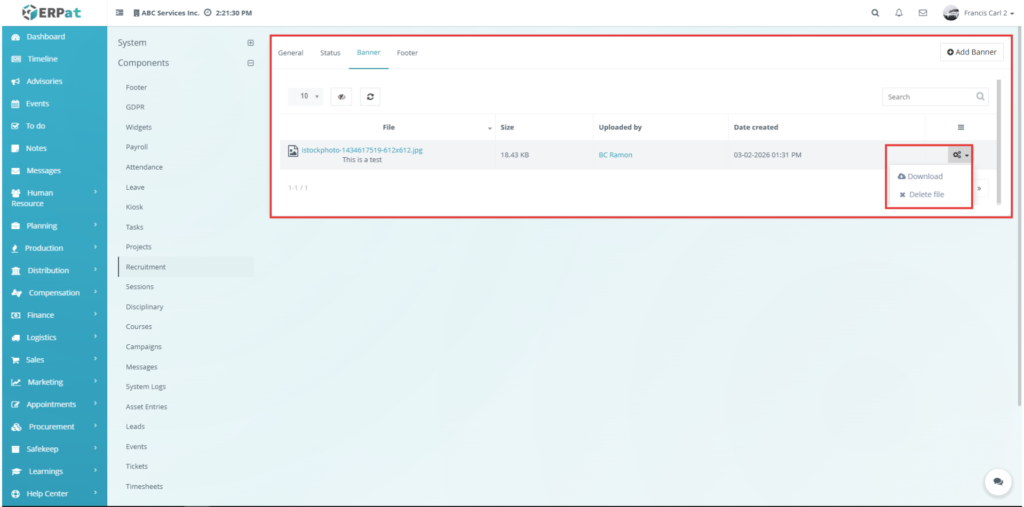
This section shows the available actions for a recruitment banner file. When the user clicks the action button beside a banner record, the system displays available options such as Download and Delete file. This section is used when the administrator wants to manage an uploaded recruitment banner directly from the list.
Components – Recruitment – Banner – Add Banner #

This form is used to upload a new recruitment banner file. When the user clicks Add Banner, the system opens a modal with a drag-and-drop upload area. The user can drag a file into the upload box or browse a file manually, then click Save to upload it. This form is used when the administrator wants to add a new recruitment banner into the system.
Components – Recruitment – Banner – Footer #
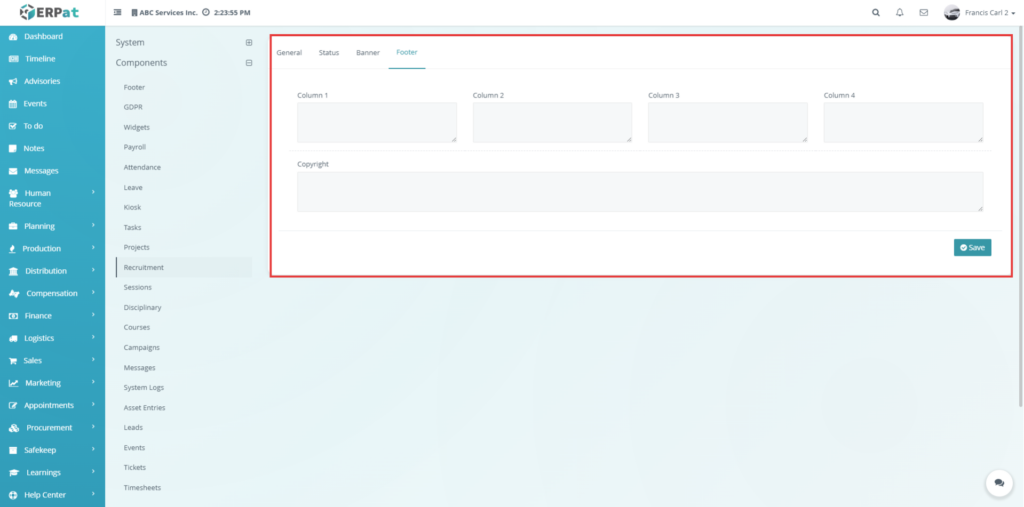
This page is used to configure the footer section of the Recruitment module. When the user opens Settings > Components > Recruitment > Footer, the system displays text areas for Column 1, Column 2, Column 3, Column 4, and a Copyright field. This page is used when the administrator wants to customize the footer content displayed in recruitment-related pages.
Components – Sessions #

This page is used to manage the status labels used in the Sessions module. When the user opens Settings > Components > Sessions, the system displays the current status list and provides controls to add, edit, or delete status entries. This page is used when the administrator wants to customize the workflow statuses used for sessions.
Components – Sessions – Update Status #
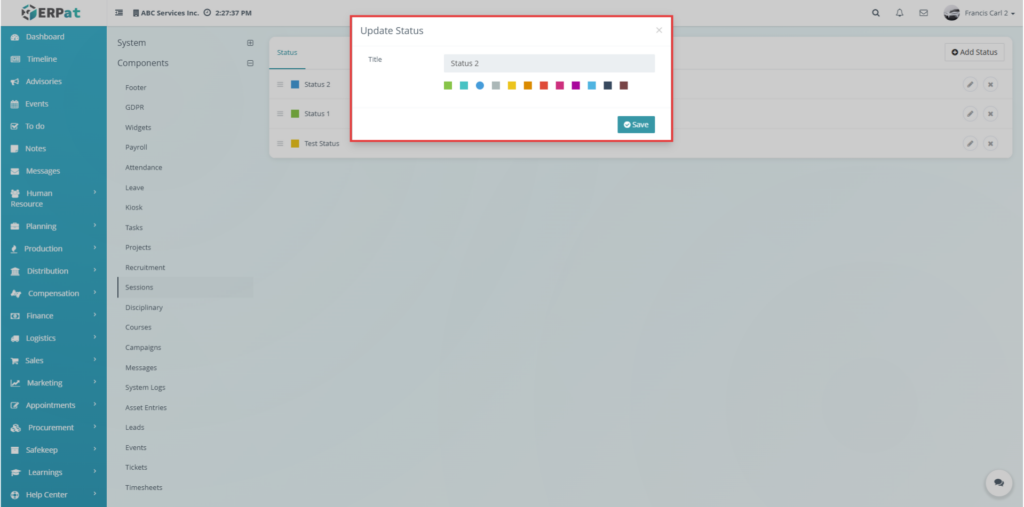
This form is used to update an existing session status. When the user clicks the edit button for a session status, the system opens a modal where the title and color can be modified. This allows administrators to revise the appearance or name of an existing session status.
Components – Sessions – Add Status #

This form is used to add a new session status. When the user clicks Add Status, the system opens a modal where the title and color of the new status can be entered. This page is used when the administrator wants to add another status option for session tracking.
Components – Disciplinary #
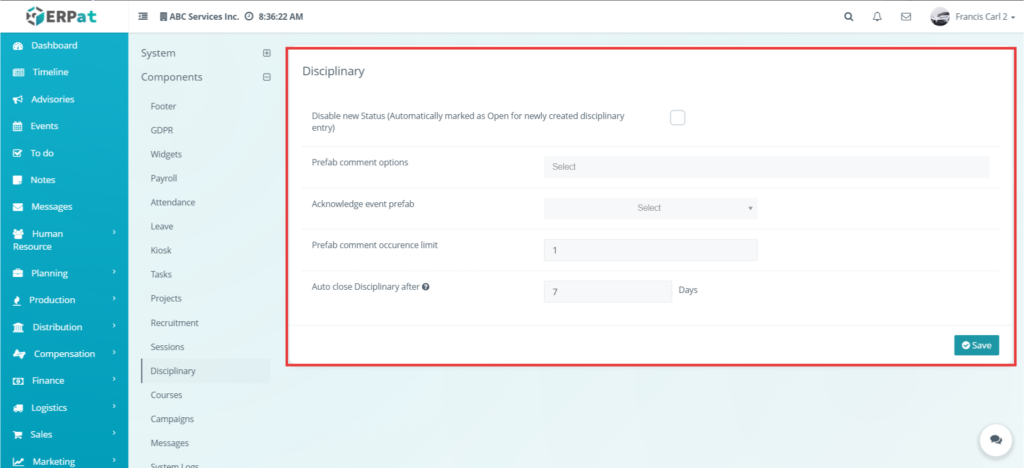
This page is used to configure disciplinary-related settings in the system. When the user opens Settings > Components > Disciplinary, the system displays options such as disabling new status, setting prefab comment options, selecting the acknowledge event prefab, defining the prefab comment occurrence limit, and setting the number of days before disciplinary entries close automatically. This page is used when the administrator wants to standardize disciplinary configuration behavior.
Components – Courses #
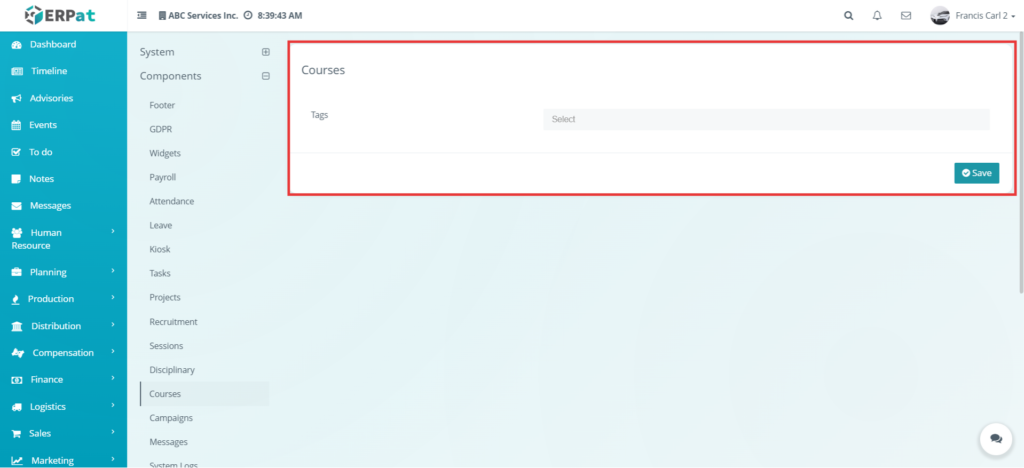
This page is used to configure course tags. When the user opens Settings > Components > Courses, the system provides a Tags field that can be used to manage course-related tag values. This page is used when the administrator wants to organize or classify courses using tags.
Components – Campaigns #

This page is used to configure campaign-related settings. When the user opens Settings > Components > Campaigns, the system shows the Use Email Setting Templates option. This page is used when the administrator wants campaigns to use predefined email template settings.
Components – Messages #
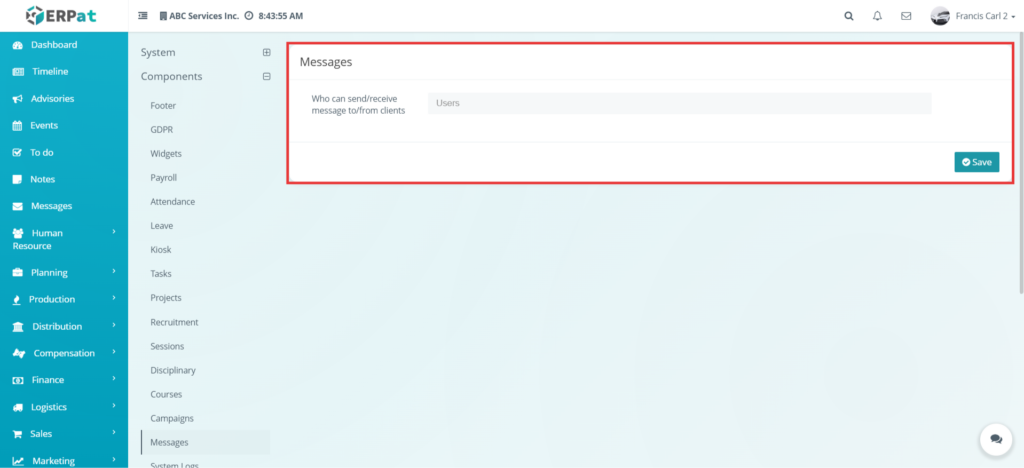
This page is used to configure message-related settings in the system. When the user opens Settings > Components > Messages, the system displays options that control how messaging features behave between users.
This page is used when the administrator wants to manage how users communicate inside the system. Depending on the available settings shown on the page, the administrator can enable or disable messaging features, control message behavior, and define how messages are handled across the system.
The settings in this section help ensure that communication between users is properly managed, secure, and aligned with company policies.
Components – System Logs Configuration #
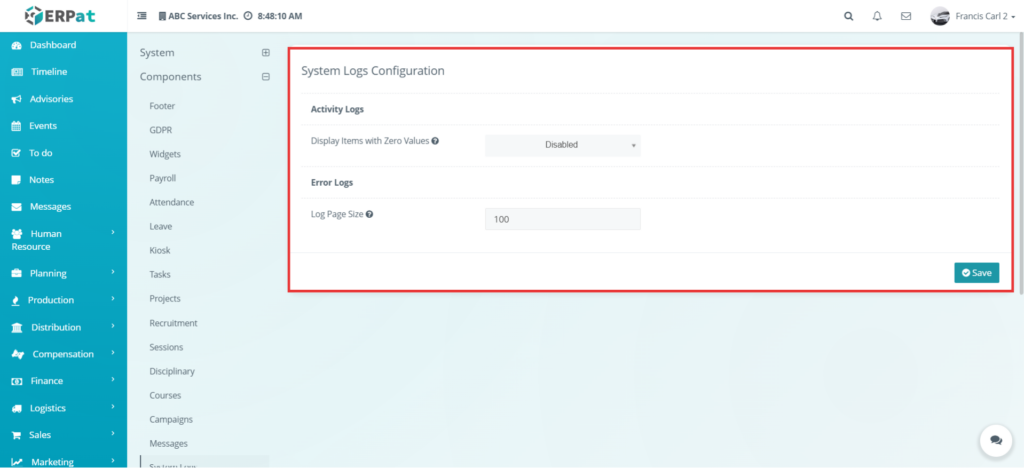
This page is used to configure how system logs are managed and stored. When the user opens Settings > Components > System Logs, the system displays configuration options related to logging system activities.
This page is used when the administrator wants to control how logs are recorded, stored, or displayed. System logs are important because they track user actions, system changes, and events that occur within the system.
The administrator can use this page to ensure that logs are properly maintained for monitoring, troubleshooting, and auditing purposes. Proper configuration of this section helps improve system transparency and accountability.
Components – Asset Entries #
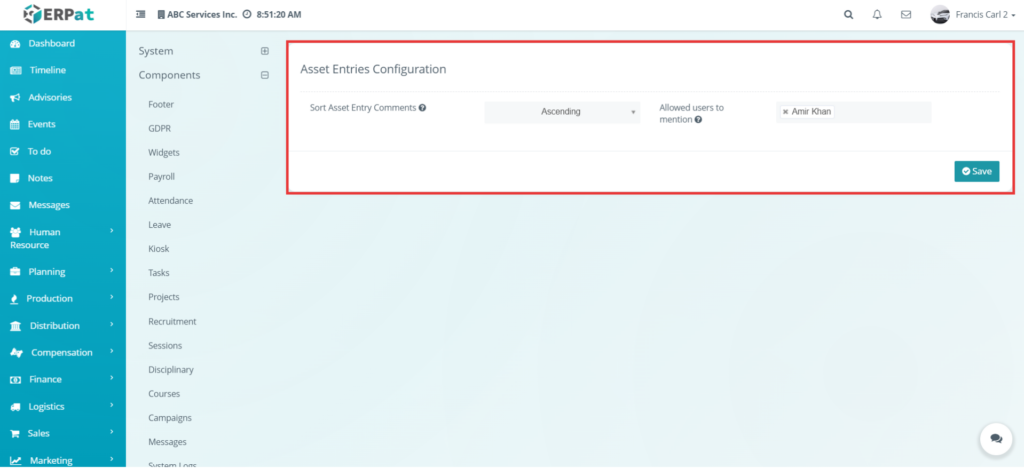
This page is used to configure settings related to asset management in the system. When the user opens Settings > Components > Asset Entries, the system displays options that affect how assets are recorded, tracked, and managed.
This page is used when the administrator wants to define how asset entries behave within the system. Depending on the available settings, the administrator can control asset-related processes such as tracking, assignment, or status management.
These settings help ensure that asset records are organized, consistent, and aligned with the organization’s asset management policies.
Components – Leads #
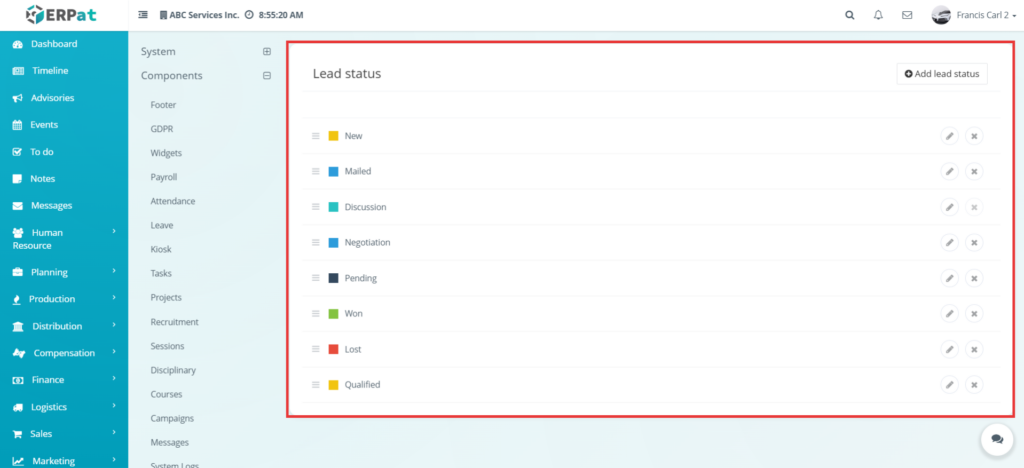
This page is used to manage lead status labels in the system. When the user opens Settings > Components > Leads, the system displays a list of lead statuses that are used to track the progress of leads.
This page is used when the administrator wants to define or customize the stages of lead management. Each status represents a stage in the lead process, such as new, contacted, qualified, or closed.
The administrator can add new statuses, edit existing ones, or remove unnecessary statuses. This allows the system to adapt to the organization’s lead handling process.
Components – Edit Lead Status #
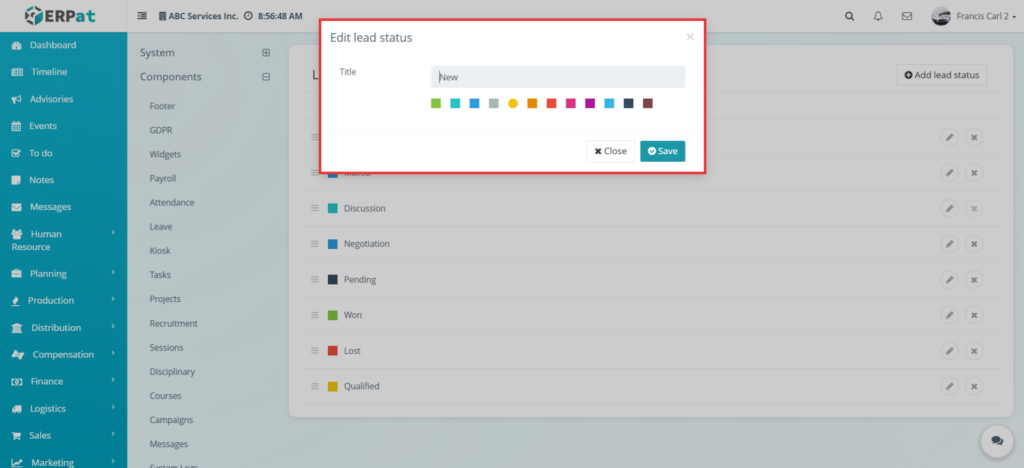
This form is used to update an existing lead status. When the user clicks the edit button, the system opens a modal where the user can modify the status name and other related settings.
This page is used when the administrator wants to update or correct an existing lead status.
Components – Add Lead Status #

This form is used to add a new lead status. When the user clicks the Add Status button, the system opens a modal where the user can enter the title of the status and configure any additional options.
This page is used when the administrator wants to create a new stage for tracking leads in the system.
Components – Leads – Delete Lead Status #
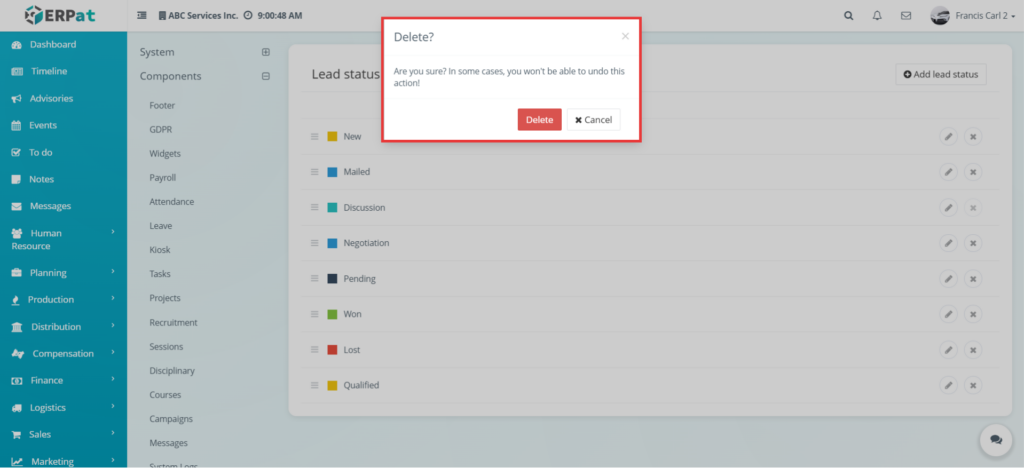
This section shows the delete action for a lead status. It is used when the user wants to remove an existing lead status from the system. A confirmation prompt may appear before the deletion is completed.
Components – Events #
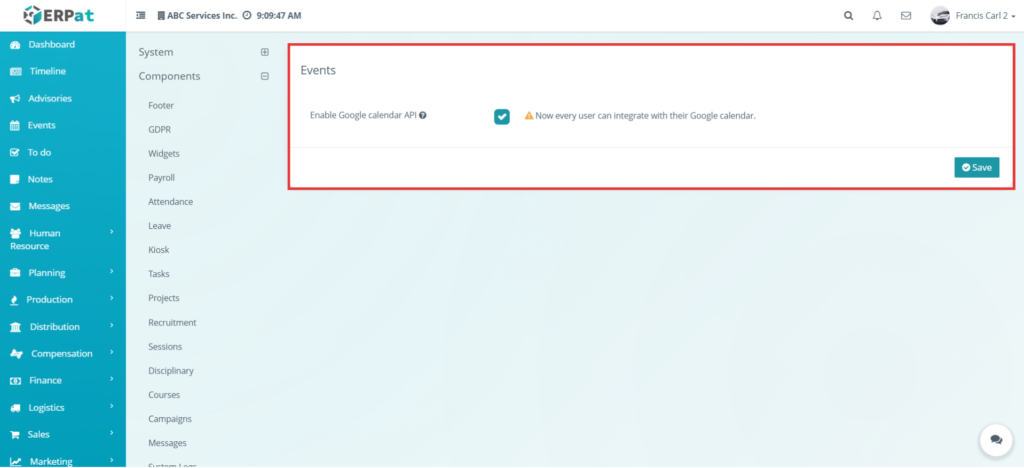
This page is used to configure event-related settings in the system. When the user opens Settings > Components > Events, the system displays options that control how events are created, managed, and displayed.
This page is used when the administrator wants to customize how the Events module behaves. The settings available in this section may include event visibility, event behavior, or other system-related configurations.
These settings help ensure that events are properly managed and displayed according to the organization’s needs.
Components – Tickets #

This page is used to configure ticket-related settings in the system. When the user opens Settings > Components > Tickets, the system displays options that affect how support tickets are handled.
This page is used when the administrator wants to define how tickets are created, processed, or managed within the system. These settings may include ticket behavior, response rules, or system-level configurations for ticket handling.
Proper configuration ensures that the ticketing system works efficiently and aligns with the organization’s support process.
Components – Timesheets #
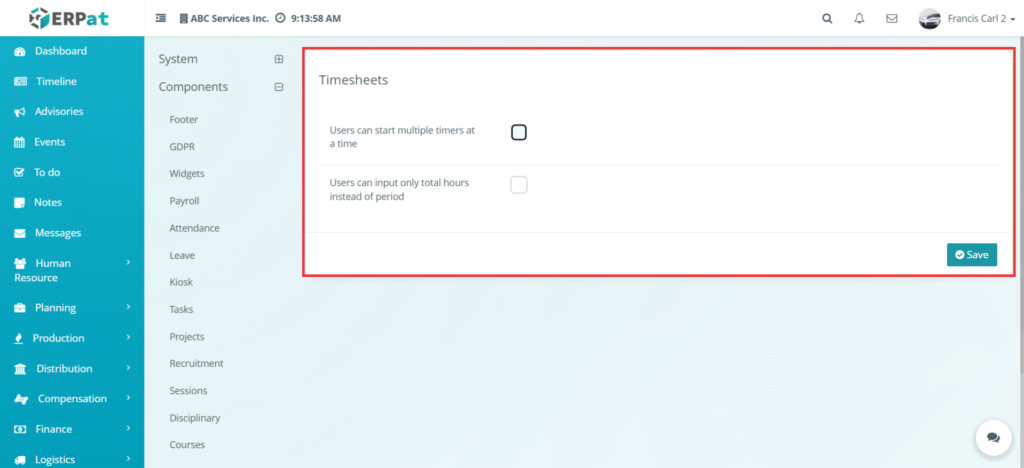
This page is used to configure timesheet-related settings in the system. When the user opens Settings > Components > Timesheets, the system displays options that control how time entries are recorded and managed.
This page is used when the administrator wants to define how employees log their working hours and how those records are processed. The settings may include rules for time tracking, validation, or system behavior related to timesheets.
These configurations help ensure accurate tracking of working hours and proper integration with payroll or attendance systems.
Permissions and Access Control
- This module is restricted to authorized users to ensure data security and proper system configuration
- Only system administrators or authorized users can access and modify component settings
- Users without proper permissions are not allowed to change module configuration, system rules, or component behavior
- Access to this module is controlled through system roles and permissions
Best Practices #
- Review each component setting carefully before saving changes
- Use only the configuration values that match the organization’s actual policies and workflow
- Avoid changing multiple major settings at once without testing
- Check notes, help text, and conditional fields before enabling options
- Test the affected module after updating any component setting
- Limit configuration access to authorized administrators only
Audit & Logs #
The system records all activities performed within the module, including updating component settings, enabling or disabling options, and changing module-specific configurations. Each action is logged with details such as the user, date, and type of change
Last Updated: [April 01, 2026] Module Owner: Settings Module – ERPat System


