Overview #
The Customer Module serves as a centralized hub for managing individual customer records within the Sales department. It is designed to track personal identities, communication details, and account lifecycles, ensuring that customer data is organized and easily accessible for relationship management and reporting.
By consolidating demographic and contact information, this module allows for precise tracking of customer activity and status without being tied directly to a corporate client entity.
Key Features #
- Centralized Profile Storage: Maintain and update detailed profiles for every individual customer.
- Status Tracking: Monitor account activity through color-coded status indicators (Active or Inactive).
- Advanced Categorization: Use customizable labels and group filters to organize the customer database.
- Data Portability: Instantly export the entire customer list or filtered views into Excel for offline analysis.
- Demographic Tracking: Store key individual data points such as birthdays and geographic locations.
Accessing the Customer Module #
- Log in to the system.
- Navigate to Sales from the main sidebar.
- Select Customers (located directly below the Clients option).
- You will be directed to the Customers listing page displaying all existing individual records.
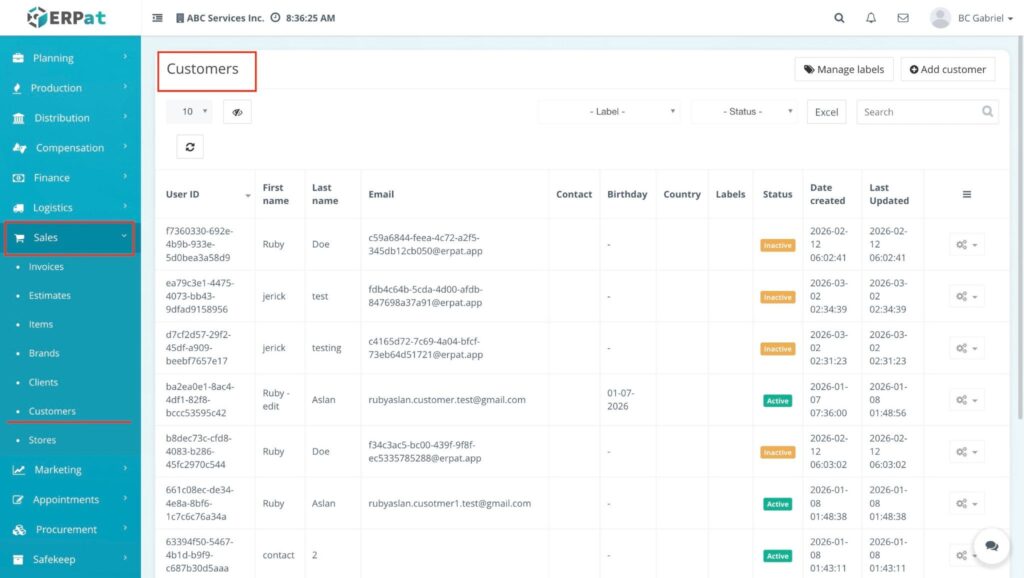
Customer Listing Page #
The listing page provides a granular view of all individual accounts with the following information:
- User ID – The unique system identifier assigned to each customer.
- First name / Last name – The full name of the individual.
- Email – The primary email address for correspondence.
- Contact – The customer’s phone or mobile number.
- Birthday – The recorded birth date for the individual.
- Country – The geographic location assigned to the record.
- Labels – Visual tags used for categorization and filtering.
- Status – Indicates account activity (Active in green or Inactive in orange).
- Date Created / Updated – Timestamps for record entry and the most recent modification.
- Actions (⚙️ icon) – Controls for managing specific records, such as Viewing, Editing or Deleting.
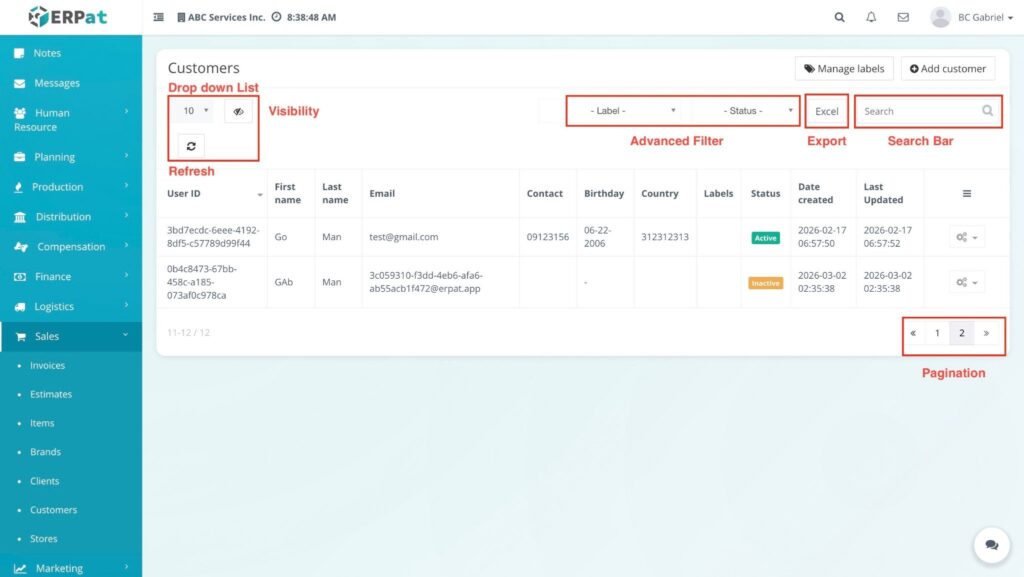
Additional Controls #
- Advanced Filters: Dropdown menus to sift through records by Labels or Status.
- Search bar: Real-time lookup by name, User ID, or email address.
- Export (Excel): Download the current list view as a spreadsheet.
- Visibility (👁️ icon): Toggle specific columns to customize your table view.
- Refresh (🔄 icon): Reload the table to reflect the most recent data updates.
- Record Count Dropdown: Choose how many records to display per page (e.g., 10, 20, 50).
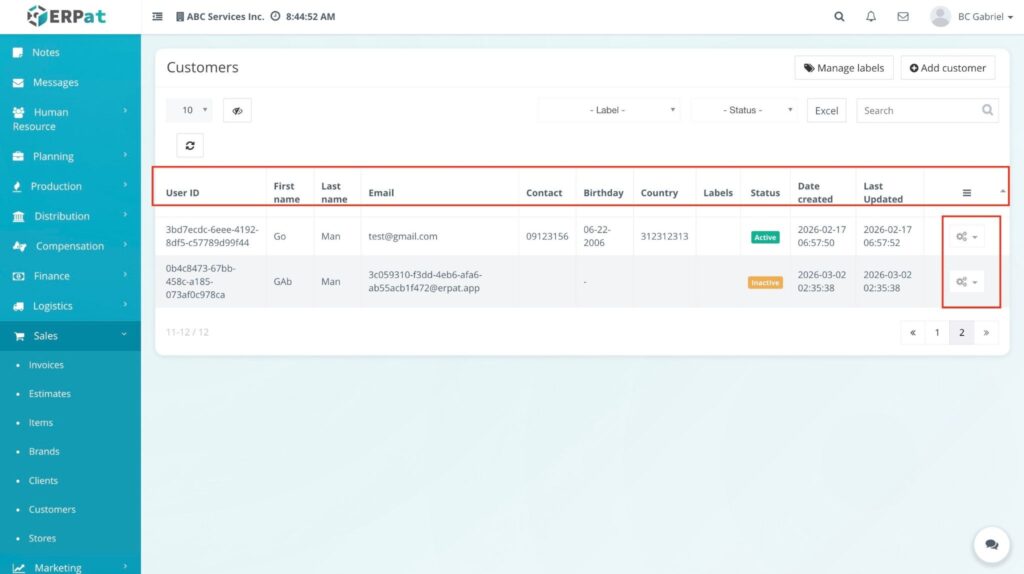
- Pagination: Use the arrow controls at the bottom right to navigate through the customer database.
Steps for Adding a Customer #
STEPS #
- Navigate to the Sales sidebar and select Customers.
- Click the + Add customer button located at the top-right of the dashboard.
- Fill in the required fields in the Add customer modal:
- First name and Last name: Enter the customer’s full legal name.
- Email: Provide a valid email address for communication.
- Gender: Select the appropriate option from the dropdown.
- Birthday: Use the calendar picker to record the customer’s birth date.
- Contact: Enter the primary phone or mobile number.
- Country: Select the customer’s location from the dropdown menu.
- Set the Status:
- Choose Active to enable the record or Inactive to keep it disabled.
- Click the Save button.
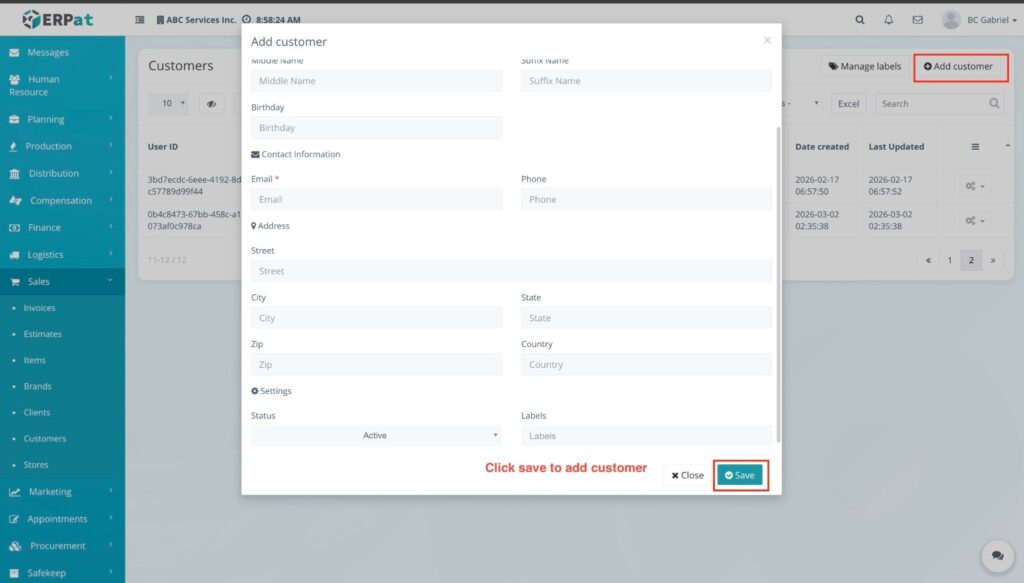
RESULT #
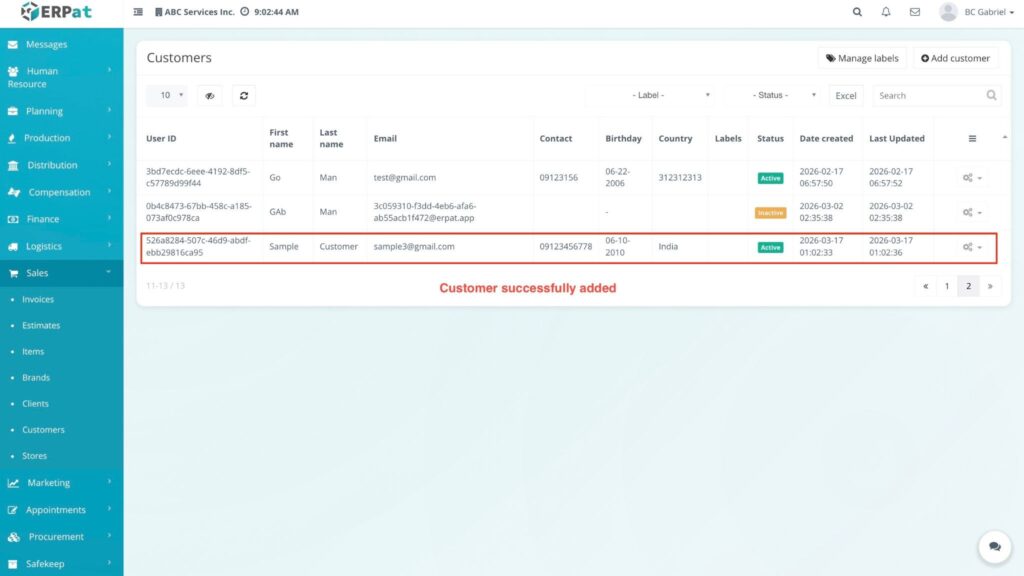
The modal closes and the new customer record is instantly visible in the Customers listing table.
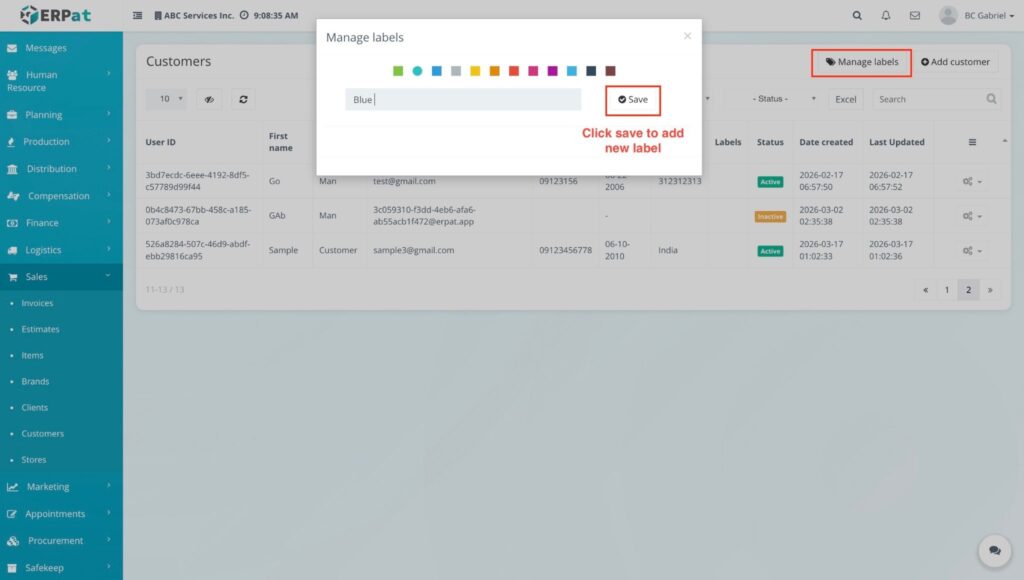
Steps for Adding Labels #
STEPS #
- Click the Manage labels button.
- Type the label name in the text field.
- Click the Save button.
RESULT #
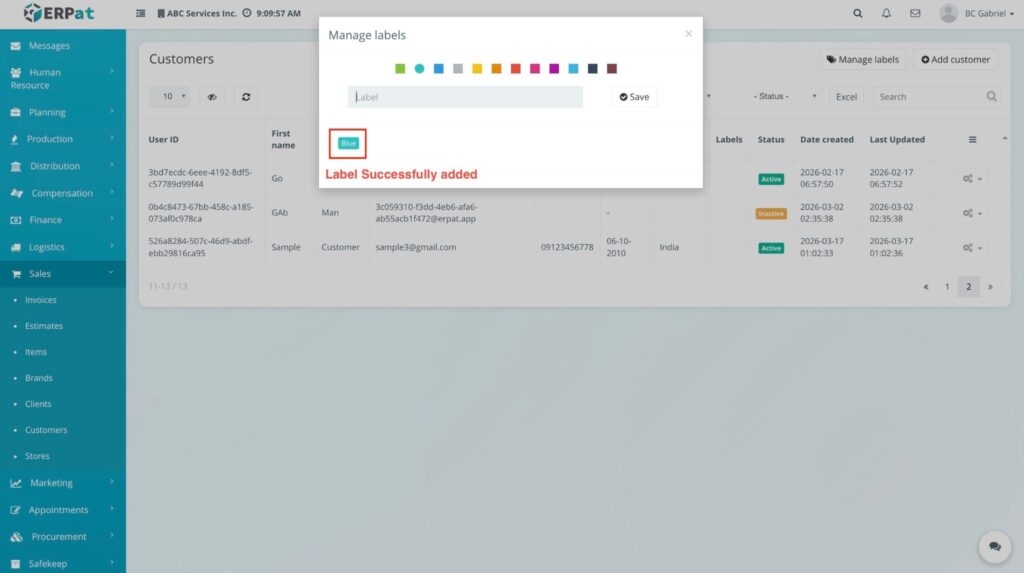
The label is added to the list and is now available to be used in the system.
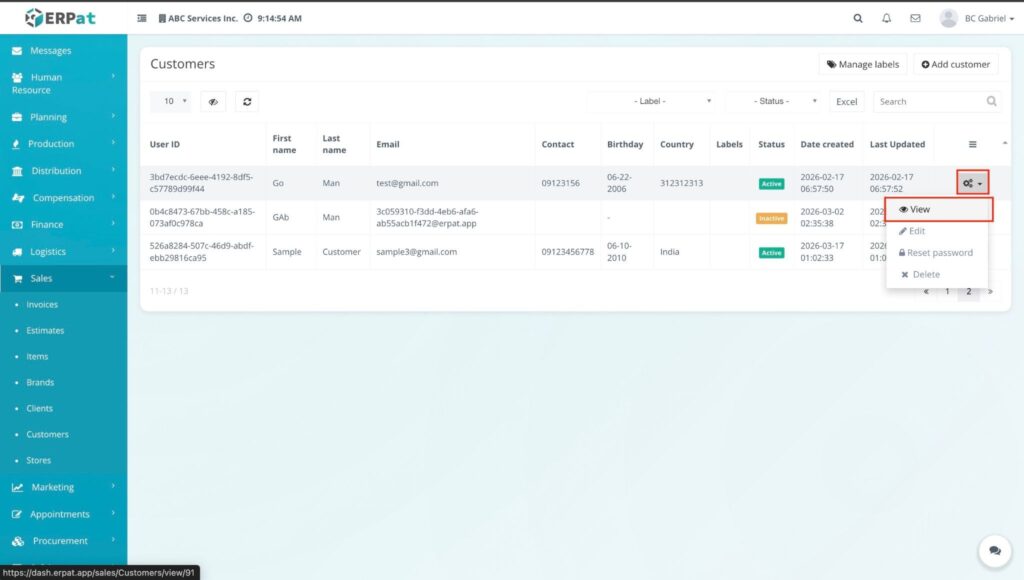
Steps for Viewing a Customer #
STEPS #
- Navigate to the Sales sidebar and select Customers.
- Locate the specific customer in the listing and click the Actions (⚙️) gear icon.
- Select View from the dropdown menu.
RESULT #

The customer’s profile page opens, allowing you to view their full details, history, and associated records.
Steps for Editing and Resetting Customer Passwords (via View Page) #
STEPS #
- Navigate to the specific customer’s profile page.
- Locate the Quick Actions section on the right side of the dashboard to access the functions for editing and resetting passwords.
- Perform the desired action:
- To Edit: Click the Edit customer button. Update the necessary fields in the modal and click Save.
- To Reset Password: Click the Reset password button. Type the new password, choose whether to send an email notification, and click Save.
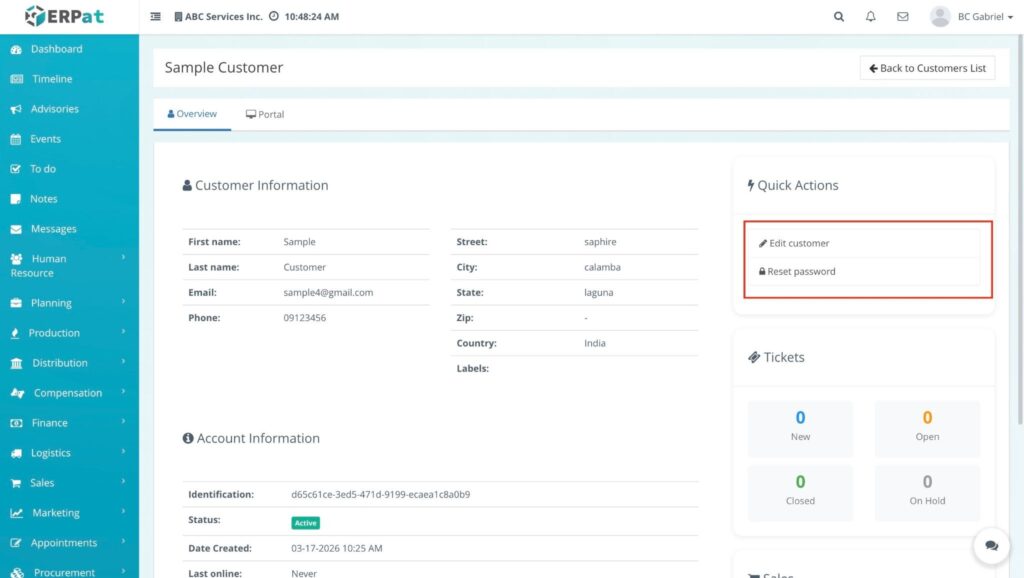
Result The record is updated immediately, and any new password settings take effect instantly.
NOTES #
- Detailed Procedures: To know more about the specific fields and functions, please refer to Steps for Editing a Customer and Steps for Resetting a Customer Password.
Steps for Editing a Customer #
STEPS #
- Navigate to the Sales sidebar and select Customers.
- Locate the specific customer in the listing and click the Actions (⚙️) gear icon.
- Select Edit from the dropdown menu.
- Update the necessary information in the Edit customer modal, such as:
- Personal Info: Middle Name, Suffix Name, and Birthday.
- Contact Information: Email and Phone.
- Address: Street, City, State, Zip, and Country.
- Settings: Status (Active/Inactive) and Labels.
- Click the Save button to save changes.
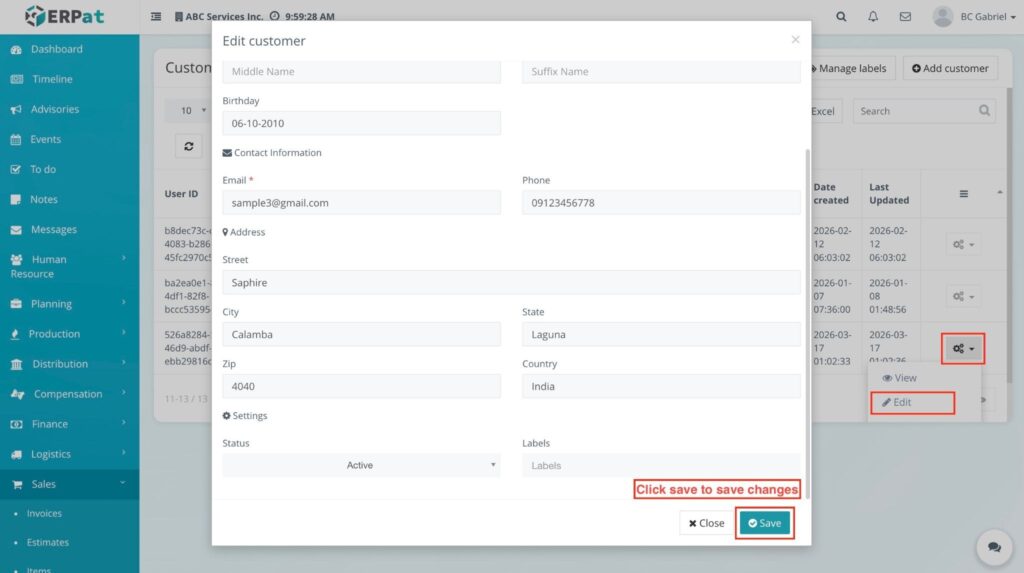
RESULT #
the modal closes and the updated information is immediately reflected in the customer record.
Steps for Resetting a Customer Password #
STEPS #
- Navigate to the Sales sidebar and select Customers.
- Locate the specific customer and click the Actions (⚙️) gear icon.
- Select Reset password from the dropdown menu.
- In the Reset password modal, type the new password in the New Password field.
- Note: You can click the Generate (🔄) icon to create a password or the Eye (👁️) icon to view the characters.
- (Optional) Check the Send Email Notification box if you want to notify the customer via email.
- Click the Save button to set the new password.
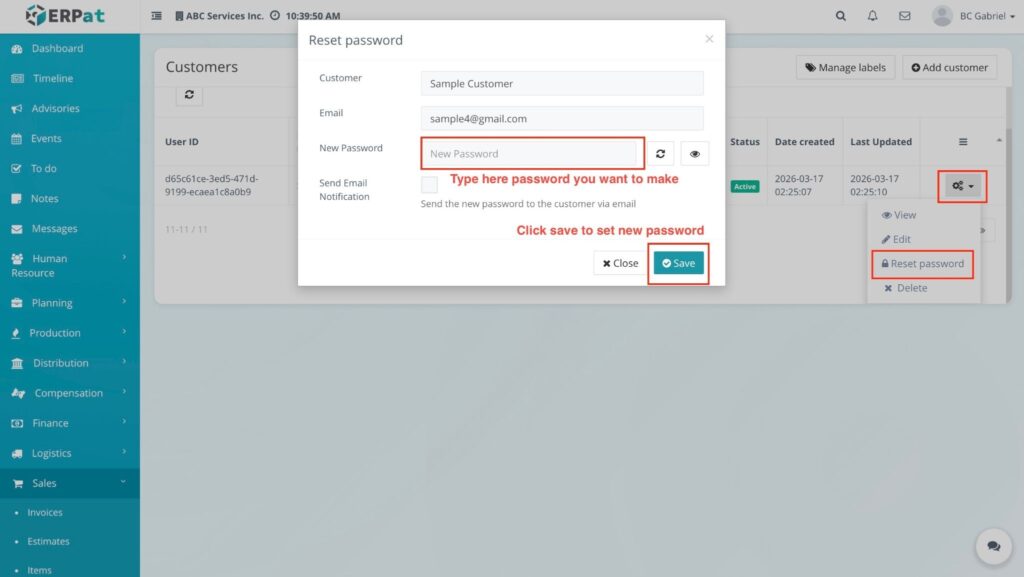
RESULT #
The customer’s password is updated, and they can now log in using the new credentials.
Steps for Accessing the Portal Dashboard #
STEPS #
- Navigate to the Sales sidebar and select Customers.
- Locate the specific customer in the listing and click the Actions (⚙️) gear icon.
- Select View from the dropdown menu to open the customer profile page.
- Locate the tabs at the top of the profile page and click on Portal (located directly beside the Overview tab).
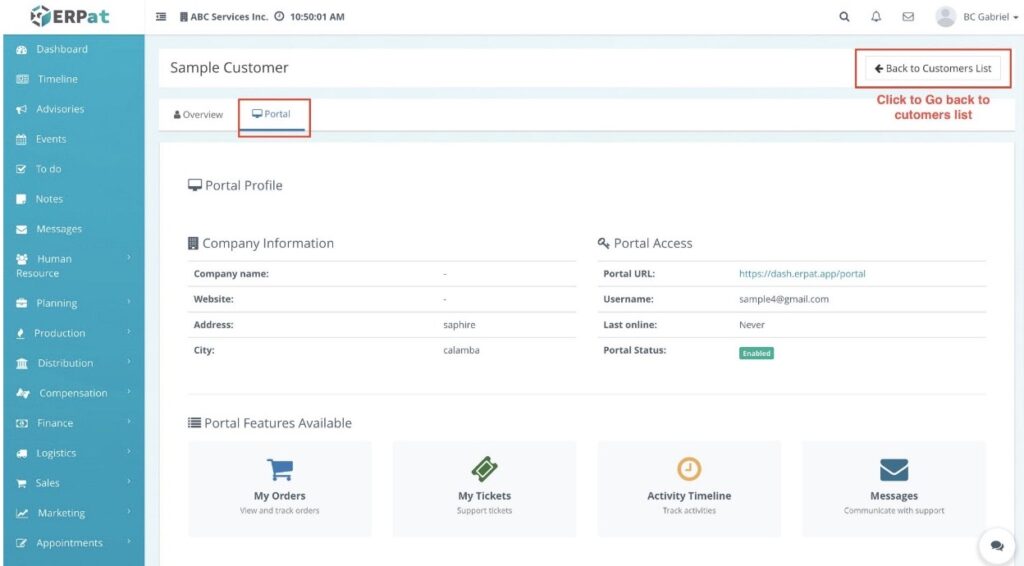
RESULT #
The Portal Profile screen is displayed, showing the customer’s portal login credentials, status, and available features.
NOTES #
- To return to the main list, click the ⬅ Back to Customers List button at the top-right of the page.
Steps for Deleting a Customer #
STEPS #
- Navigate to the Sales sidebar and select Customers.
- Locate the customer record you wish to remove from the listing.
- Click the Actions (⚙️) gear icon for that specific record.
- Select Delete from the dropdown menu.
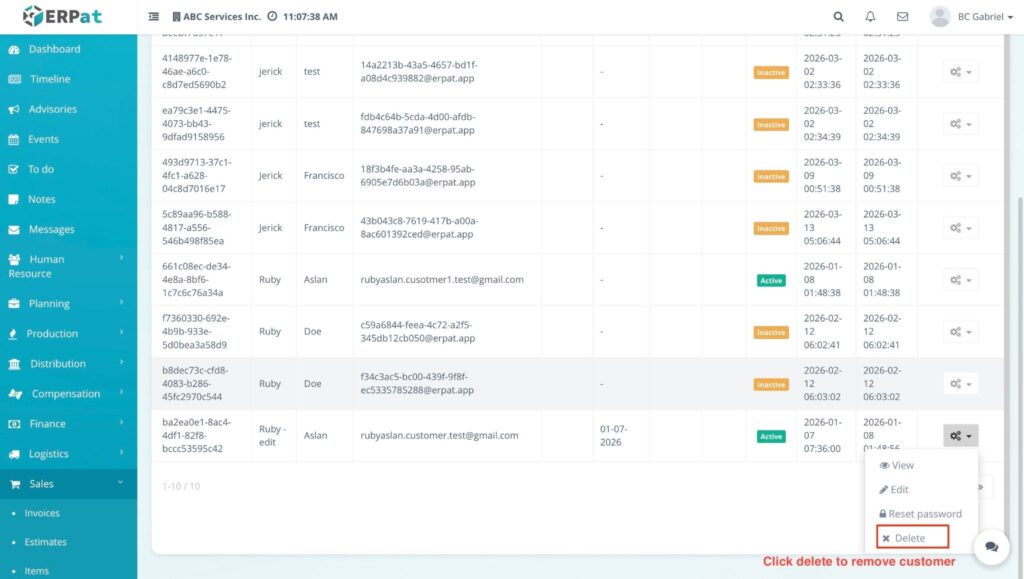
RESULT #
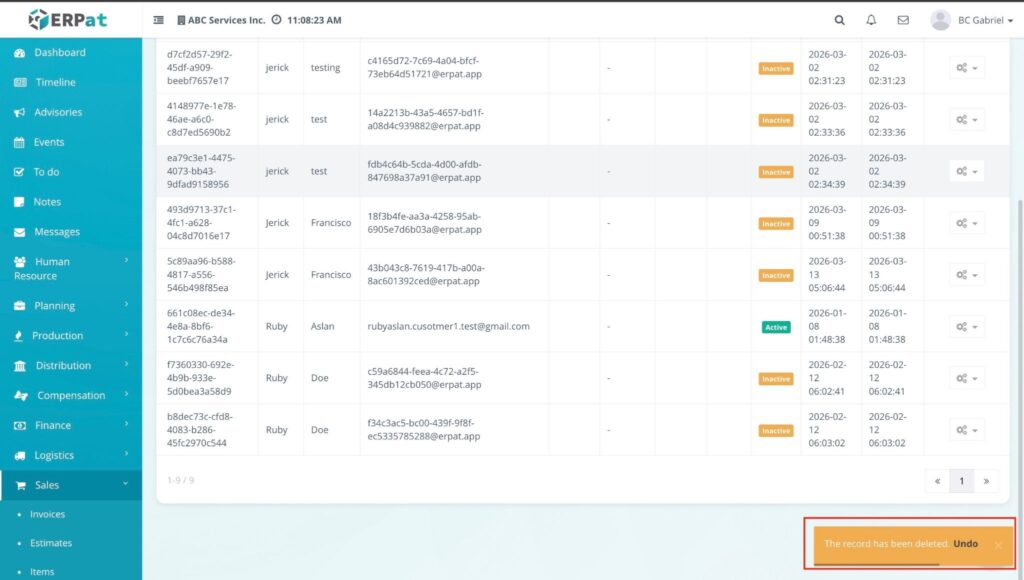
The record is immediately removed from the Customers listing table.
NOTE #
- Undo Action: If you deleted a record by mistake, you can click the Undo button within the notification at the bottom right to restore the customer record immediately.
Permissions and Access Control #
- Only authorized Sales or Admin roles can add, edit, or delete client records.
- View-only access may be granted to support or accounting roles for monitoring dues and payments.
Best Practices #
- Always assign a Primary Contact to ensure communication channels are clear.
- Use Groups to distinguish between high-priority “Best clients” and standard accounts.
- Regularly export client data as a backup for external reporting.
Audit & Logs #
All creation, update, and deletion actions for client records are logged for audit and compliance purposes within the ERPat System.
Last Updated: March 17, 2026 Module Owner: Sales – ERPat System


