Overview #
The Ticket Module is used to manage and track technical issues, service requests, and system inquiries through a centralized ticketing portal. It serves as a unified interface where users can browse existing tickets, utilize pre-defined templates, and categorize requests into specific types or groups for streamlined resolution.
Each ticket record contains essential tracking data including unique IDs, client information, assigned personnel, due dates, and real-time status updates ensuring consistent communication and accountability between users and the support team.
Key Features #
- Centralized Ticket Portal for managing and tracking all technical issues and service requests.
- Template Management for creating standardized, reusable ticket formats for recurring tasks.
- Customizable Ticket Types to categorize requests with specific point values and estimated durations.
- Departmental Grouping to organize tickets by accessibility and functional teams.
- Real-time Status Tracking with visibility into “Overdue” status, “Last Activity” timestamps, and due dates.
- Collaborative Assignment allowing for specific “Assigned To” personnel and the addition of multiple collaborators.
- Integrated Search and Filtering by client, project, ticket group, or creation date for efficient record retrieval.
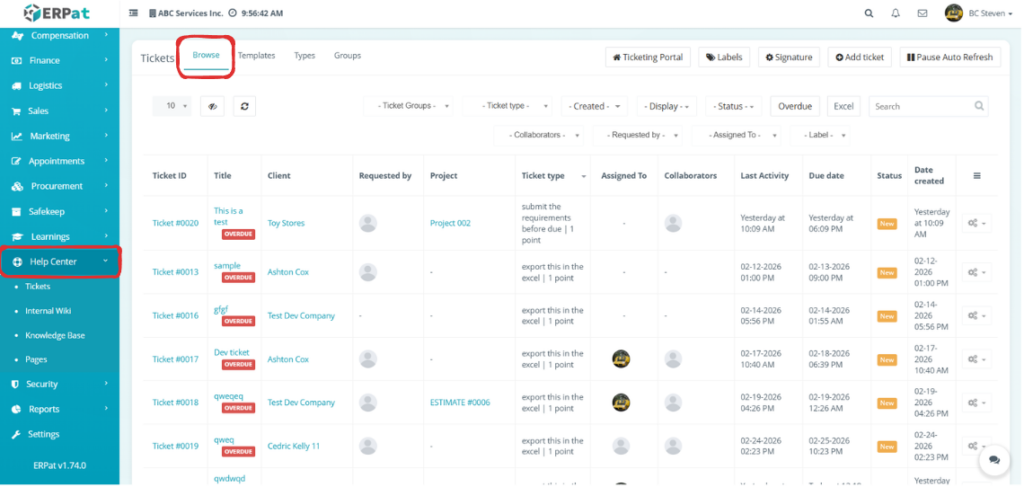
Accessing the Ticket Module #
- Log in to the ERPat System.
- Navigate to Help Center from main sidebar.
- Select Tickets
- You will be directed to to the Tickets – Browse page displaying all tickets records.
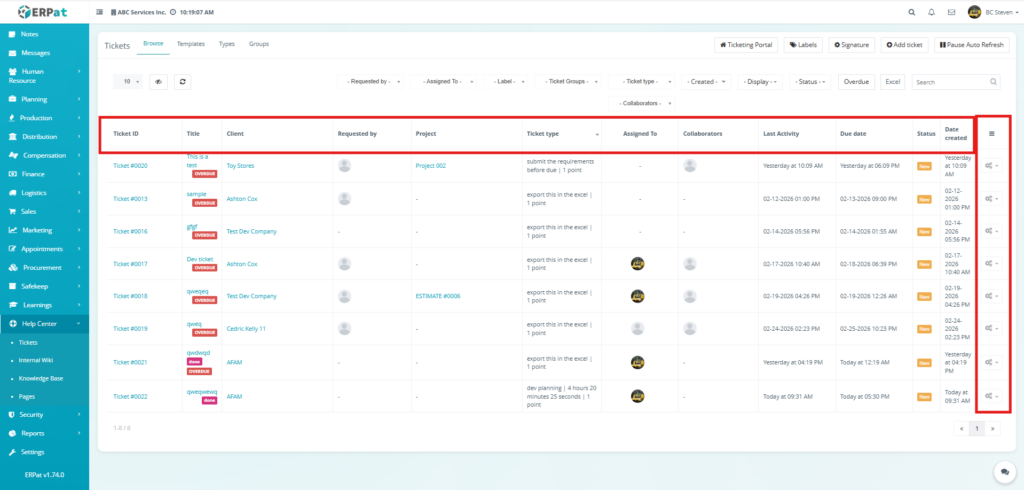
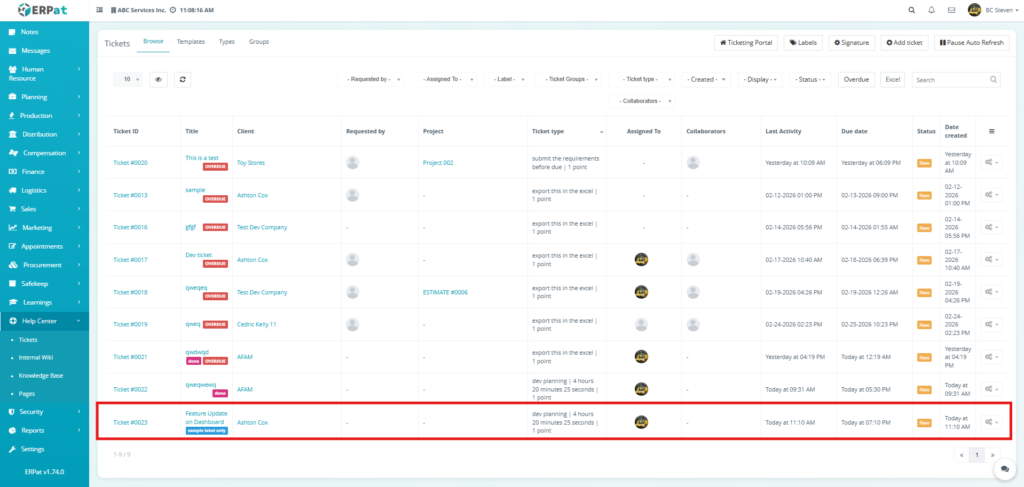
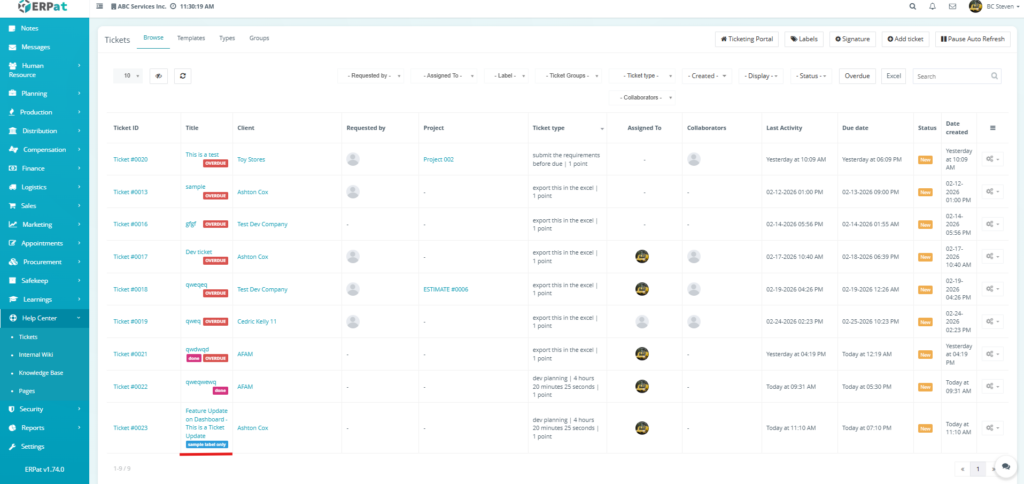
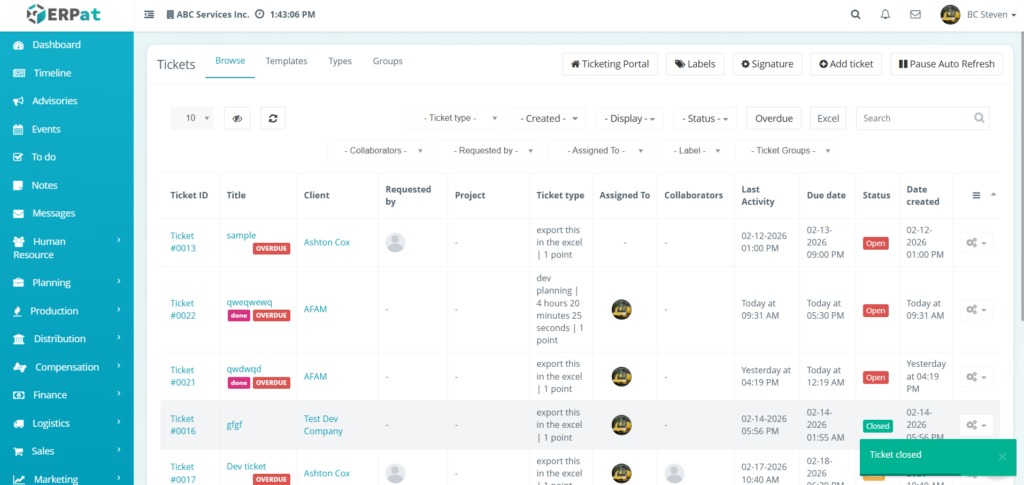
Ticket Browse Page #
The browse page provides an overview of all system support requests with the following information:
- Ticket ID – Unique identifier for each support request
- Title – Brief heading or summary of the reported issue
- Client – Name of the company or entity associated with the ticket
- Requested by – User profile of the individual who initiated the request
- Project – Specific project or estimate link related to the task
- Ticket type – Classification of the work and its point value
- Assigned To – Primary personnel responsible for resolving the ticket
- Collaborators – Additional team members involved in the support process
- Last Activity – Timestamp of the most recent update or comment
- Due date – Deadline for ticket resolution
- Status – Current stage of the ticket
- Date created – Original submission timestamp
- Actions – Controls to manage, edit, or view ticket settings
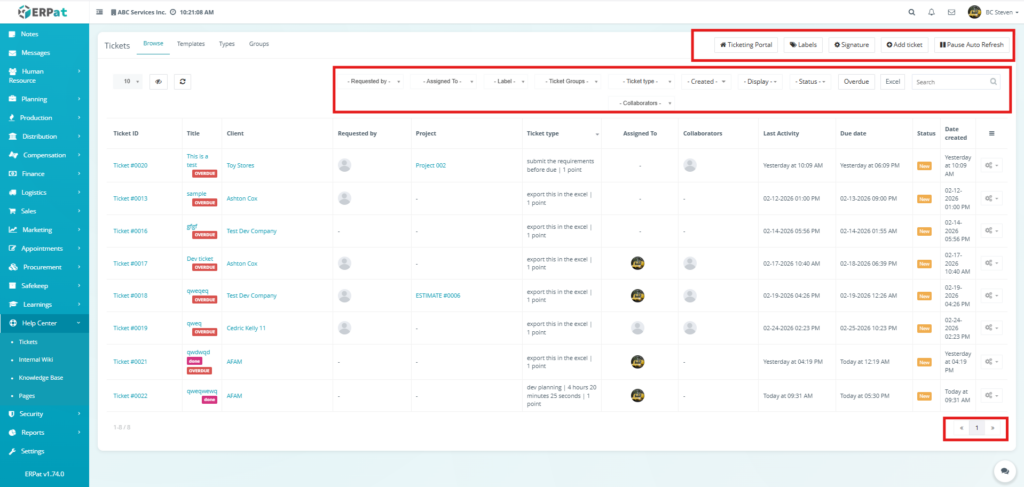
Additional controls:
- Search bar for quick lookup of specific ticket details
- Advanced Filters to sort by Groups, Type, Created date, Display, and Status
- Ticketing Portal for a high-level overview of all support activities
- Labels and Signature for organizational tagging and personalized communication
- Add ticket button to create new entries manually
- Overdue and Excel buttons for urgent task isolation and data export
- Pause Auto Refresh to freeze the live data feed during review
- Pagination and Row Display to manage large datasets per page
Steps for Creating a New Ticket #
STEPS
To create a support ticket in the system, follow these steps:
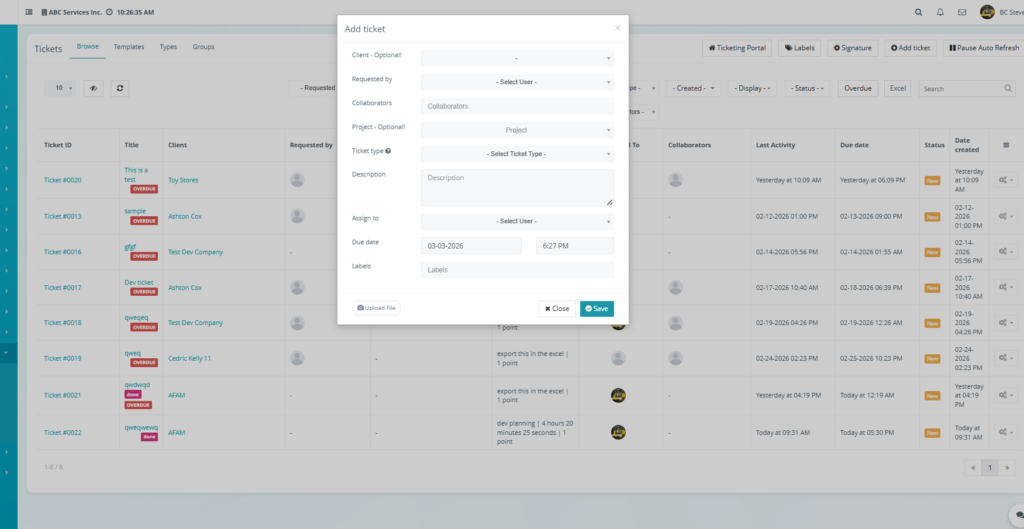
Creating a Support Ticket #
- Click the Add ticket button located at the top-right of the page to open the creation modal.
- Fill in the required and optional fields in the form:
- Client – Select the company or entity associated with the request (Optional).
- Requested by – Choose the user initiating the ticket from the dropdown menu.
- Collaborators – Add any additional team members who need to be involved in the ticket.
- Project – Link the ticket to a specific existing project or estimate (Optional).
- Ticket type – Select the classification for the work to be performed.
- Title – Enter a brief heading or summary of the issue or request.
- Description – Provide detailed information or instructions regarding the ticket.
- Assign to – Choose the primary personnel responsible for resolving the request.
- Due date – Select the deadline date and time for ticket resolution.
- Labels – Apply organizational tags for easier categorization (Optional).
- Upload File – Attach any relevant documents, screenshots, or logs if necessary by clicking the Upload File button at the bottom of the modal.
- Review the information for accuracy to ensure all technical details are correct.
- Click Save to create the ticket and add it to the active support queue.
Result #
The newly added ticket will appear in the listing and become available.
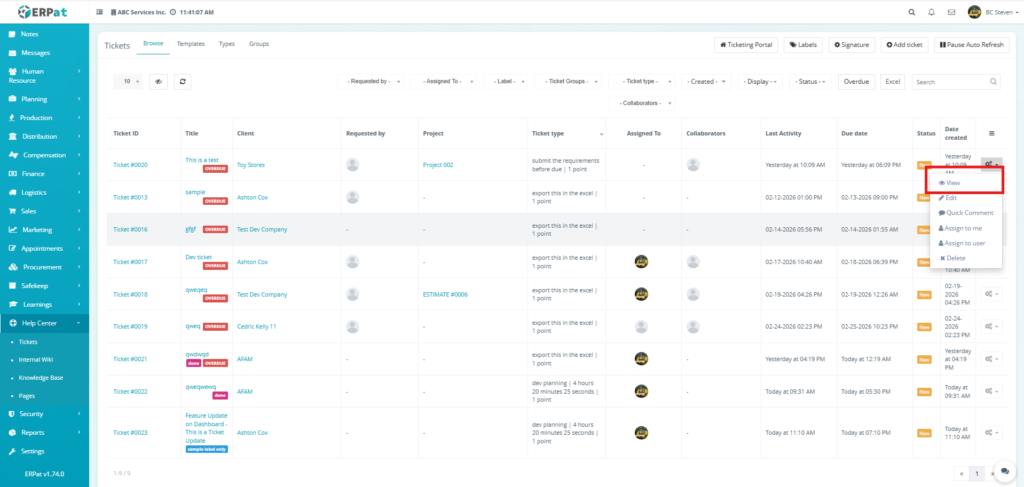
Steps to View a Ticket #
- Locate the ticket from the browse listing table.
- Click the Option (⚙) icon under the Actions column.
- Select the View button from the dropdown menu.
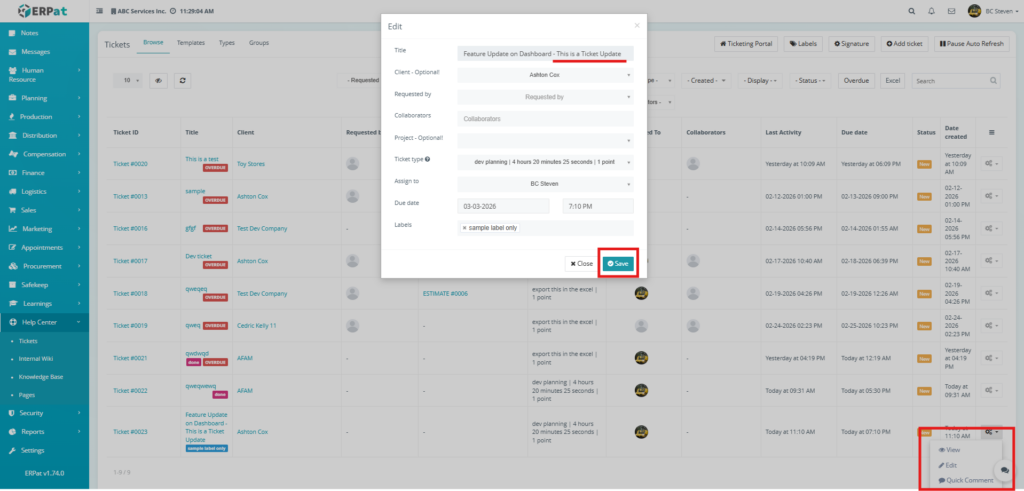
Steps for Editing a Ticket #
STEPS
- Locate the ticket from the browse listing table.
- Click the Option (⚙) icon under the Actions column.
- Select the Edit button from the dropdown menu.
- Update the necessary fields such as Title, Assigned To, or Due date.
- Click Save to apply changes.
Notes:
- Changes will reflect across all linked ticket modules and dashboards.
- Existing ticket IDs and historical activity logs remain intact unless manually modified.
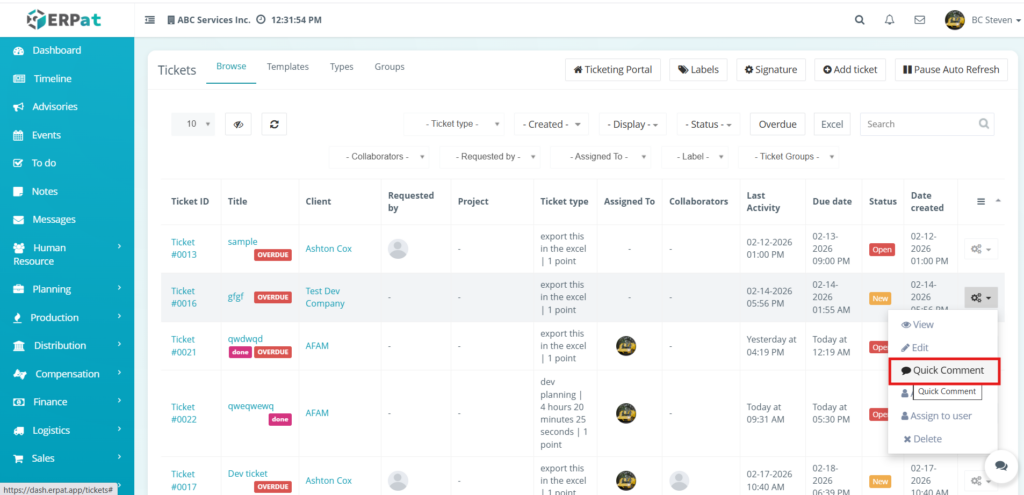
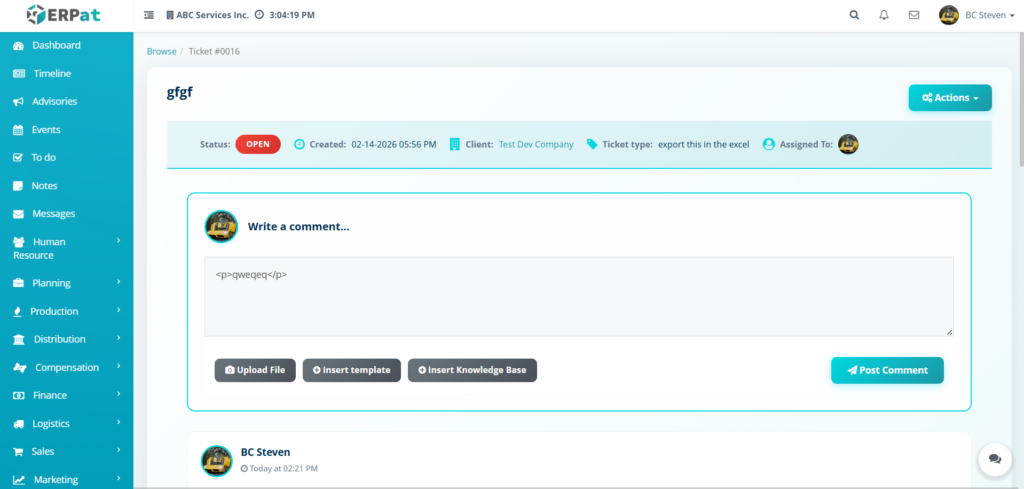
Steps for Creating a Quick Comment #
STEPS
- Locate the ticket from the browse listing table.
- Click the Option (⚙) icon under the Actions column.
- Select the Quick Comment button from the dropdown menu.
- Input the Comment you want to have.
- Click Post to apply changes.
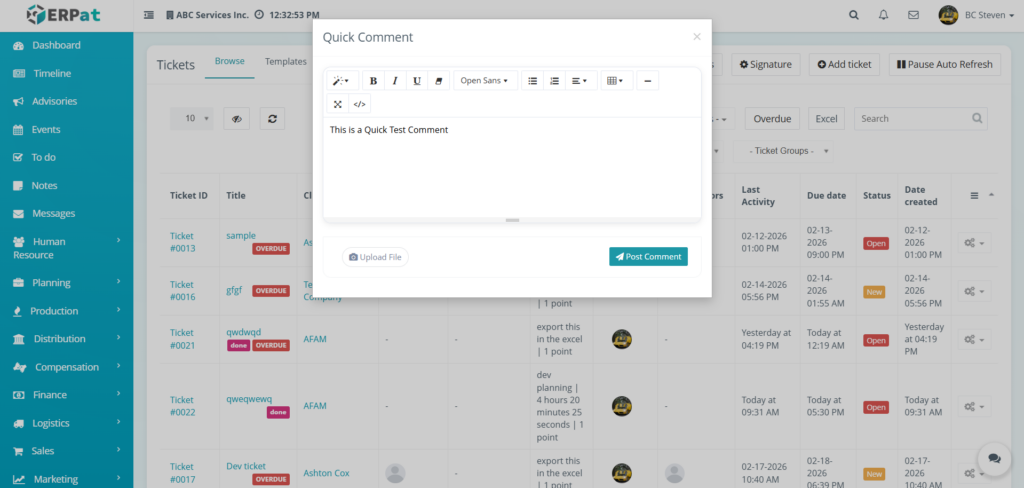
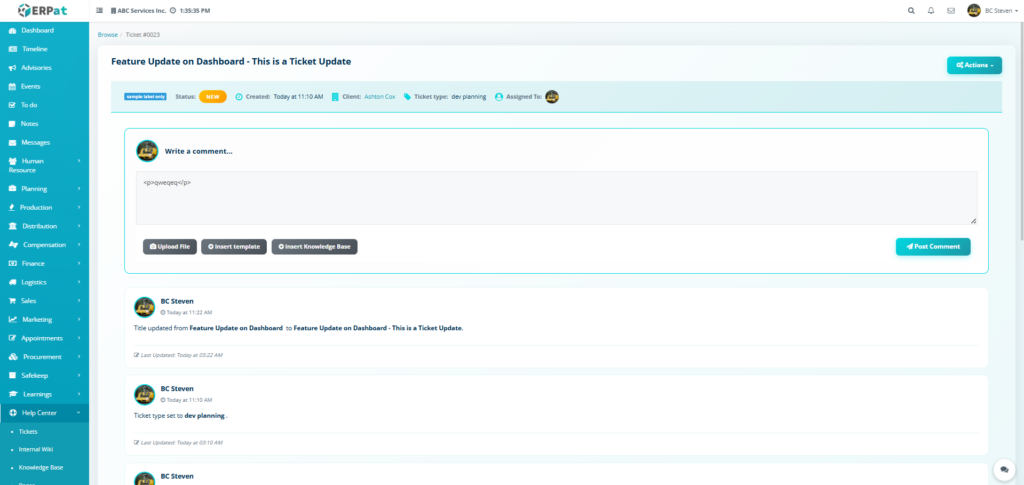
Result #
After creating a quick comment on the selected ticket the status of that ticket will be set from new to open. The quick comment that was created will appear on the ticket view.
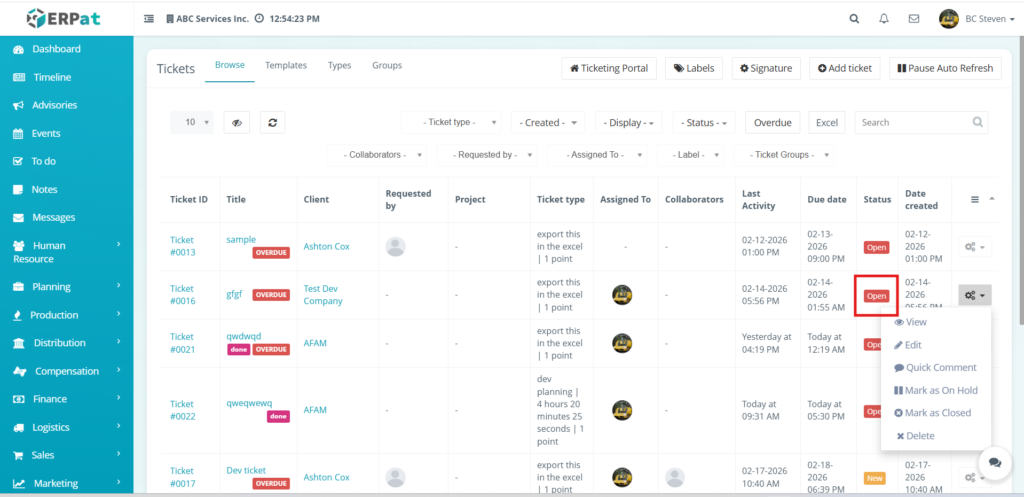
Steps to mark the ticket to “On Hold” status #
STEPS
- Locate the ticket whose status is open.
- Click the Option (⚙) icon under the Actions column.
- Select the Mark as On Hold button from the dropdown menu.
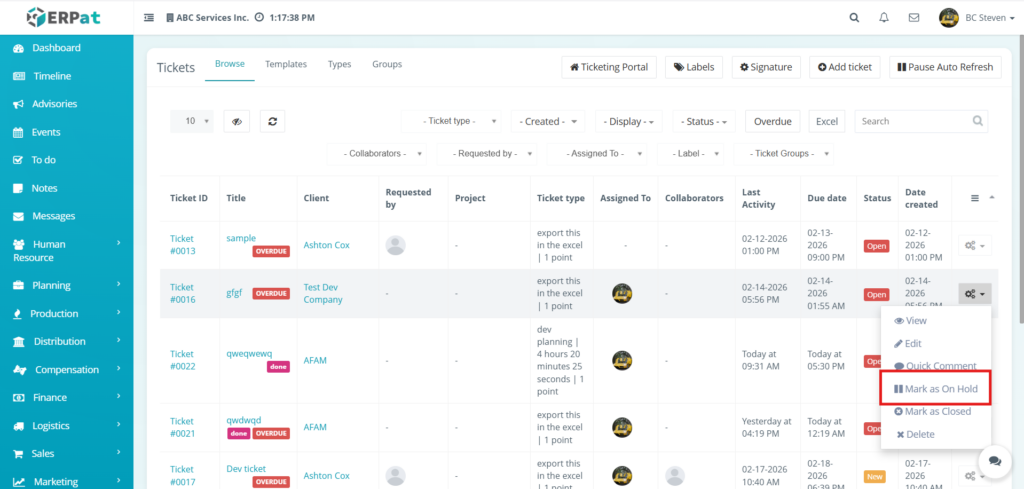
Result #
Status change will apply to the ticket that was selected into “On Hold”
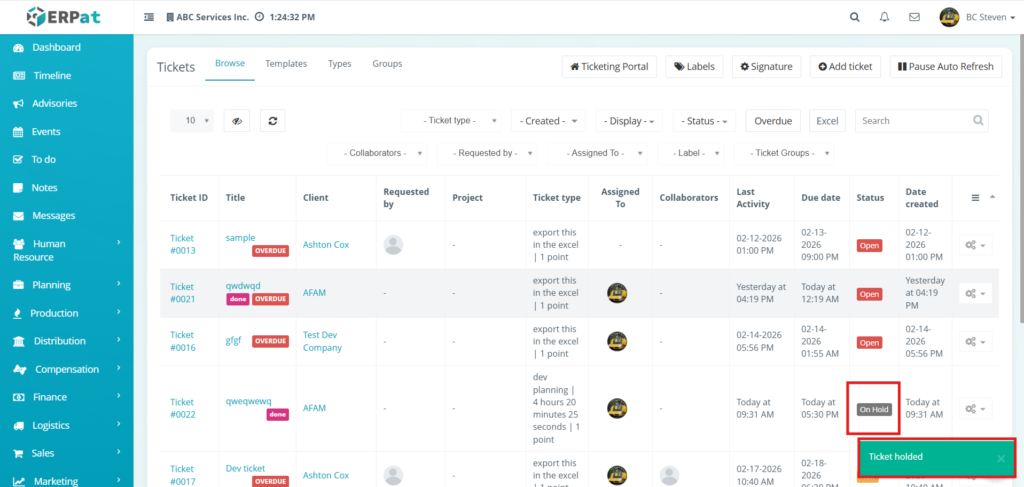
Notes:
- Ticket whose status is “Open” are the only one that can be set to “On Hold”
Steps to mark the ticket to “Closed” status. #
STEPS
- Locate the ticket whose status is open.
- Click the Option (⚙) icon under the Actions column.
- Select the Mark as Closed button from the dropdown menu.
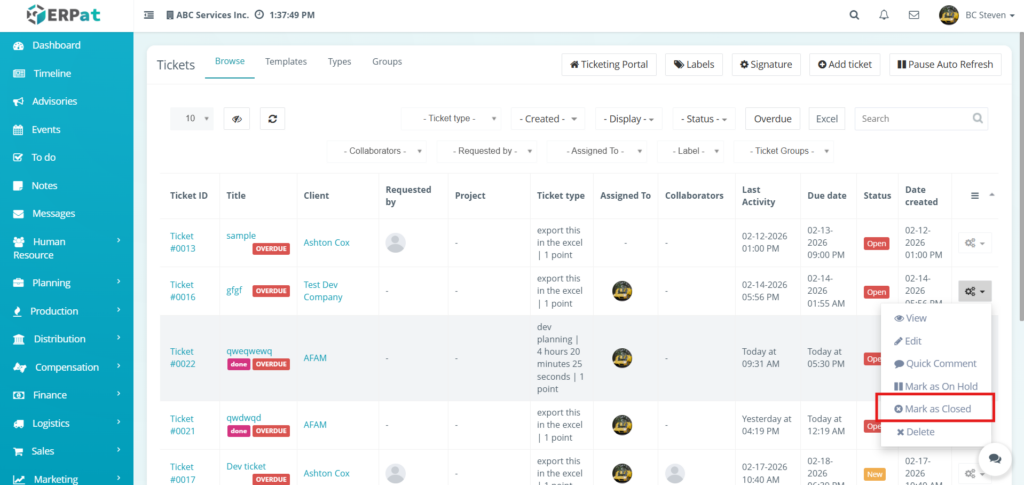
Result #
Status change will apply to the ticket that was selected into “Closed”
Notes:
- Ticket whose status is “Open” are the only one that can be set to “Closed”
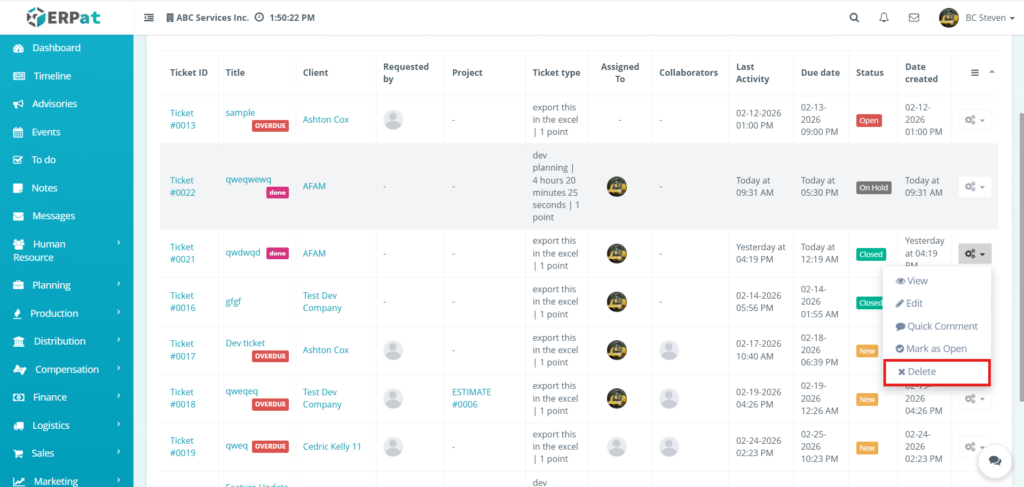
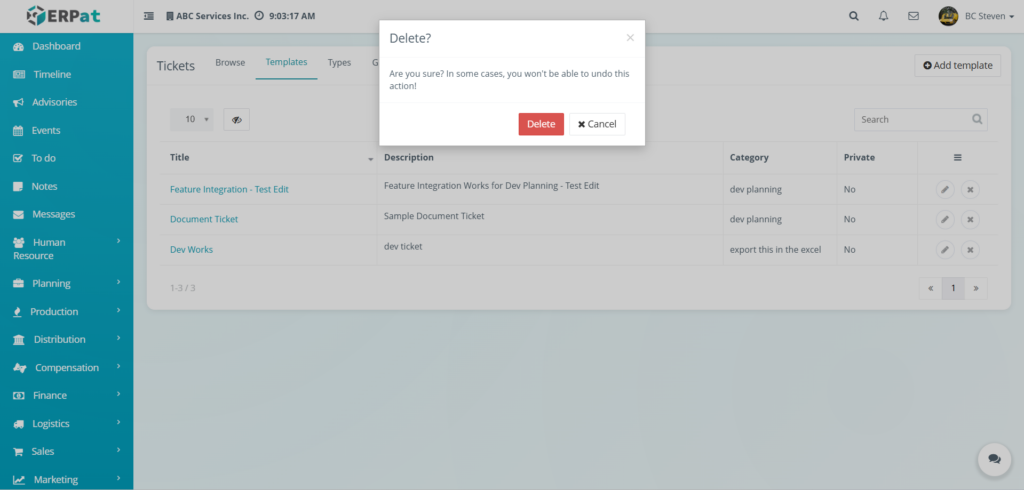
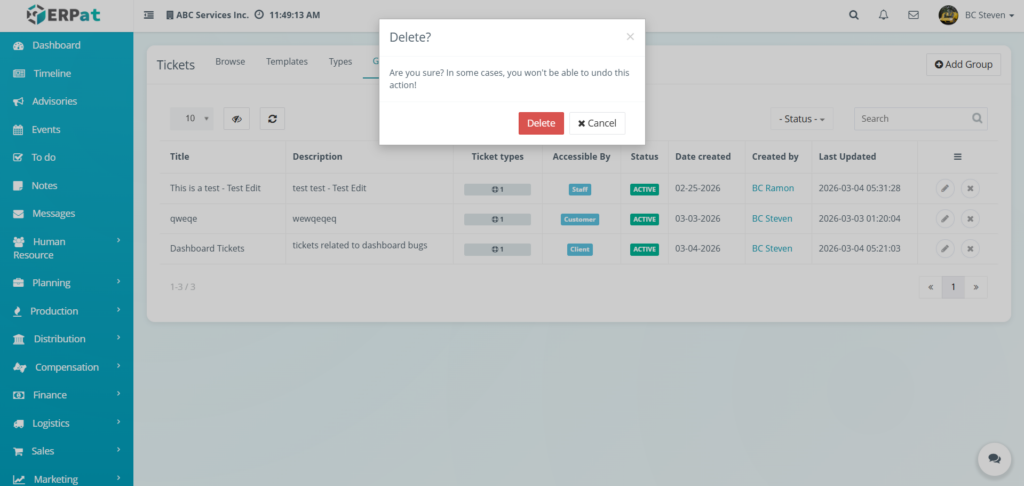
Steps to Delete a Ticket #
STEPS
- Locate the ticket from the browse listing table.
- Click the Option (⚙) icon under the actions column.
- Select the Delete button from the dropdown menu.
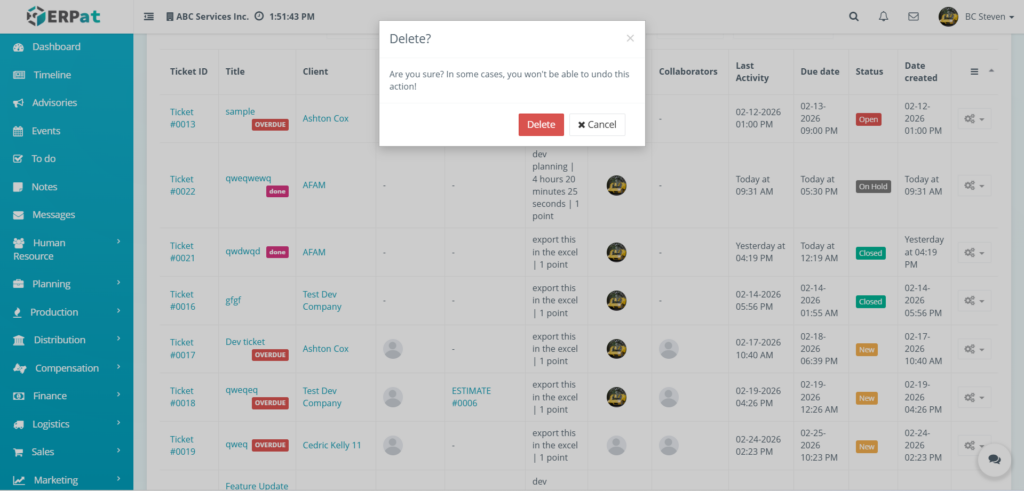
- Click the Delete button from the delete modal.
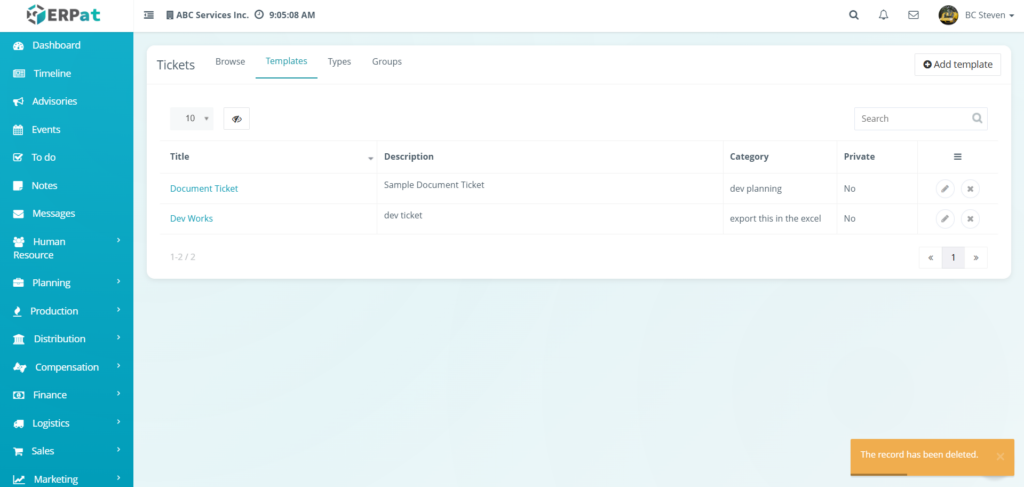
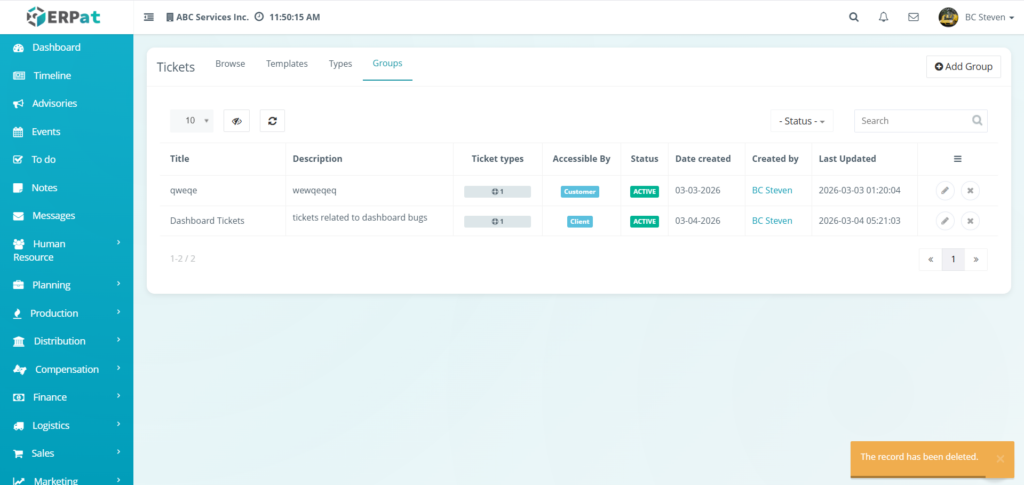
Result #
A Notification would appear indicating that the record was been deleted.
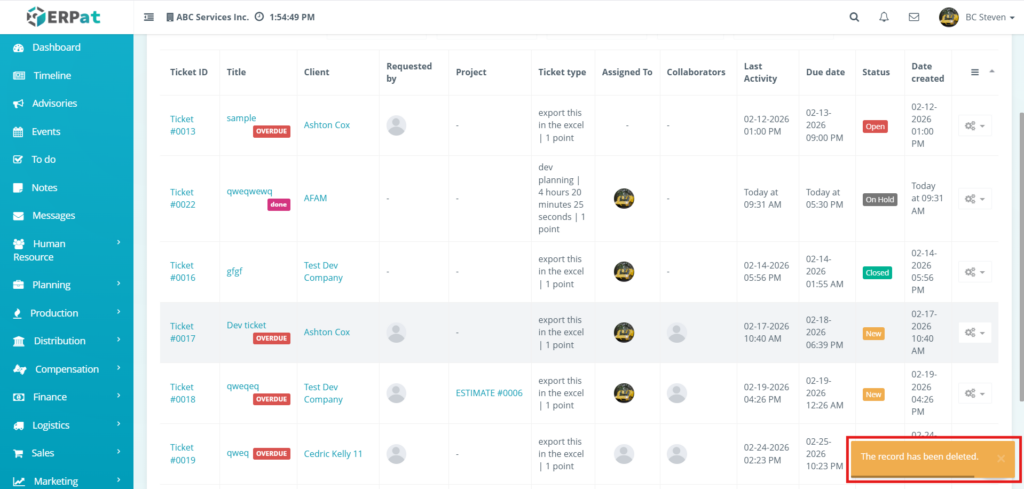
Notes:
- Tickets can be deleted whether the status is New, Open, On Hold or Closed.
Tickets Templates #
Ticket Templates are used to manage and maintain standardized support request formats for recurring tasks or common system issues. These templates help streamline the ticket creation process by providing pre-defined blueprints, ensuring consistent data entry and improving operational efficiency across the support team.
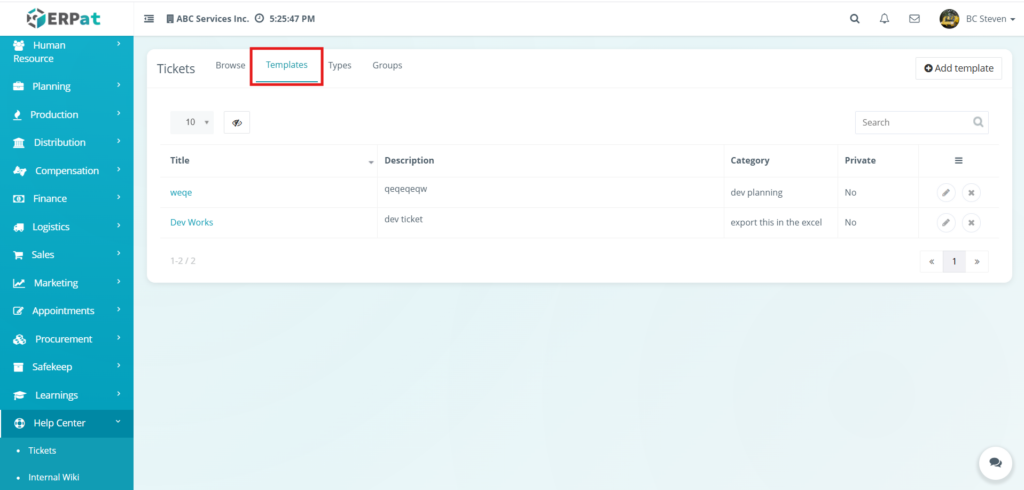
Accessing Ticket Templates #
- Navigate to Help Center – Tickets
- Click the Templates Tab
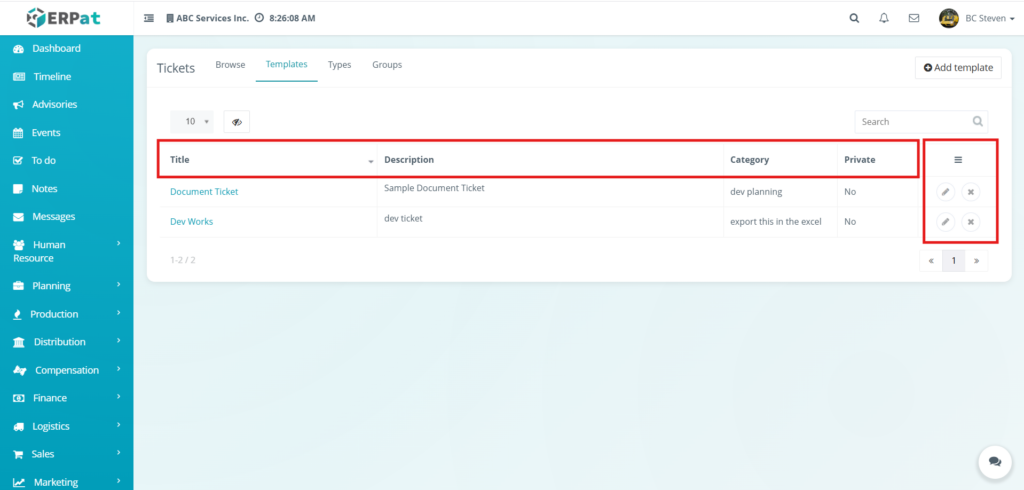
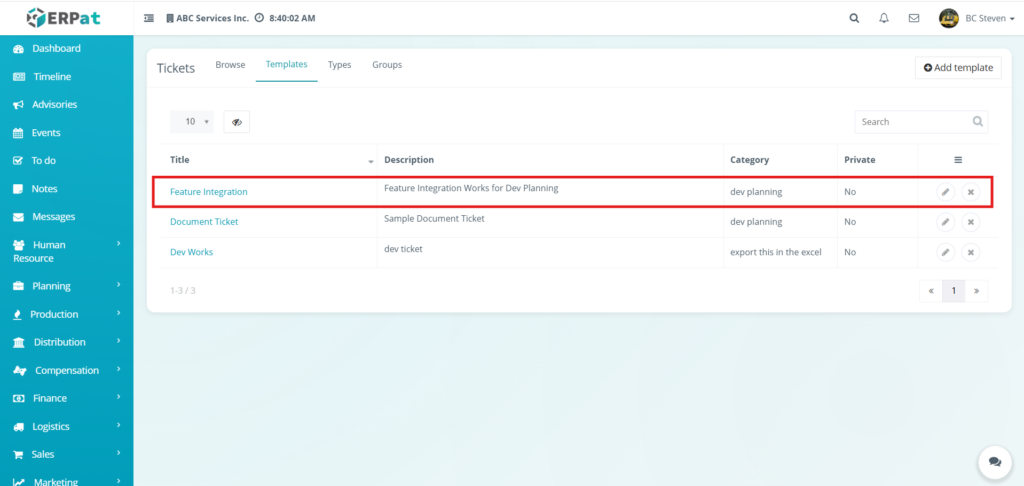
Templates Listing Page #
Displays the following details:
- Title – Name of the ticket group (e.g., Support Team, Dev Group)
- Description – Brief summary of the group’s purpose or scope
- Ticket types – Number of specific work classifications linked to this group
- Accessible By – Visibility permissions (e.g., Staff or Customer)
- Status – Indicates if the group is currently Active or Inactive
- Date created – The original date the group was established
- Created by – The user profile who added the group to the system
- Last Updated – Timestamp of the most recent modification
- Actions – Edit or Delete controls
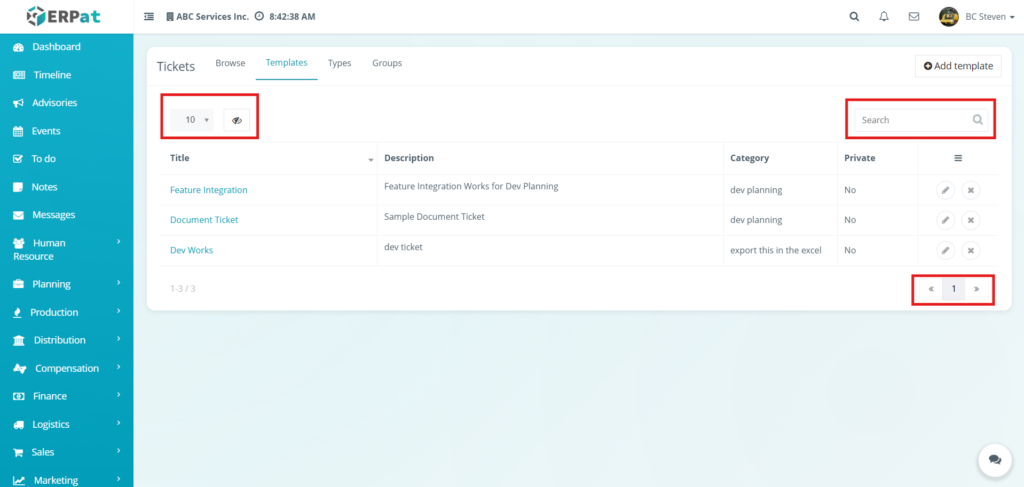
Page Controls and Tools #
- Row Display – Adjust the number of ticket templates shown per page (e.g., 10, 25, 50) to manage data density.
- Visibility Control – Toggle the visibility of specific columns or elements within the template table to customize the workspace.
- Search Bar – Search for specific templates by entering titles, descriptions, or category keywords for quick retrieval.
- Pagination – Navigate through multiple pages of template records using the previous, next, or specific page number controls.
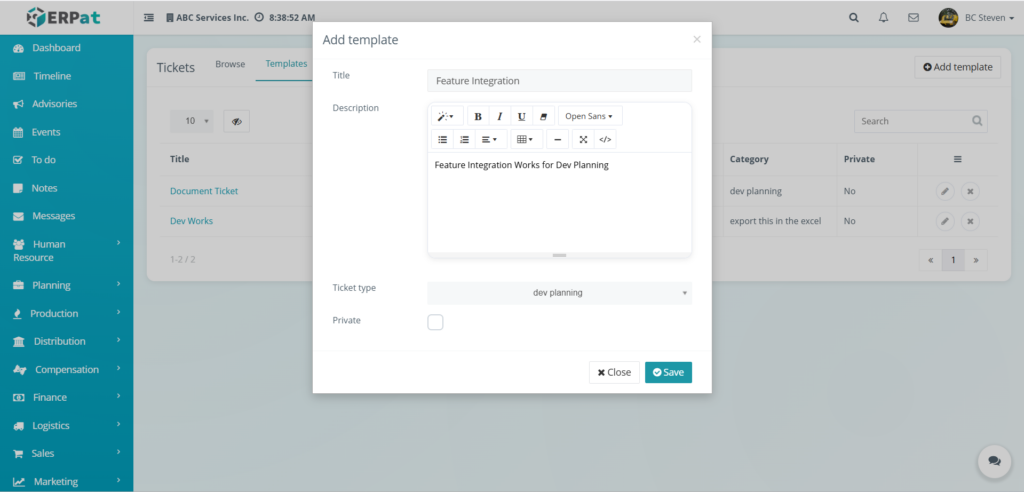
Steps for Adding a Template #
The Add template form is used to create new ticket blueprints for recurring support requests. This form supports pre-defined ticket configurations and metadata to streamline the ticket creation process and maintain documentation consistency.
STEPS
- Click the Add template button at the top-right of the Templates page.
- Fill in the required fields:
- Title (Name of the template for quick identification)
- Description (Instructions or summary details to be pre-filled)
- Ticket type (Classification category for the template)
- Private (Checkbox to restrict template visibility to the creator only)
- Review the information for accuracy.
- Click Save to create the ticket template.
Result #
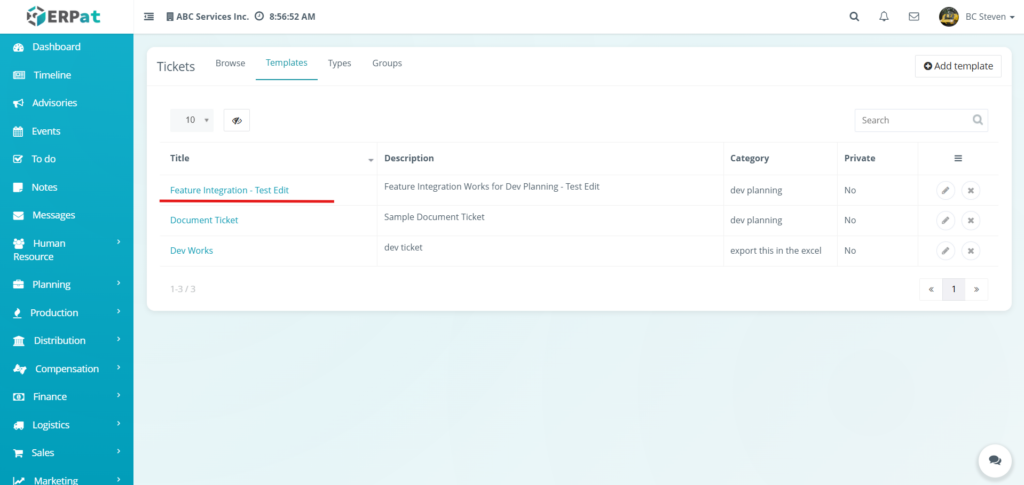
The saved template now appears in the tickets template list page
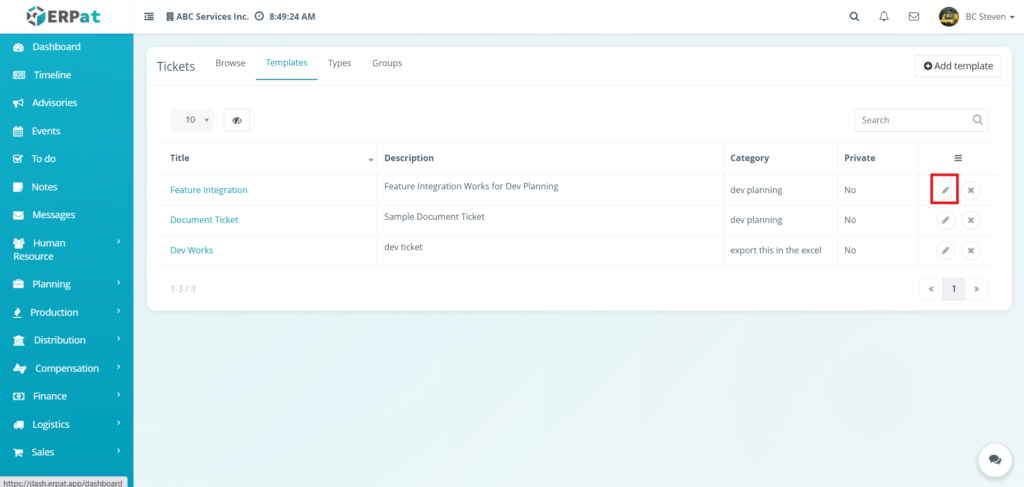
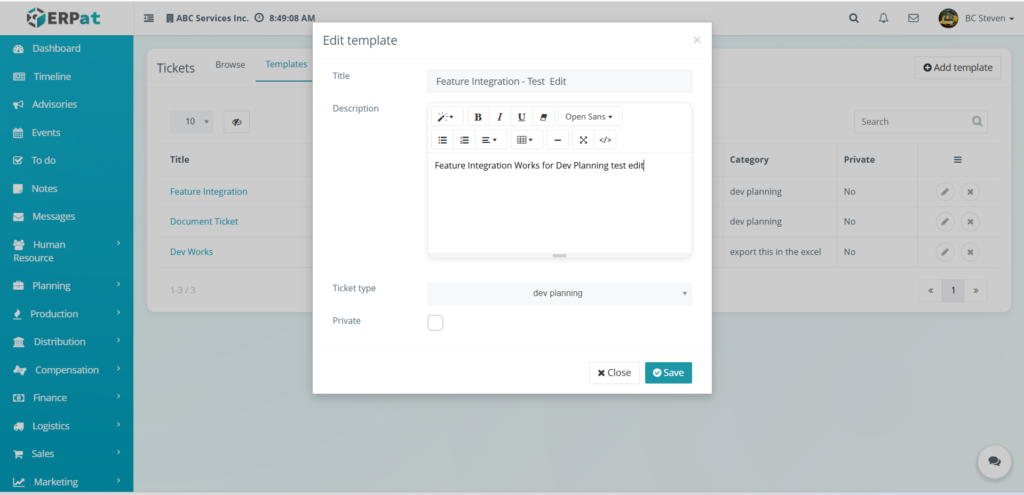
Steps for Editing a Template #
STEPS
- Locate the ticket from the template listing table.
- Click the Pencil icon under the Actions column.
- Update the necessary fields such as Title, Description, Ticket Type and Private
- Click Save to apply changes.
Result #
Steps to Delete a Template #
STEPS
- Locate the ticket from the template listing table.
- Click the X icon under the Actions column.
- Delete confirmation modal will apply after clicking the X icon
- Click the delete button to properly delete it
Result #
Ticket Types #
Ticket Types are used to define and categorize the specific nature of various service requests within the system. By classifying work into types such as development planning or data exports, the system can provide more accurate task estimates, default assignments, and structured reporting, ensuring that each request is routed to the appropriate personnel with the correct priority.
Accessing the Ticket Types #
- Navigate to Help Center – Ticket
- Click the Types Tab
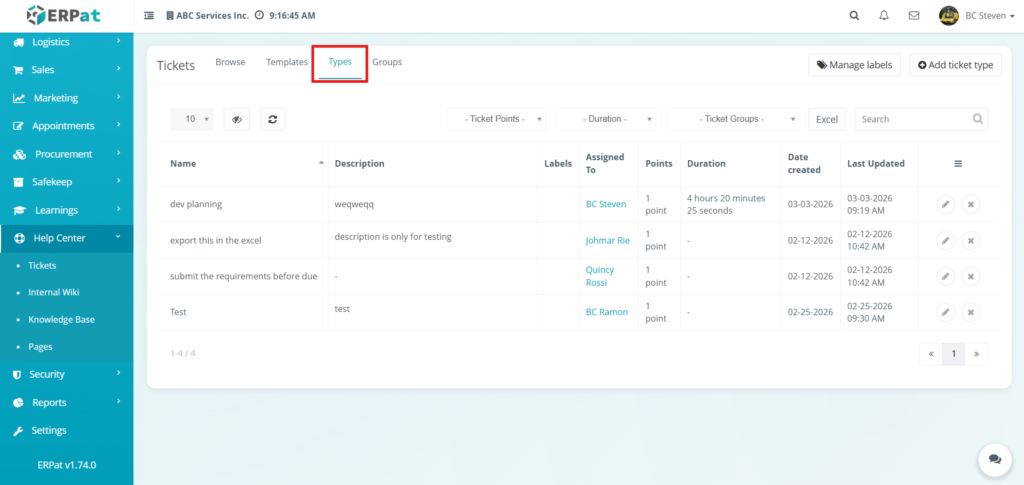
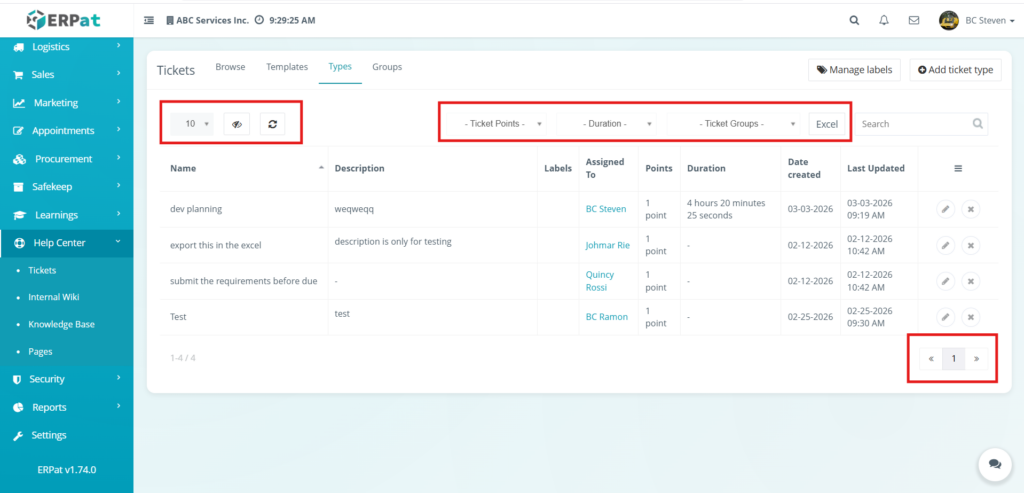
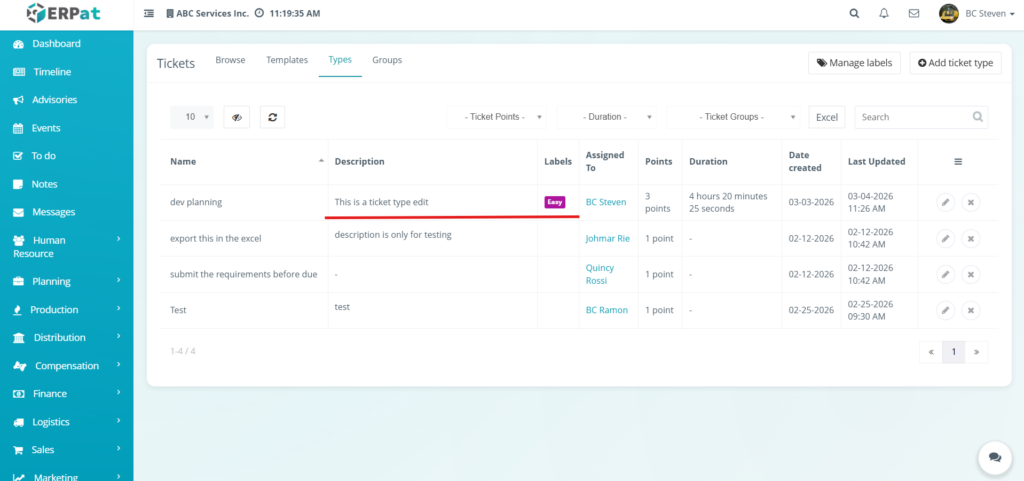
Types Listing Pages #
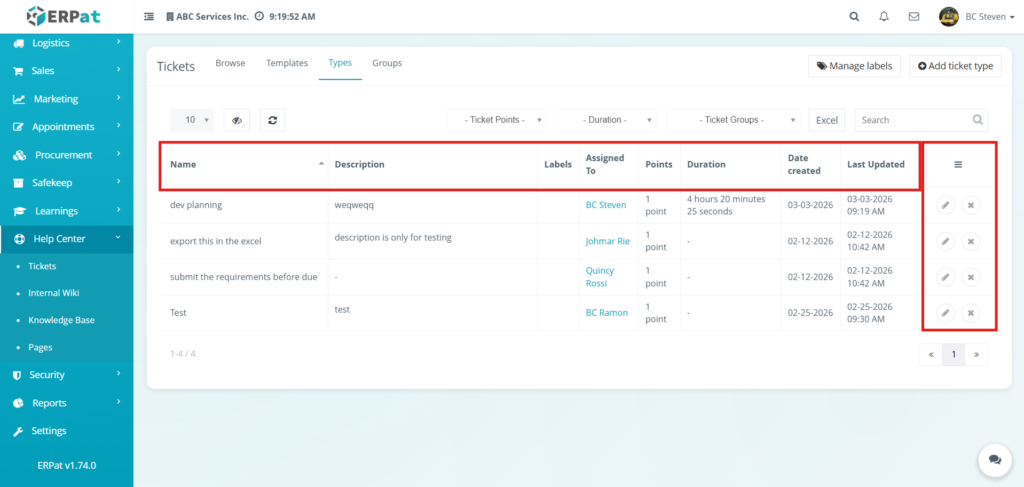
The types listing page provides an overview of all defined work classifications with the following information:
- Name – The unique label assigned to the ticket type (e.g., dev planning, Test).
- Description – A brief summary explaining the scope or purpose of the classification.
- Labels – Tags associated with the type for enhanced filtering and organization.
- Assigned To – The default team member responsible for resolving tickets under this specific type.
- Points – The numerical value assigned to represent the weight or complexity of the task.
- Duration – The estimated time required to complete tasks of this type.
- Date created – The original date and time the ticket type was established.
- Last Updated – The most recent timestamp of configuration changes.
- Actions – Controls to Edit (pencil icon) or Delete (x icon) existing ticket type definitions.
Page Controls and Tools #
- Row Display – Adjust the number of ticket templates shown per page (e.g., 10, 25, 50) to manage data density.
- Visibility Control – Toggle the visibility of specific columns or elements within the template table to customize the workspace.
- Refresh – Manually update the live data feed.
- Search Bar – Search for specific templates by entering titles, descriptions, or category keywords for quick retrieval.
- Pagination – Navigate through multiple pages of template records using the previous, next, or specific page number controls.
- Ticket Points – Used to narrow down the listing by specific complexity values or task weights.
- Duration – Used to sort or view the list based on the estimated time required to complete tasks.
- Ticket Groups – Used to view only those types associated with specific organizational or departmental clusters.
- Excel Button – A primary export tool used to download the current ticket type dataset into a spreadsheet format for external reporting or auditing.
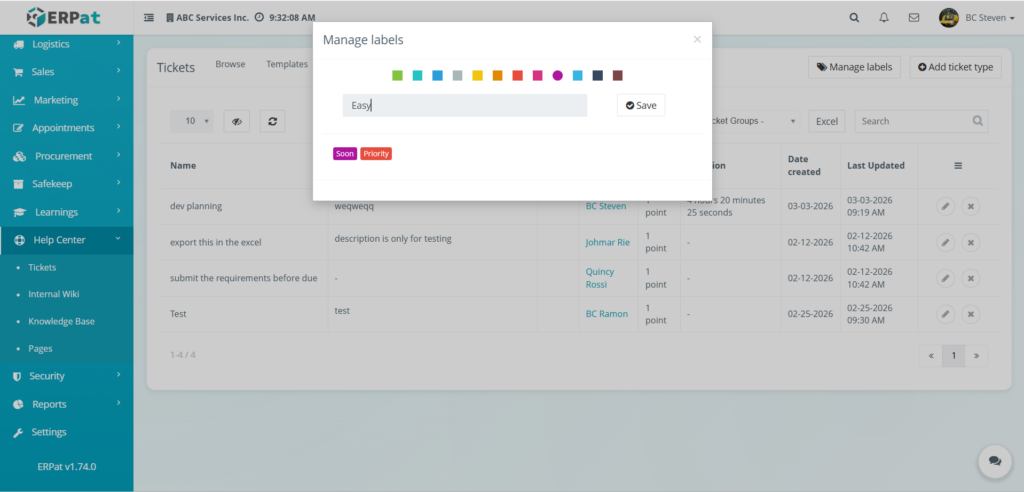
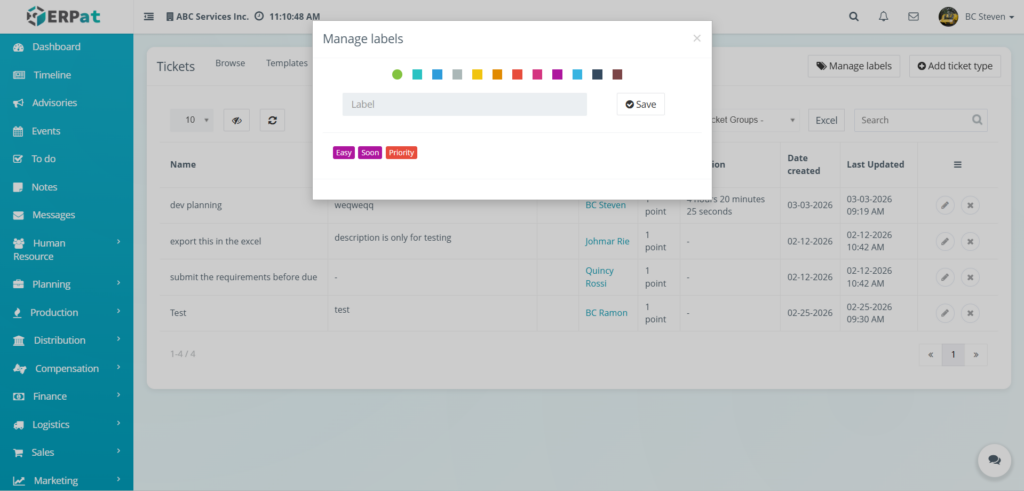
Ticket Types Create Label #
STEPS #
- Click Manage labels button located at the top-right corner of the screen.
- Input the label.
- Select the color for the label.
- Click Save
Result #
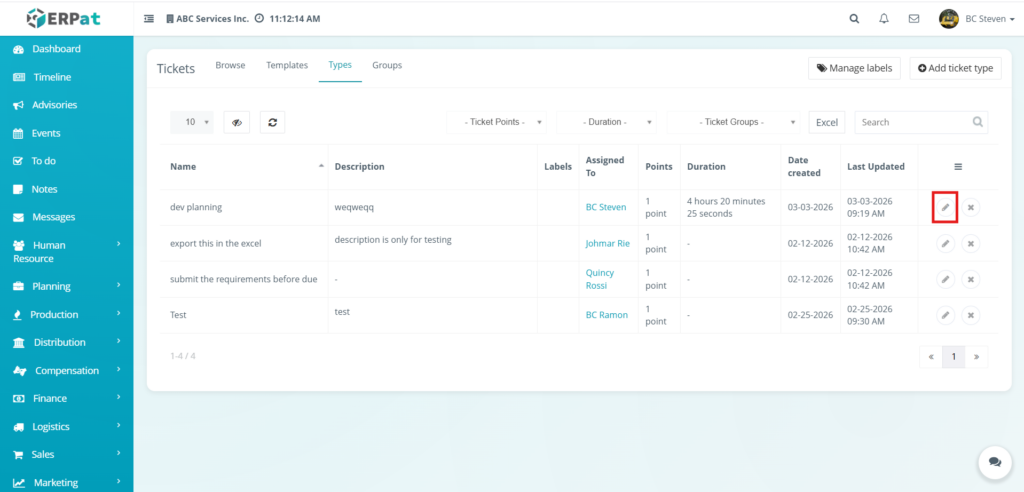
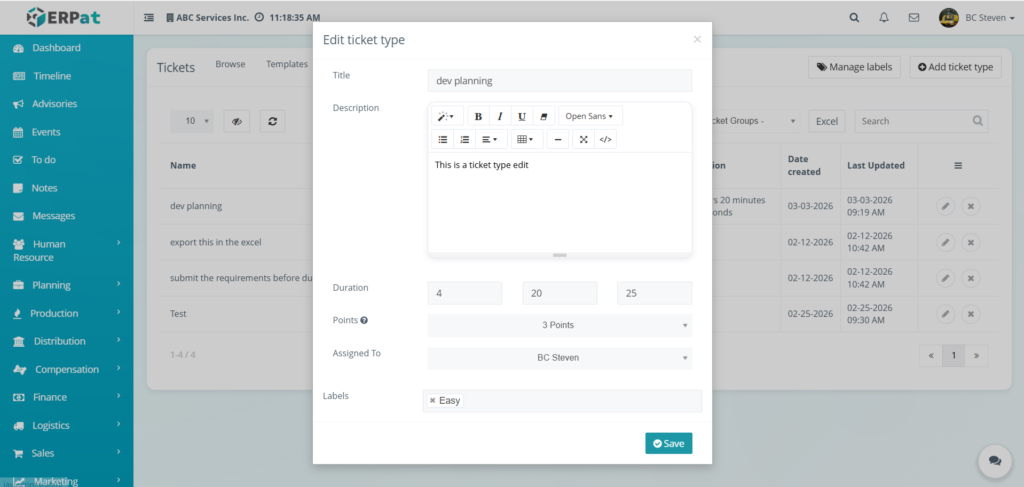
Steps for Editing a Types #
STEPS
- Locate the ticket type from the types listing table.
- Click the Edit (✎) icon under the Actions column.
- Update the necessary fields in the modal:
- Title (The name of the work classification)
- Description (Detailed summary of the work type using the provided text editor)
- Duration (Estimated time in hours, minutes, and seconds)
- Points (The complexity value assigned to the task)
- Assigned To (The default personnel for this type)
- Labels (Relevant tags for categorization)
- Click Save to apply the changes.
Result #
Steps to Delete a Types #
STEPS
- Locate the ticket from the types listing table.
- Click the X icon under the Actions column.
- The selected ticket type would be deleted
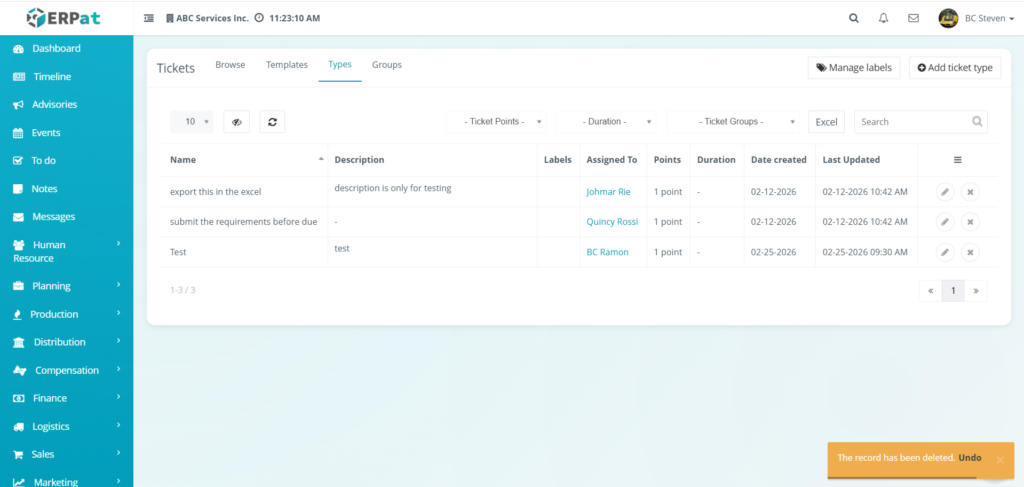
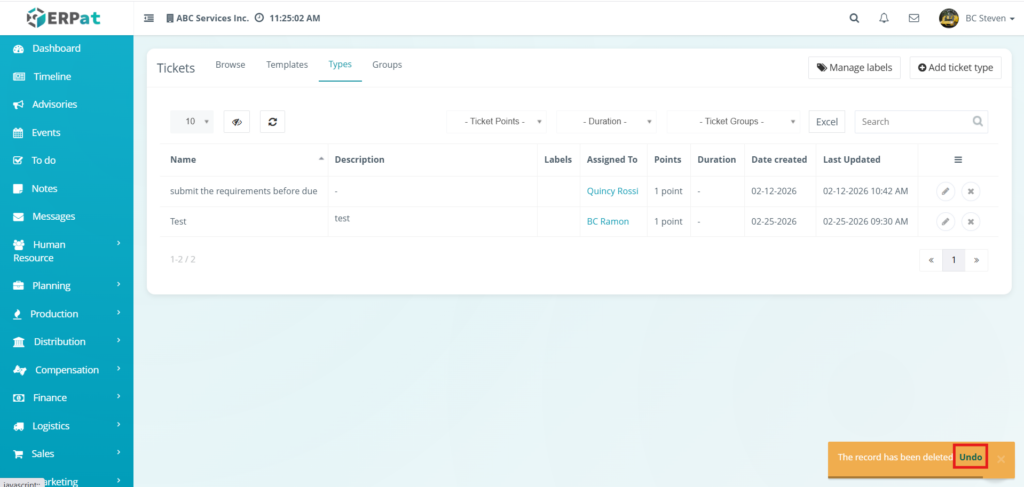
Steps to Undo a Deleted Type #
- After deleting a ticket type a notification would appear
- Click Undo to bring back the deleted ticket type
Notes:
- Ticket types that was recently deleted can be the only one that can be undo
Ticket Groups #
Ticket Groups are used to organize support tickets into logical clusters based on departmental functions or specific user accessibility. These groups serve to control visibility and streamline the management of work requests by ensuring that specific ticket types are accessible only to the appropriate personnel, such as Staff or Customers.
Accessing Ticket Groups #
- Navigate to Help Center – Ticket
- Click the Groups Tab
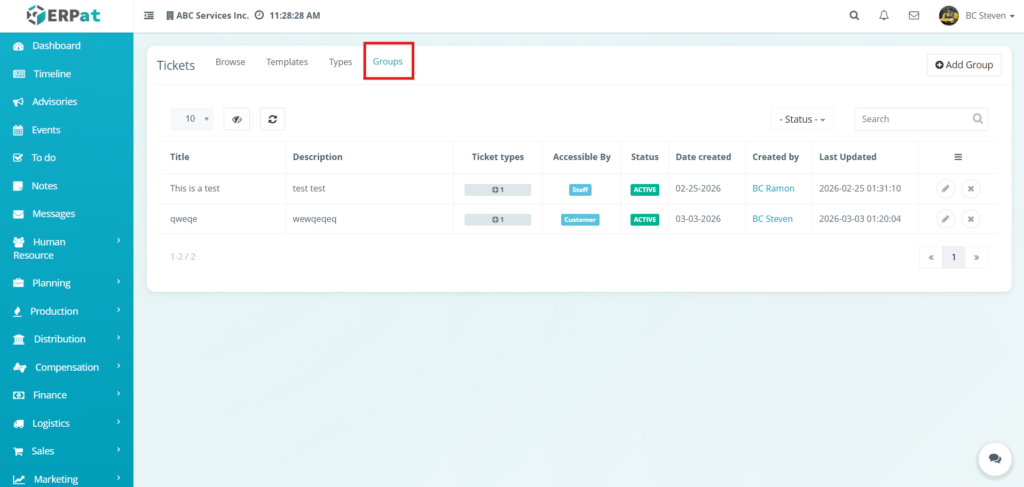
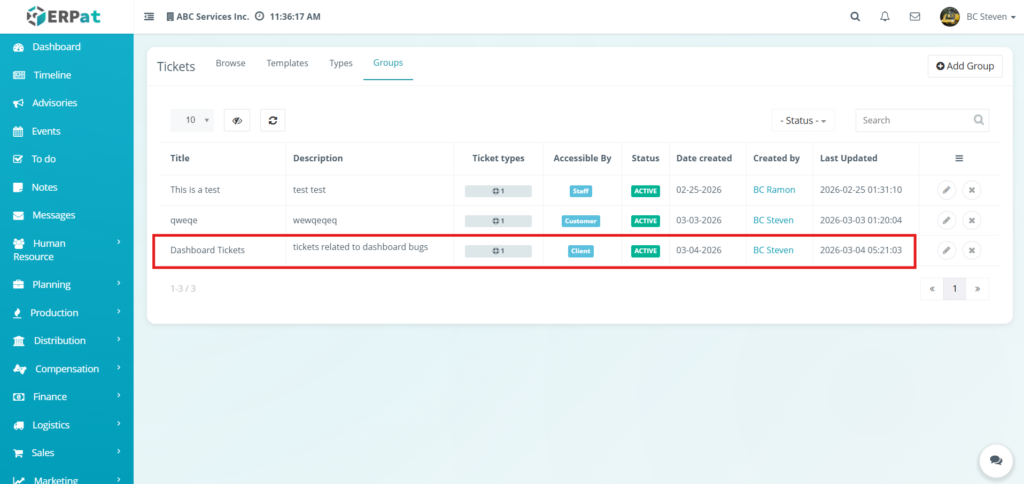
Groups Listing Page #
Ticket Groups Listing Page #
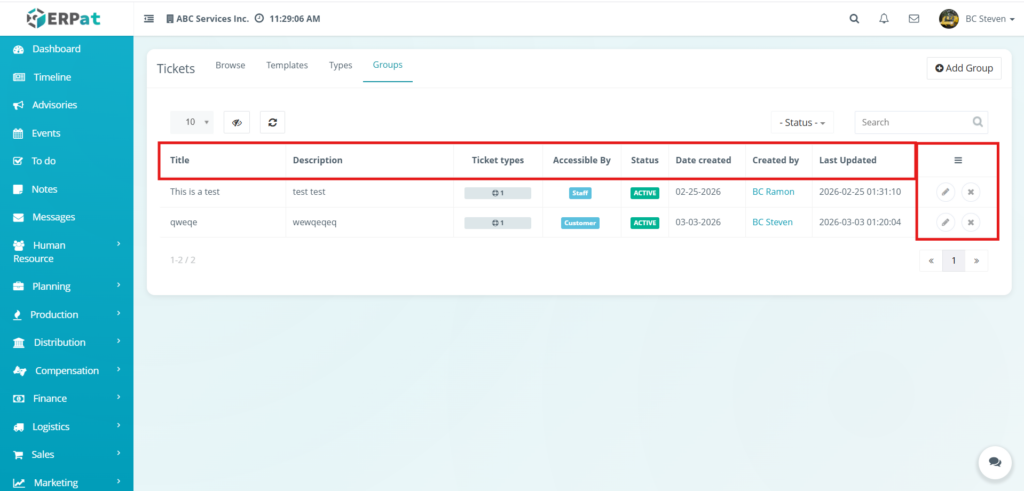
Display the Following Details:
- Title – The unique name assigned to the ticket group for identification (e.g., “This is a test”).
- Description – A brief summary or explanation of the group’s specific purpose or scope.
- Ticket types – A numerical indicator showing the quantity of specific work classifications linked to the group.
- Accessible By – Permission status indicating if the group is restricted to internal Staff or open to the Customer.
- Status – A visual indicator (e.g., ACTIVE) showing if the group is currently operational within the system.
- Date created – The original timestamp when the group was established (e.g., 02-25-2026).
- Created by – The name of the user profile responsible for adding the group to the system.
- Last Updated – The most recent date and time any modifications were made to the group record.
- Actions – Controls to Edit (pencil icon) or Delete (x icon) specific group definitions.
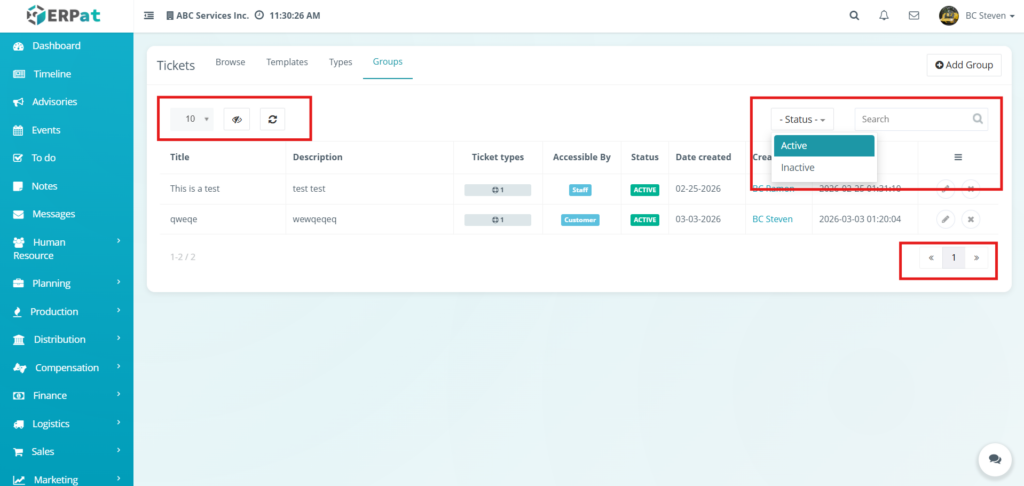
Page Controls and Tools
- Status – A dropdown menu used to narrow the listing by filtering for Active or Inactive groups.
- Search Bar – Facilitates quick lookup of specific groups by entering titles or keyword descriptions.
- Row Display – Adjusts the number of records visible per page to manage data density.
- Visibility Control – Toggles the visibility of specific columns within the groups table.
- Refresh – Manually updates the live data feed to show the most recent group configurations.
- Pagination – Navigation controls used to browse through multiple pages of group records.
Steps for Adding a Ticket Group #
STEPS
- Click the Add Group button located at the top-right of the Groups page.
- Fill in the required fields in the modal:
- Title – Enter the name of the new ticket group.
- Description – Provide a brief summary of the group’s purpose or scope.
- Ticket types – Select the specific work classifications to be included in this group from the dropdown menu.
- Accessible By – Choose the permission level (e.g., Staff or Customer) to determine who can view tickets in this group.
- Status – Set the group as Active or Inactive.
- Click Save to create the ticket group.
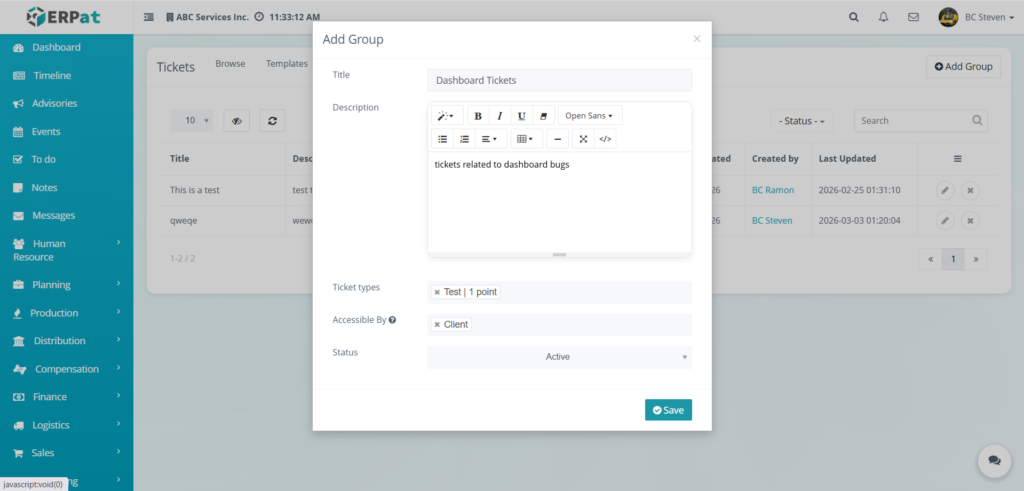
Result #
The saved ticket group will now list in the tickets group page
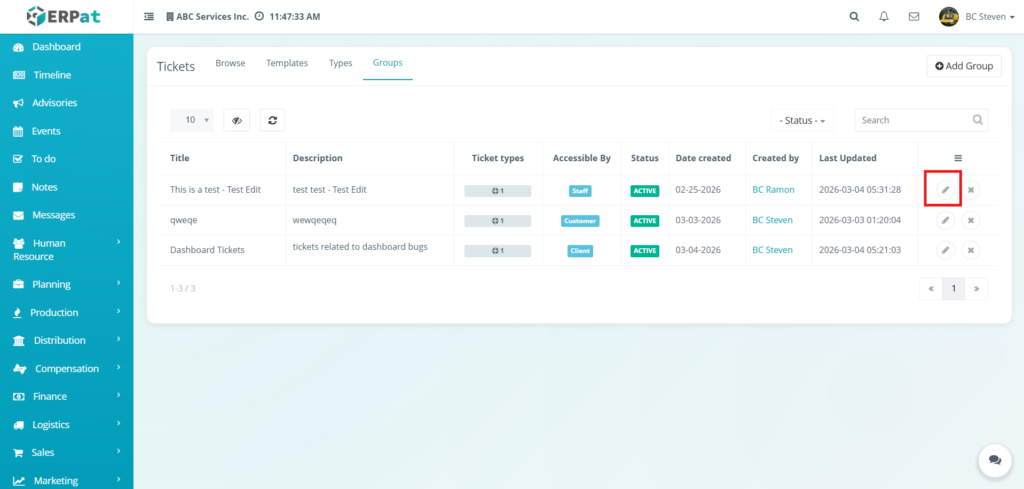
Steps for Editing a Ticket Group #
STEPS
- Locate the ticket group from the groups listing table.
- Click the Edit (✎) icon under the Actions column for the specific group you wish to modify.
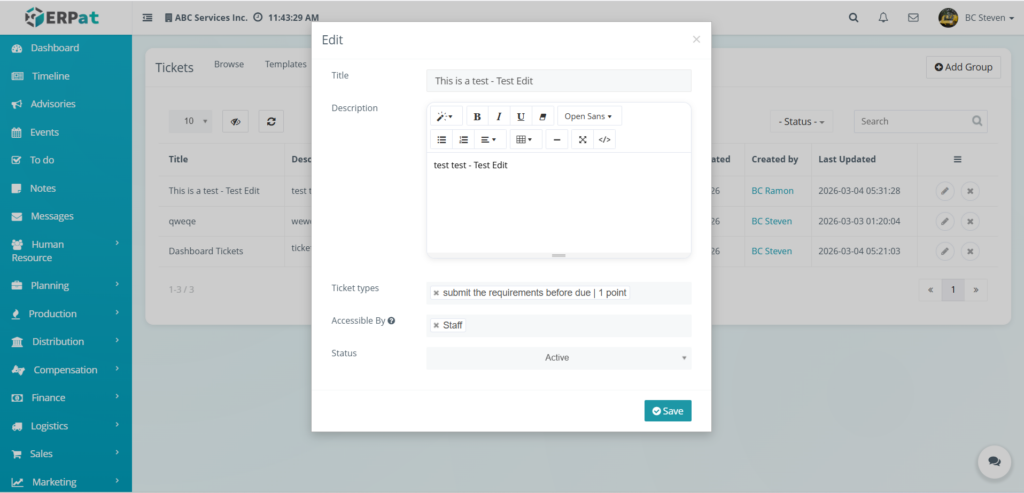
- Update the necessary fields in the modal:
- Title – Modify the name of the ticket group.
- Description – Use the text editor to update the group’s purpose or scope.
- Ticket types – Add or remove work classifications (e.g., submit the requirements before due | 1 point) linked to this group.
- Accessible By – Adjust whether the group is restricted to Staff or visible to the Client.
- Status – Update the group to Active or Inactive.
- Click Save to apply the changes to the group record.
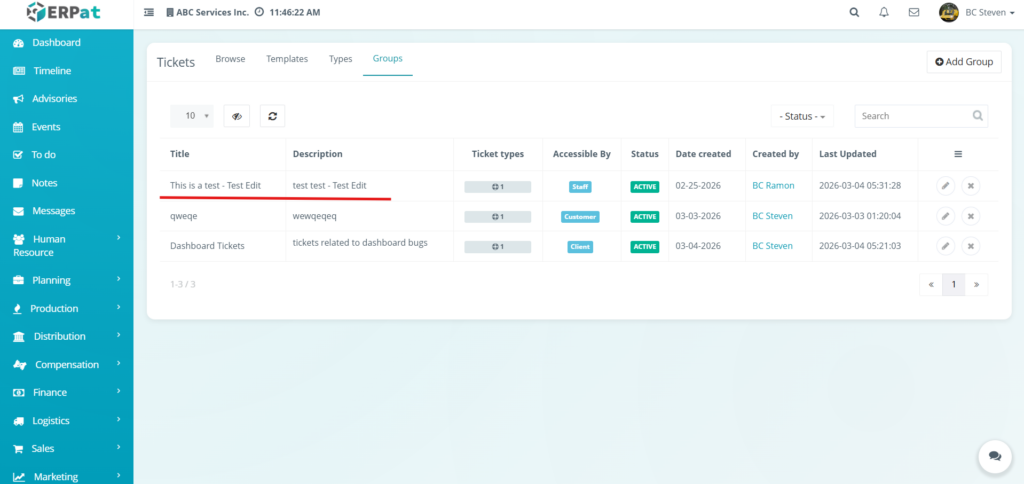
Result #
The updated saved ticket group will now list in the tickets group page
Steps for Deleting a Ticket Group #
STEPS
- Locate the ticket from the template listing table.
- Click the X icon under the Actions column.
- Delete confirmation modal will apply after clicking the X icon
- Click the delete button to properly delete it
Result #
Best Practices #
- Standardize Naming Conventions – Use clear and consistent naming for ticket groups to ensure they are easily identifiable by all team members.
- Verify Accessibility Levels – Double-check the “Accessible By” settings to prevent sensitive internal data from being visible to external clients.
- Maintain Accurate Descriptions – Provide detailed summaries for each group so users understand which ticket types belong in each category.
- Audit Active Ticket Types – Regularly review the work classifications linked to each group to ensure they align with current project requirements.
- Avoid Deleting Active Groups – Instead of deleting, set a group to “Inactive” if it is no longer needed to preserve historical ticket data for reporting.
Audit & Logs #
All create, update, and delete actions for tickets are logged for audit and compliance purposes within the ERPat System.
Last Updated: [March 6, 2026] Module Owner: Help Center IS – ERPat System


