Overview #
The Stores Module acts as a centralized repository for managing physical or digital store locations and their associated data. It is designed to categorize and track store entries, providing clear visibility into store statuses, classifications, and ownership within the Sales department.
By organizing store information into distinct categories, this module ensures that assets are easily searchable and manageable, facilitating better coordination of store-level operations and reporting.
Key Features #
- Structured Entry Management: Create and maintain detailed records for every store, including visual assets and descriptions.
- Categorization System: Use specialized store categories to group entries for easier filtering and organization.
- Visual Status Indicators: Instantly identify operational status through clear Active or Inactive labels.
- Data Export: Export store lists directly to Excel for external auditing and inventory management.
- Creation Tracking: Monitor who created or updated specific store entries with integrated timestamps.
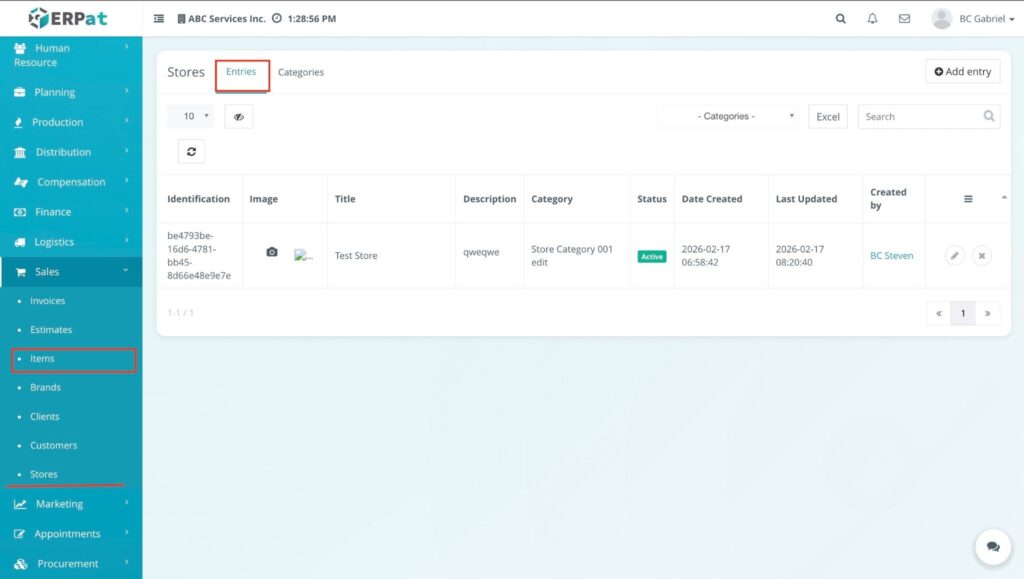
Accessing the Stores Module #
- Log in to the system.
- Navigate to Sales from the main sidebar.
- Select Stores.
- By default, you will be directed to the Entries tab, displaying the main store listing page.
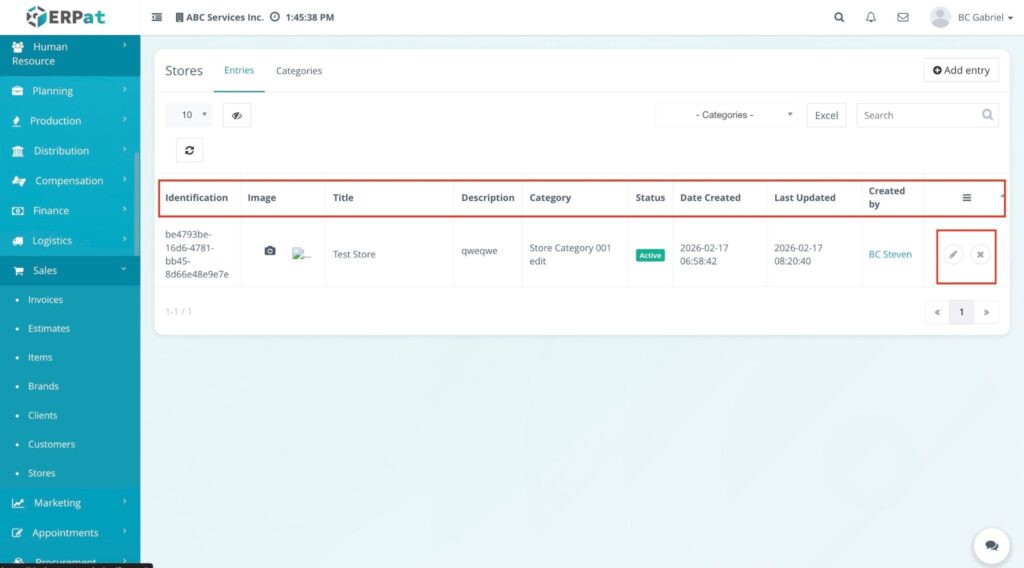
Stores Listing Page #
The listing page provides a comprehensive view of all store records with the following information:
- Identification – The unique system ID assigned to each store entry.
- Image – A thumbnail preview of the store’s profile or representative image.
- Title – The official name or title of the store.
- Description – A brief summary or additional details regarding the store.
- Category – The assigned classification (e.g., Store Category 001).
- Status – Indicates operational activity (Active or Inactive).
- Date Created / Last Updated – Timestamps for record entry and the most recent modification.
- Created by – The name of the user who added the store to the system.
- Actions – Quick controls for managing records:
- Edit (🖊️ icon): Modify store details and settings.
- Delete (✖ icon): Remove the store entry from the database.
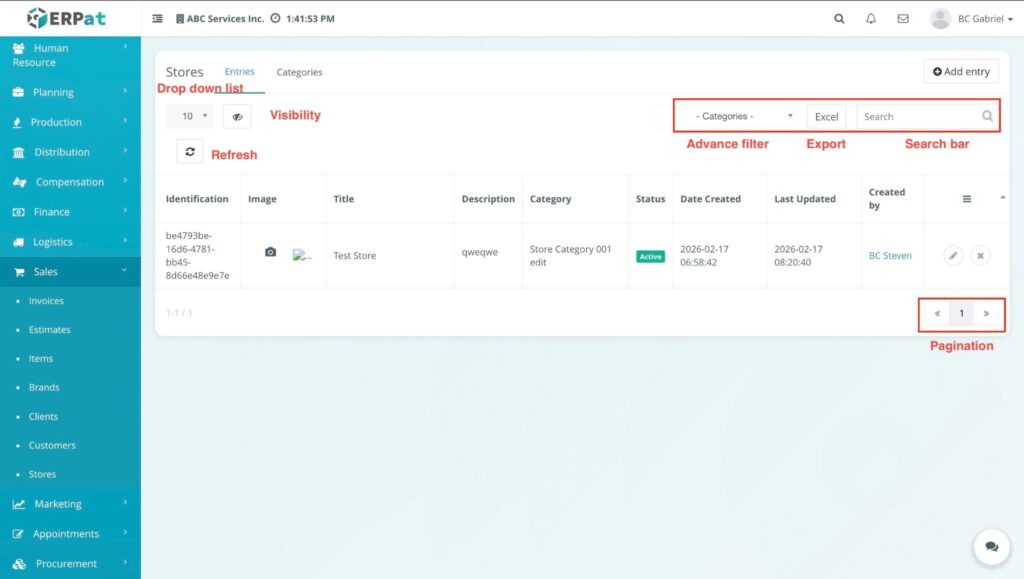
Additional Controls #
- Advanced Filters: A dropdown menu to sift through records based on specific Categories.
- Search bar: Real-time lookup by store Title, Description, or Identification ID.
- Export (Excel): Download the current list view as a spreadsheet.
- Visibility (👁️ icon): Toggle specific columns to customize your table view.
- Refresh (🔄 icon): Reload the table to reflect the most recent data updates.
- Record Count Dropdown: Choose how many records to display per page (e.g., 10, 25, 50, 100).
- Pagination: Use the arrow controls at the bottom right to navigate through the store database.
Steps for Adding a Store Entry #
STEPS #
- Navigate to the Sales sidebar and select Stores.
- Ensure the Entries tab is selected at the top of the dashboard.
- Click the + Add entry button located at the top-right of the page.
- Fill in the required fields in the Add entry modal:
- Category: Select the appropriate store category from the dropdown menu.
- Title: Enter the official name for the new store entry.
- Description: Use the text editor to provide a detailed summary or notes.
- Click the Save button to add the new entry.
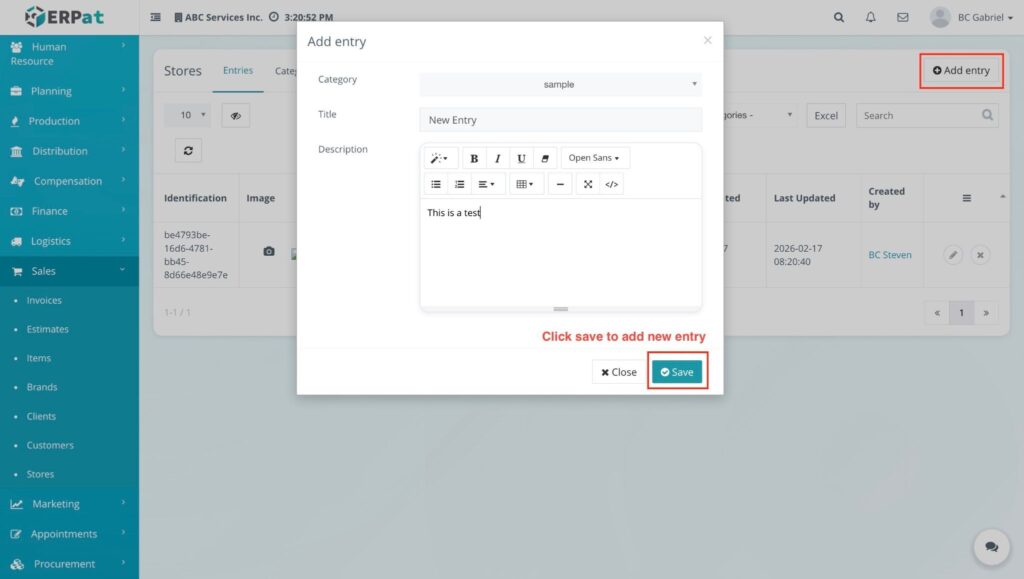
RESULT #
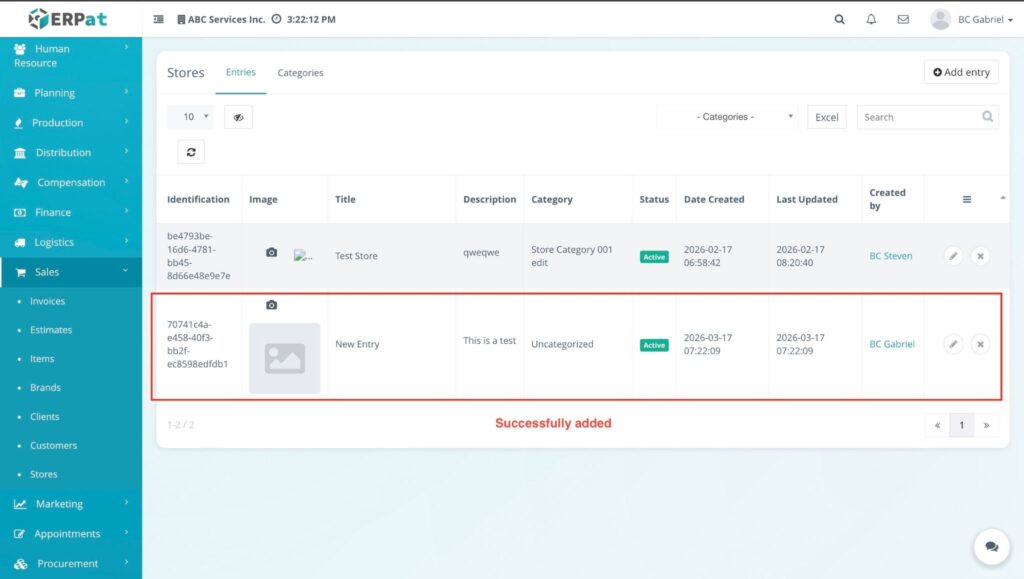
The modal closes, and the new store entry is immediately added to the listing table.
Steps for Uploading a Store Image #
STEPS #
- Navigate to the Sales sidebar and select Stores.
- Ensure the Entries tab is selected to view the store listing.
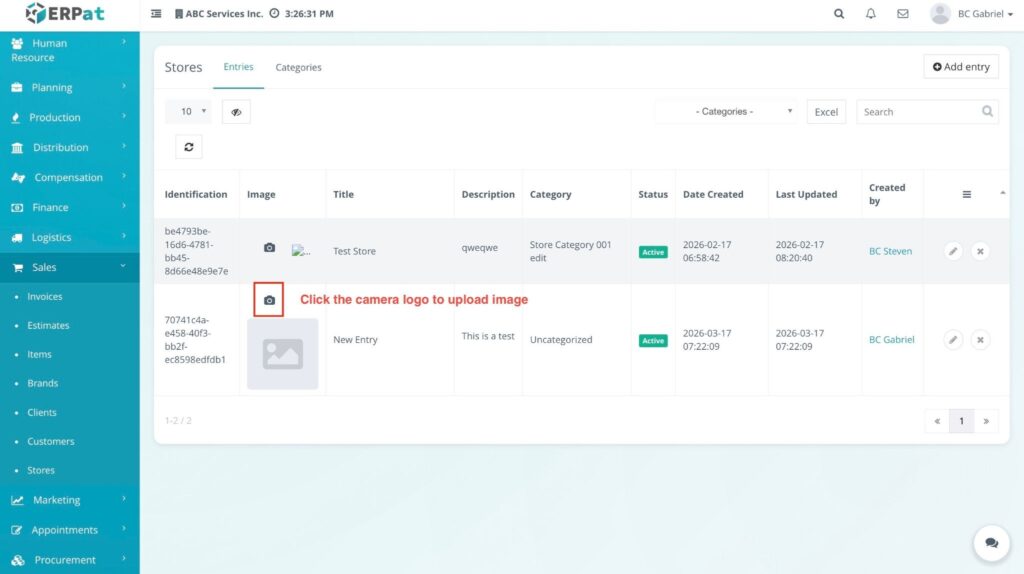
- Locate the specific store entry and find the Image column.
- Click the Camera (📷) icon located next to the image placeholder.
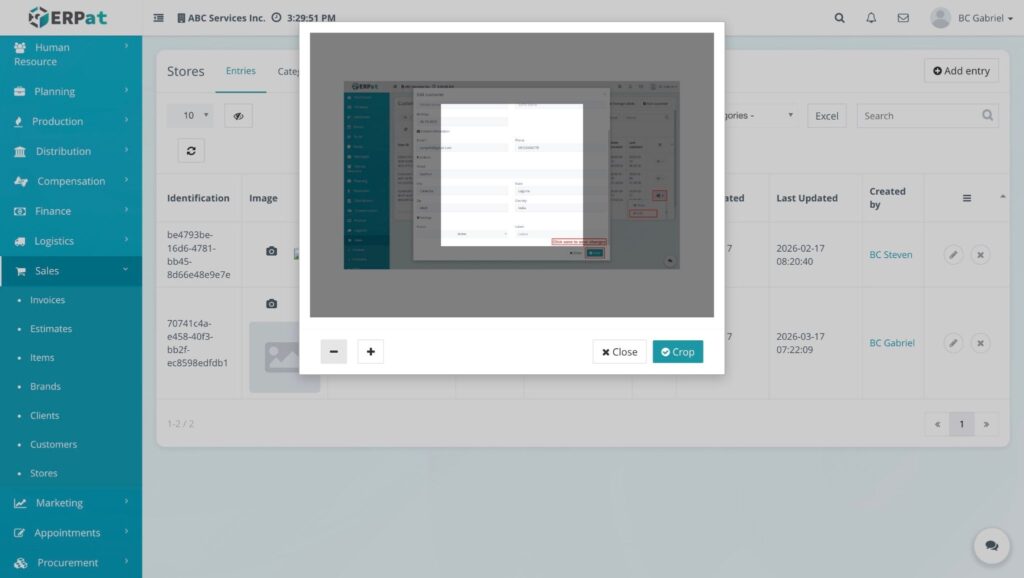
- In the upload window, select the image file from your device.
- Once the image is selected, use the Crop tool to adjust the photo:
- Click the Plus (+) or Minus (-) buttons to zoom in or out.
- Click the Crop button to finalize and save the image.
RESULT #
The modal closes, and the uploaded image thumbnail is immediately displayed in the Image column for that store entry.
Steps for Editing a Store Entry #
STEPS #
- Navigate to the Sales sidebar and select Stores.
- Ensure the Entries tab is selected to view the listing.
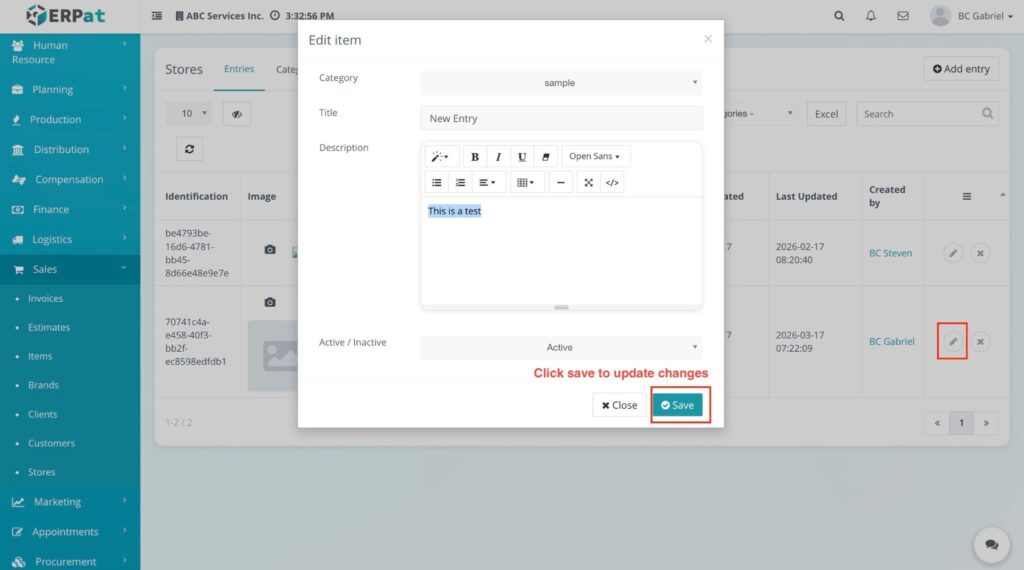
- Locate the specific store entry and click the Edit (🖊️) pencil icon under the Actions column.
- Modify the necessary information in the Edit item modal:
- Category: Update the store classification using the dropdown.
- Title: Change the name of the store entry.
- Description: Edit the text content using the provided formatting tools.
- Active / Inactive: Toggle the operational status of the store.
- Click the Save button to apply the updates.
RESULT #
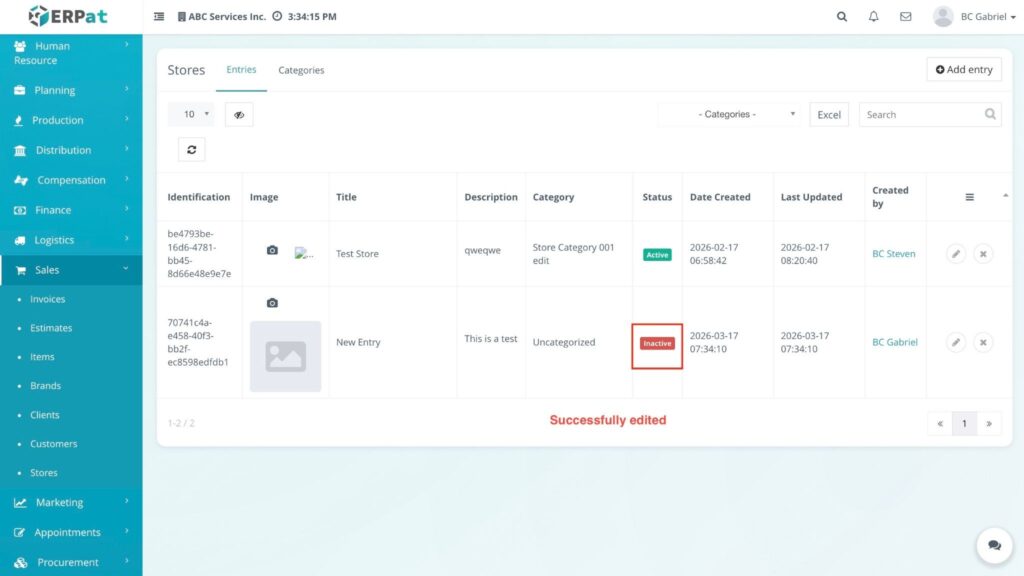
The modal closes, and the updated details (such as a status change to Inactive) are immediately reflected in the listing table.
Steps for Deleting a Store Entry #
STEPS #
- Navigate to the Sales sidebar and select Stores.
- Ensure the Entries tab is selected to view the listing.
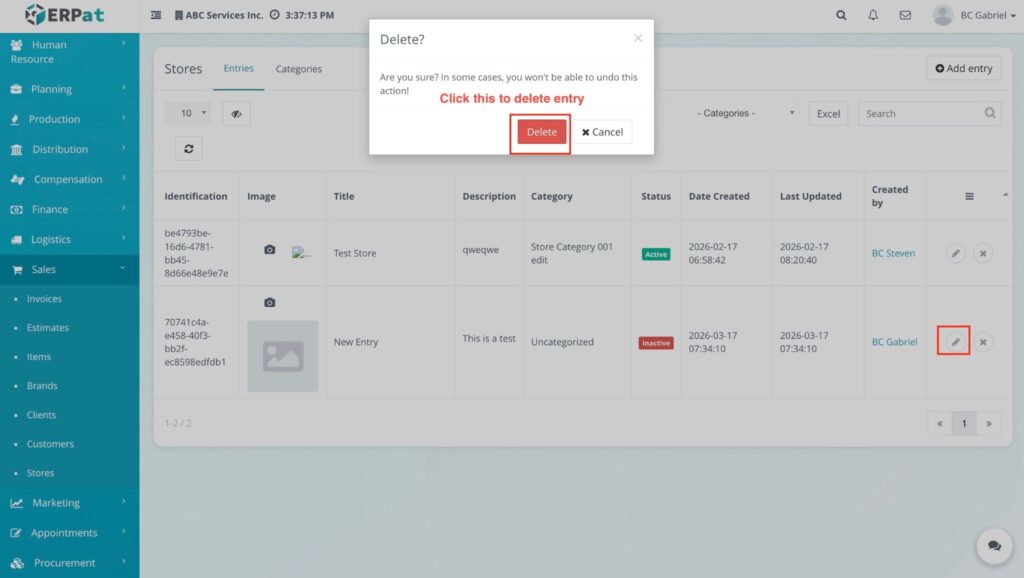
- Locate the specific store entry you wish to remove and click the Delete (✖) icon under the Actions column.
- When the Delete? confirmation modal appears, click the Delete button to confirm.
RESULT #
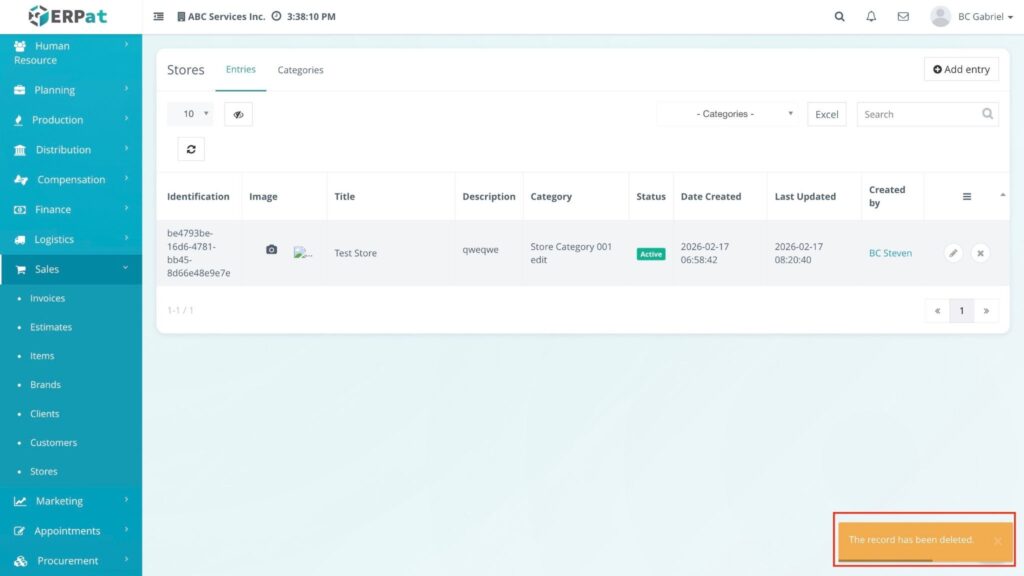
The entry is removed from the listing, and a notification stating “The record has been deleted.” will appear at the bottom right of the screen.
Accessing Store Categories #
STEPS #
- Navigate to the Sales sidebar and select Stores.
- Click the Categories tab located at the top of the dashboard (beside the Entries tab).
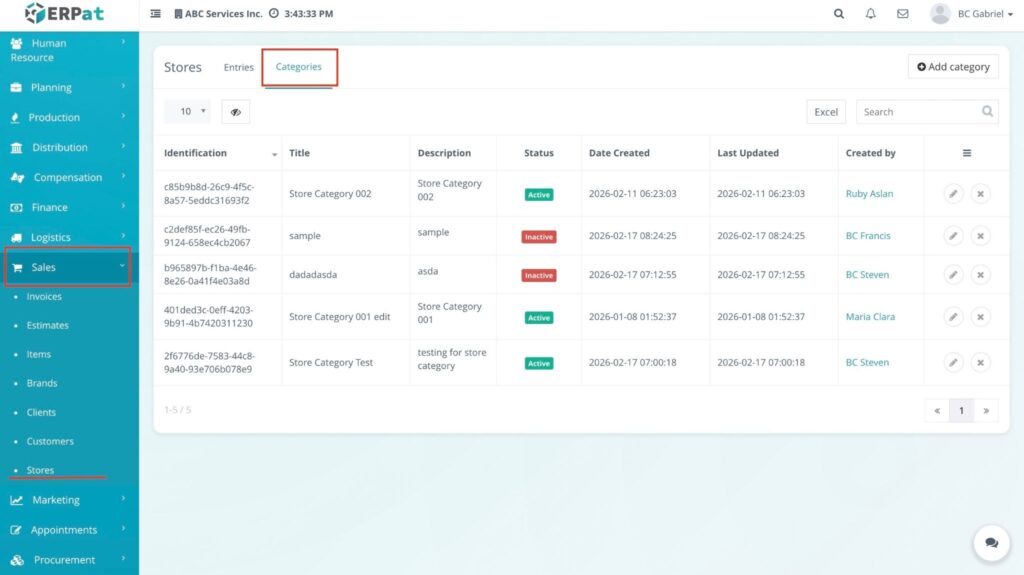
RESULT #
The Category listing page is displayed, showing all established store classifications, their descriptions, and current status.
Steps for Adding a New Category #
STEPS #
- From the Categories tab, click the + Add category button at the top-right.
- In the Add category modal, enter the following:
- Title: The name of the new category.
- Description: A brief summary explaining what this category covers.
- Click the Save button.
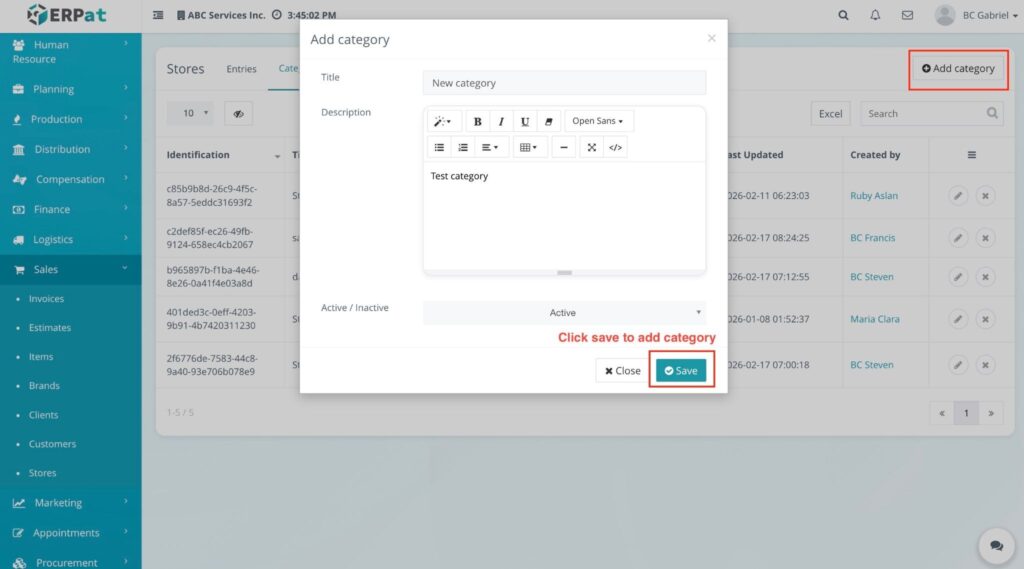
RESULT #
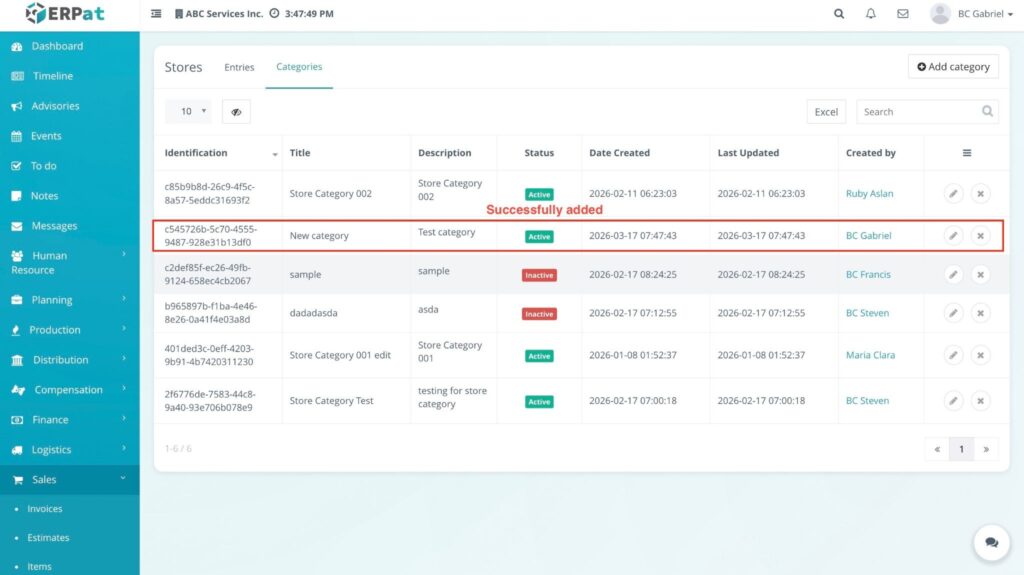
The new category is added to the list and becomes available for selection when creating or editing store entries.
Steps for Editing a Category #
STEPS #
- Within the Categories tab, locate the specific category you wish to update.
- Click the Edit (🖊️) pencil icon under the Actions column.
- Modify the Title or Description in the Edit category modal.
- If needed, toggle the status between Active and Inactive.
- Click the Save button to apply changes.
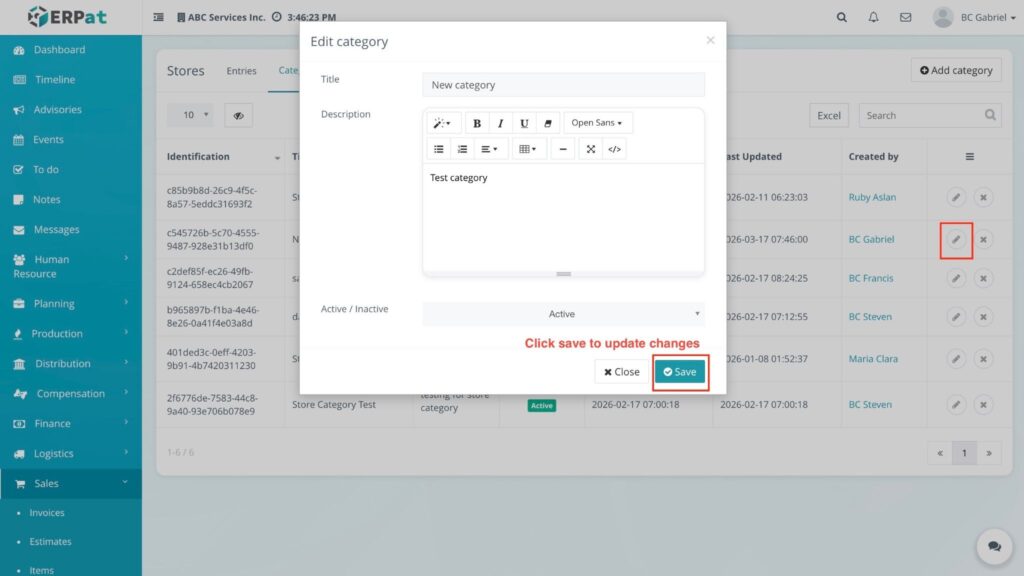
RESULT
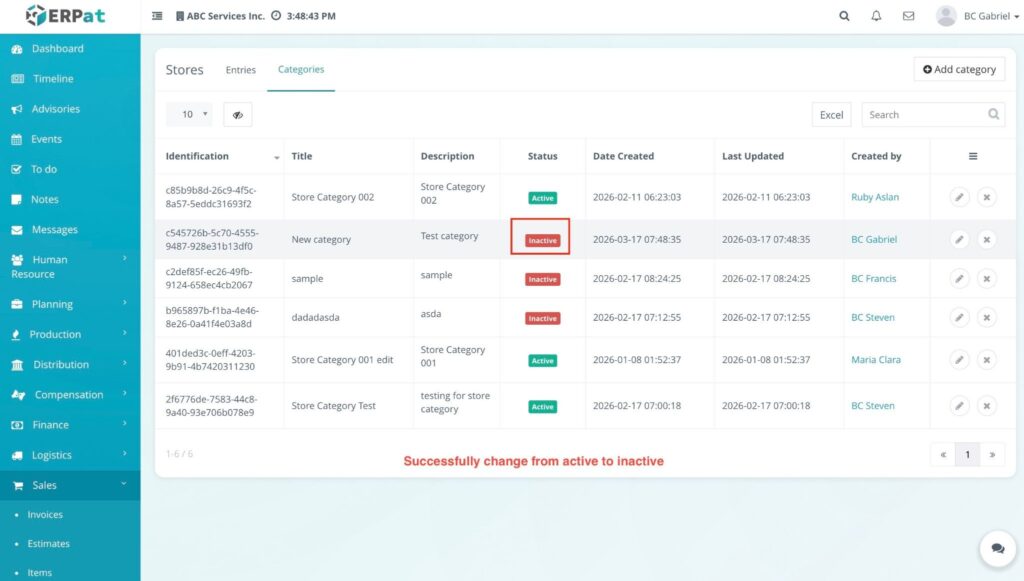
The updated category details are saved, and a notification confirming the update will appear.
Steps for Deleting a Category #
STEPS #
- Within the Categories tab, locate the category you want to remove.
- Click the Delete (✖) icon under the Actions column.
- Click the Delete button in the confirmation modal to finalize.
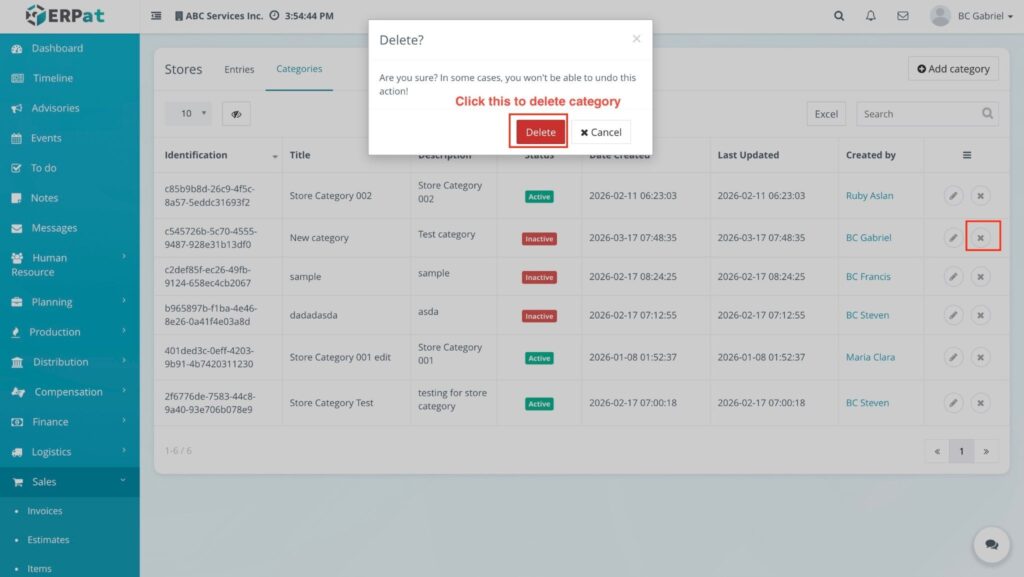
RESULT #
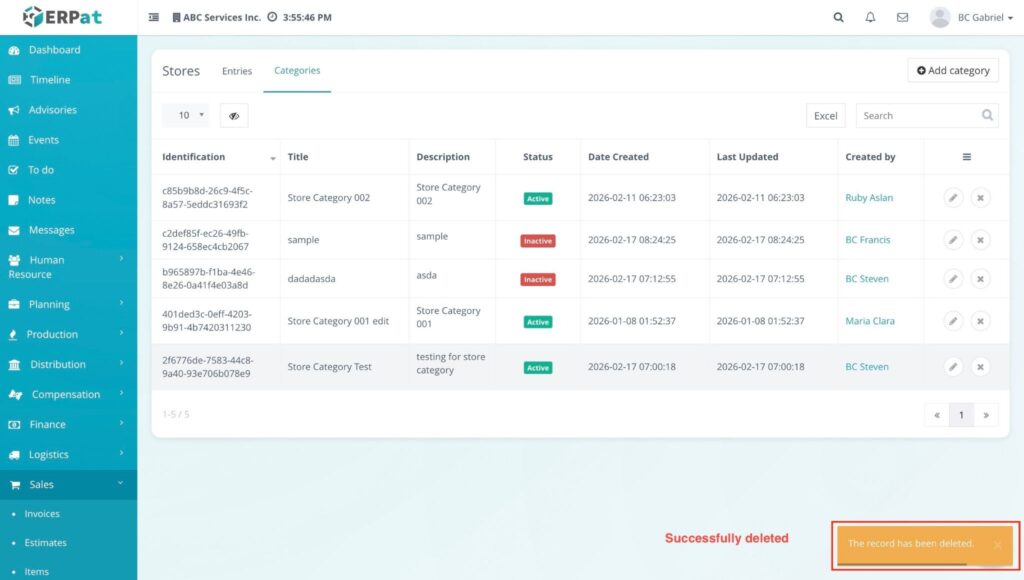
The category is removed from the system, and a deletion confirmation message is displayed.
Permissions and Access Control #
- Sales or Admin Roles: Only authorized Sales or Admin roles can add, edit, or delete store entries and categories.
- Support or Accounting Roles: View-only access may be granted to support or accounting roles for monitoring store data and associated records.
Best Practices #
- Visual Clarity: Always upload high-quality images to ensure store locations are easily identifiable in the listing.
- Category Accuracy: Use the Categories tab to organize stores into specific groups for better filtering and reporting.
- Data Backup: Regularly export store data as an Excel backup for external reporting and inventory planning.
Audit & Logs #
All creation, update, and deletion actions for store records and categories are logged for audit and compliance purposes within the ERPat System.
Last Updated: [March 17, 2026] Module Owner: Sales – ERPat System


