The Tasks Module is used to create, manage, assign, and monitor work items within projects. It enables teams and administrators to organize activities, set deadlines, track progress, and collaborate efficiently.
Each task record contains essential details such as title, schedule, assignees, milestones, and status, ensuring transparency and accountability across departments and projects.
Key Features #
- Centralized task management
- Task assignment to users or teams
- Deadline and milestone tracking
- List and Kanban view options
- Project-based organization
- Status monitoring (e.g., Pending, In Progress, Completed)
- Search, filter, and export capabilities
- Secure role-based access control
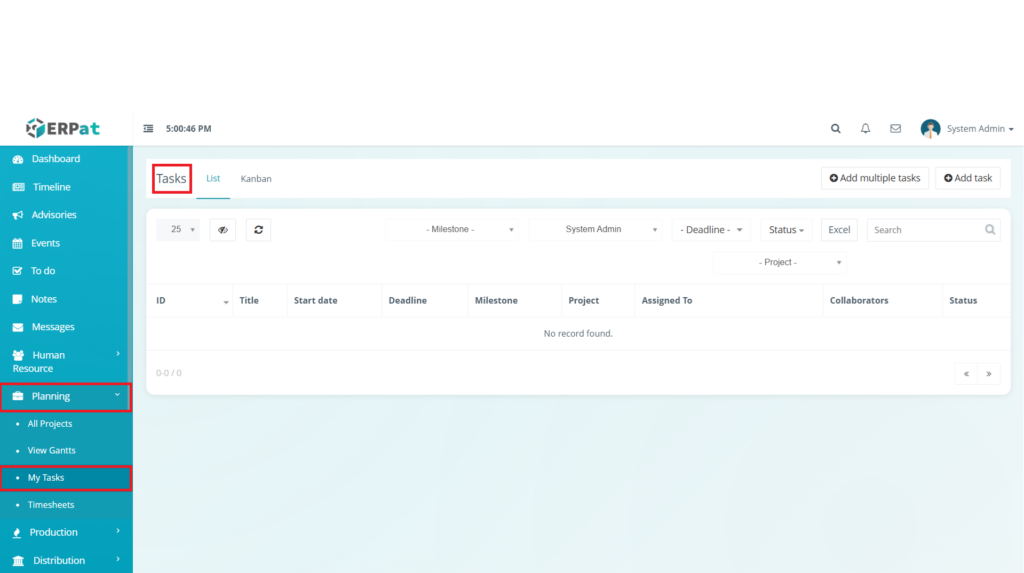
Accessing the Tasks Module #
- Log in to the ERPat System.
- From the main sidebar, navigate to Planning.
- Select My Tasks or All Projects.
- Click Tasks.
- You will be directed to the Tasks Listing Page displaying all available task records.
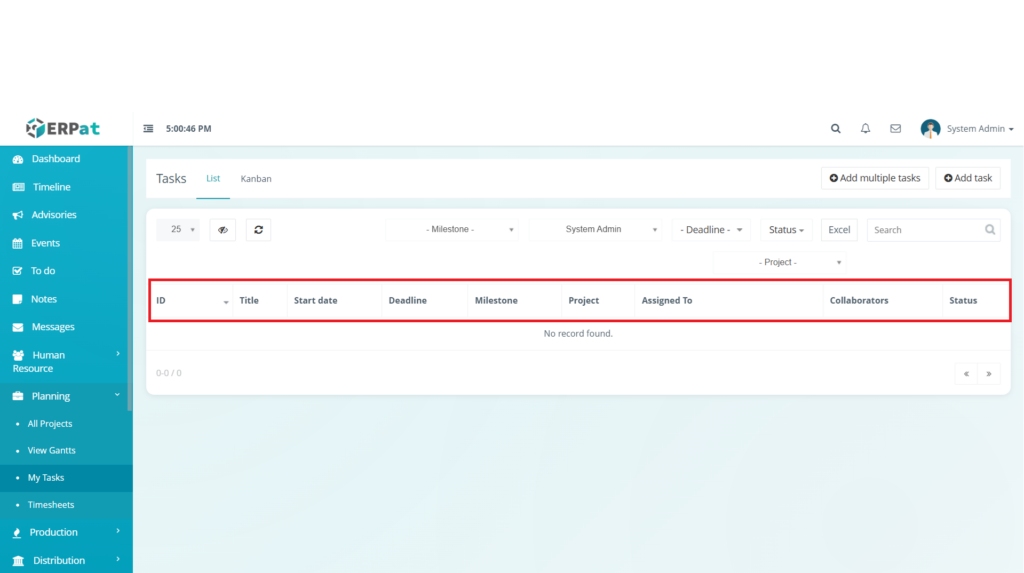
Tasks Listing Page #
The listing page provides a tabular overview of all tasks with the following information:
- ID – Unique task identifier
- Title – Name or summary of the task
- Start Date – Task commencement date
- Deadline – Target completion date
- Milestone – Associated project milestone
- Project – Linked project name
- Assigned To – Responsible user
- Collaborators – Supporting team members
- Status – Current progress state
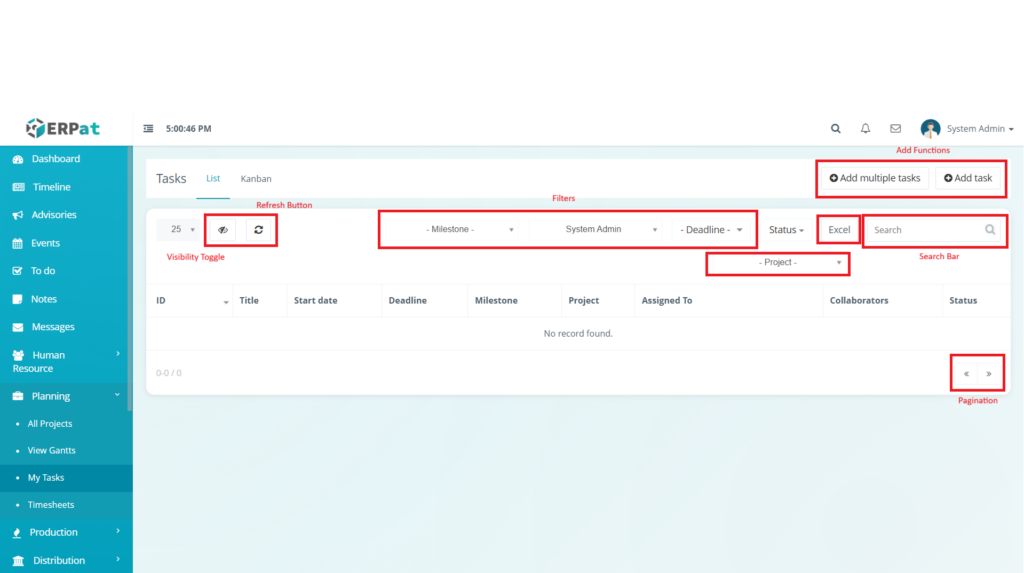
Additional Controls #
- Add Task – Create a single new task
- Add Multiple Tasks – Bulk creation of tasks
- Search Bar – Quick keyword lookup
- Filters – Milestone, Project, Deadline, Status, and Assignee
- Excel Export – Download task data
- Refresh Button – Reload the list
- Visibility Toggle – Show / Hide columns
- Pagination – Navigate large datasets
Steps for Adding a New Task #
STEPS #
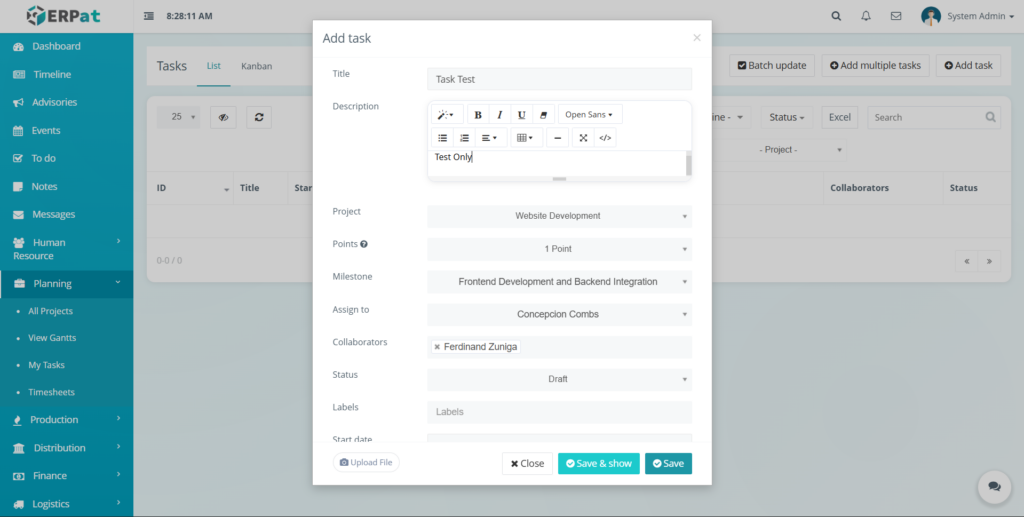
- Click the Add Task button located at the top-right of the page.
- Fill in the required fields:
- Title
- Description
- Project
- Project
- Points
- Milestone
- Assign To
- Collaborators
- Status
- Labels
- Start Date
- Deadline
- Recurring (Optional)
- Review the entered information.
- Click Save to create the task.
Result #
The newly created task will appear in the listing and become visible in the Kanban board and project views.
Steps for Adding Multiple Tasks (Bulk) #
STEPS #
- Click Add Multiple Tasks.
- Enter task details in the provided bulk form or upload template.
- Validate entries.
- Click Save/Import
Result #
Multiple tasks will be generated simultaneously and listed automatically.
Steps for Editing a Task #
STEPS #
- Locate the task from the listing or search field.
- Click the Edit icon under the Actions column or open the task record.
- Update necessary fields.
- Click Save.
Notes #
- Changes reflect immediately across linked projects.
- Assigned users will see updates in real time.
Steps to Delete a Task #
STEPS #
- Locate the task to be removed.
- Click the Delete icon.
- Confirm the deletion prompt.
Warning #
Deleting a task permanently removes it from reports and project timelines unless audit recovery is enabled.
Search and Filtering #
- Use the Search Field to find tasks by title or keyword.
- Apply dropdown filters:
- Milestone
- Project
- Deadline
- Status
- Assignee
- Combine filters for more precise results.
- Pagination controls assist navigation through large task volumes.
Status Indicators #
Common status labels includes:
- Pending – Task created but not started
- In Progress – Work is ongoing
- Completed – Task finished
- On Hold – Temporarily paused
- Cancelled – No longer active
Permissions and Access Control #
- Admin / Project Manager – Full create, edit, delete, and assign rights
- Team Member – View and update assigned tasks
- Viewer / Supervisor – Read-only access
Permissions are governed by system role configuration.
Best Practices #
- Use clear and descriptive task titles.
- Assign realistic deadlines.
- Link tasks to correct projects and milestones.
- Regularly update task statuses.
- Avoid deleting completed tasks needed for reporting.
Audit & Logs #
All task creation, modification, and deletion activities are recorded in the system audit logs to maintain accountability and compliance within the ERPat System.
Last Updated: [February 12, 2026]
Module Owner: Planning – ERPat System


