Overview #
The Leave Module is used to manage employee leave applications, approvals, leave credits, and leave types within the ERPat System. It enables employees to request leave while allowing HR and administrators to monitor balances, approvals, and compliance with company policies.
This module integrates with Employee, Attendance, Payroll, and Reporting modules.
Key Features #
- Employee leave application management
- Approval workflow for supervisors and HR
- Leave credit tracking and adjustments
- Support for paid and unpaid leave types
- Leave status monitoring
- Leave reports and export functionality
- Audit trail for leave transactions
Accessing the Leaves Module #
- Log in to the ERPat System.
- Navigate to Human Resource from the main sidebar.
- Select Leaves.
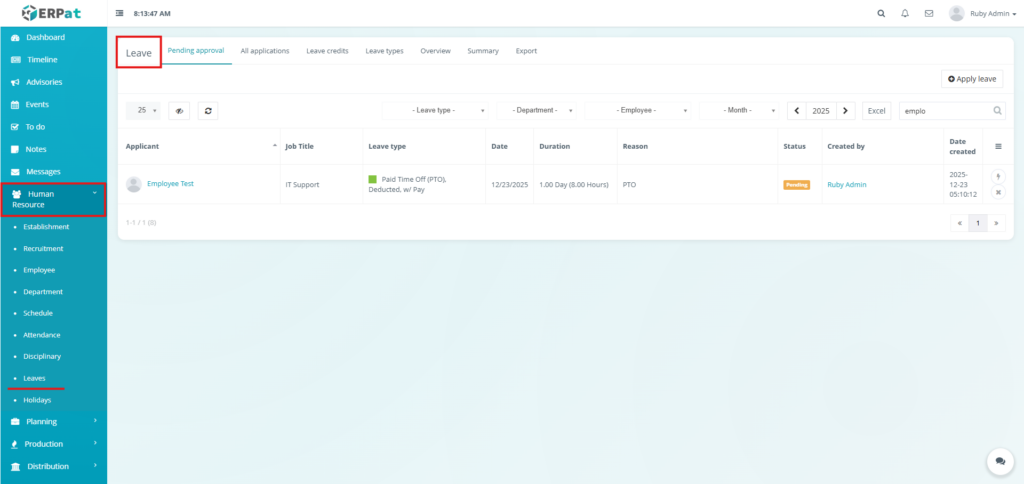
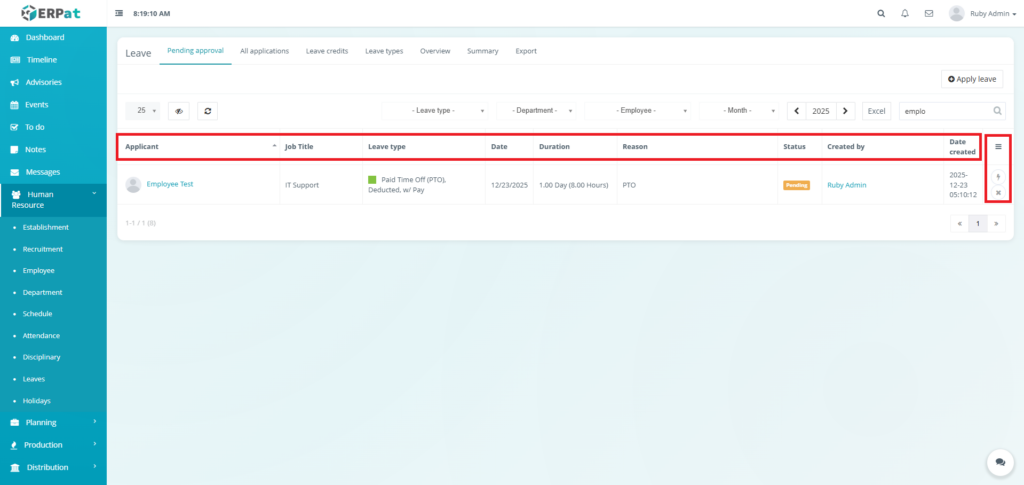
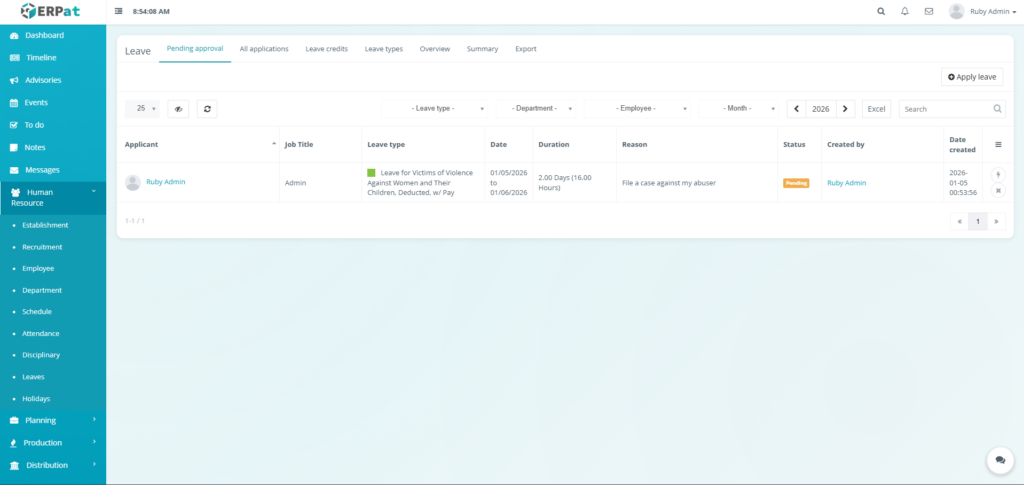
Leave – Listing Page #
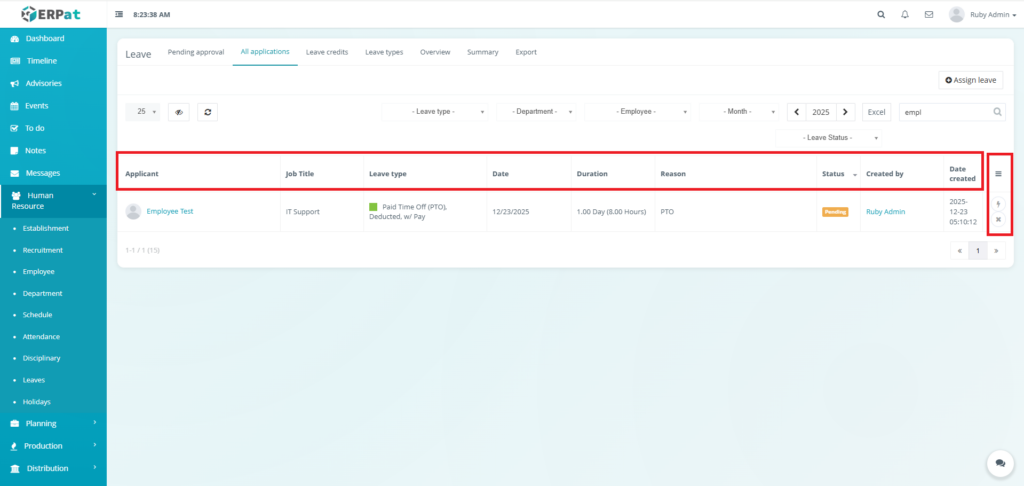
The All Applications page displays all leave requests with the following columns:
- Applicant – Employee name
- Job Title – Employee position
- Leave Type – Type of leave applied
- Date – Leave duration
- Duration – Number of days or hours
- Reason – Reason for leave
- Status – Pending, Approved, Rejected
- Created By – Request originator
- Date Created – Submission timestamp
- Actions – Approve, Reject, or View
Leave – Listing Page Tabs #
- Pending approval – Displays Leave Applications with Pending Status
- All applications – Displays Leave Applications regardless of Status
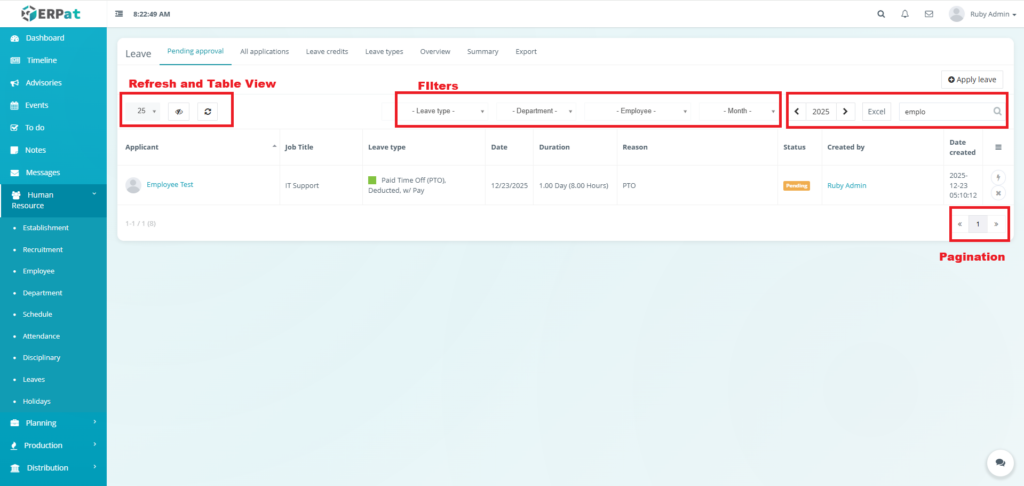
Page Controls and Tools #
- Filters
- Leave Type
- Department
- Employee
- Month
- Search bar
- Year selector
- Export to Excel
- Pagination
- Refresh and Table View controls
Leaves – Pending Approval Apply Leave #
STEPS #
- Click the Apply leave button.
- Fill the necessary fields.
- Click Apply leave button to submit the leave application.
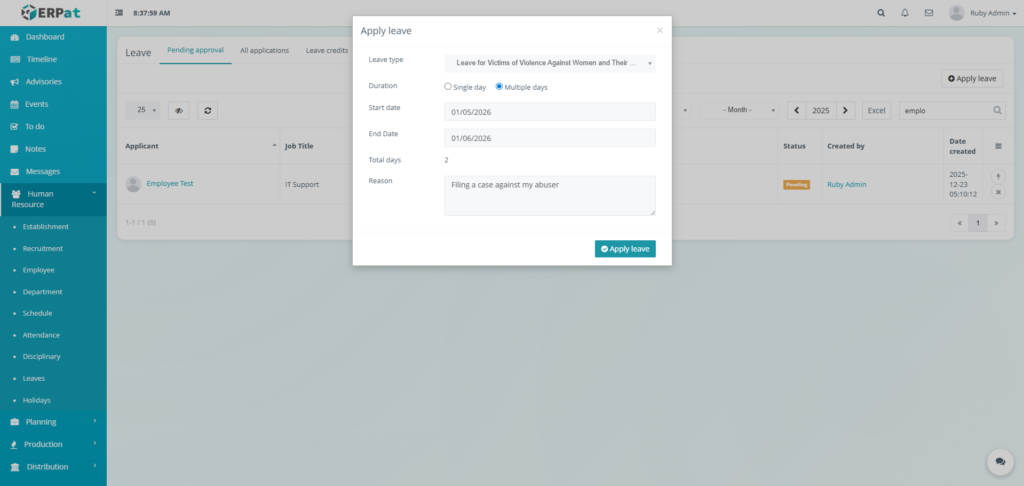
Result #
Leaves – All applications Assign Leave #
STEPS #
- Click the Assign leave button.
- Fill the necessary fields.
- Click Assign leave button to submit the leave application.
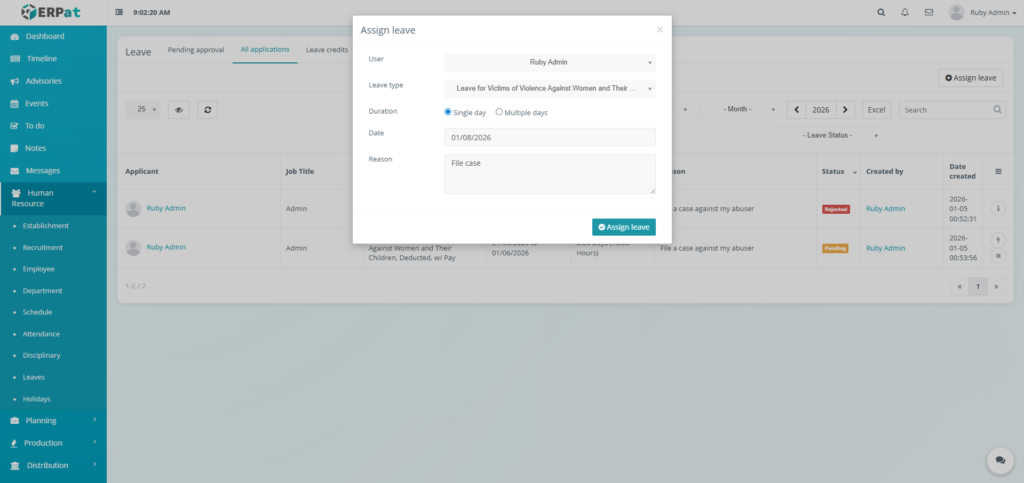
Result #
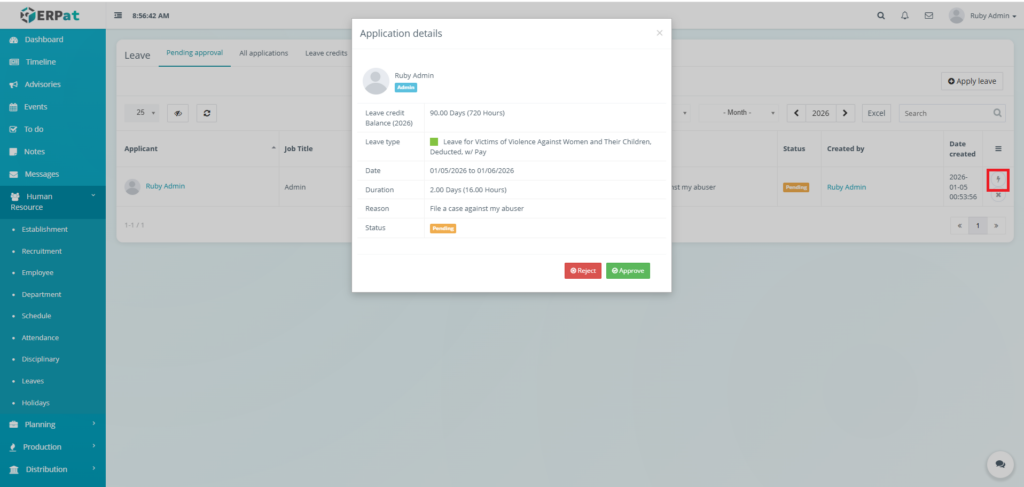
Leaves – View Application (Approve or Reject Application) #
- Click the lightning icon in the actions.
- Click the Reject or Approve button to Approve or Reject the leave application.
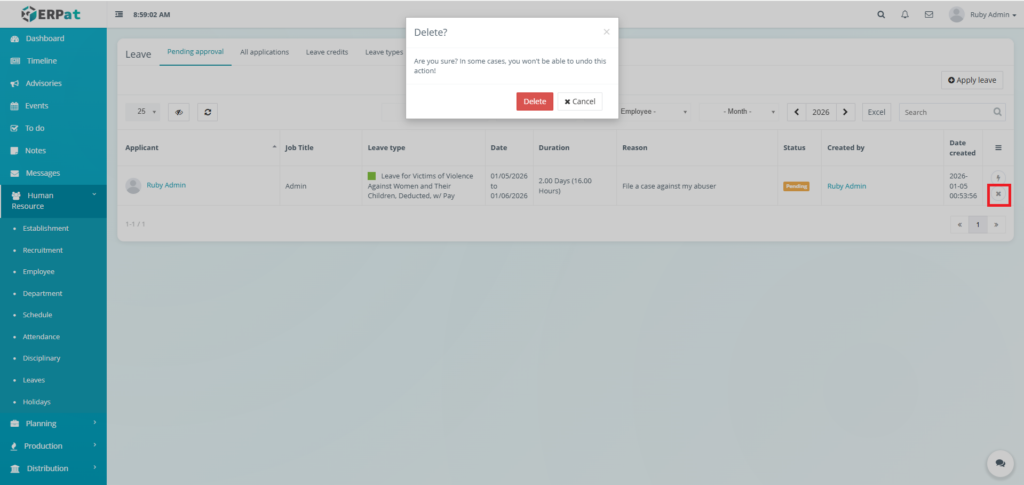
Leaves – Delete Application #
- Click the x icon in the actions.
- Click the Delete button to remove the leave application.
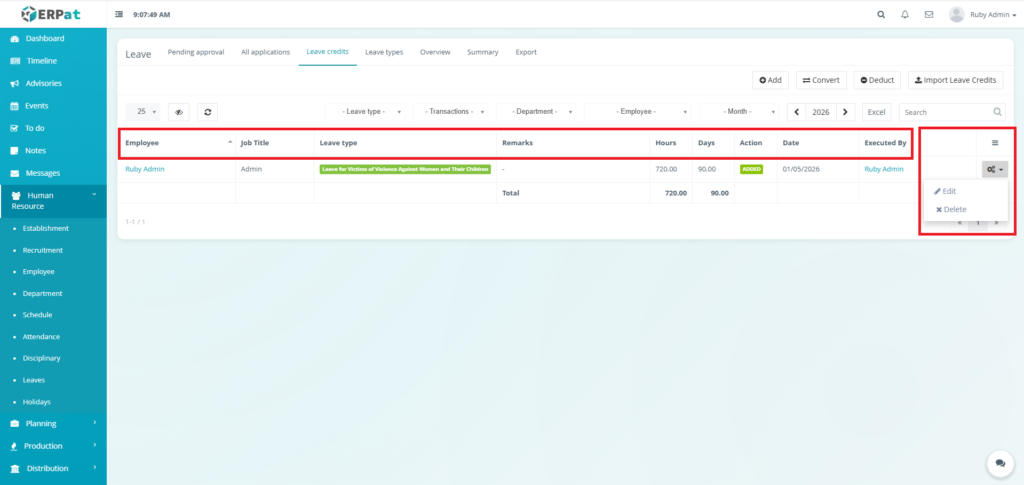
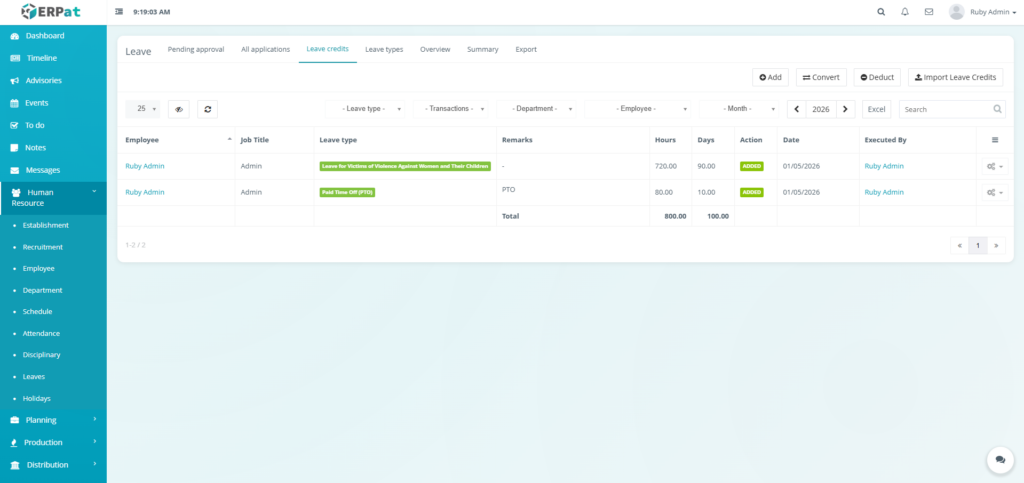
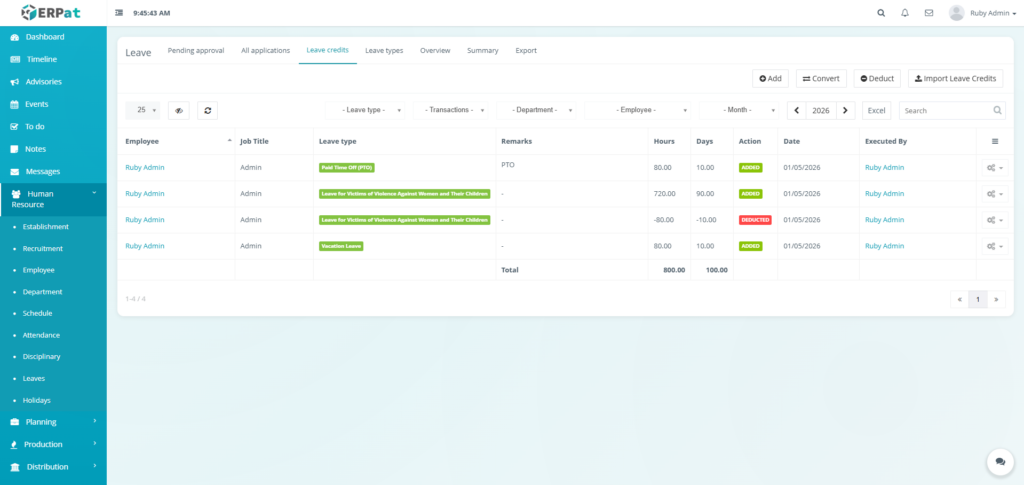
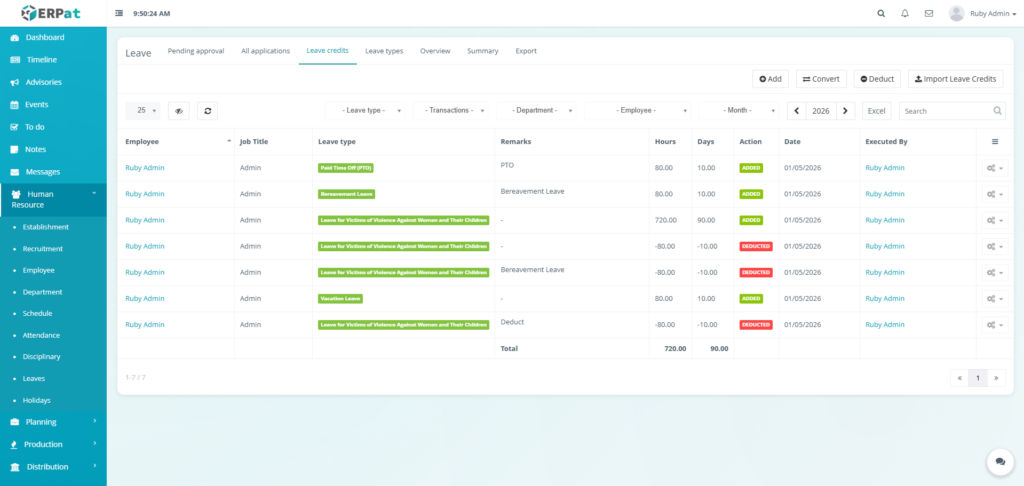
Leave Credits Listing Page #
The Leave Credits listing page provides an overview of leave credit balances and transactions with the following columns:
- Employee – Name of the employee
- Job Title – Employee position
- Leave Type – Type of leave credited or deducted
- Remarks – Notes or transaction reference
- Hours – Total credited or deducted hours
- Days – Equivalent number of leave days
- Action – Indicates whether credits were Added or Deducted
- Date – Date the transaction was executed
- Executed By – User who processed the transaction
- Actions – Edit or Delete controls
Page Controls and Tools #
- Filters
- Leave Type
- Transactions
- Department
- Employee
- Month
- Utilities
- Search bar
- Year selector
- Export to Excel
- Pagination
- Refresh and Table View controls

Leave Credits Add Credits #
STEPS #
- Click the Add button.
- Fill the necessary fields,
- Click the Save button to add the leave credits.
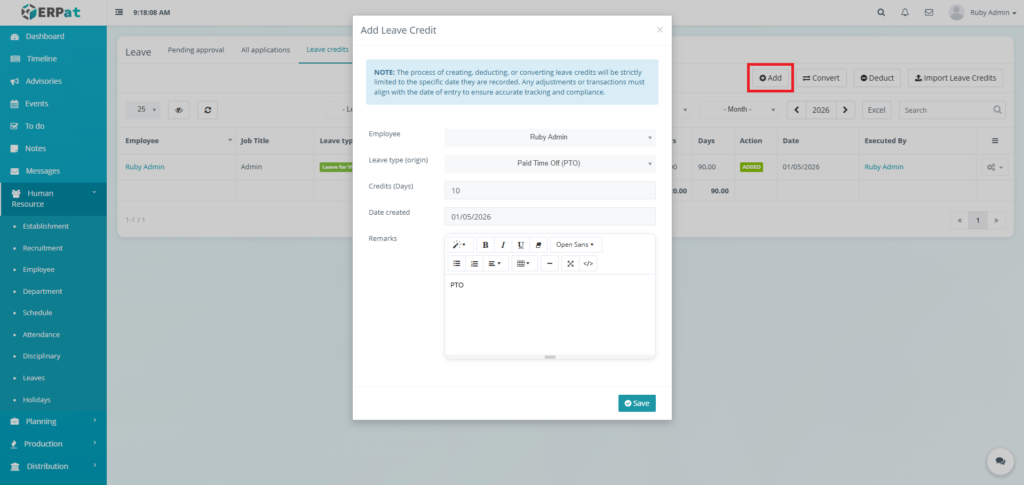
Result #
Leave Credits Convert Credits #
STEPS #
- Click the Convert button.
- Fill the necessary fields,
- Click the Save button to convert the leave credits..
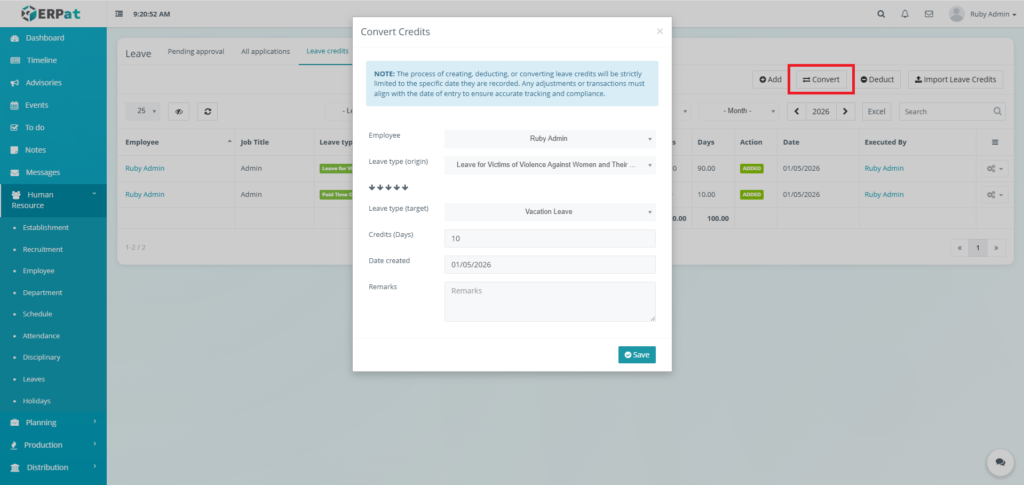
Result #
Leave Credits Deduct Credits #
STEPS #
- Click the Deduct button.
- Fill the necessary fields,
- Click the Save button to deduct the leave credits..
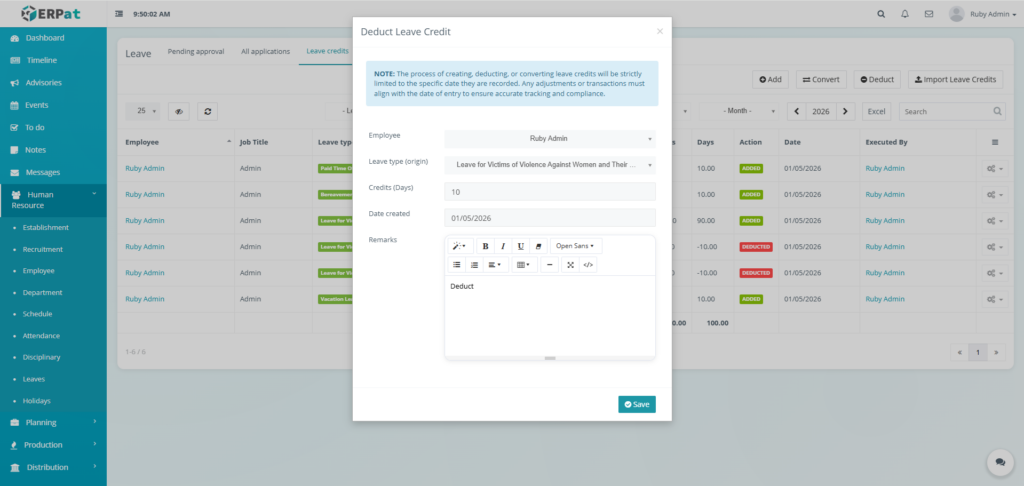
Result #
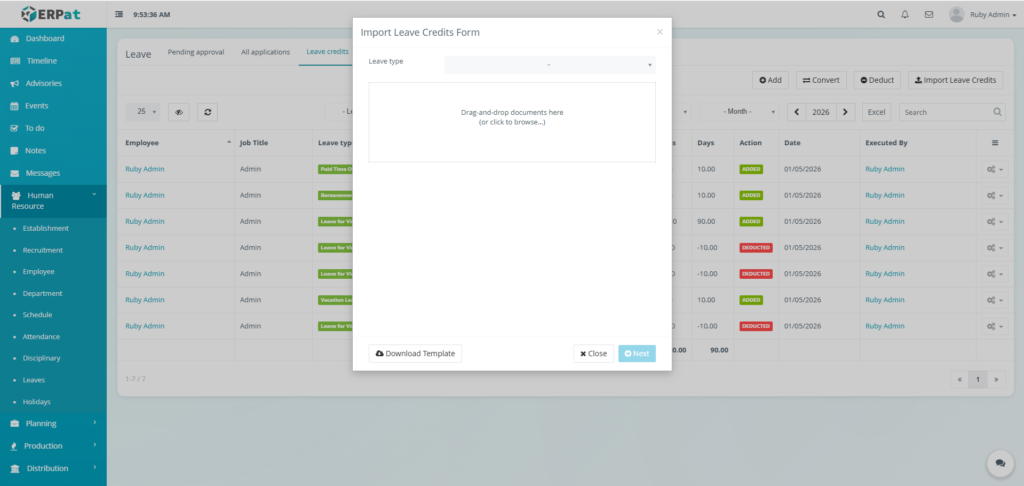
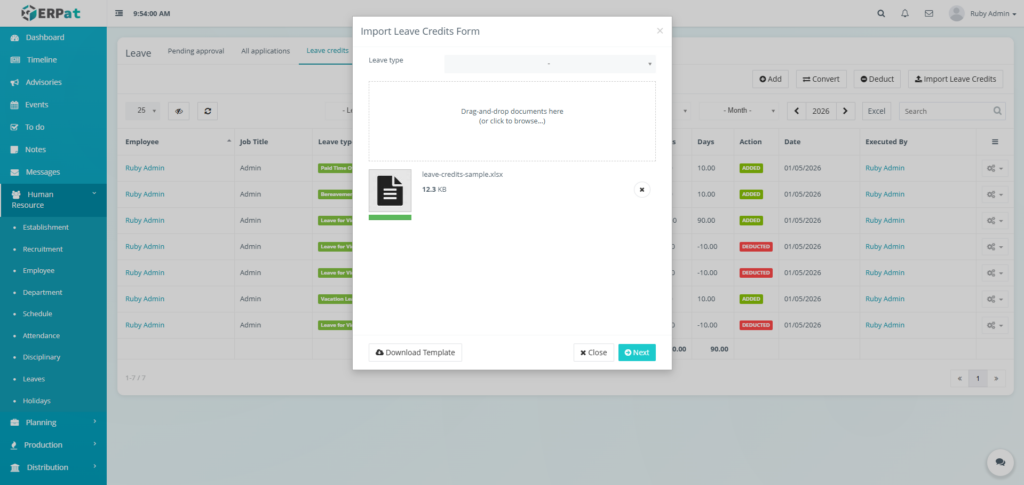
Leave Credits Import Leave Credits #
STEPS #
- Click the Import Leave Credits button.
- Click the Download Template button.
- Fill the template with the required information.
- Select Leave Type.
- Upload the filled template and click Next button to add the leave credits.
Permissions and Access Control #
- Employees can submit leave applications.
- HR Admin and authorized roles can approve, reject, and manage leave credits.
- Only authorized roles can modify leave types and credits.
Best Practices #
- Define leave types clearly
- Monitor leave balances regularly
- Avoid manual credit adjustments without documentation
- Ensure approvals follow company policy
Audit & Logs #
All leave-related actions (application, approval, credit adjustment) are logged for audit and compliance purposes within the ERPat System.
Last Updated: [January 05, 2026] Module Owner: Human Resource IS – ERPat System


