Overview #
The Vehicles Module under Logistics is used to manage and maintain records of all company vehicles utilized for delivery, transfer, and other logistics operations. It stores essential vehicle details such as specifications, capacity, and registration information, ensuring efficient assignment and monitoring of transport resources.
Each vehicle record contains important operational and identification data, supporting logistics coordination and resource planning.
Key Features #
- Centralized management of vehicle records
- Storage of vehicle specifications and details
- Tracking of vehicle capacity (cargo weight)
- Vehicle assignment support for delivery and transfer operations
- Image/document attachment for vehicles
- Integration with Delivery and Transfer modules
- Secure role-based access
Accessing the Vehicles Module #
- Log in to the ERPat System.
- Navigate to Logistics from the main sidebar.
- Select Vehicles.
You will be directed to the Vehicles listing page displaying all existing records.
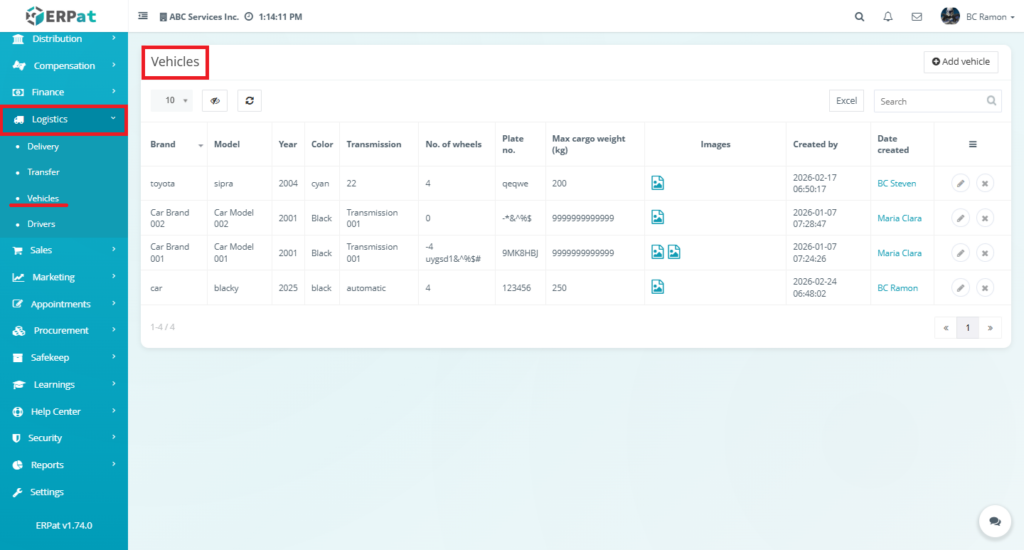
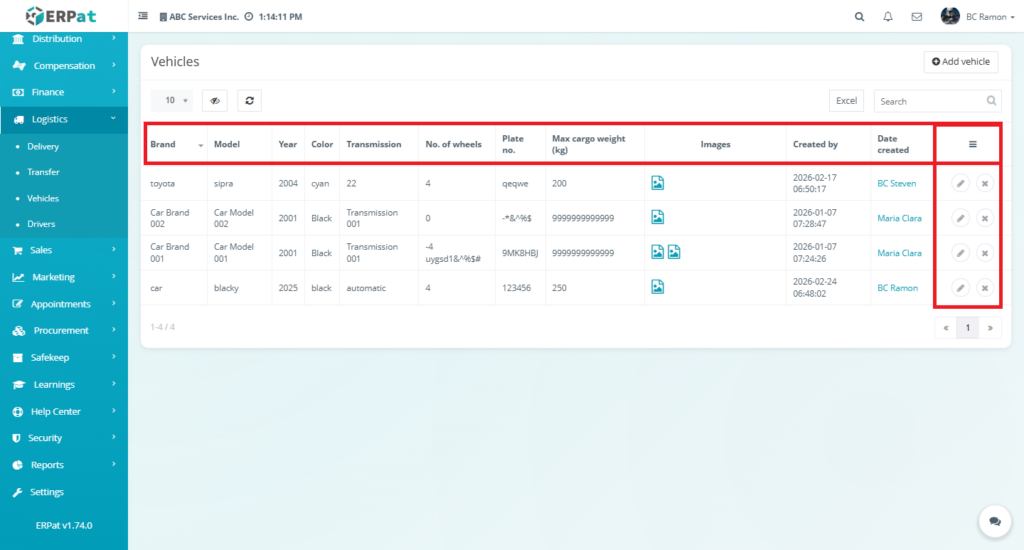
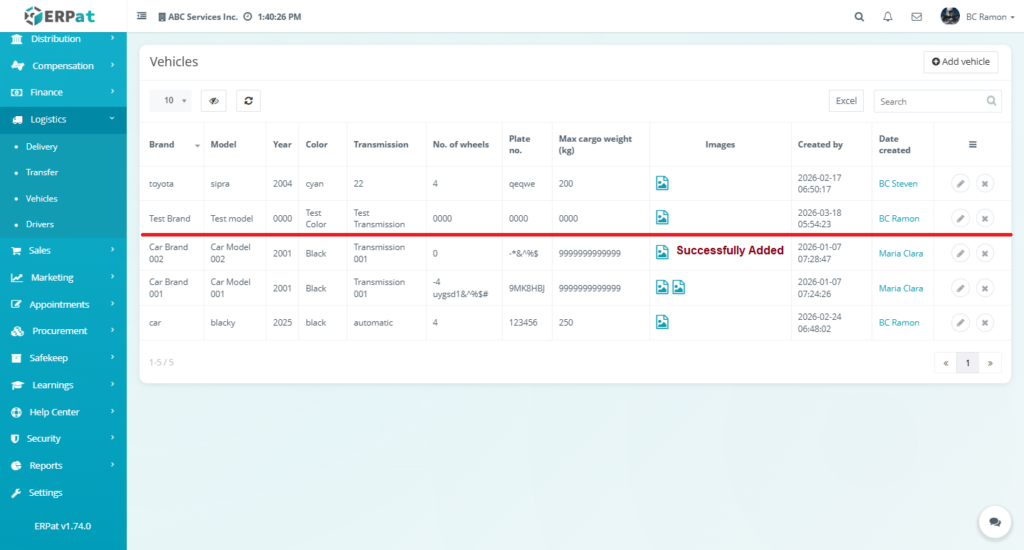
Vehicles Listing Page #
The listing page provides an overview of all vehicle records with the following information:
- Brand – Vehicle manufacturer
- Model – Vehicle model name
- Year – Year of manufacture
- Color – Vehicle color
- Transmission – Type of transmission (e.g., manual, automatic)
- No. of Wheels – Number of wheels
- Plate No. – Registered plate number
- Max Cargo Weight (kg) – Maximum load capacity
- Images – Attached vehicle images or documents
- Created By – User who created the record
- Date Created – Record creation date
- (≡) Actions – Edit or Delete controls
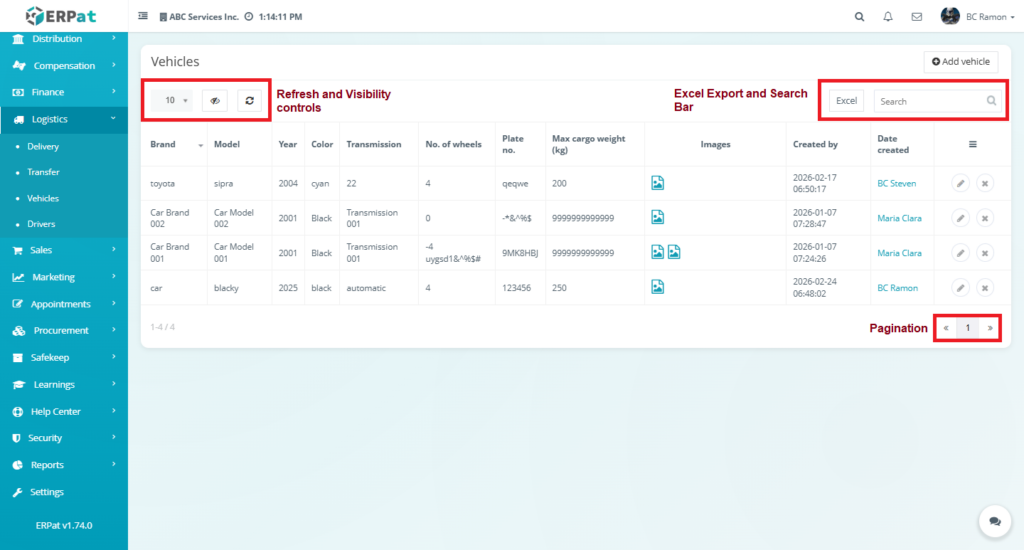
Additional controls: #
- Refresh and visibility controls
- Excel export for reporting
- Search bar for quick lookup
- Pagination for large datasets
Steps for Adding a New Vehicle #
STEPS #
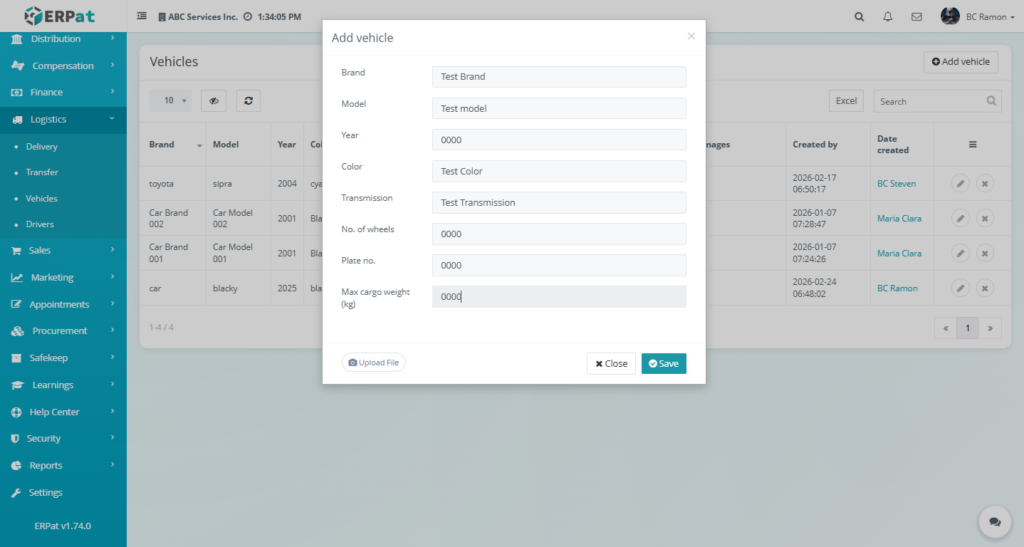
1. Click the Add Vehicle button located at the top-right of the page.
2. Fill in the required fields:
- Brand
- Model
- Year
- Color
- Transmission
- Number of Wheels
- Plate Number
- Max Cargo Weight
- Upload Images (optional)
3. Review the information for accuracy.
4. Click Save to create the vehicle record.
Result #
The newly added vehicle will appear in the listing and will be available for assignment in logistics operations.
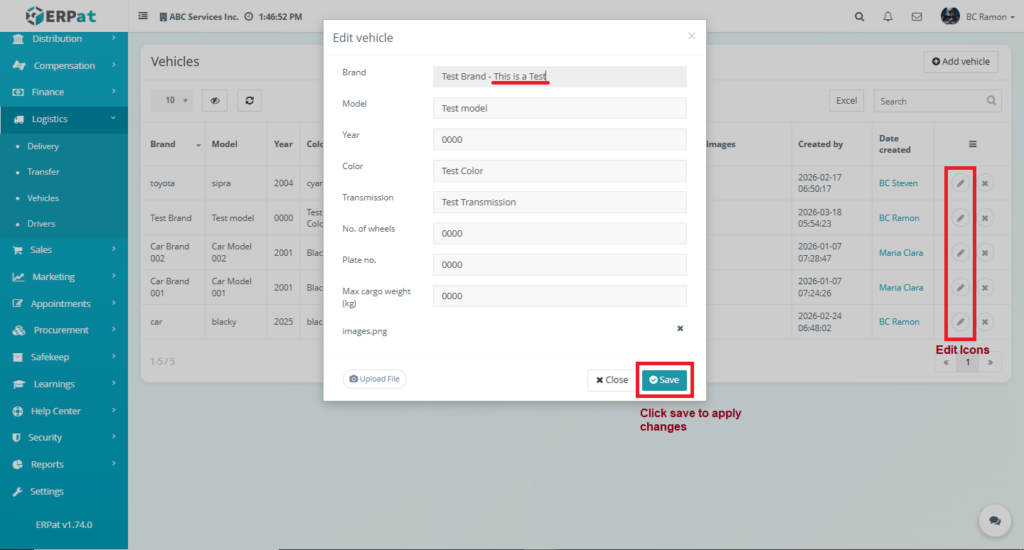
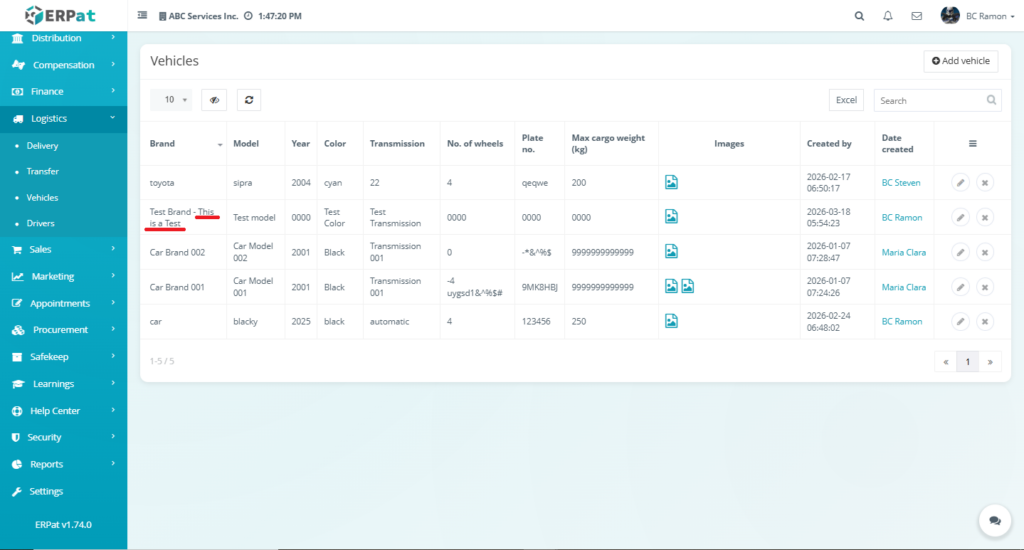
Steps for Editing a Vehicle #
STEPS #
- Locate the vehicle from the listing.
- Click the Edit (✎) icon under the Actions column.
- Update the necessary fields.
- Click Save to apply changes.
Notes #
- Changes will reflect across all linked logistics modules.
- Updated vehicle capacity may affect delivery and transfer planning.
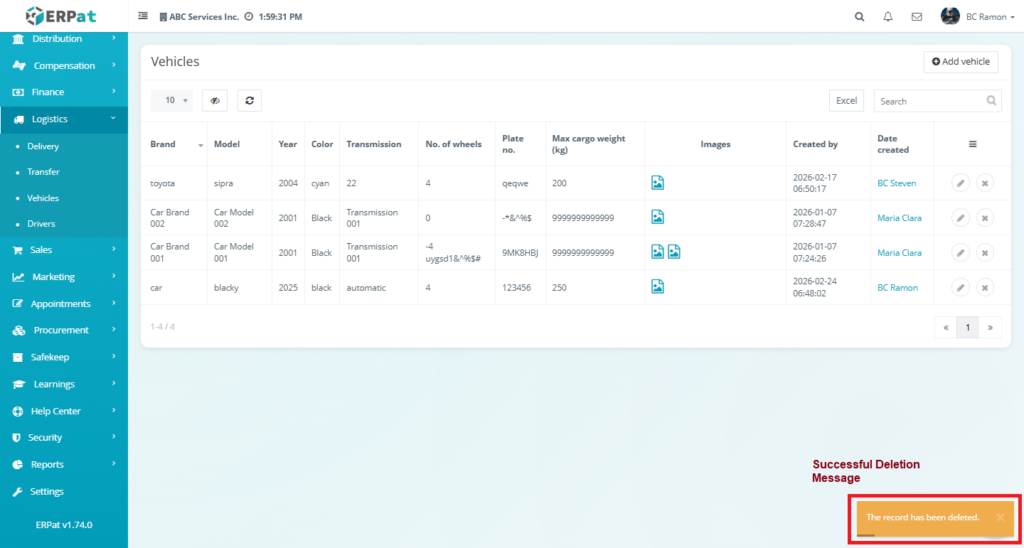
Steps to Delete a Vehicle #
STEPS #
- Locate the vehicle to be removed.
- Click the Delete (✖) icon under the Actions column.
- Confirm the deletion when prompted.

Vehicle Capacity Indicator #
Displays the maximum cargo weight (kg) of the vehicle.
Used for:
- Assigning appropriate vehicles to deliveries or transfers
- Preventing overload and ensuring compliance with transport limits
Search and Filtering #
- Use the Search field to find vehicles by brand, model, or plate number.
- Pagination controls help navigate through multiple records efficiently.
Permissions and Access Control #
- Only authorized Logistics or Admin roles can add, edit, or delete vehicle records.
- View-only access may be granted to supervisory roles.
Best Practices #
- Maintain accurate and updated vehicle details.
- Ensure plate numbers are unique and correct.
- Regularly update vehicle capacity and specifications.
- Avoid deleting vehicles currently assigned to active deliveries or transfers.
Audit & Logs #
All create, update, and delete actions for vehicle records are logged for audit and compliance purposes within the ERPat System.
Last Updated: [March 18, 2026] Module Owner: Logistics IS – ERPat System


