Overview #
The Clients Module is used to manage and maintain comprehensive records of business partners and customers. These records serve as central reference points for project management, invoicing, payment tracking, and relationship management within the Sales department.
Each client profile consolidates financial summaries and contact details, ensuring consistent data usage across financial and project-related modules.
Key Features #
- Centralized Client Directory: Comprehensive list of all active and historical clients.
- Financial Overview: Real-time tracking of invoice values, payments received, and outstanding balances.
- Organizational Tagging: Group and label clients for targeted marketing and reporting.
- Project Integration: Tracking the number of active projects linked to each client.
- Bulk Data Handling: Ability to import client lists for rapid system population.
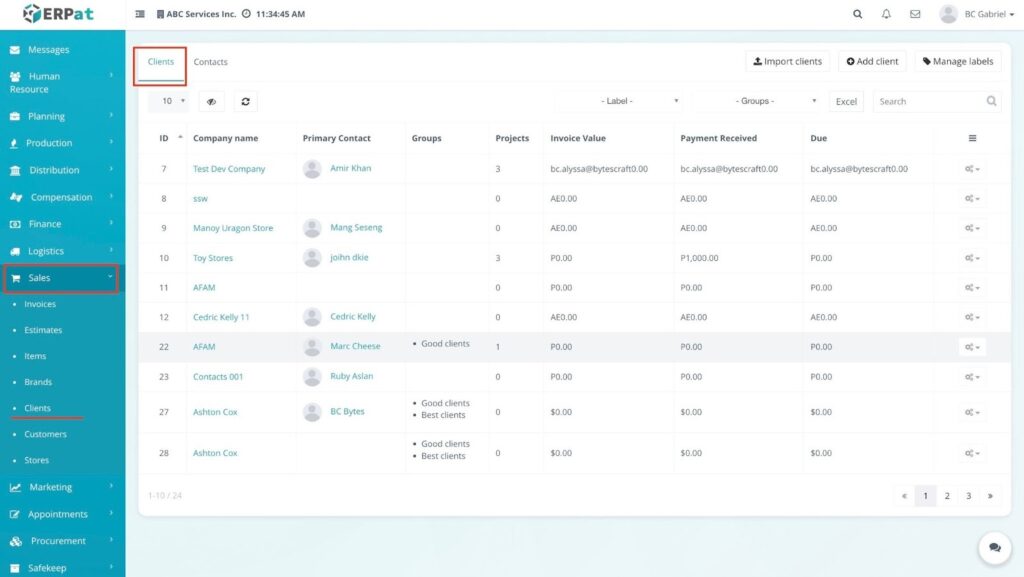
Accessing the Clients Module #
- Log in to the ERPat System.
- Navigate to Sales from the main sidebar.
- Select Clients.
- You will be directed to the Clients listing page displaying all existing records.
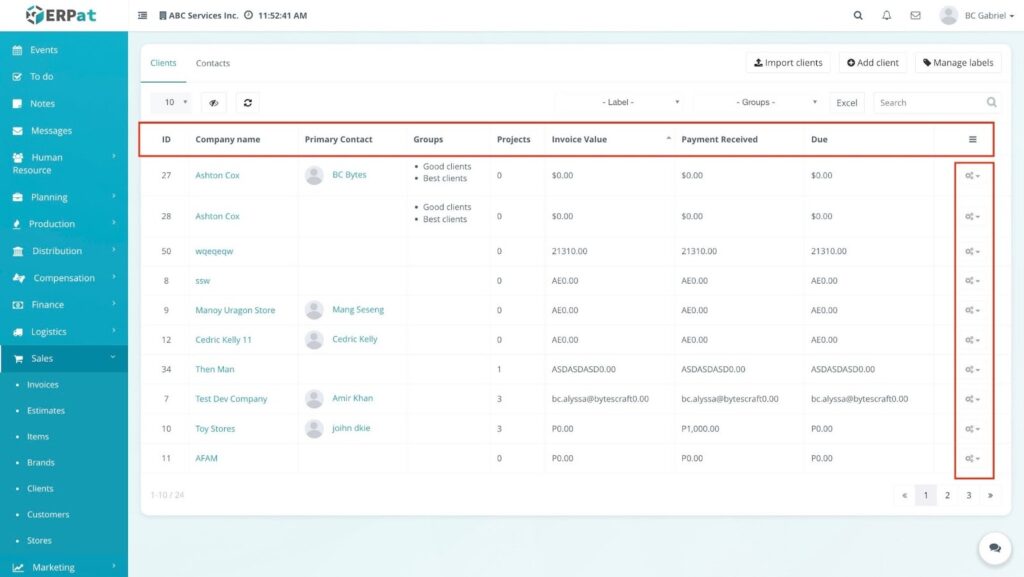
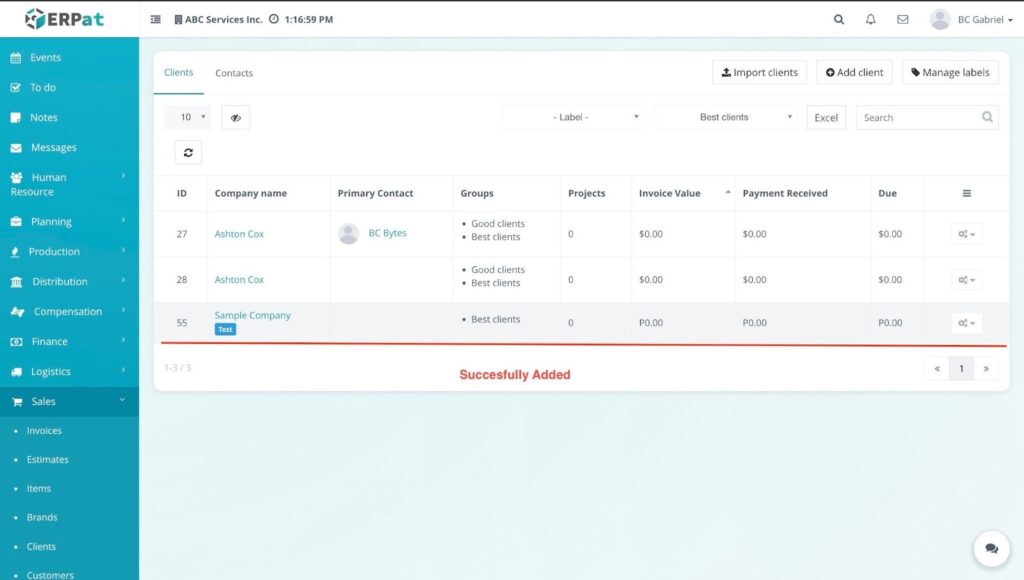
Clients Listing Page #
The listing page provides an overview of all client accounts with the following information:
- ID – Unique system identifier for the client.
- Company name – The formal name of the business or entity.
- Primary Contact – The main person of contact for the account.
- Groups – Classification tags (e.g., “Good clients,” “Best clients”).
- Projects – Total number of projects associated with the client.
- Invoice Value – Total amount billed to the client.
- Payment Received – Total funds collected from the client.
- Due – Outstanding balance remaining for the client.
- Actions (⚙️ icon) – Controls for Viewing, Editing, or Deleting records.
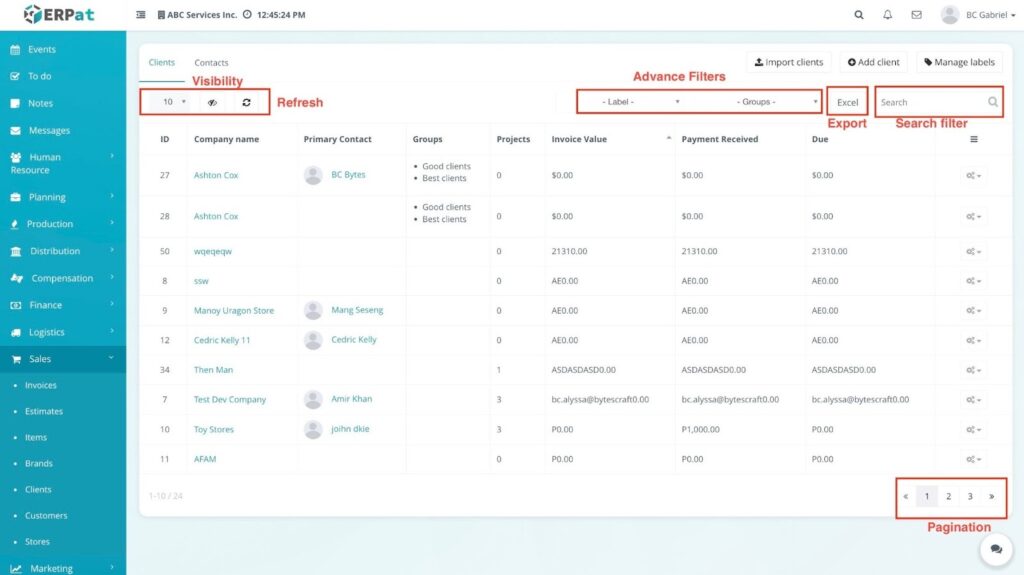
Additional Controls: #
- Advanced Filters: Dropdown menus to filter by Labels and Groups.
- Import clients: Upload bulk data from external files.
- Manage labels: Define and color-code organizational tags.
- Search bar: Real-time lookup by company or contact name.
- Export (Excel): Download the current view as a spreadsheet.
- Visibility & Refresh: Icons to customize columns and reload live data.
- Pagination: Navigate through large client databases.
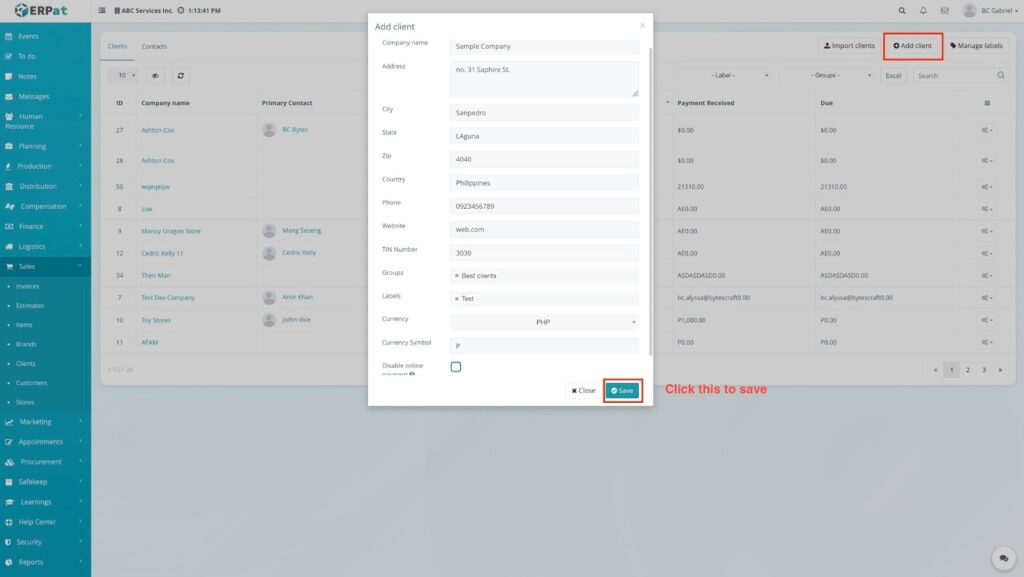
Steps for Adding a New Client #
STEPS #
- Click the Add client button located at the top-right of the page.
- Fill in the required fields:
- Company name
- Address
- City
- State
- Zip
- Country
- Phone
- Website
- TIN Number
- Groups
- Labels
- Currency
- Currency Symbol
- Disable online payment (Optional checkbox)
- Review the information for accuracy.
- Click Save to create the client profile.
Result #
The newly added client will appear in the listing and become available for selection across other Sales modules like Invoices, Estimates, and Projects.
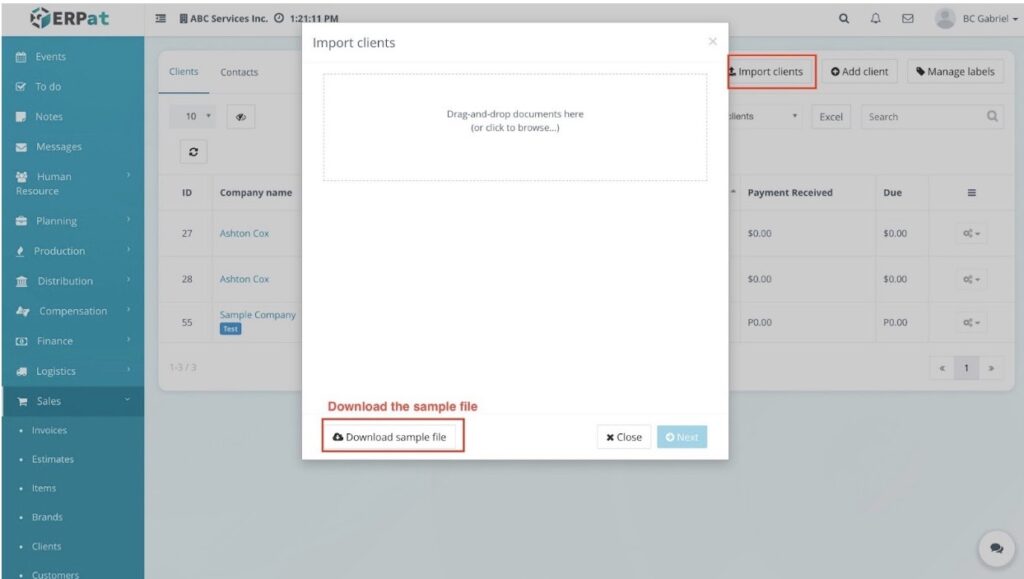
Steps for Importing Clients #
STEPS #
- Click the Import clients button located at the top-right of the page.
- Click the Download sample file button to get the template.
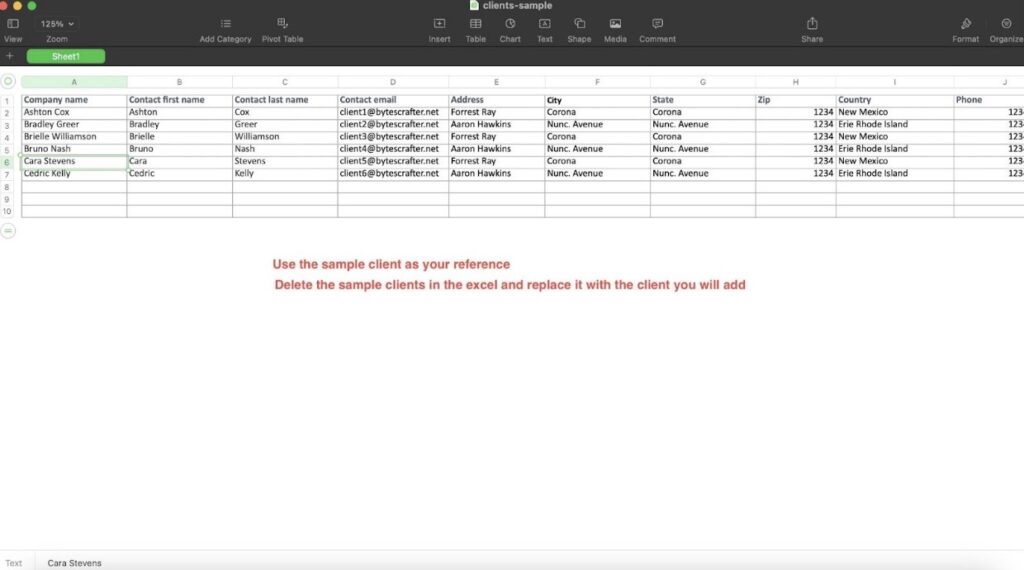
- Fill in the Excel file using the sample as your reference, then save it.
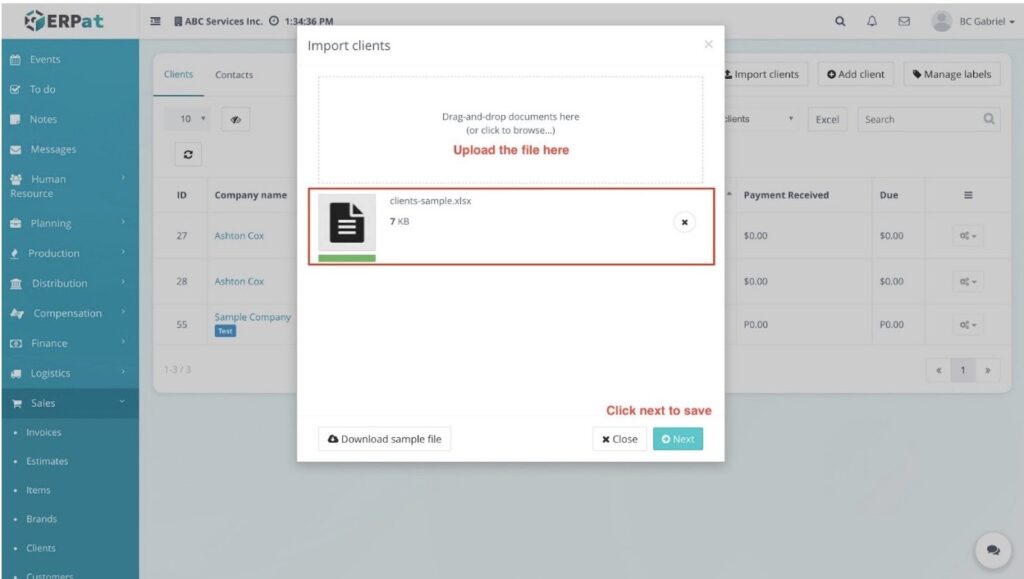
- Drag-and-drop the file into the upload area or click to browse.
- Click the Next button once the file is attached.
- Review the data preview for any errors.
- Click the Upload button to finalize the process.
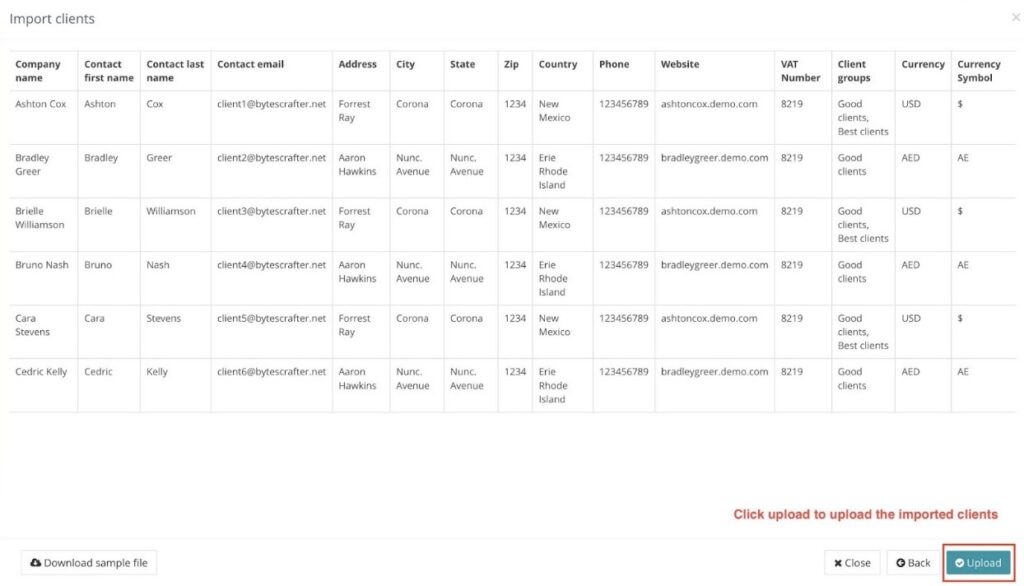
Result #
The system will process the data and the imported clients will appear in the listing page, ready to be used for projects and invoicing.
Steps for Managing Labels #
STEPS #
- Click the Manage labels button.
- Define the label title and assign a specific color.
- Click Save to finalize the label.
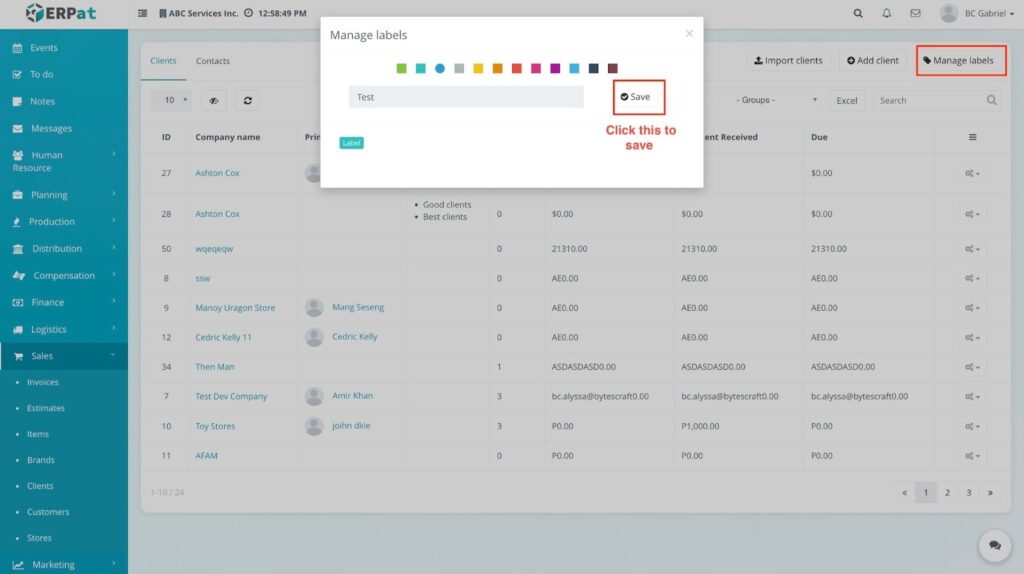
Result #
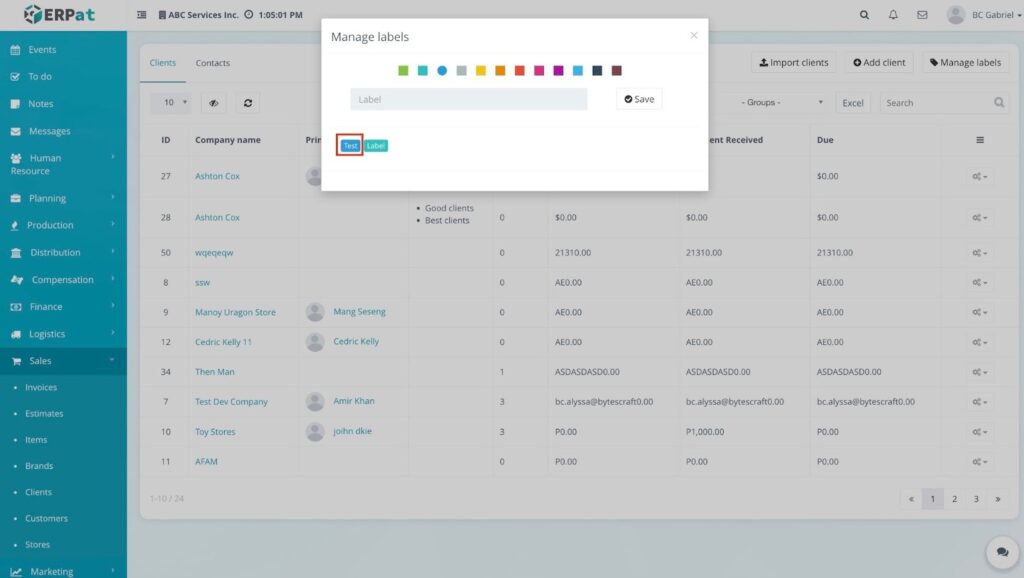
The label becomes available as a filter and can be attached to any client profile for better organization.
Steps for Viewing a Client #
STEPS #
- Locate the desired client from the Clients listing page.
- Click the Actions (⚙️) gear icon located on the far right of the client row.
- Select View from the dropdown menu.
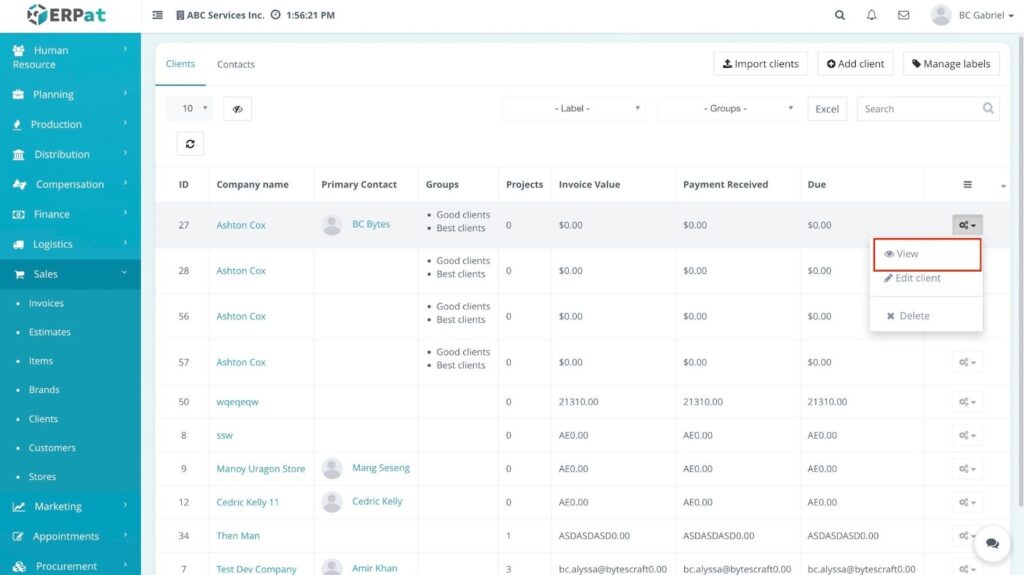
Result #

The Client details page will open, displaying a high-level summary of the client’s financial status, including the number of Projects, total Invoice Value, total Payments received, and the current Due balance. Users can navigate through various tabs to manage specific data such as Contacts, Client info, Invoices, Estimates, and Notes.
Steps for Adding a Contact #
STEPS #
- Navigate to Sales from the main sidebar and select Clients.
- Locate the specific client in the listing and click the Actions (⚙️) gear icon.
- Select View to open the Client details page.
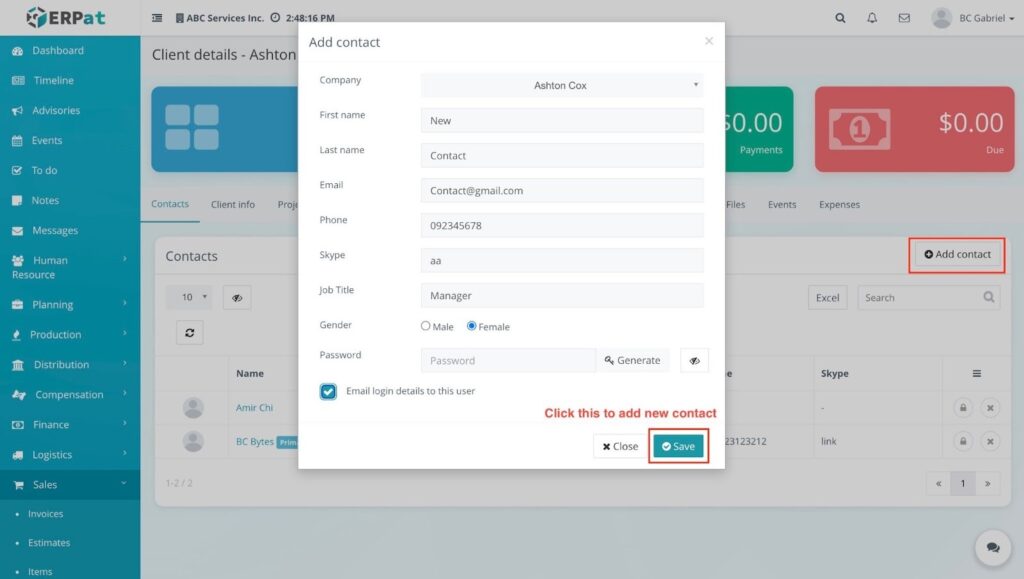
- Under the Contacts tab, click the + Add contact button.
- Fill in the required fields in the modal:
- Company (Automatically selected based on the client)
- First name
- Last name
- Phone
- Skype
- Job Title
- Gender (Select Male or Female)
- Configure access and notifications:
- Password: Manually enter or click Generate to create a secure password.
- Email login details to this user: Check this box to automatically notify the contact of their credentials.
- Click Save to finalize the entry.
Result #
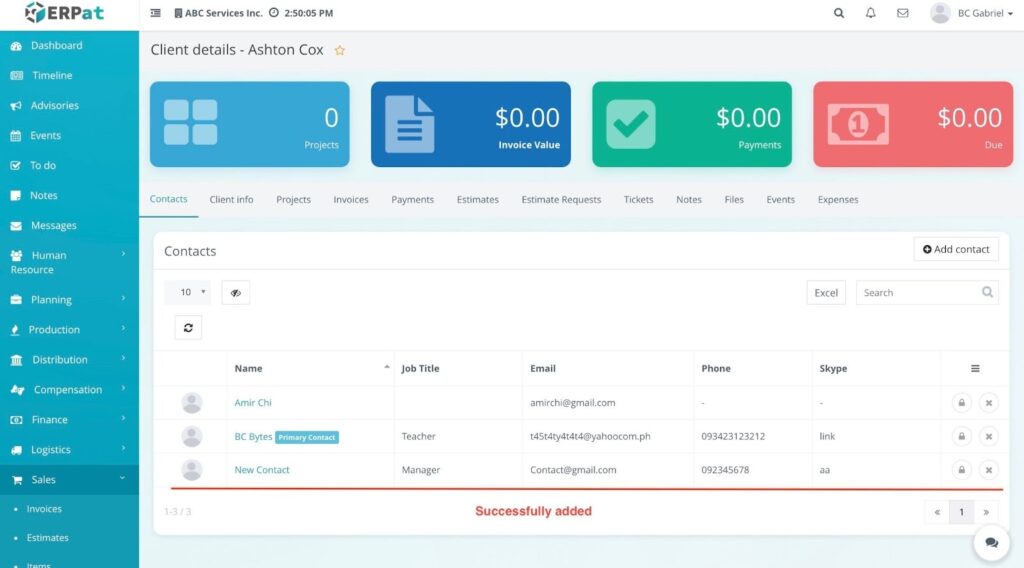
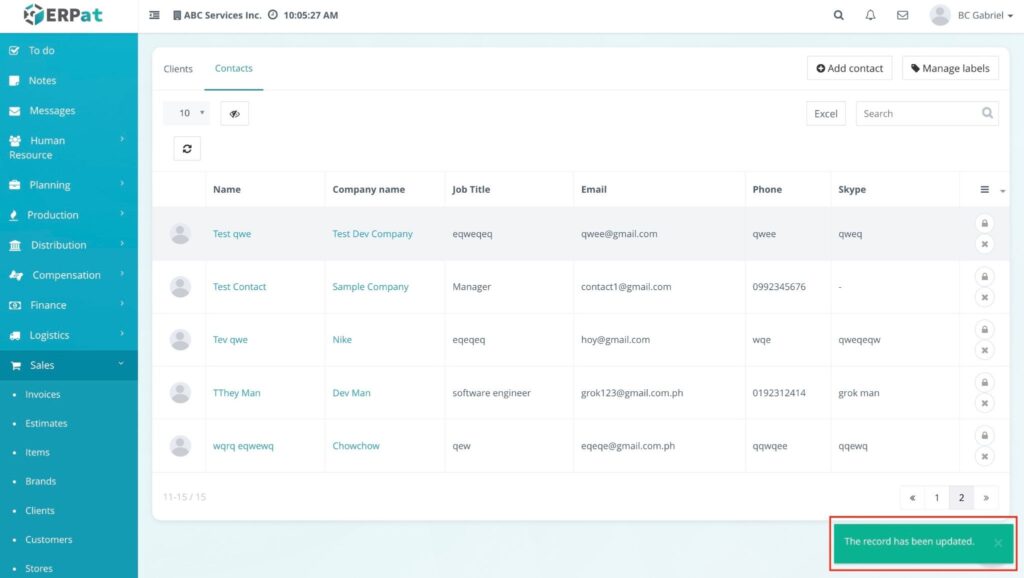
The new contact is successfully added and will appear in the Contacts table with their Name, Job Title, Email, and Phone details visible.
Notes #
- Primary Contact: If this contact is the main representative, ensure they are designated as the Primary Contact in the list view.
- Login Security: Using the Generate button for passwords ensures high security for contacts granted system access.
Steps to Reset a Contact Password #
STEPS #
- Navigate to the Sales sidebar and select Clients.
- Click the Actions (⚙️) gear icon for the specific client and select View to open the Client details page.
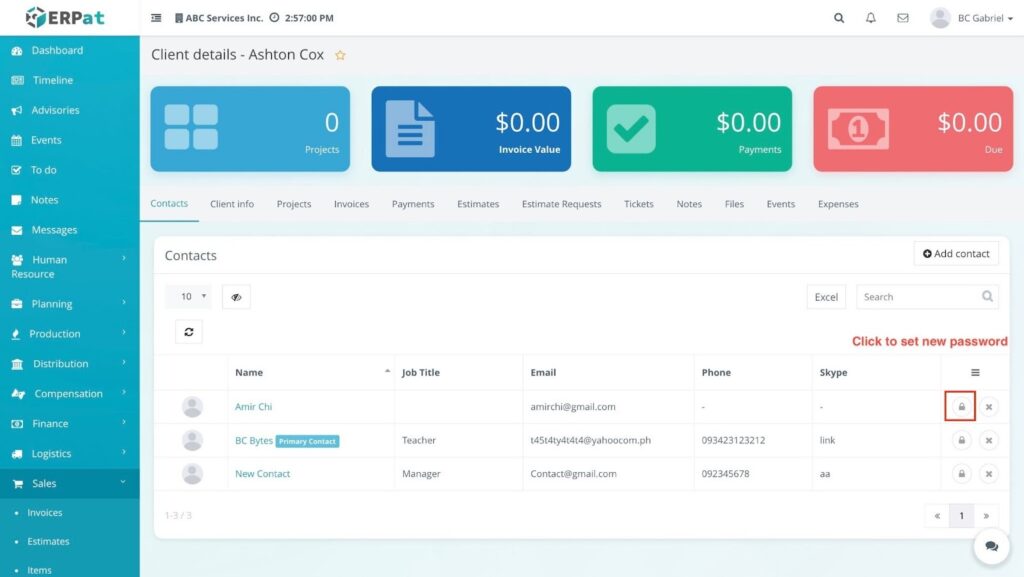
- Ensure you are on the Contacts tab.
- Locate the contact record and click the Lock (🔒) icon in the actions column on the far right.
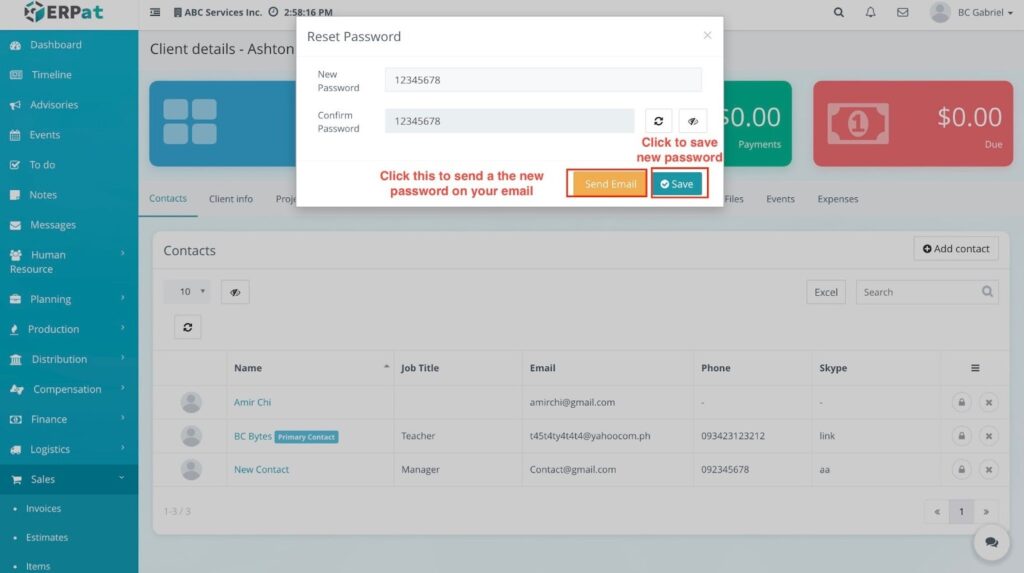
- In the Reset Password modal, enter the New Password and Confirm Password.
- Note: You can click the Generate (🔄) icon to create a secure password automatically or the Eye (👁️) icon to view the characters.
- Choose a save method:
- Click Save to update the password in the system.
- Click Send Email to update the password and send the new credentials directly to the contact’s email address.
Result #
The contact’s password will be updated immediately, allowing them to log in with the new credentials.
Steps to Delete a Contact #
STEPS #
- Navigate to the Sales sidebar and select Clients.
- Locate the specific client in the listing and click the Actions (⚙️) gear icon.
- Select View to open the Client details page.
- Ensure you are on the Contacts tab.
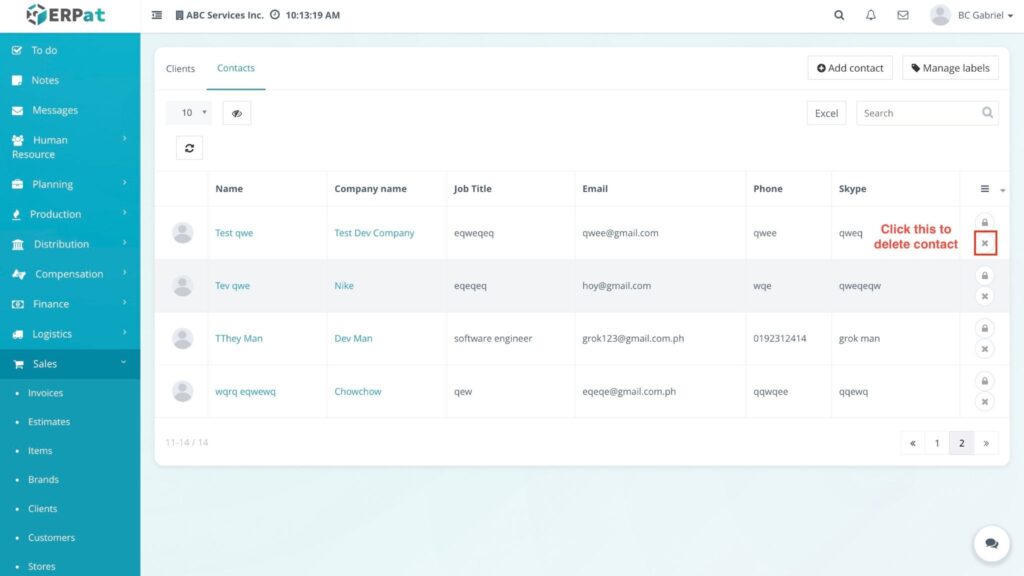
- Locate the contact you wish to remove and click the Delete (✖) icon in the actions column on the far right.
- A confirmation prompt may appear; confirm the deletion to proceed.

Result #
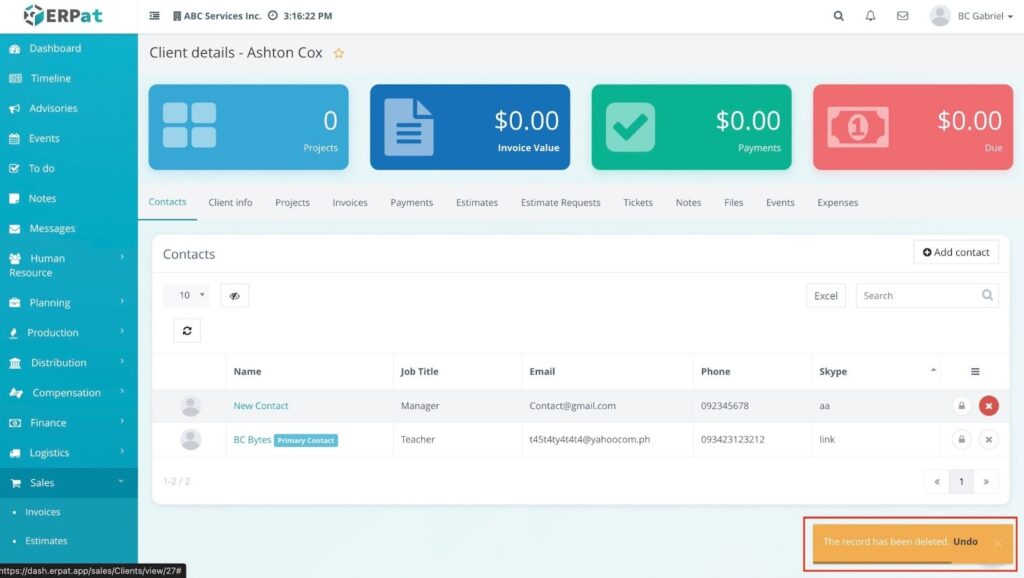
The system will remove the contact from the list and display a notification stating, “The record has been deleted”. An Undo option will briefly appear in the notification if the deletion was accidental.
Steps for Editing Client Information #
STEPS #
- Navigate to the Sales sidebar and select Clients.
- Locate the specific client in the listing and click the Actions (⚙️) gear icon.
- Select View to open the Client details page.
- Click on the Client info tab located next to the Contacts tab.
- Modify the necessary fields within the form:
- Company name
- Address / City / State / Zip / Country
- Phone / Website
- TIN Number
- Groups / Labels
- Currency / Currency Symbol
- Review the updated information for accuracy.
- Click the Save button at the bottom of the form to finalize the changes.
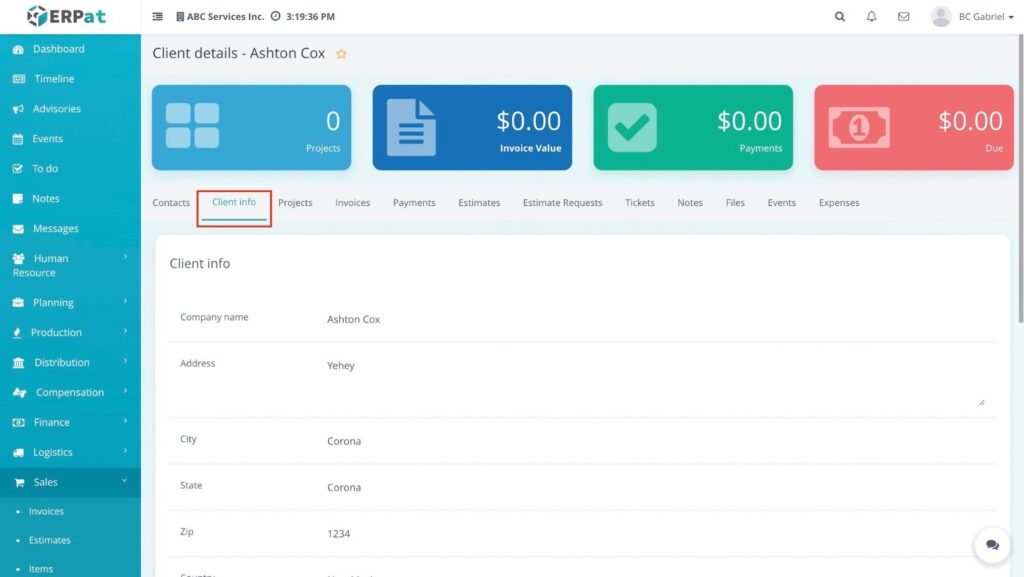
Result #
The client’s profile is updated in the database, and all changes will be reflected immediately across all related modules.
Steps for Accessing Client Projects #
STEPS #
- Navigate to the Sales sidebar and select Clients.
- Click the Actions (⚙️) gear icon for the desired client and select View.
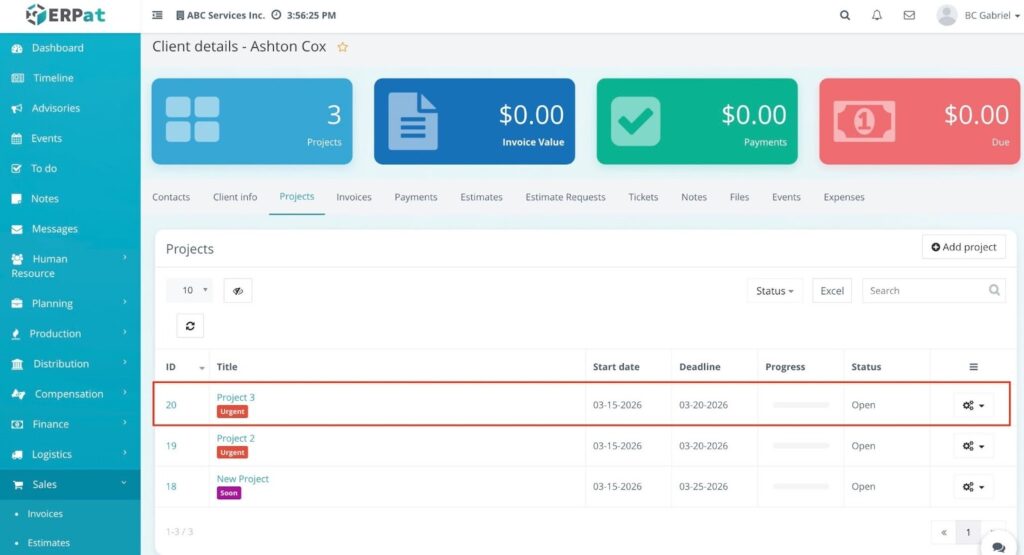
- Click the Projects tab within the Client details page.
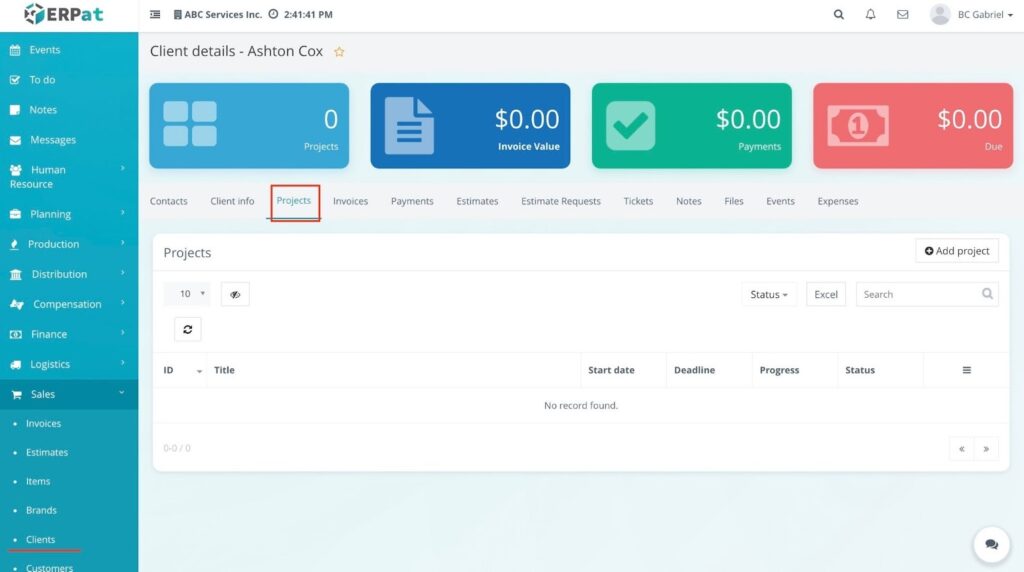
Result #
The Projects dashboard will open, showing a list of all ongoing or completed projects assigned to that client, along with their start dates, deadlines, and current status.
Steps for Adding a New Project #
STEPS #
- From the Projects tab of a client, click the + Add project button.
- Fill in the project details in the modal:
- Title: Enter a concise name for the project.
- Description: Provide specific project notes or instructions.
- Start date: Select the date the project is scheduled to begin.
- Deadline: Set the final date for project completion.
- Labels: Assign relevant tags (e.g., Urgent).
- Click the Save button to create the project.
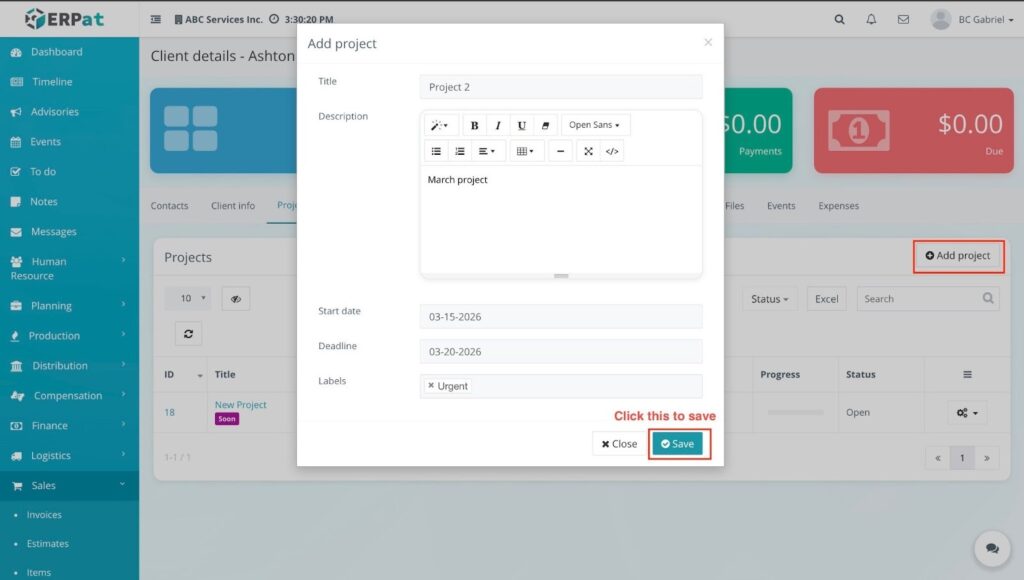
Result #
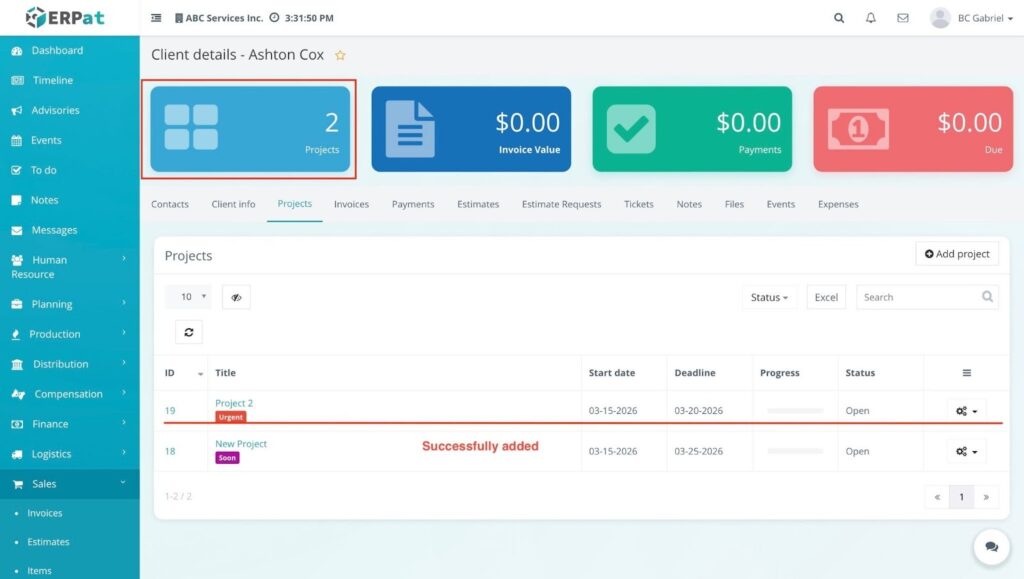
The new entry will be visible in the projects list. The total project count in the client’s summary header will update automatically.
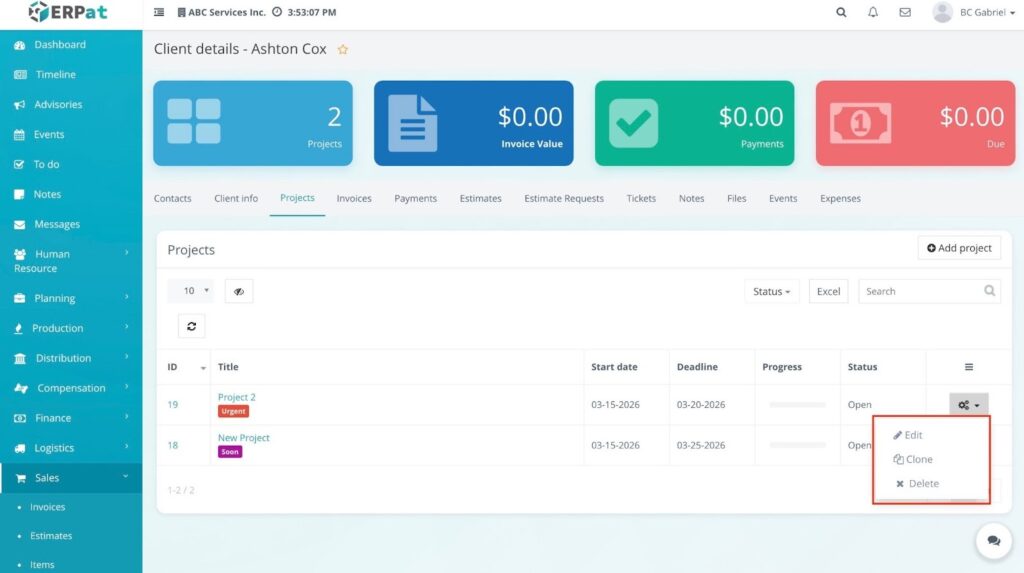
Steps for Managing Project Actions (Edit, Clone, and Delete) #
STEPS #
- Navigate to the Projects tab within the Client details page.
- Locate the specific project and click the Actions (⚙️) gear icon on the far right.
Results for Project Actions #
Following the execution of each action, the system provides specific visual feedback and updates to the project list:
1. Edit Project Result #
- Update Confirmation: Once the Save button is clicked in the modal, the project row in the dashboard is immediately updated with the new details.
- Dashboard Sync: Any changes made to the Title or Dates are reflected in the Projects list and the client summary header.
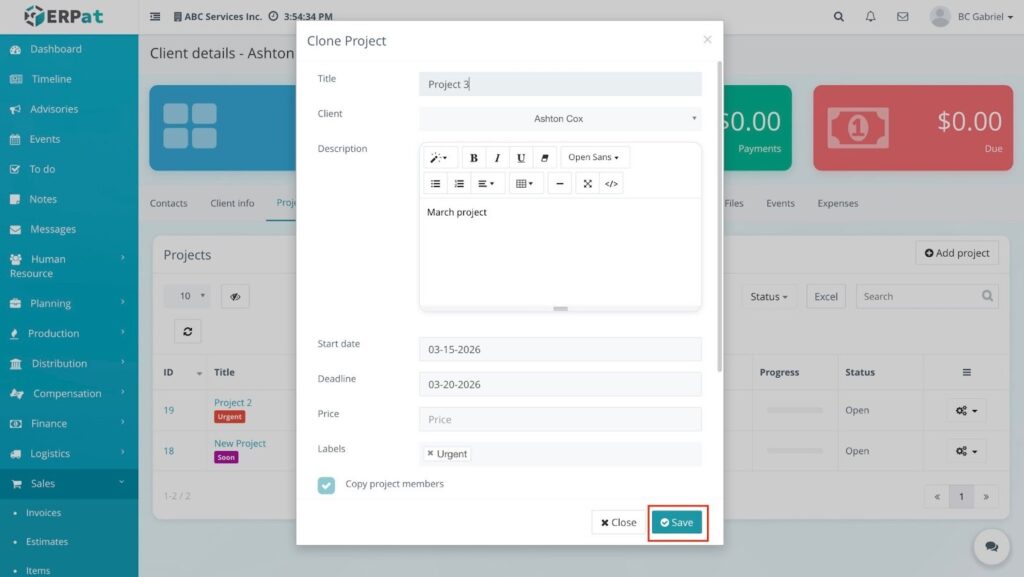
2. Clone Project Result #

- Duplicate Entry: A new project entry appears in the list with the same details as the original, except for any modifications made during the cloning process.
- System Notification: A green notification stating “Successfully added” appears at the bottom of the screen to confirm the creation of the duplicate record.
3. Delete Project #
- Select Delete from the dropdown menu.
- Confirm the action in the delete prompt.
- Result: The record is removed from the table, and a notification appears stating, “The record has been deleted” with an Undo option.
Steps for Managing Project Actions (Edit, Clone, and Delete) #
STEPS #
- Navigate to the Projects tab within the Client details page.
- Locate the specific project and click the Actions (⚙️) gear icon on the far right.

Results for Project Actions #
Following the execution of each action, the system provides specific visual feedback and updates to the project list:
1. Edit Project Result #

- Update Confirmation: Once the Save button is clicked in the modal, the project row in the dashboard is immediately updated with the new details.
- Dashboard Sync: Any changes made to the Title or Dates are reflected in the Projects list and the client summary header.
2. Clone Project Result #
- Duplicate Entry: A new project entry appears in the list with the same details as the original, except for any modifications made during the cloning process.
- System Notification: A green notification stating “Successfully added” appears at the bottom of the screen to confirm the creation of the duplicate record.
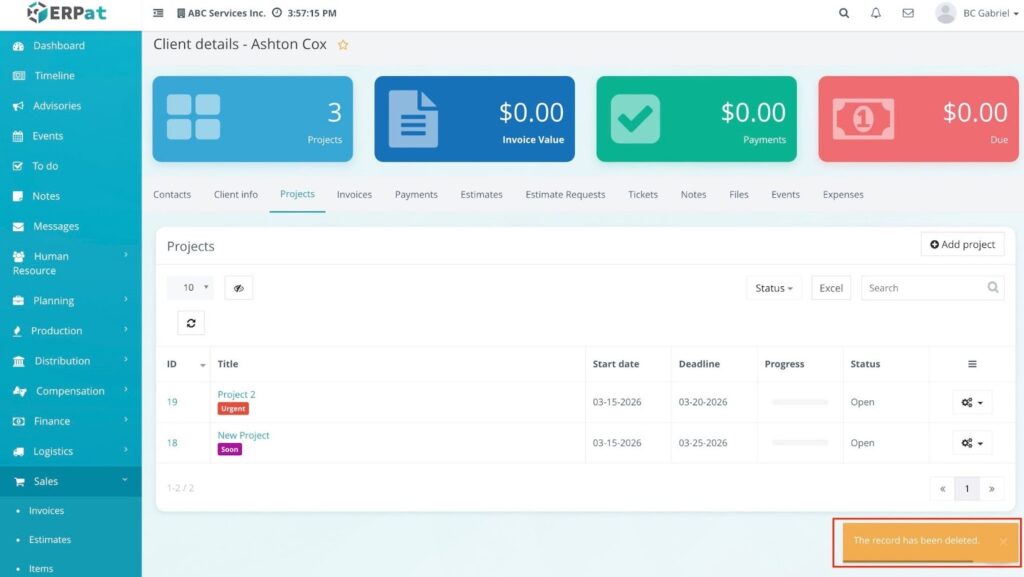
3. Delete Project Result #

- Record Removal: The selected project is immediately removed from the dashboard table.
- Deletion Notification: A yellow notification bar appears at the bottom right stating, “The record has been deleted”.
- Undo Option: The notification includes an Undo link, allowing you to restore the deleted project if the action was accidental.
Steps for Accessing Client Invoices #
STEPS #
- Navigate to the Sales sidebar and select Clients.
- Locate the specific client in the listing and click the Actions (⚙️) gear icon, then select View.
- Click the Invoices tab within the Client details page.
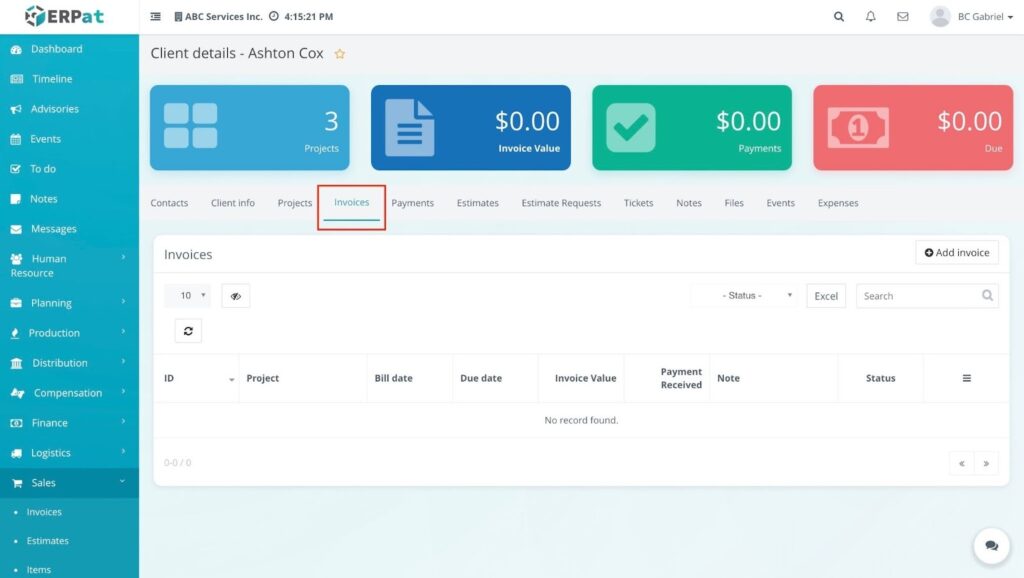
Result #
The Invoices dashboard will display a list of all bills associated with the client, including the Invoice ID, Project name, Bill date, Due date, Invoice value, Payment received, and current Status.
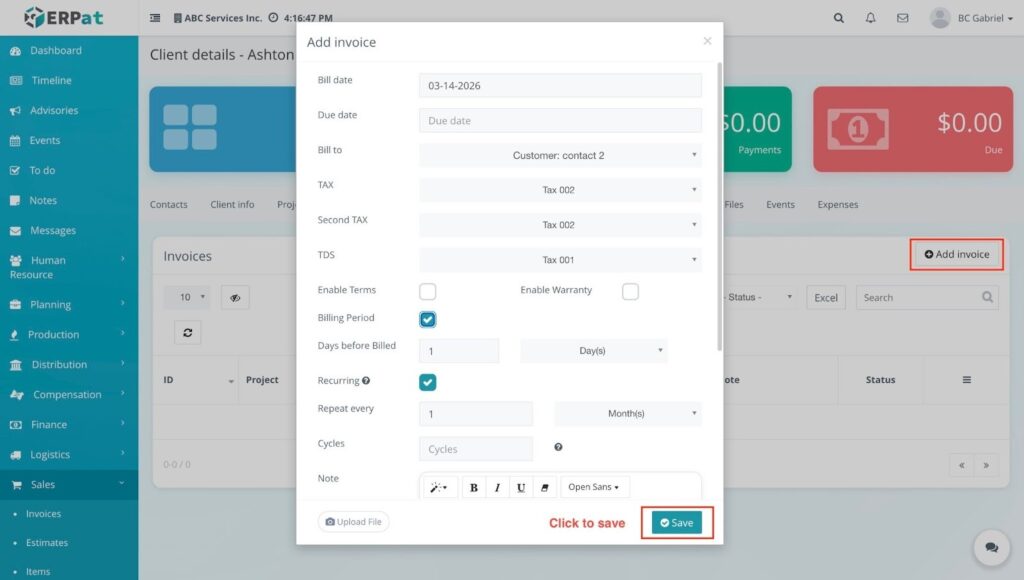
Steps for Adding a New Invoice #
STEPS #
- From the Invoices tab of a client, click the + Add invoice button.
- Fill in the required details in the Add invoice modal:
- Bill date: Select the date the invoice is issued.
- Due date: Set the final date for payment.
- Client: This is automatically set to the current client.
- Project: Select the relevant project from the dropdown menu.
- Tax / Second tax: Apply any necessary tax rates.
- Recurring: Toggle this on if the invoice should repeat at specific intervals.
- Note: Add any specific instructions or comments for the client.
- Labels: Assign relevant tags to categorize the invoice.
- Click Save to create the invoice.
Result #
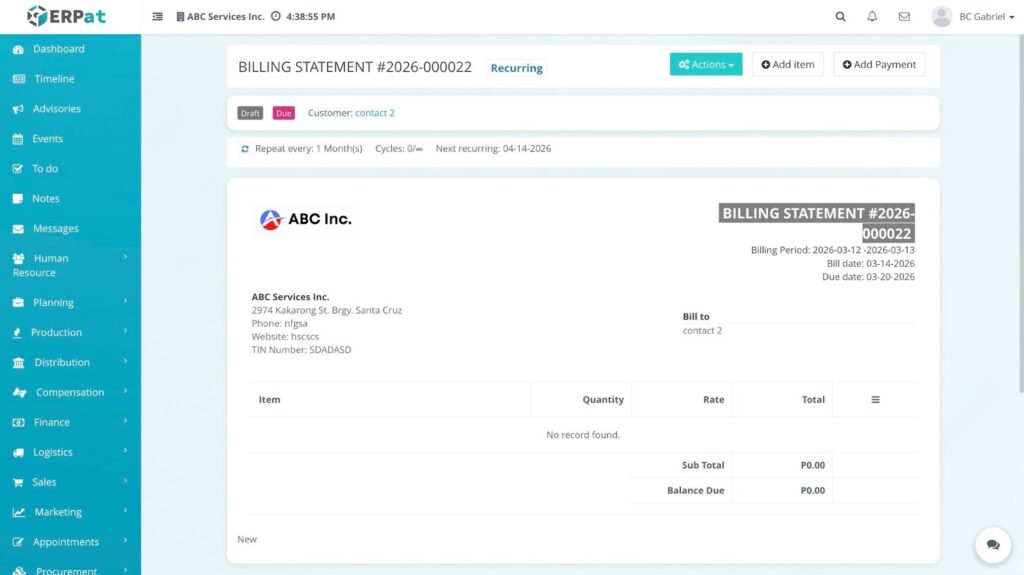
Upon saving, you will be directed to the Billing Statement, which is managed under the Sales – Invoices module. For instructions on how to navigate this page, please refer to the Sales Invoice knowledge base under the section “Steps for View the Invoice Detailed Page”.
Steps for Accessing Client Payments #
STEPS #
- Navigate to the Sales sidebar and select Clients.
- Click the Actions (⚙️) gear icon for the specific client record and select View.
- Click the Payments tab located in the navigation menu of the Client details page.
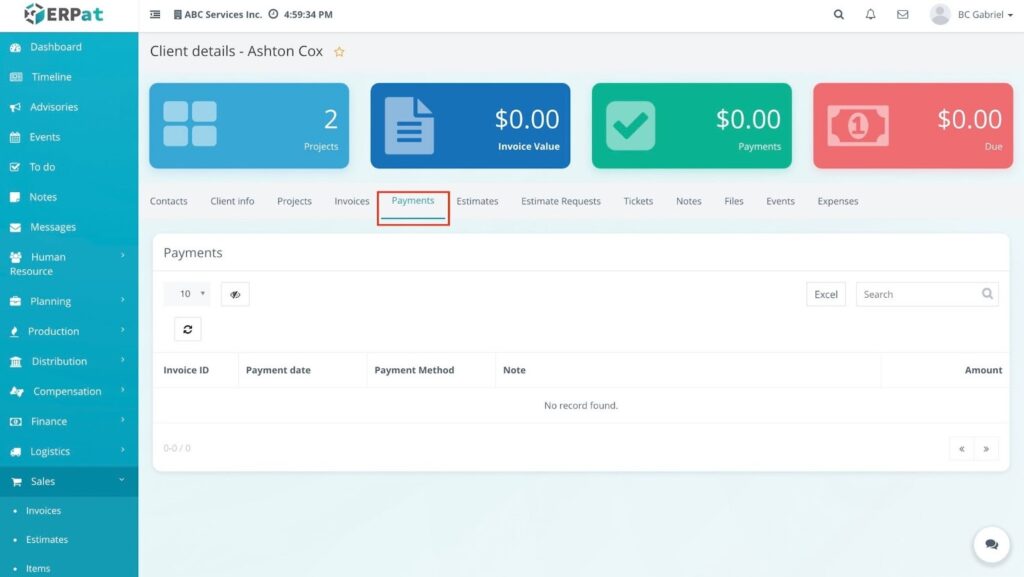
Result
The Payments dashboard will load, displaying a detailed history of all transactions associated with the client, including the Invoice ID, Payment date, Payment method, and the total Amount paid.
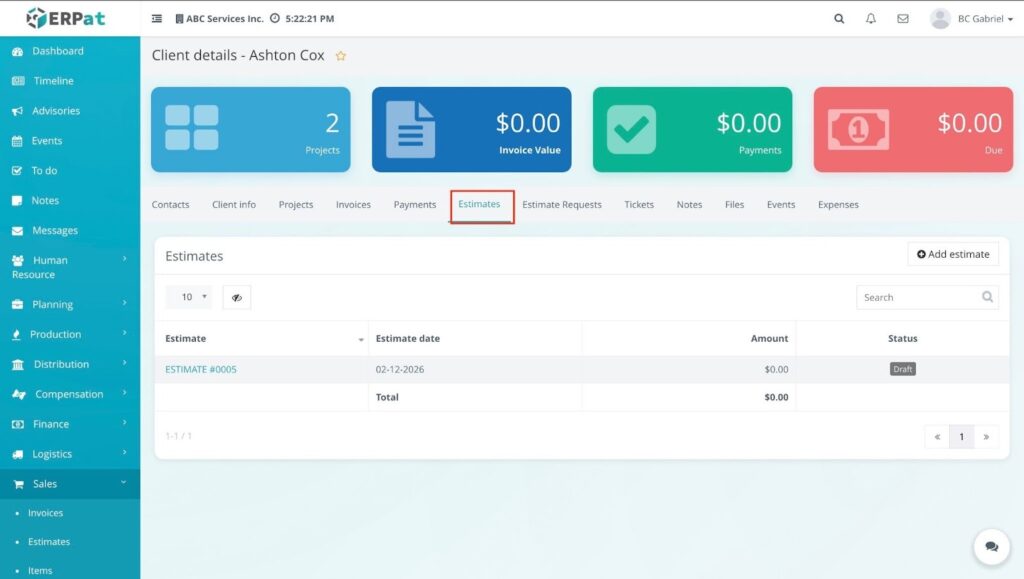
Steps for Adding an Estimate #
STEPS #
- From the Estimates tab of the Client details page, click the + Add estimate button.
- Fill in the required fields in the Add estimate modal:
- Estimate date: Select the date the quote is issued.
- Valid until: Set the expiration date for the estimate.
- Client: This is automatically selected based on the current client.
- Project: Choose the relevant project from the dropdown menu.
- Tax / Second tax: Apply any necessary tax calculations.
- Note: Add specific terms, instructions, or item descriptions.
- Labels: Assign tags to help categorize the estimate.
- Click the Save button to finalize the entry.
Result #

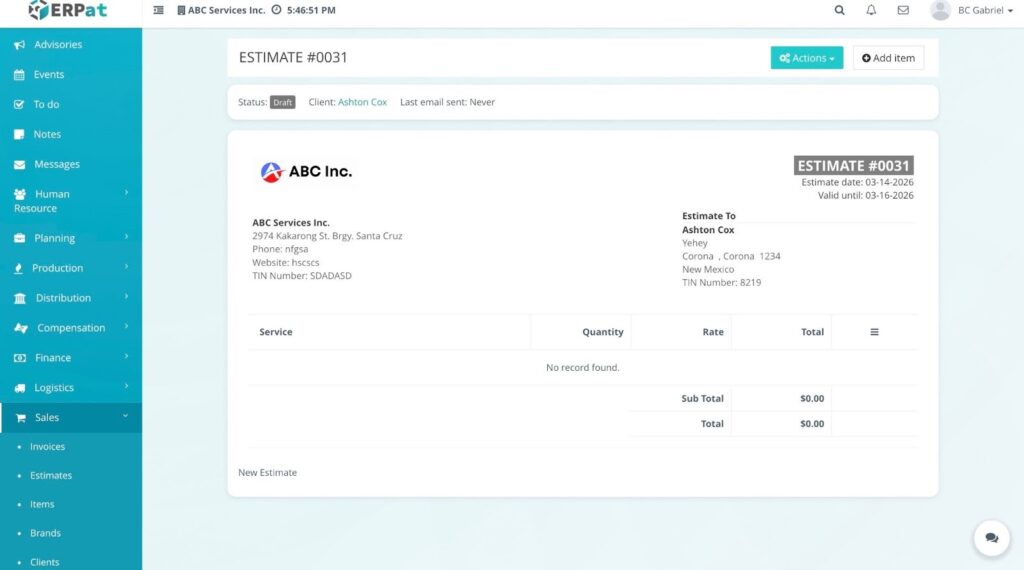
Upon saving, you will be redirected to the detailed quote page, which is managed under the Sales – Estimates module. For detailed navigation of that section, please refer to the Sales Estimates knowledge base under “Steps for View the Estimate Detailed Page”.
Steps for Accessing Estimate Requests #
STEPS #
- Navigate to the Sales sidebar and select Clients.
- Locate the specific client in the listing and click the Actions (⚙️) gear icon, then select View.
- Click the Estimate requests tab within the Client details navigation bar.
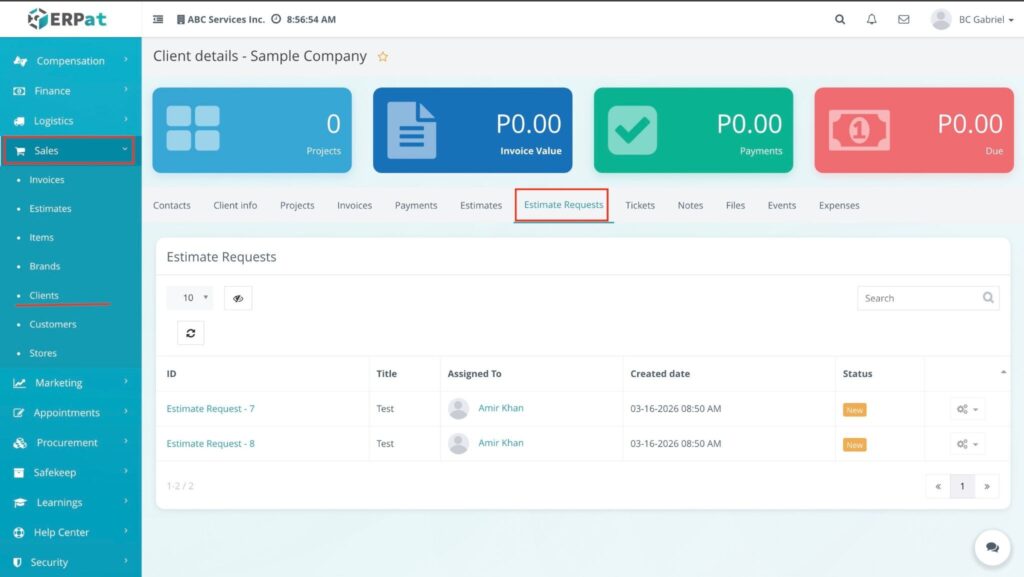
RESULT #
The system opens the Estimate requests dashboard, displaying a list of all requests submitted by or for that specific client.
NOTES #
- Detailed Navigation: For instructions on how to navigate the specific fields or manage these entries, please refer to the Sales – Estimates – Request knowledge base.
- Functions & Settings: The detailed functions and settings for these requests are already explained in the “Accessing the Estimate Request Page” section of the Estimates module documentation.
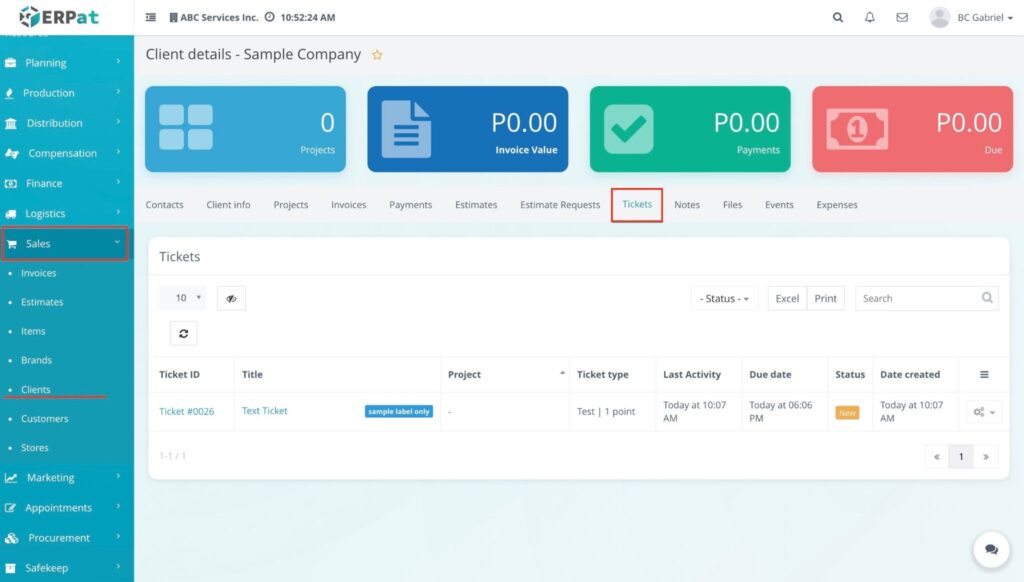
Steps for Accessing Client Tickets #
STEPS #
- Navigate to the Sales sidebar and select Clients.
- Locate the specific client in the listing and click the Actions (⚙️) gear icon, then select View.
- Click the Tickets tab within the Client details navigation bar.
RESULT #
The Tickets dashboard will open, showing a list of all support requests or issues linked to this specific client, including the Ticket ID, Subject, and Status.
NOTES #
- Adding & Navigating Tickets: The function to add a new ticket or navigate through ticket details is not available within the Client details page.
- Reference: For instructions on how to create and manage tickets, please refer to the knowledge base titled “Accessing the Ticket Module in the System” located under Help Center – Ticket.
Steps for Printing Client Tickets #
STEPS #
- Navigate to the Sales sidebar and select Clients.
- Locate the specific client in the listing and click the Actions (⚙️) gear icon, then select View.
- Click the Tickets tab within the Client details navigation bar.
- Click the Print button located at the top-right of the tickets table.
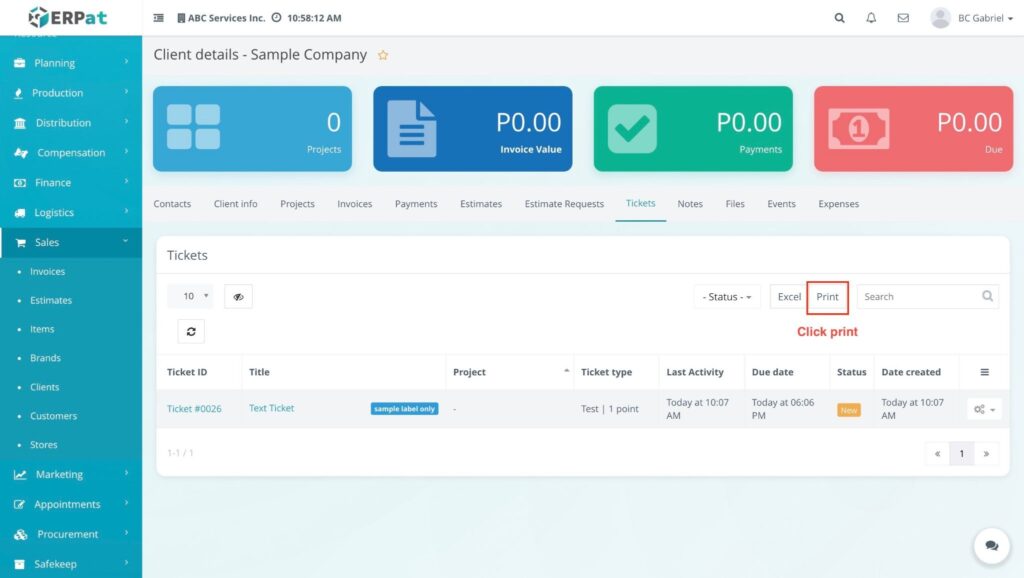
RESULT #
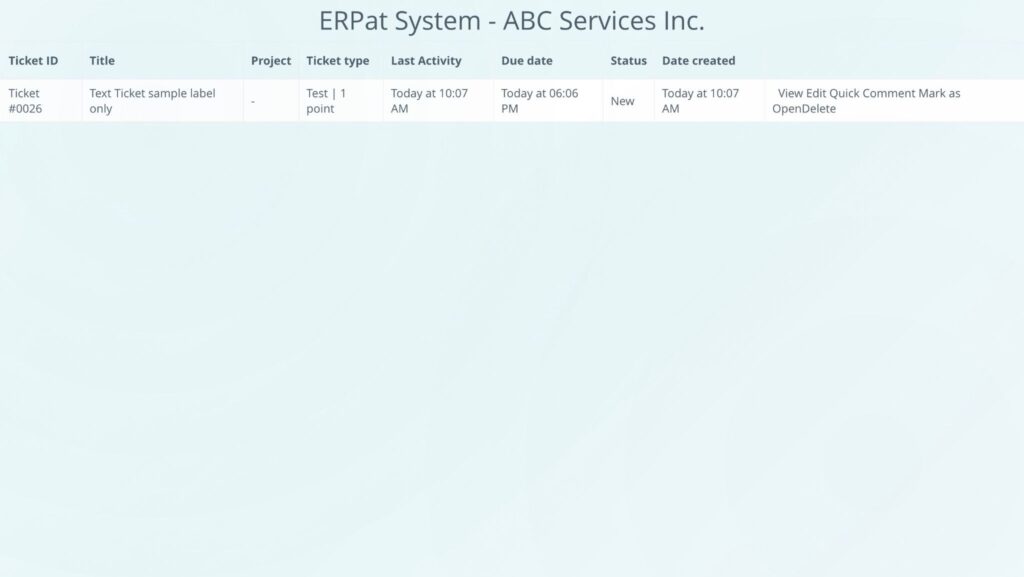
The system generates a print-ready view of the tickets associated with the client, displaying columns such as Ticket ID, Title, Project, Ticket type, Last Activity, Due date, Status, and Date created.
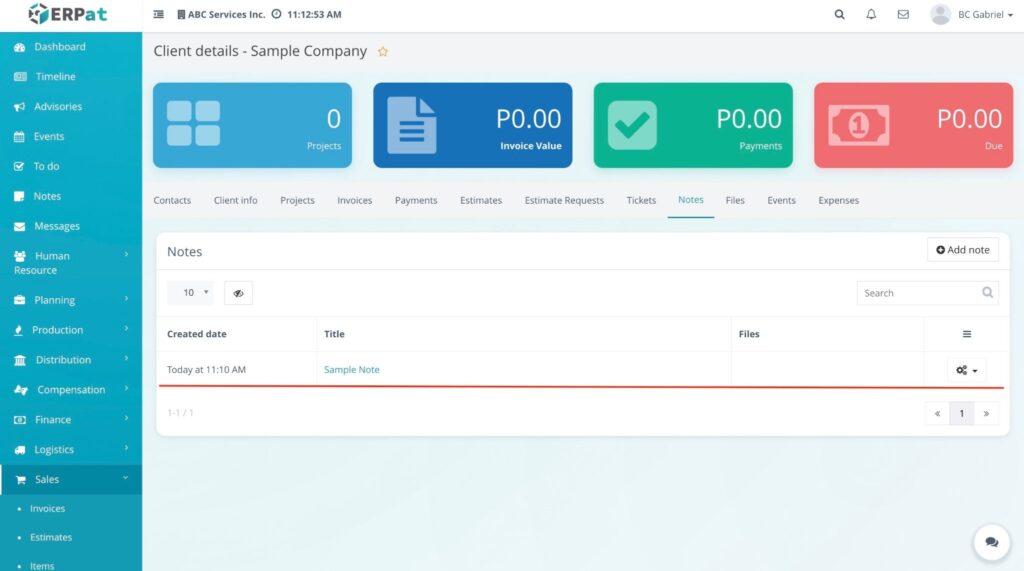
Steps for Accessing Client Notes #
STEPS #
- Navigate to the Sales sidebar and select Clients.
- Locate the specific client in the listing and click the Actions (⚙️) gear icon, then select View.
- Click the Notes tab within the Client details navigation bar.
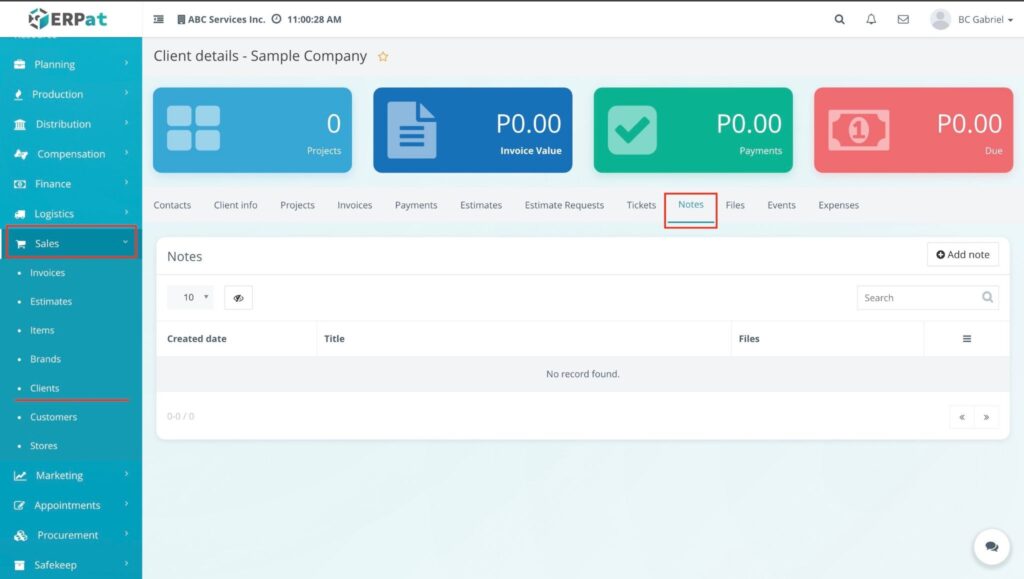
Result #
The Notes dashboard will load, displaying a collection of all personal or shared notes related to the client.
Steps for Adding a Note #
STEPS #
- From the Notes tab of the Client details page, click the + Add note button.
- Fill in the required fields in the Add note modal:
- Title: Enter a brief heading for the note.
- Description: Type the detailed content of your note.
- Labels: Assign relevant tags for categorization.
- Click the Save button.
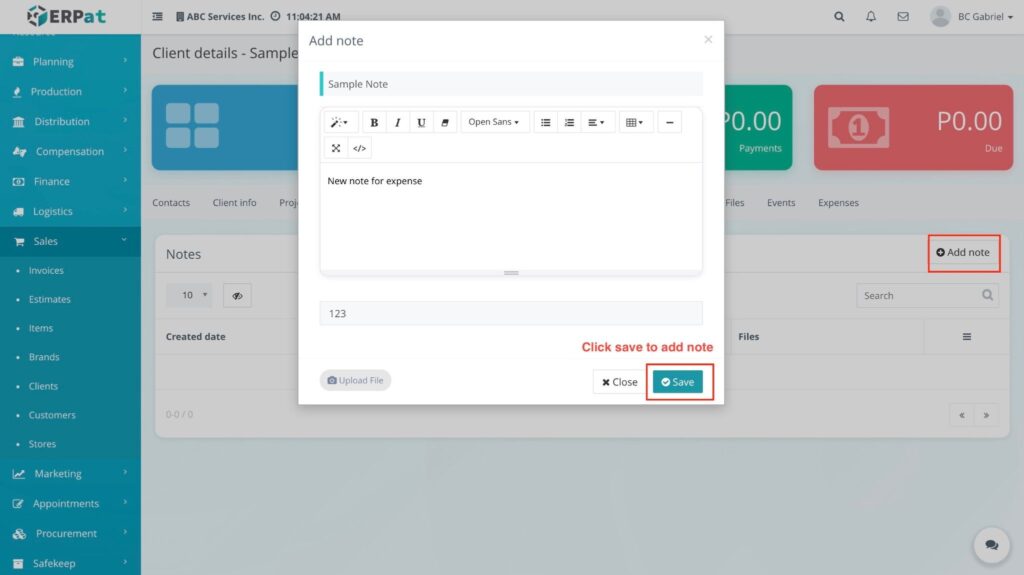
Result #
A “Successfully added” notification will appear at the bottom right, and the new note card will be instantly visible in the dashboard.
Steps for Editing a Note #
STEPS #
- Locate the note card you wish to modify within the Notes dashboard.
- Click the Edit (🖊️) pencil icon on the note card.
- Update the Title, Description, or Labels in the Edit note modal.
- Click the Save button.
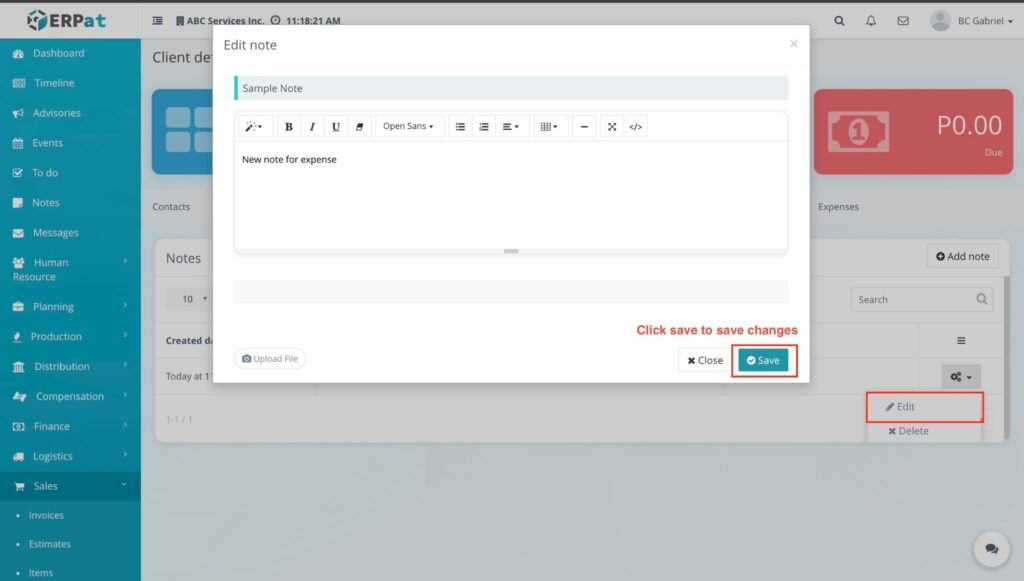
Result #
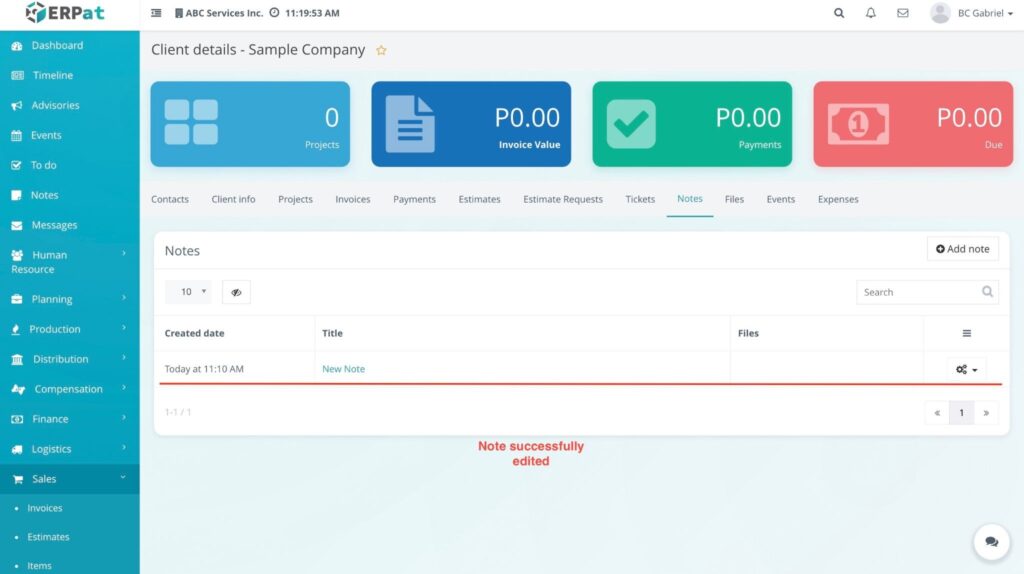
The content on the note card is updated immediately to reflect your changes.
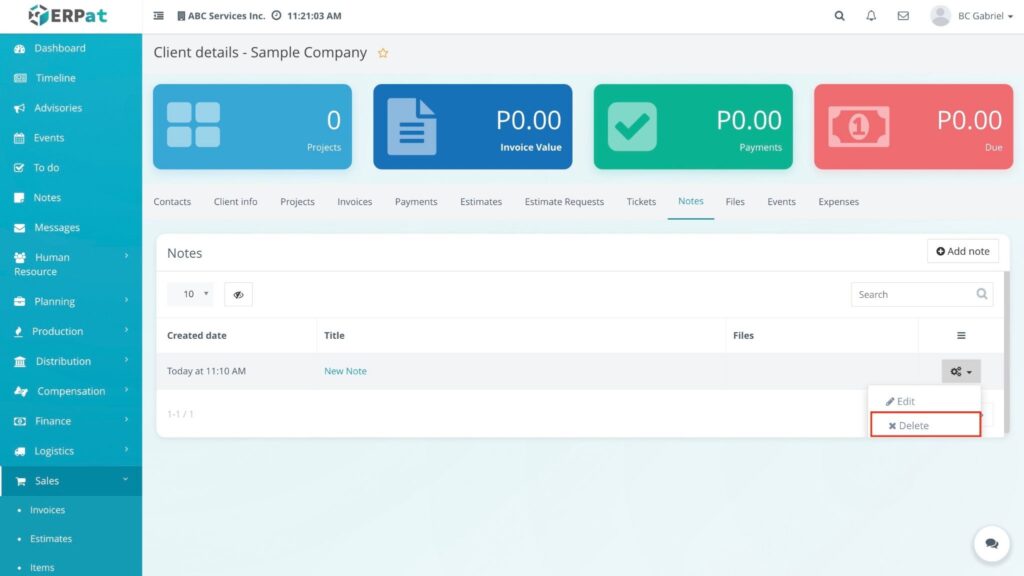
Steps for Deleting a Note #
STEPS #
- Locate the specific note card you want to remove.
- Click the Delete (✖) icon on the note card.
- Confirm the action in the deletion prompt.
Result #
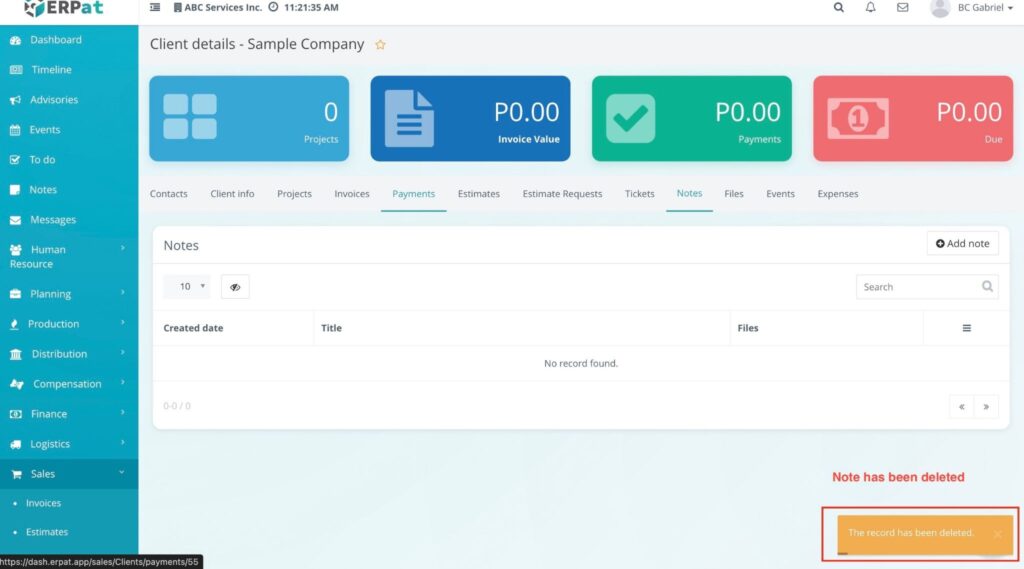
The note is removed from the dashboard, and a yellow notification bar appears stating, “The record has been deleted” with an Undo option.
Steps for Accessing Client Files #
STEPS #
- Navigate to the Sales sidebar and select Clients.
- Locate the specific client in the listing and click the Actions (⚙️) gear icon, then select View.
- Click the Files tab within the Client details navigation bar.
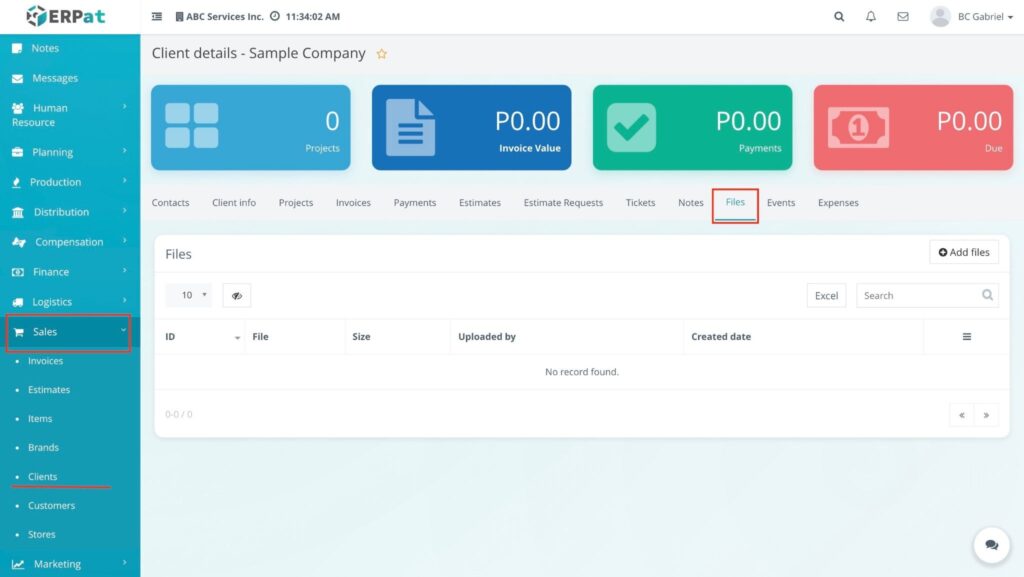
Result #
The Files dashboard will load, displaying a list of all documents uploaded for the client, including details such as File name, Size, and Date uploaded.
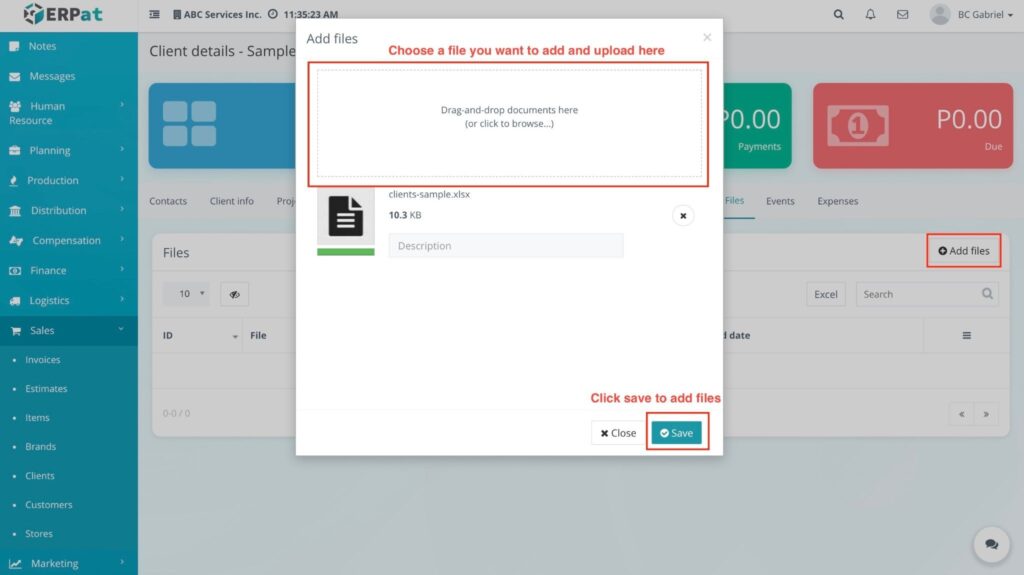
Steps for Adding Files #
STEPS #
- From the Files tab, click the + Add files button.
- In the Add files modal, you can:
- Drag and drop files directly into the upload area.
- Click the upload area to browse and select files from your device.
- Click the Upload button to finalize.

RESULT #
A notification will appear, and the new files will be visible in the list
Steps for Accessing Client Files #
STEPS #
- Navigate to the Sales sidebar and select Clients.
- Locate the specific client in the listing and click the Actions (⚙️) gear icon, then select View.
- Click the Files tab within the Client details navigation bar.

RESULT #
The Files dashboard will load, displaying a list of all documents uploaded for the client, including details such as File name, Size, and Date uploaded.
Steps for Adding Files #
STEPS #
- From the Files tab, click the + Add files button.
- In the Add files modal, you can:
- Drag and drop files directly into the upload area.
- Click the upload area to browse and select files from your device.
- Click the Upload button to finalize.
RESULT #
A notification will appear, and the new files will be visible in the list.
Steps for File Actions (Preview, Download, and Remove) #
STEPS #
- Locate the specific file in the dashboard list.
- Identify the action icons on the far right of the file row:
- Preview (👁️): Click the eye icon to view the file content within the system without downloading.
- Download (⬇️): Click the download icon to save a copy of the file to your local device.
- Remove (✖): Click the delete icon to remove the file from the client record.
- If removing, confirm the action in the prompt.
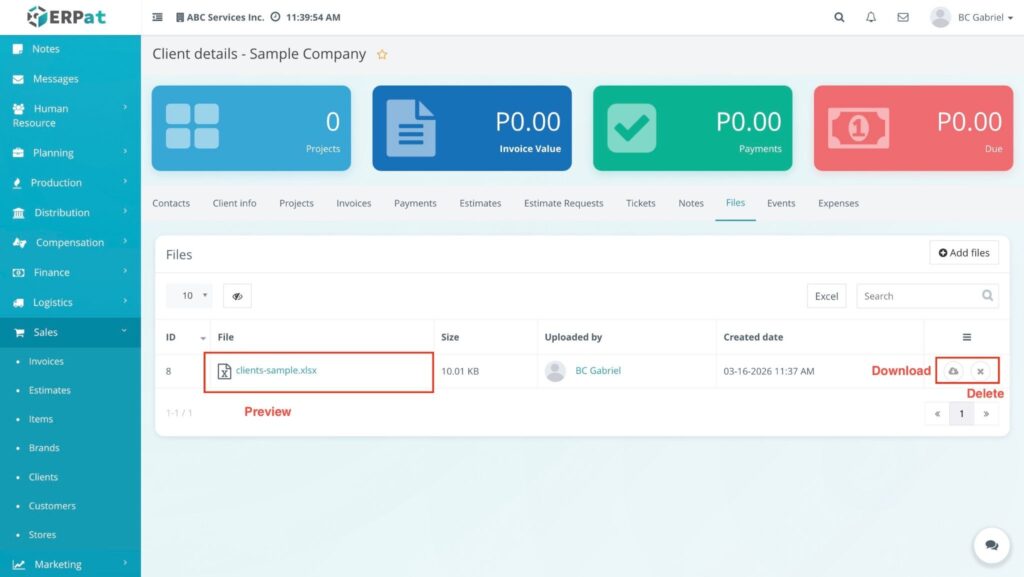
RESULT #
- Preview: An overlay displays the document or image.
- Download: The file is saved to your computer.
- Remove: The record is deleted, and a yellow notification bar appears with an Undo option.
Steps for Accessing Client Events #
STEPS #
- Navigate to the Sales sidebar and select Clients.
- Locate the specific client in the listing and click the Actions (⚙️) gear icon, then select View.
- Click the Events tab within the Client details navigation bar.
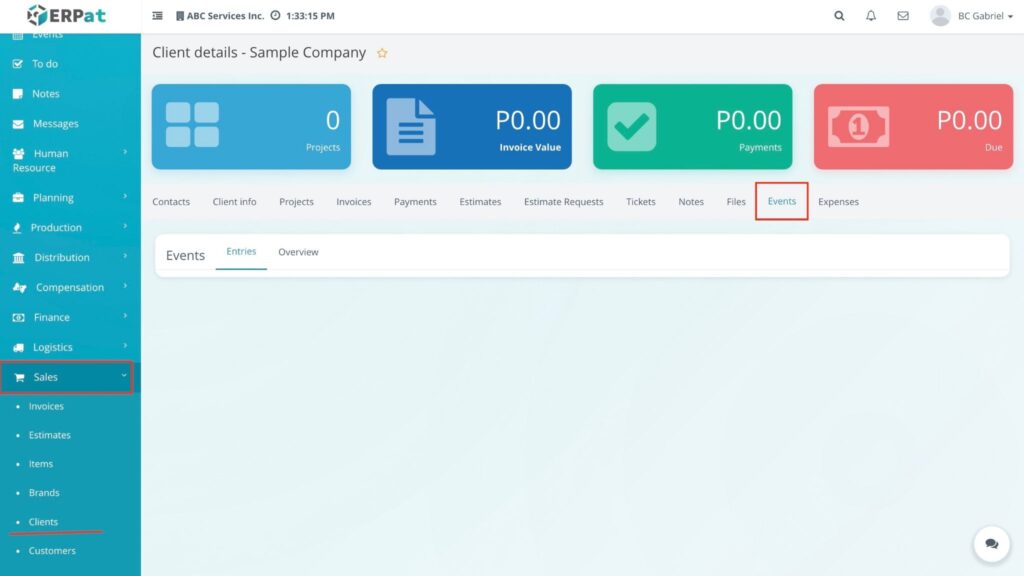
RESULT #
The Events dashboard will load, displaying a calendar or list view of all scheduled meetings, appointments, or milestones specifically linked to this client.
NOTES #
- Alternative Access: Events can also be managed globally under the Events module.
- Detailed Navigation: For comprehensive instructions on managing the calendar or shared events, please refer to the documentation for Accessing the Events Module.
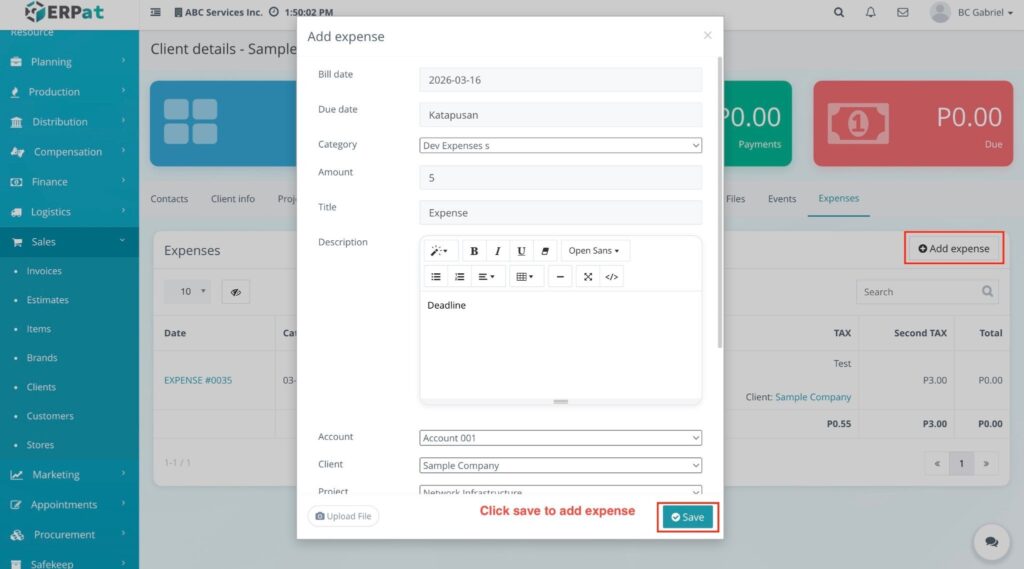
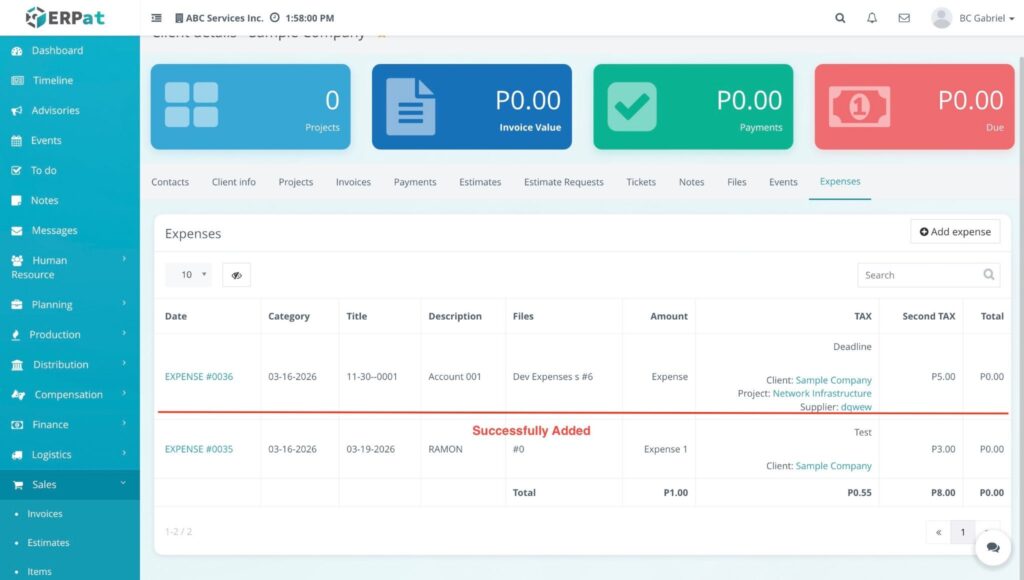
Steps for Adding an Expense #
STEPS #
- From the Expenses tab of the Client details page, click the + Add expense button.
- Fill in the required fields in the Add expense modal:
- Date of expense: Select the transaction date.
- Category: Choose the appropriate expense type from the dropdown.
- Amount: Enter the total cost.
- Project: Select the specific project this expense is billed to.
- Tax / Second tax: Apply any applicable tax rates.
- Description: Provide additional details or reasons for the expense.
- Click the Save button.
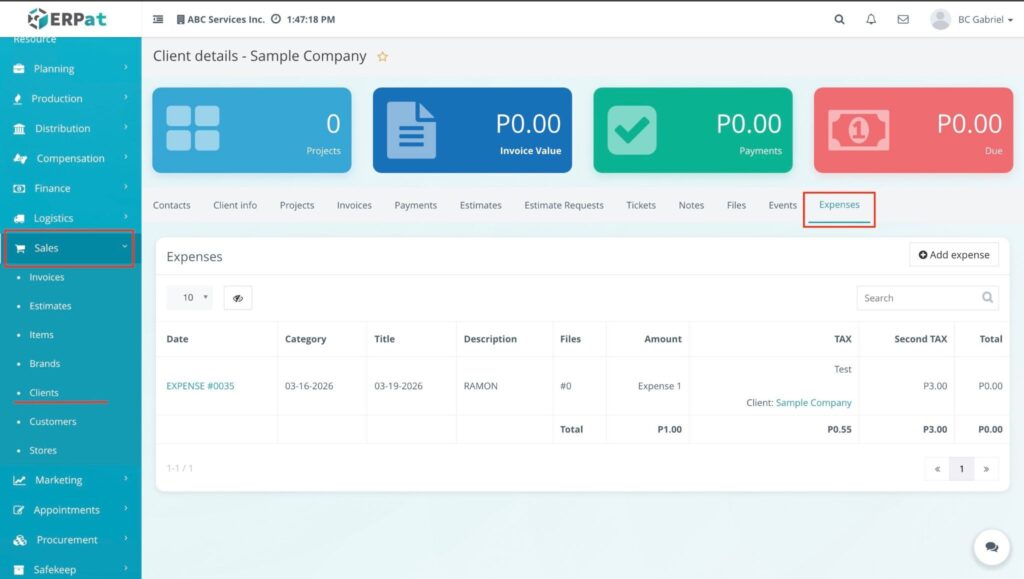
RESULT #
A notification will appear at the bottom right, and the new expense record will be added to the list.
NOTES #
- Alternative Access: Expenses can also be managed globally under the Finance – Expenses menu.
- Detailed Navigation: For instructions on how to filter, manage, or audit expense records, please refer to the Expenses Module documentation under “Accessing the Expenses Module”.
Steps for Adding an Expense #
STEPS #
- From the Expenses tab of the Client details page, click the + Add expense button.
- Fill in the required fields in the Add expense modal:
- Date of expense: Select the transaction date.
- Category: Choose the appropriate expense type from the dropdown.
- Amount: Enter the total cost.
- Project: Select the specific project this expense is billed to.
- Tax / Second tax: Apply any applicable tax rates.
- Description: Provide additional details or reasons for the expense.
- Click the Save button.
RESULT #
Notification will appear at the bottom right, and the new expense record will be added to the list.
NOTES #
- Alternative Access: Expenses can also be managed globally under the Finance – Expenses menu.
- Detailed Navigation: For instructions on how to filter, manage, or audit expense records, please refer to the Expenses Module documentation under “Accessing the Expenses Module”.
Steps for Editing Client Information #
STEPS #
- Navigate to the Sales sidebar and select Clients.
- Locate the specific client in the listing and click the Actions (⚙️) gear icon.
- Select Edit client from the dropdown menu.
- Update the necessary information in the Edit client modal, such as:
- Company name and Address (City, State, Zip, Country).
- Phone, Website, and TIN Number.
- Groups, Labels, and Currency.
- Click the Save button.
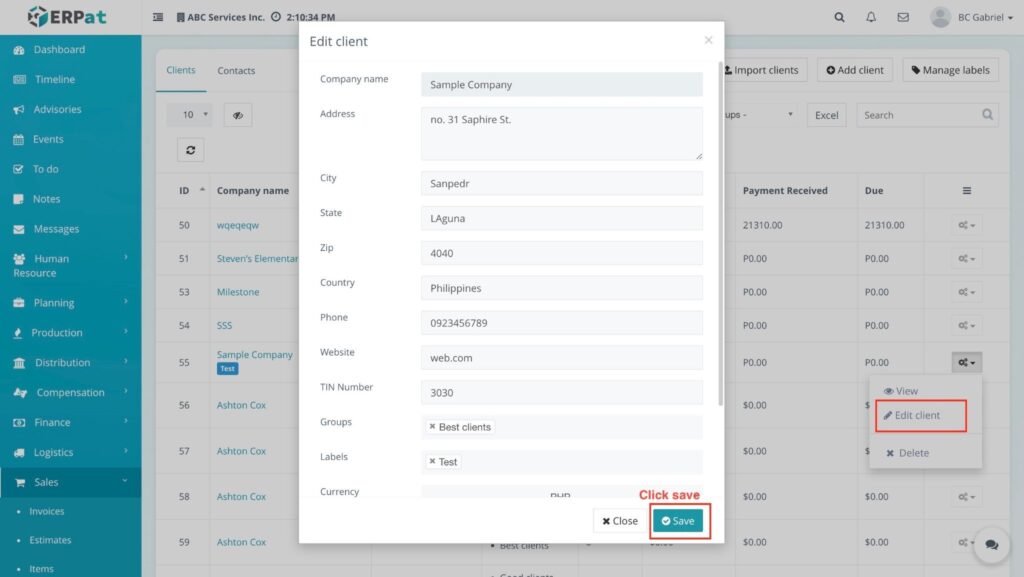
RESULT #
The client’s information is updated immediately, and the changes are reflected in the client listing.
Steps for Deleting a Client #
STEPS #
- Navigate to the Sales sidebar and select Clients.
- Locate the specific client in the listing and click the Actions (⚙️) gear icon on the far right.
- Select Delete from the dropdown menu.
- Confirm the deletion in the system prompt.
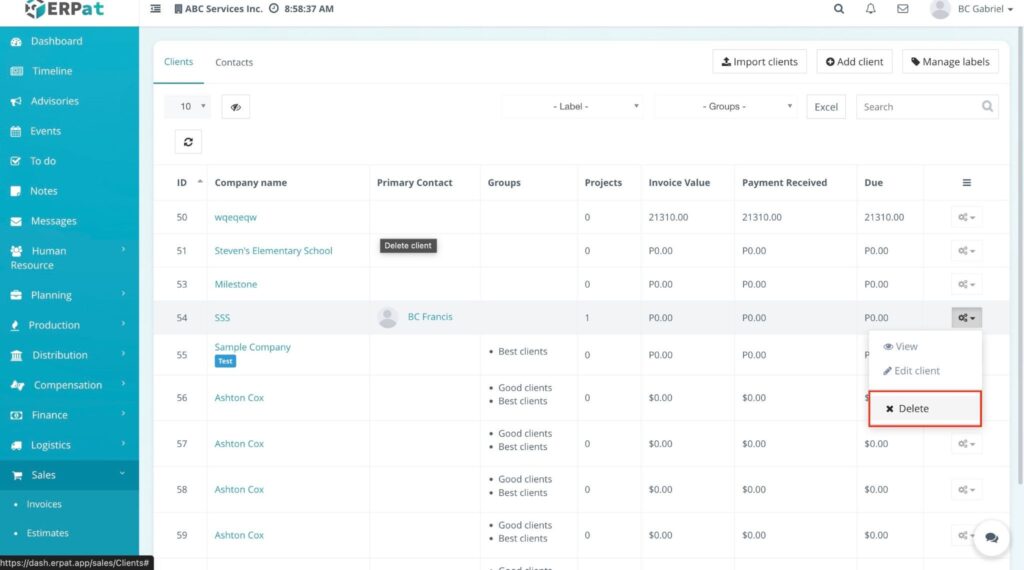
RESULT #
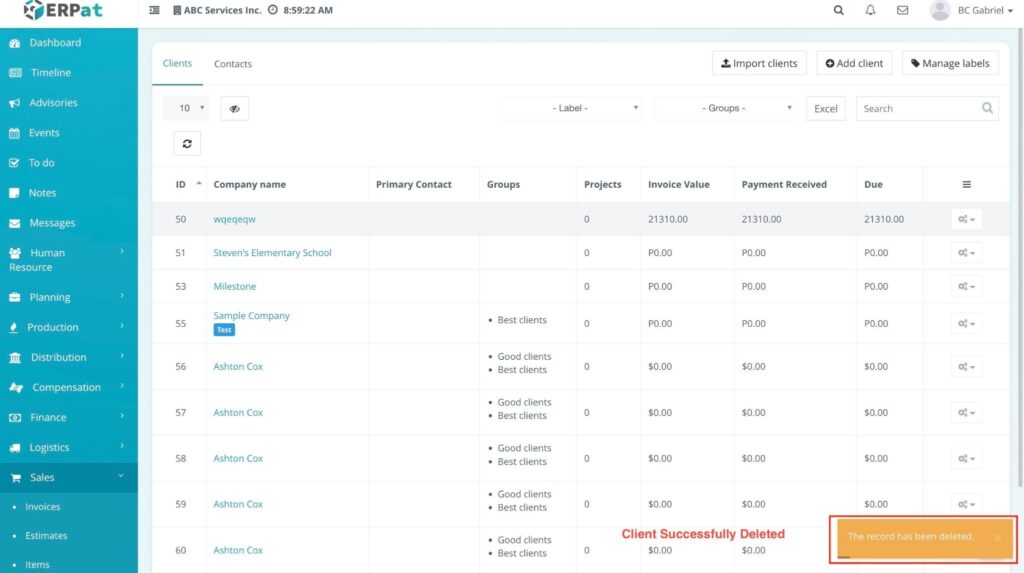
The client record is removed from the list, and a yellow notification bar will appear at the bottom right stating, “The record has been deleted.”
Accessing Contacts #
STEPS #
- Navigate to the Sales sidebar.
- Select Contacts (located directly beside the Clients option).
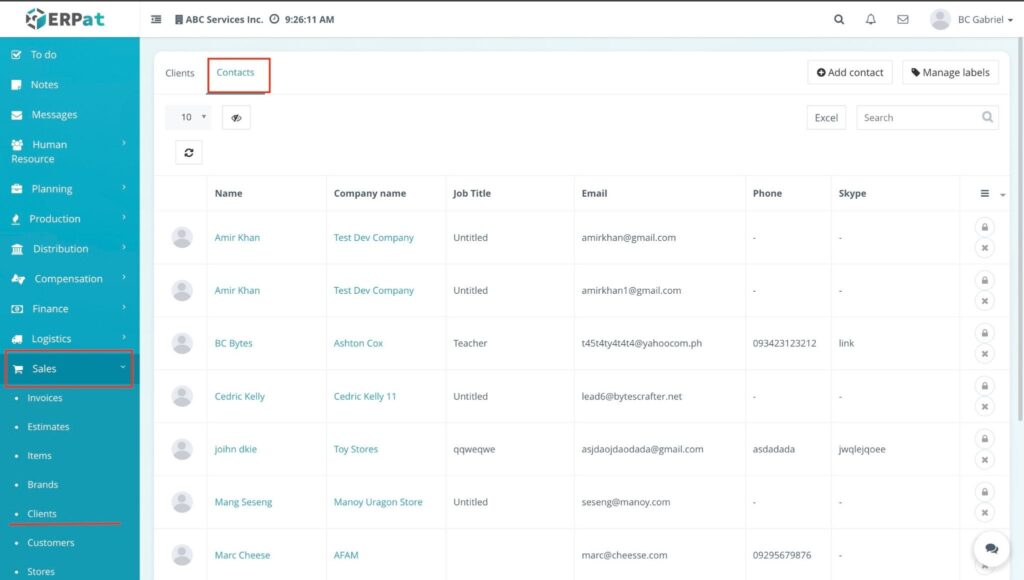
RESULT #
The Contacts listing page will open, displaying a comprehensive list of all individual contacts across all clients, including their Name, Client Company, Email, and Phone.
Steps for Adding a Contact #
STEPS #
- From the Contacts listing page, click the + Add contact button.
- Fill in the required fields in the modal:
- Company: Select the relevant client from the dropdown menu.
- First name and Last name.
- Email, Phone, Skype, and Job Title.
- Gender: Select Male or Female.
- Configure access and notifications:
- Password: Manually enter or click Generate to create a secure password.
- Email login details to this user: Check this box to automatically notify the contact of their credentials.
- Click Save to finalize the entry.
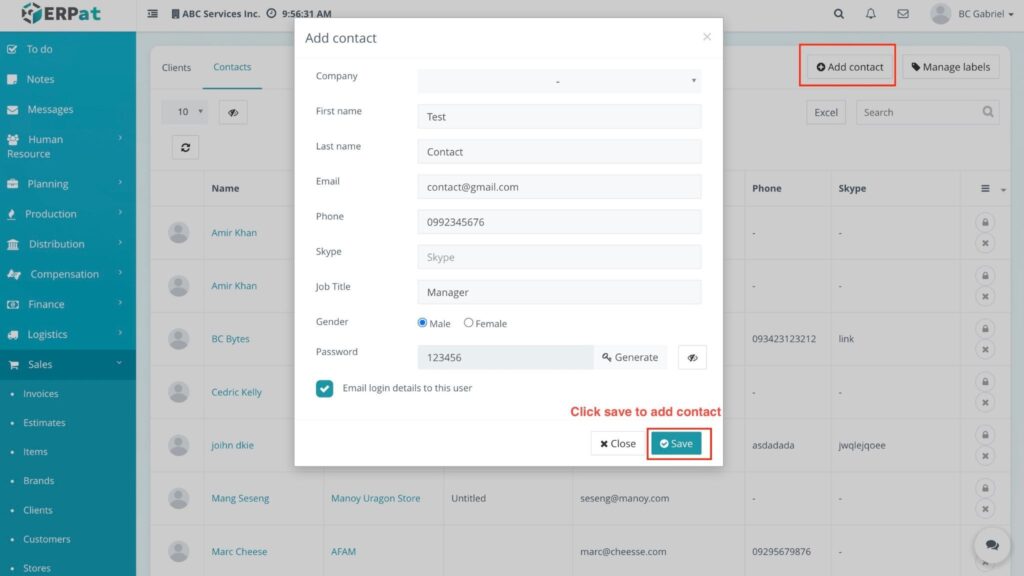
RESULT #
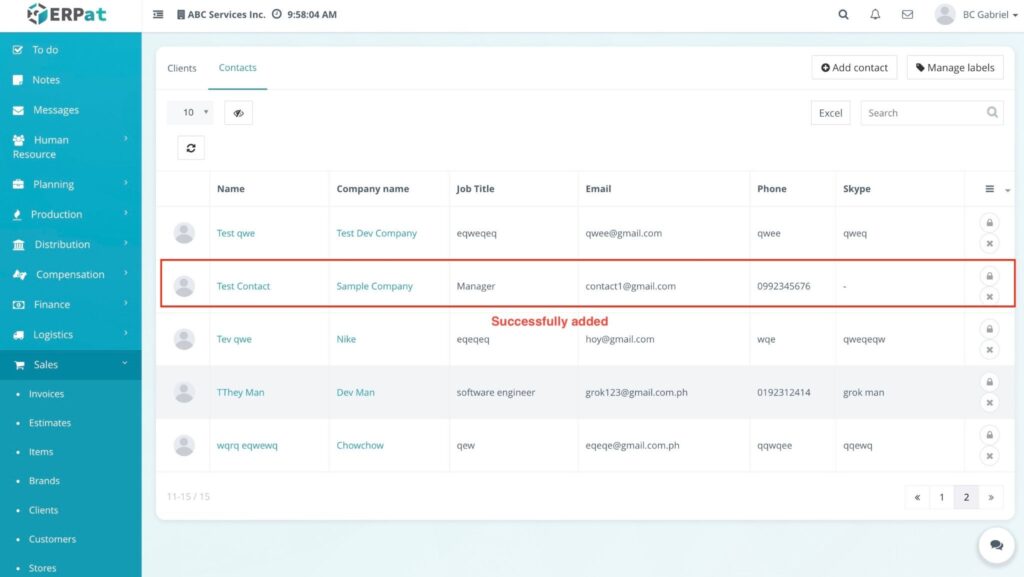
The new contact is successfully added and will appear in the main Contacts table.
Steps to Reset a Contact Password #
STEPS #
- In the Contacts listing page, locate the specific contact record.
- Click the Lock (🔒) icon in the actions column on the far right.
- In the Reset Password modal, enter the New Password and Confirm Password.
- Note: You can click the Generate (🔄) icon for a secure password or the Eye (👁️) icon to view the characters.
- Choose a save method:
- Click Save to update the password in the system.
- Click Send Email to update the password and notify the contact immediately.
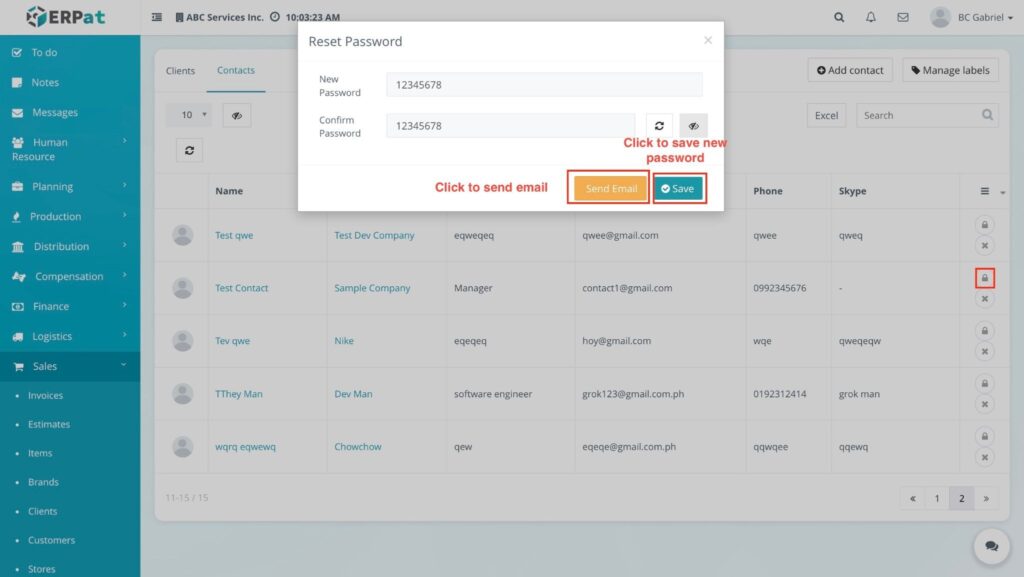
RESULT #
The contact’s password will be updated immediately.
Steps to Delete a Contact #
STEPS #
- In the Contacts listing page, locate the contact you wish to remove.
- Click the Delete (✖) icon in the actions column on the far right.
- Confirm the deletion in the prompt.
RESULT #
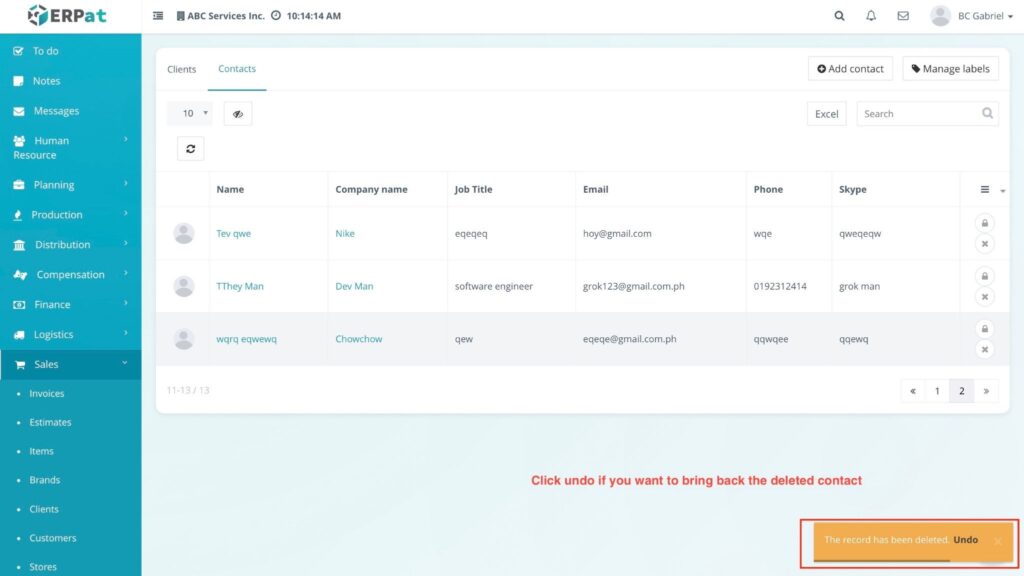
The system removes the contact and displays a “The record has been deleted” notification with an Undo option.
Permissions and Access Control #
- Only authorized Sales or Admin roles can add, edit, or delete client records.
- View-only access may be granted to support or accounting roles for monitoring dues and payments.
Best Practices #
- Always assign a Primary Contact to ensure communication channels are clear.
- Use Groups to distinguish between high-priority “Best clients” and standard accounts.
- Regularly export client data as a backup for external reporting.
Audit & Logs #
All creation, update, and deletion actions for client records are logged for audit and compliance purposes within the ERPat System.
Last Updated: March 16, 2026 Module Owner: Sales – ERPat System


