Overview #
The Internal Wiki module is used to create, manage, and store company-specific documentation and collaborative knowledge. It serves as a centralized repository where users can browse internal articles, categorize information into functional groups, and search for specific procedural guides. This ensures that essential business logic and workflows are documented and easily accessible to all authorized team members.
Each wiki record contains structured metadata, including article titles, category classifications, and real-time view counts, ensuring that the organization maintains a “Source of Truth” for its internal operations and evolving knowledge base.
Key Features #
- Centralized Knowledge Hub for managing and browsing all internal company documentation.
- Category Organization to classify articles into functional or departmental groups for better structure.
- Article Management for creating, editing, and maintaining detailed procedural records.
- Real-time View Tracking to monitor the popularity and relevance of specific internal articles.
- Collaborative Search allowing users to quickly find answers to internal questions through a unified search bar.
- Status Monitoring to track the active or inactive state of documentation and categories.
Accessing the Internal Wiki Module
- Log in to the ERPat System.
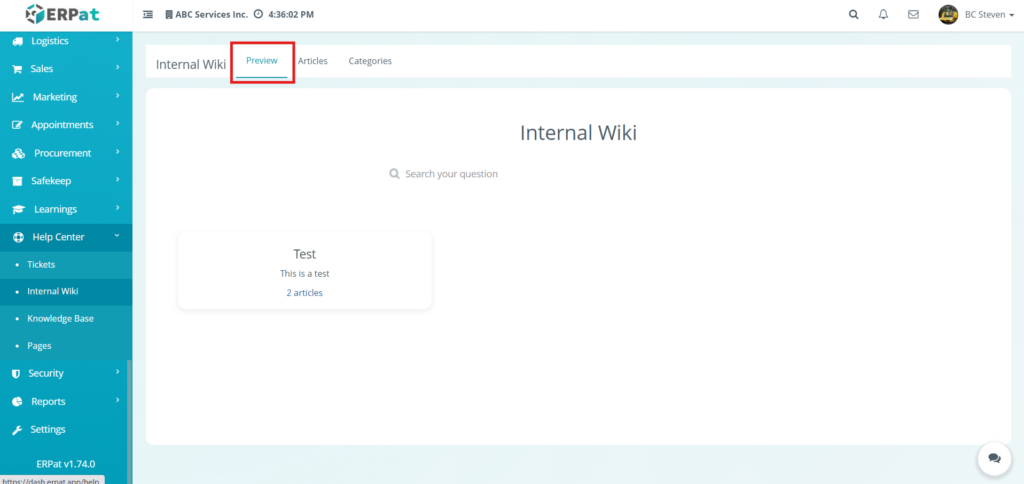
- Navigate to Help Center from main sidebar.
- Select Internal Wiki
- You will be directed to to the Internal Wiki – Preview page displaying all tickets records.
Steps for Viewing Internal Wiki #
STEPS
- Navigate to the Internal Wiki module from the main sidebar.
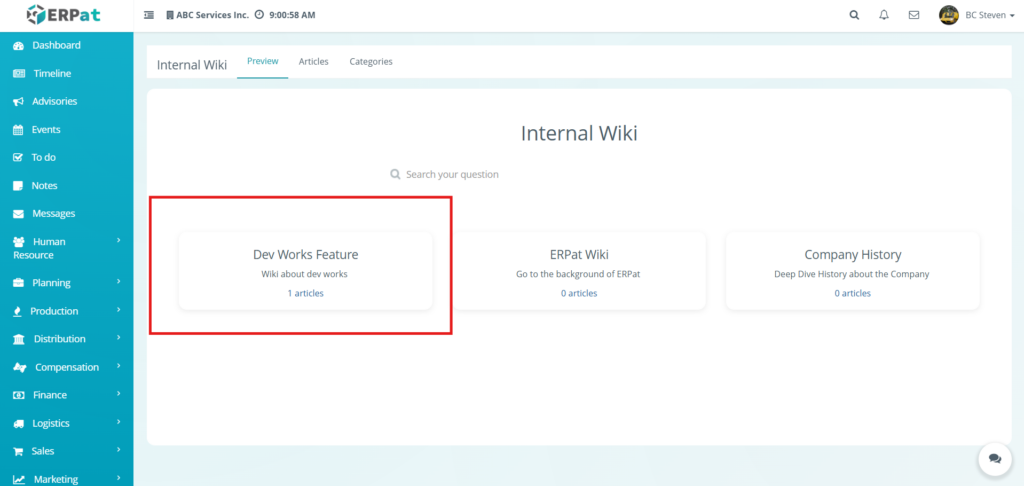
- Ensure you are on the Preview tab to see the category overview.
- Locate the Category Card containing the documentation you wish to view..
- Click the Articles link located at the bottom of the category card.
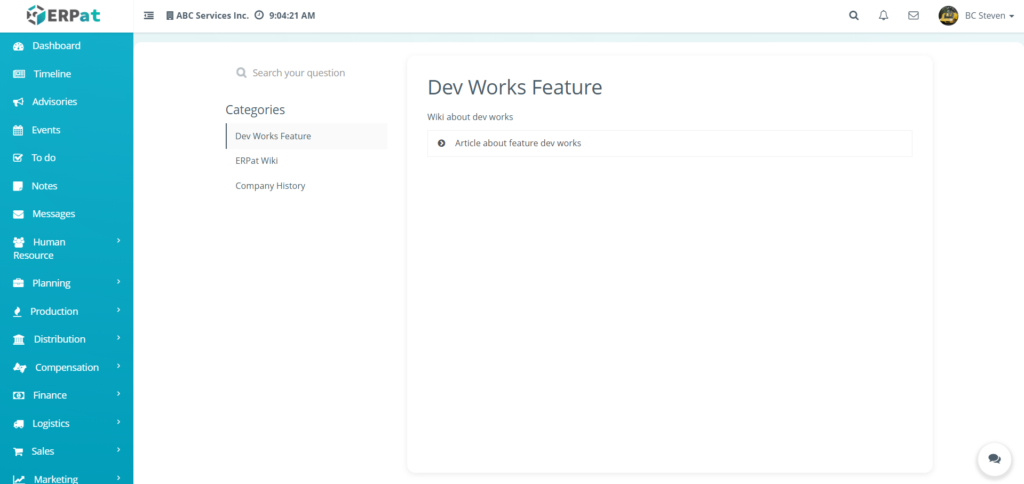
- Select the Article Title from the list on the right side of the screen.
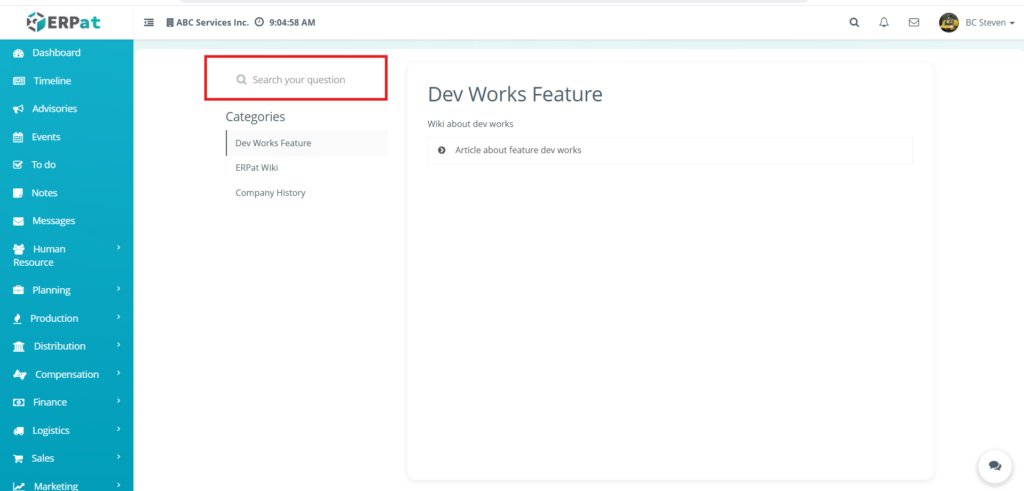
- Categories List: The left sidebar of this view allows you to switch between different knowledge groups.
- Article List: Displays all available documentation within the selected category.
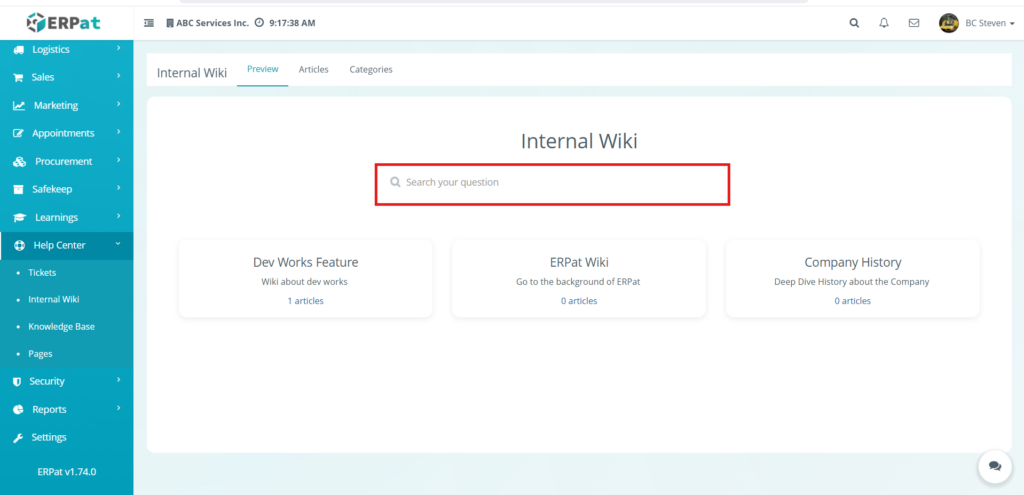
Search Bar Functionality
The search bar is a central tool within the Internal Wiki designed to help users quickly locate specific documentation or answers to procedural questions without manually browsing through categories.
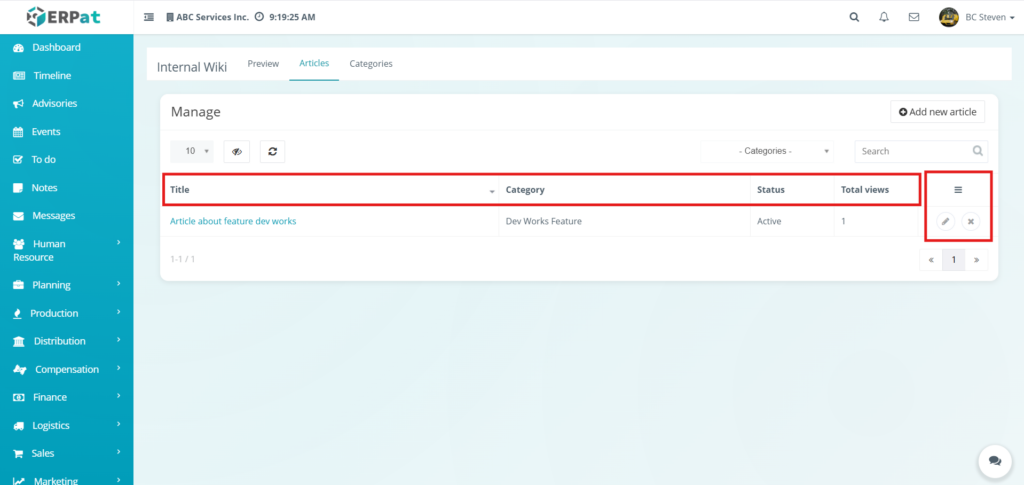
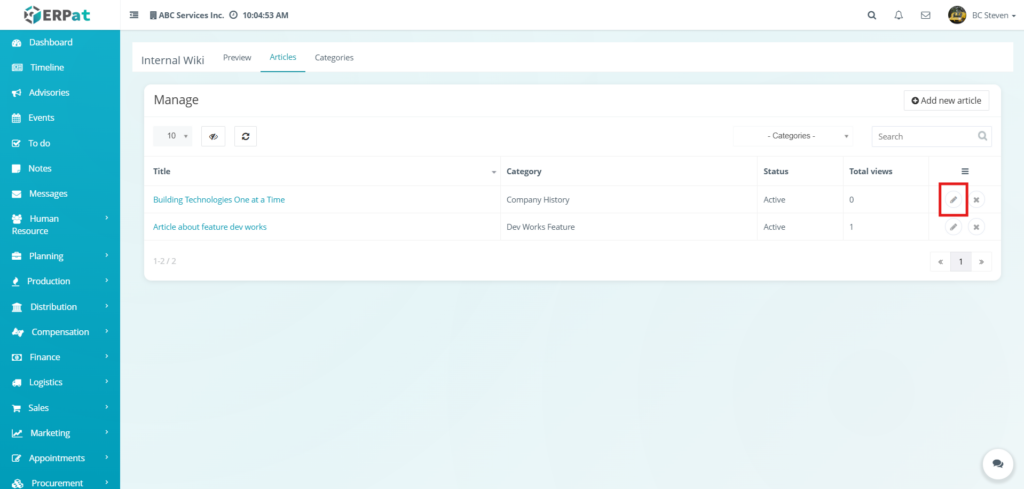
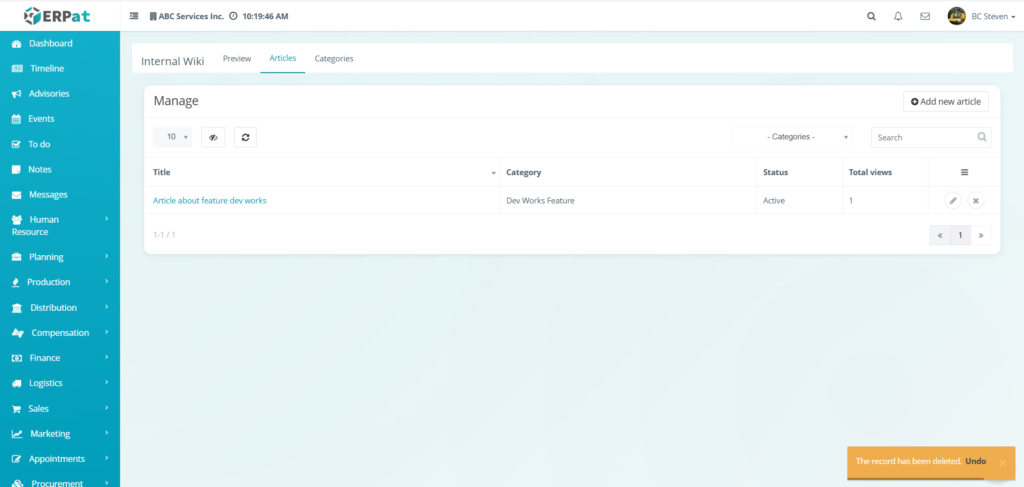
Internal Wiki: Articles Manage Page #
The Articles listing page provides an overview of all documented knowledge entries within the system. Administrators can use this interface to track engagement levels and manage the visibility of specific guides.
Displays the following details:
- Title – The name of the specific wiki article.
- Category – The functional group or department the article belongs to .
- Status – Indicates whether the article is currently Active or Inactive.
- Total views – A real-time counter showing how many times the article has been accessed by users.
- Actions – Controls to Edit (pencil icon) or Delete (x icon) specific article records.
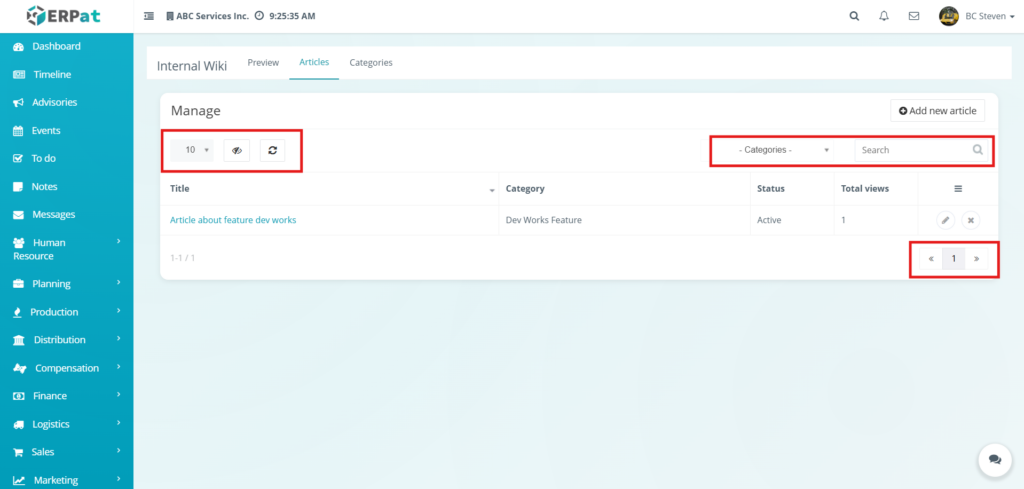
Additional Controls
- Row Display – Adjusts the number of articles shown in the table view (e.g., 10, 25, 50) to manage data density.
- Visibility Control – Toggles the visibility of specific columns in the table, allowing users to customize which metadata is displayed.
- Refresh – Manually updates the data table to ensure the most recent view counts and article statuses are shown.
- Categories Filter – A dropdown menu used to narrow the list of articles to a specific functional group or department.
- Search Bar – Facilitates quick lookup of specific articles by entering titles or keyword descriptions.
- Pagination – Navigation controls located at the bottom-right used to browse through multiple pages of records within the Wiki.
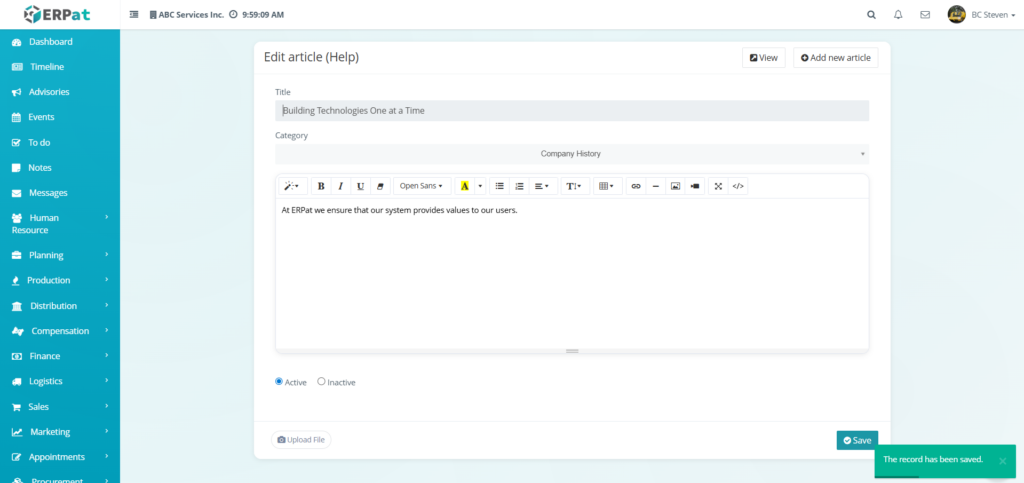
Steps for Adding a Article #
STEPS
- Navigate to the Internal Wiki module and select the Articles tab.
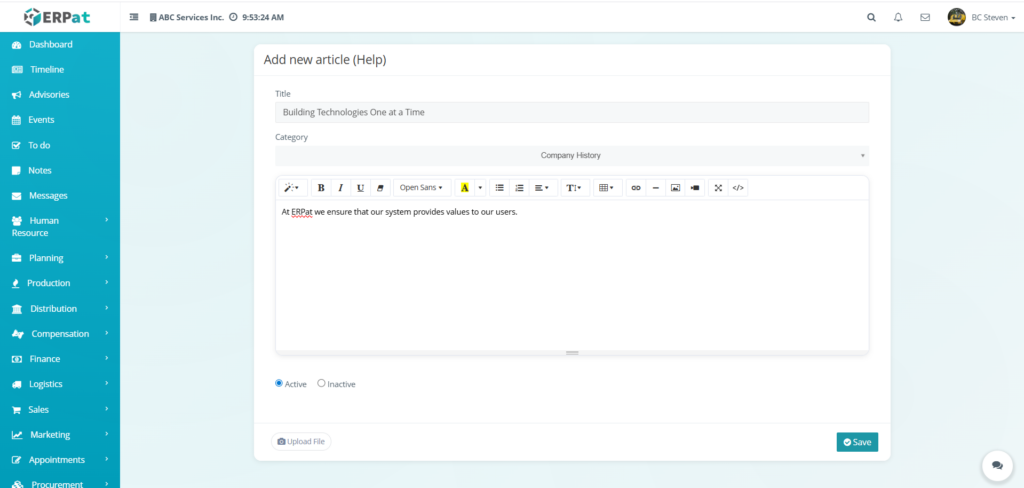
- Click the Add new article button located at the top-right of the management interface.
- Fill in the required fields in the creation form:
- Title – Enter the primary heading for the article (e.g., Building Technologies One at a Time).
- Category – Select the appropriate functional group from the dropdown menu (e.g., Company History).
- Content Editor – Type the article body into the rich-text editor. Use the toolbar to apply formatting:
- Text Styling – Bold, Italic, Underline, and Strikethrough options.
- Typography – Font family and text color selection.
- Alignment & Lists – Bulleted/numbered lists and paragraph alignment.
- Media & Links – Insert tables, hyperlinks, images, and videos.
- Code View – Use the
</>button to edit the article using HTML.
- Set the Article Status by selecting the Active or Inactive radio button.
- Upload Attachments by clicking the Upload File button at the bottom of the form if supporting documents are required.
- Click Save to publish the article to the internal wiki.

Result #
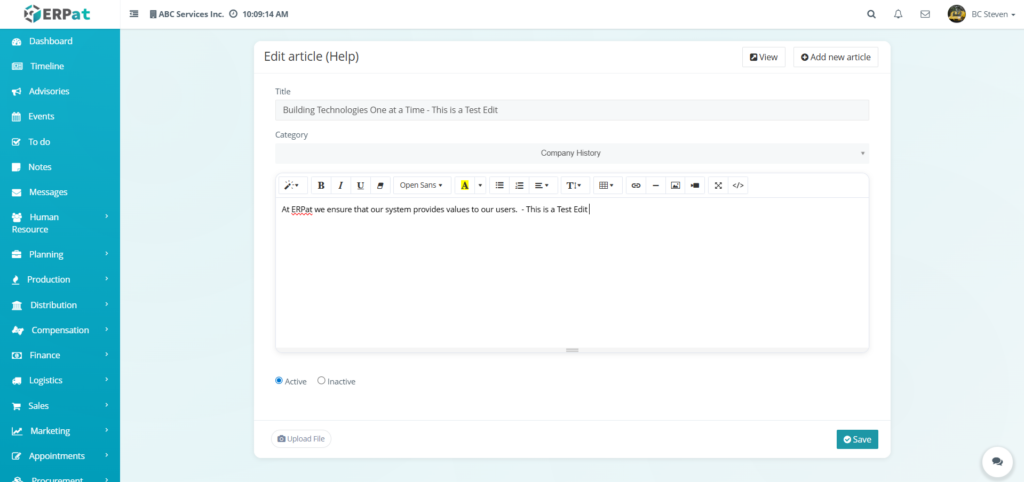
Steps for Editing an Article #
STEPS
- Navigate to the Internal Wiki module and select the Articles tab.
- Locate the specific article you wish to modify from the management table.
- Click the Edit (pencil) icon under the Actions column.
- Update the necessary information within the edit interface:
- Title – Modify the heading of the article if needed.
- Category – Reassign the article to a different functional group using the dropdown menu.
- Content Editor – Use the rich-text toolbar to update the article body, including text styles, lists, and media embeds.
- Status – Switch the article between Active and Inactive.
- Upload File – Add or replace supporting attachments at the bottom of the form.
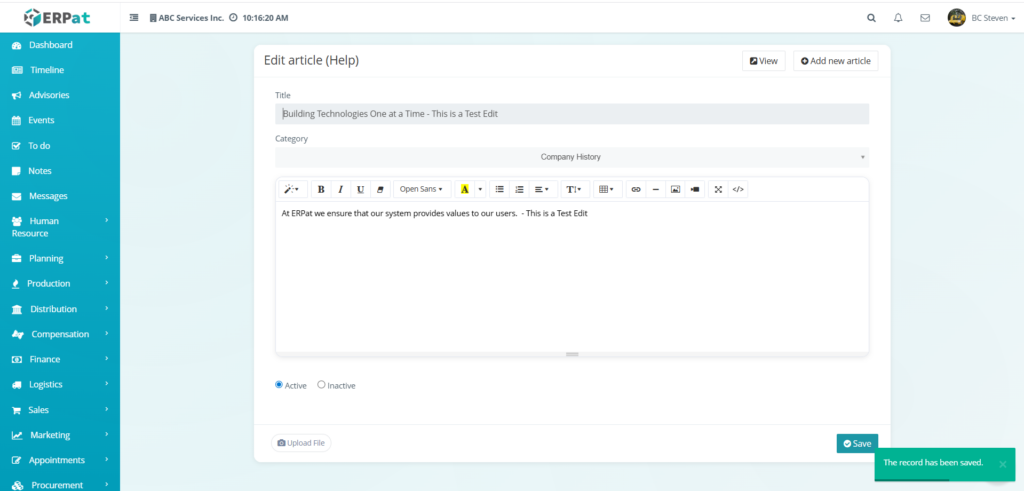
- Click Save to apply and publish the changes.
Result #
Steps to Delete an Article #
STEPS
- Locate the article from the articles listing table.
- Click the X icon under the Actions column.
- The selected article would be deleted.

Steps to Undo a Deleted Article #
STEPS
- Locate the notification toast that appears at the bottom-right of the screen.
- Click the Undo link within the notification box.
- The deleted article would be restored to the listing table.
Notes:
- Articles that was recently deleted can be the only one that can be undo
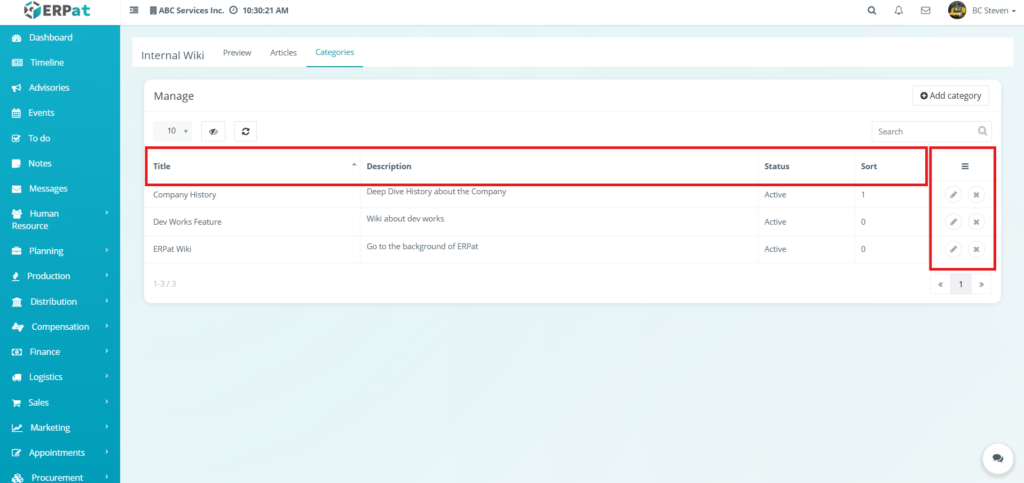
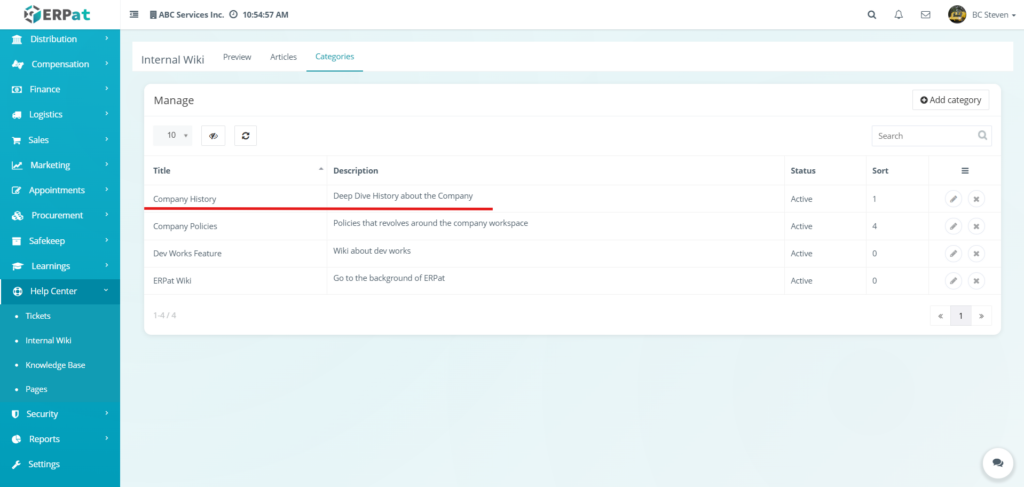
Internal Wiki: Categories Listing Page #
The Categories listing page provides a high-level view of all organizational groups used to classify internal documentation. This interface allows administrators to manage how articles are structured and control the sequence in which categories appear on the preview page.
Displays the following details:
- Title – The name assigned to the knowledge category.
- Description – A brief summary explaining the scope of documentation housed within that category.
- Status – Indicates whether the category is currently Active and visible to users.
- Sort – The numerical order assigned to the category, determining its placement on the Preview page.
- Actions – Functional icons used to Edit (pencil) or Delete (x) specific category records.
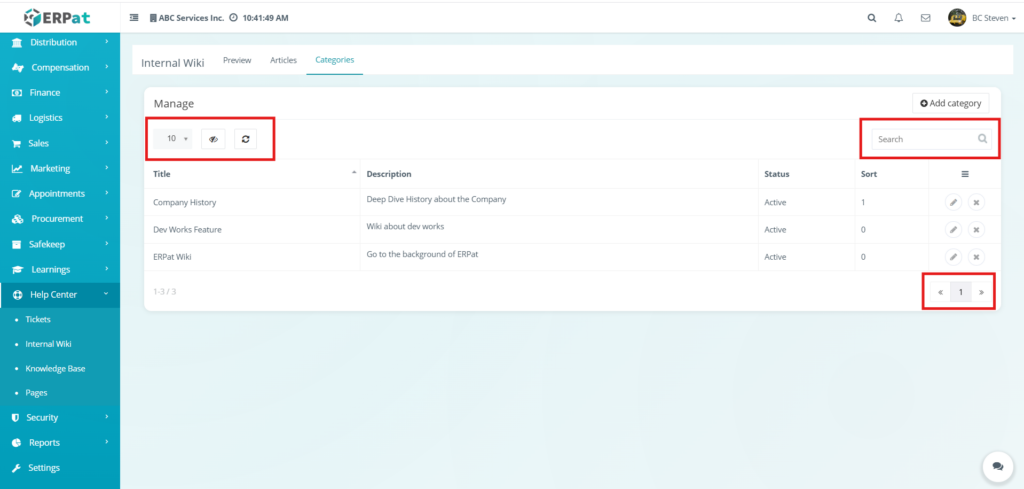
Additional Controls:
- Add category – A primary action button located at the top-right used to define and create a new organizational group for wiki articles.
- Row Display – A dropdown menu used to adjust the number of categories visible in the table per page, with options such as 10, 25, or 50.
- Visibility Control – An icon used to toggle the display of specific columns within the categories table to customize the workspace.
- Refresh – A button used to manually update the listing table to reflect recent changes or additions.
- Search – An input field used for quick lookup of specific categories by entering titles or keyword descriptions.
- Pagination – Navigation controls located at the bottom-right used to browse through multiple pages of category records.
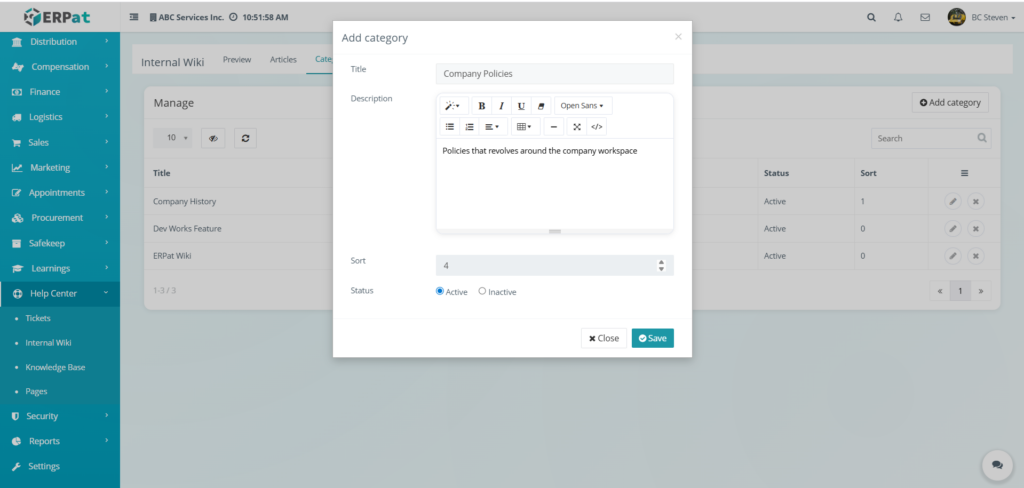
Steps for Adding a Category #
STEPS
- Navigate to the Internal Wiki module and select the Categories tab.
- Click the Add category button located at the top-right of the management interface.
- Fill in the required fields in the modal:
- Title – Enter the name of the new knowledge group.
- Description – Provide a brief summary of the category’s scope using the rich-text editor.
- Sort – Enter a numerical value to determine the display order of the category on the Preview page.
- Status – Select the Active or Inactive radio button to control visibility.
- Review the information for accuracy.
- Click Save to create the new category, or click Close to discard the changes.
Result #
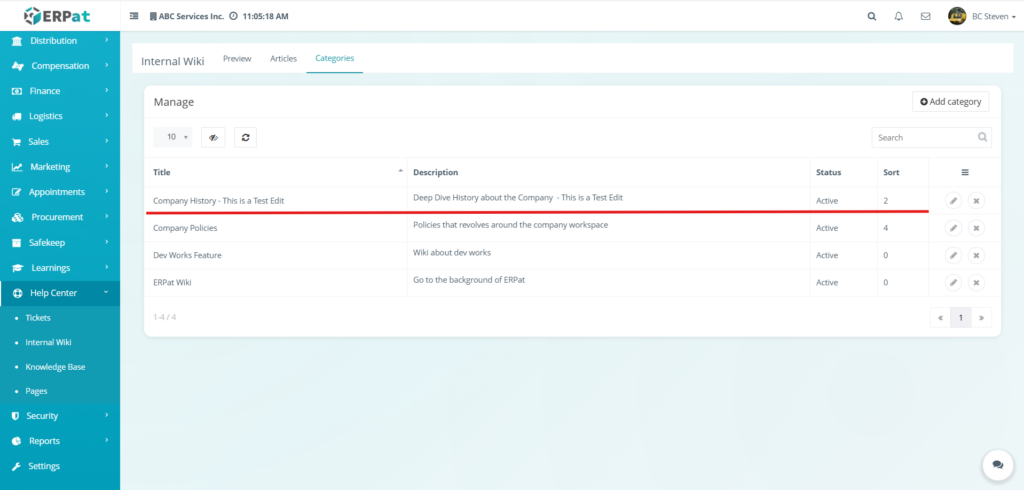
Steps for Editing a Category #
STEPS
- Navigate to the Internal Wiki module and select the Categories tab.
- Locate the specific category you wish to update from the management table.
- Click the Edit (pencil) icon under the Actions column.
- Update the necessary information in the modal:
- Title – Modify the name of the category.
- Description – Update the summary of the category using the rich-text editor to provide more context.
- Sort – Adjust the numerical value to change where this category appears in the list on the Preview page.
- Status – Toggle between Active or Inactive to control whether users can see this category and its articles.
- Click Save to apply the changes to the category record.

Result #
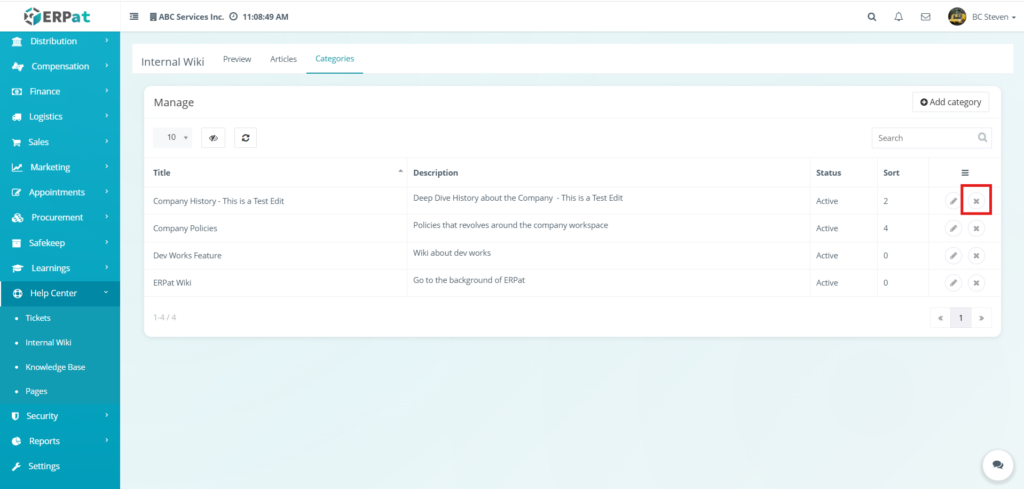
Steps for Deleting a Category #
STEPS
- Locate the category you wish to remove from the categories listing table.
- Click the X icon located under the Actions column for that specific category.
- The selected category would be deleted from the listing.
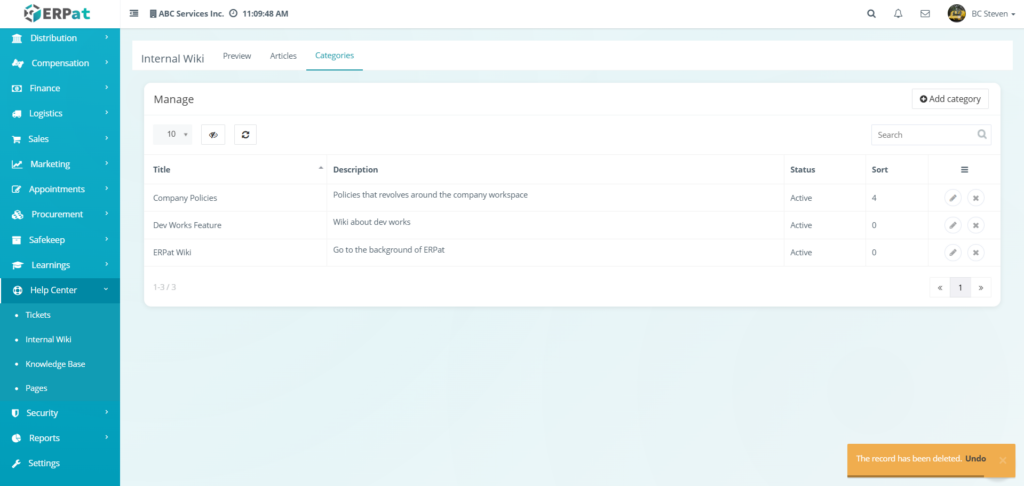
Steps to Undo Deleted Category #
STEPS
- Locate the notification toast that appears at the bottom-right of the screen immediately after deletion.
- Click the Undo link within the orange notification box.
- The deleted category would be restored to the listing table with its original title, description, and sort order intact.
Notes:
- Category that was recently deleted can be the only one that can be undo
Best Practices #
- Standardize Documentation Titles – Use clear and concise naming for articles to ensure that knowledge is easily searchable and identifiable for all team members.
- Categorize Content Logically – Group related articles into functional categories to maintain a structured and intuitive browsing experience for users.
- Maintain Detailed Summaries – Provide accurate descriptions for each category card so users understand the scope of the documentation housed within that section.
- Regularly Audit Article Status – Review the listing table periodically to ensure outdated guides are set to Inactive or updated to reflect current company workflows.
- Use Inactive Status for Archiving – Instead of deleting categories or articles, set them to Inactive to preserve the content for future reference while removing it from the public Preview page.
- Verify Visual Formatting – Utilize the rich-text editor consistently to ensure articles remain readable and professional across different departments.
- Optimize Sort Order – Regularly review the numerical sort values of categories to ensure the most frequently accessed knowledge groups appear first on the Preview page.
Audit & Logs #
All create, update, and delete actions for articles and categories are logged for audit and compliance purposes within the ERPat System.
Last Updated: [March 6, 2026] Module Owner: Help Center IS – ERPat System


