Overview #
The Security Module is used to manage system access, user roles, and security restrictions within the ERPat system. It provides administrators with full control over user permissions, inactivity rules, and IP-based access limitations.
This module ensures that only authorized users can access specific features and modules, helping maintain system integrity, data security, and proper user accountability.
Key Features #
- Centralized role and permission management
- Role-based access control across all modules
- Permission configuration per module action (view, create, edit, remove)
- User assignment to specific roles
- Inactive user lockout configuration
- IP-based restriction for timecard access
- Real-time permission updates
- Search and filtering functionality
- Secure role-based access for administrators
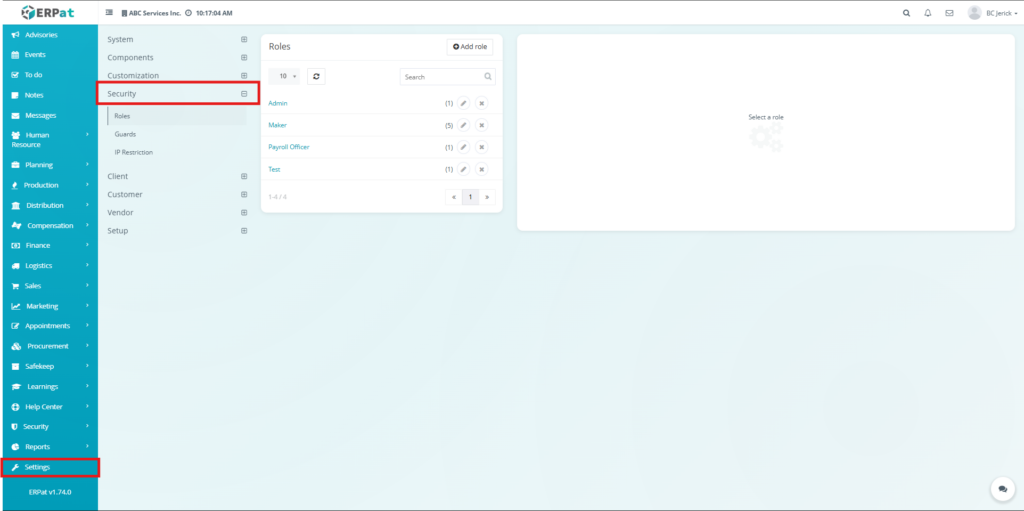
Accessing the Security Module #
- Navigate to the left sidebar menu
- Click Settings
- Select Security
- Choose the desired tab (Roles, Guards, IP Restriction).
Roles Tab #
The Roles Tab is used to create and manage user roles within the ERPat system. Each role defines a set of permissions that control what actions users can perform across different modules.
Administrators can enable or disable permissions such as viewing, creating, editing, and removing records. This ensures that users only have access to functions relevant to their responsibilities.
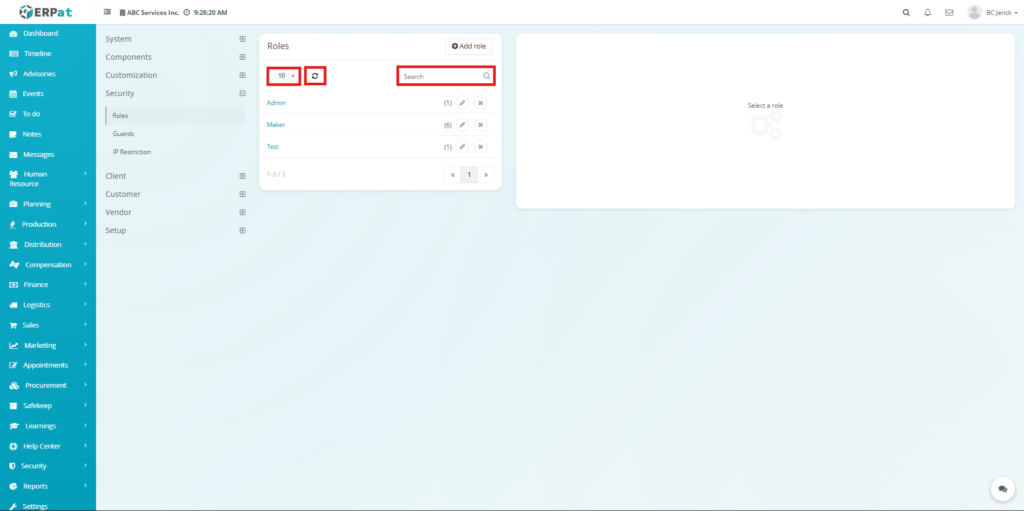
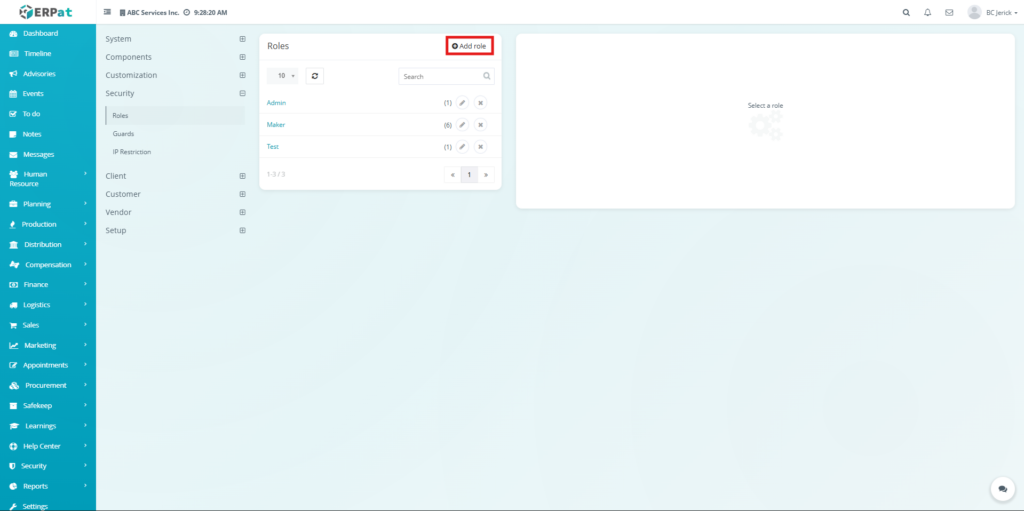
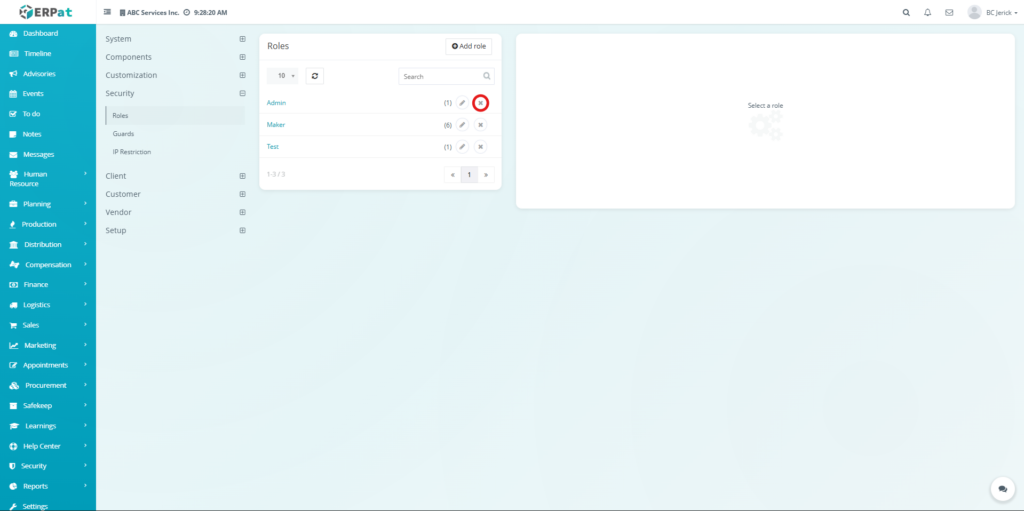
Roles Listing Page #
The Roles page displays all created roles and their assigned users.
Each record displays the following information:
- Title – Name of the role
- Staffs – Number of users assigned to the role
- Actions – Edit and Delete controls
Additional Controls #
- Rows per page selector for record display
- Reload button to refresh records
- Search bar for quick role lookup
- Pagination controls for navigating multiple records
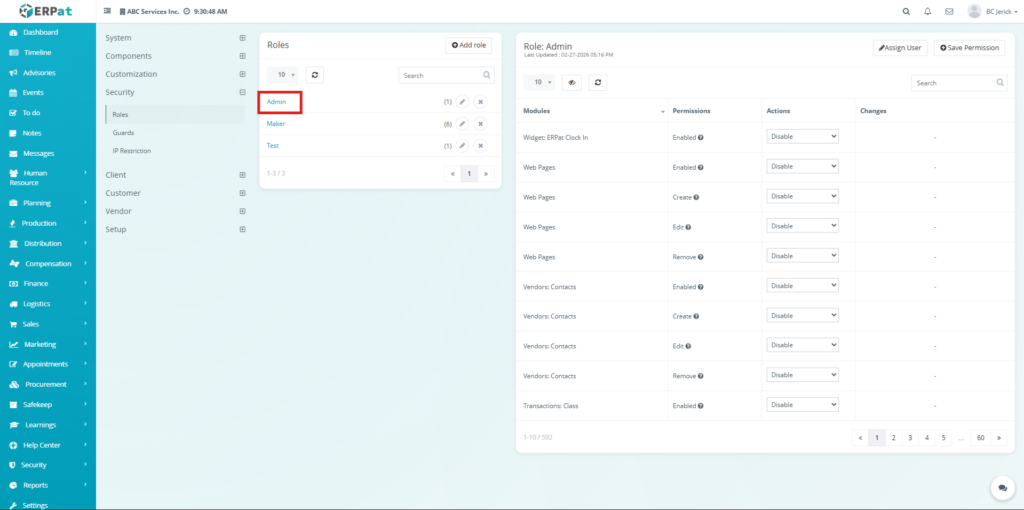
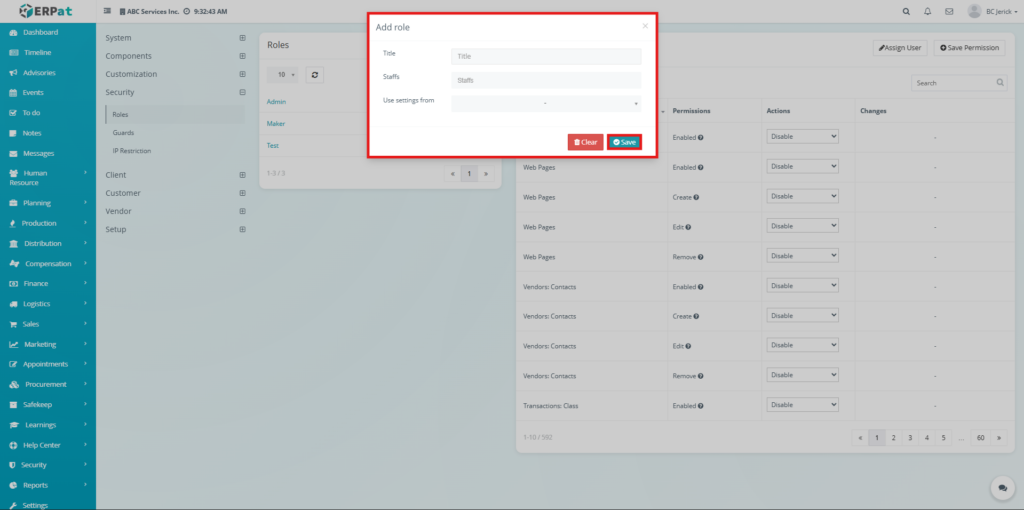
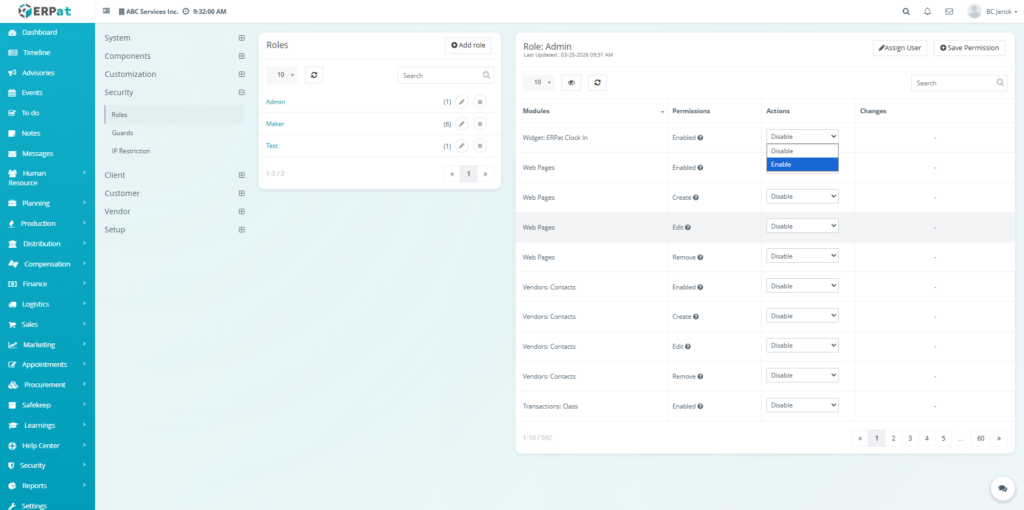
Permission Management Panel #
When a role is selected, the system displays its permissions on the right panel.
- Modules – List of system modules
- Permissions – Type of permission (Enabled, Create, Edit, Remove)
- Actions – Dropdown to Enable or Disable access
- Changes – Displays pending updates
Administrative action buttons available on the page include:
- Assign User – Assign users to the selected role
- Save Permission – Apply permission changes
Steps for Adding a Role #
STEPS #
- Click the Add Role button
- The Add Role popup window will appear
- Enter the Title of the role
- Assign Staffs if necessary
- Select Use settings from if applying a template
- Click Save
Result #
- The new role will be added to the Roles listing page and will be available for permission configuration
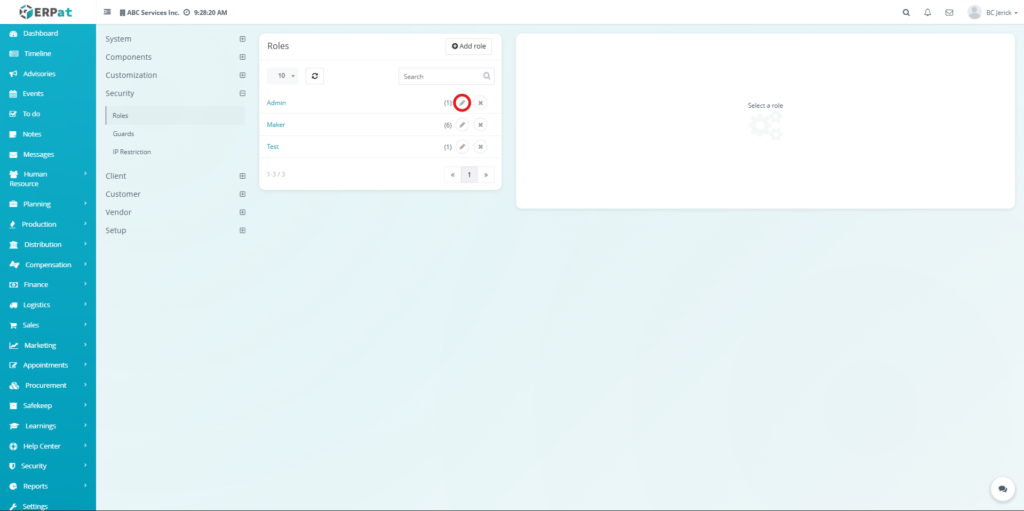
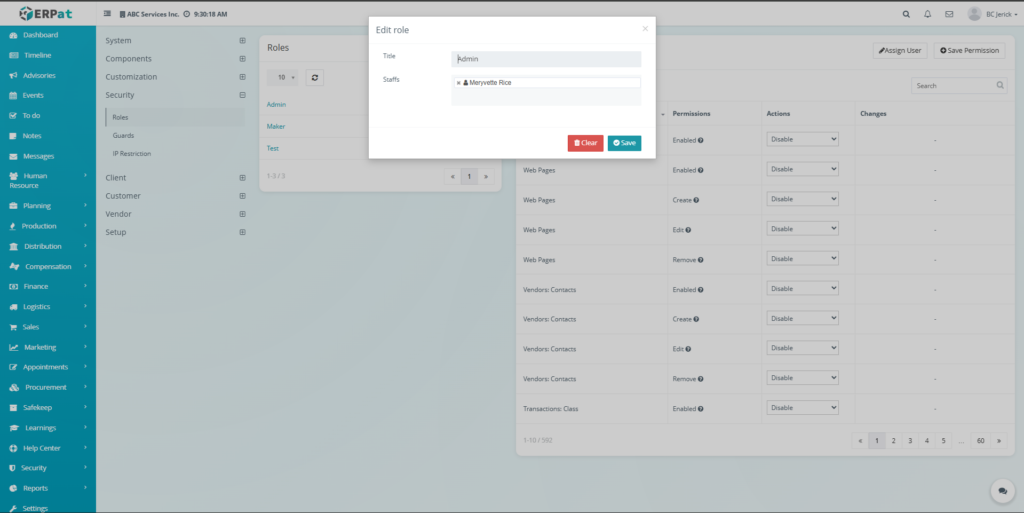
Steps for Editing a Role #
STEPS #
- Locate the role in the listing table
- Click the Edit (✏️) icon
- Modify the role information
- Click Save
Steps for Deleting a Role #
STEPS #
- Locate the role in the listing table
- Click the Delete (✖) icon
- Confirm the deletion
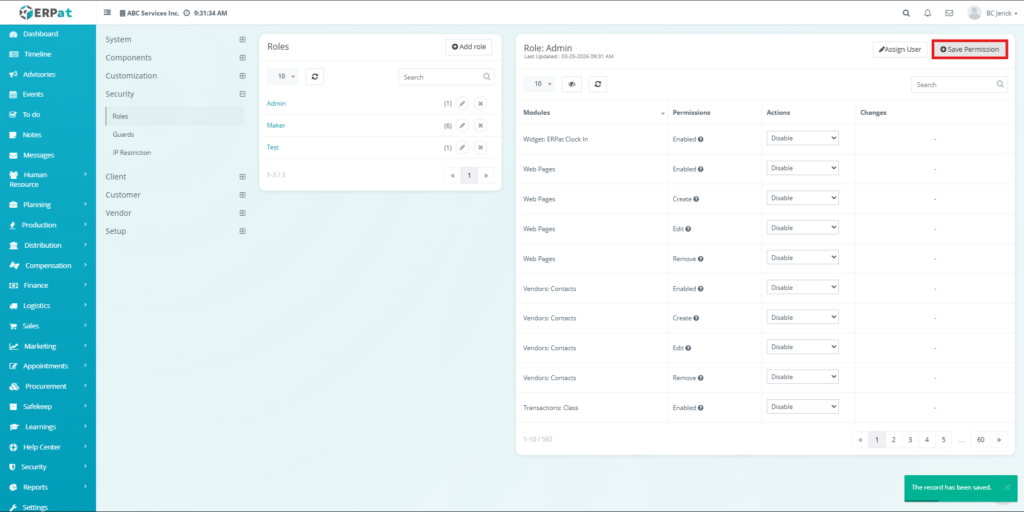
Steps for Configuring Permissions #
STEPS #
- Select a role from the list
- Locate the module and permission type
- Choose Enable or Disable from the dropdown
- Click Save Permission
Result #
- The selected role permissions will be updated and applied across the system
Notes #
- Permission changes are not automatically saved and require manual confirmation
- Changes will immediately affect users assigned to the role
Guards Tab #
The Guards Tab is used to manage inactivity-based security rules within the ERPat system. It allows administrators to define how long a user can remain inactive before their account is automatically locked.
This feature helps prevent unauthorized access from inactive or unattended accounts.
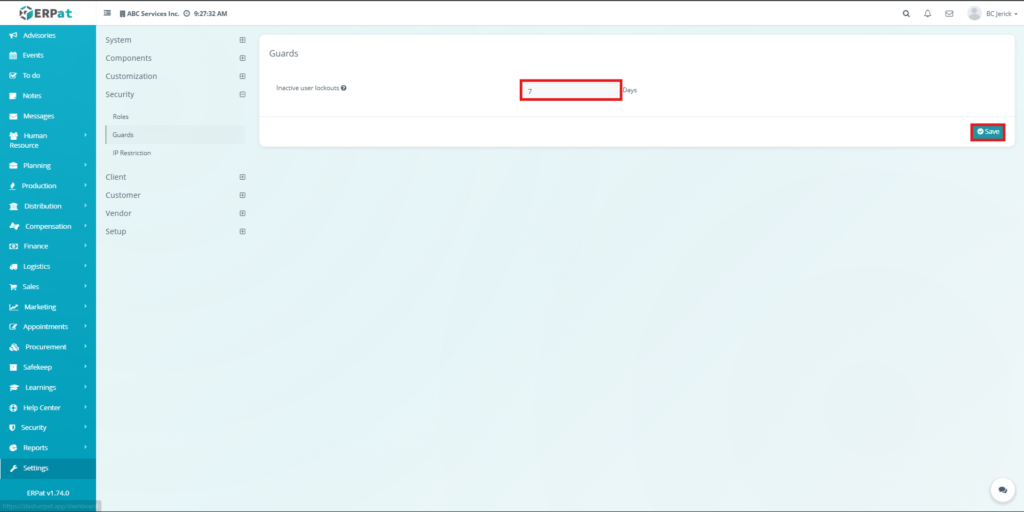
Guards Configuration #
Inactive user lockouts – Number of days before a user account is locked due to inactivity
Steps for Configuring Guards #
STEPS #
- Enter the number of inactive days
- Click Save
Result #
- The system will automatically lock users who exceed the defined inactivity period
Notes #
- Only administrators can modify guard settings
- Locked users may require administrative action to regain access
IP Restriction Tab #
The IP Restriction Tab is used to control access to timecard features based on IP addresses. It ensures that users can only access the system from authorized networks or locations.
This adds an additional layer of security, especially for attendance and time tracking functionalities.
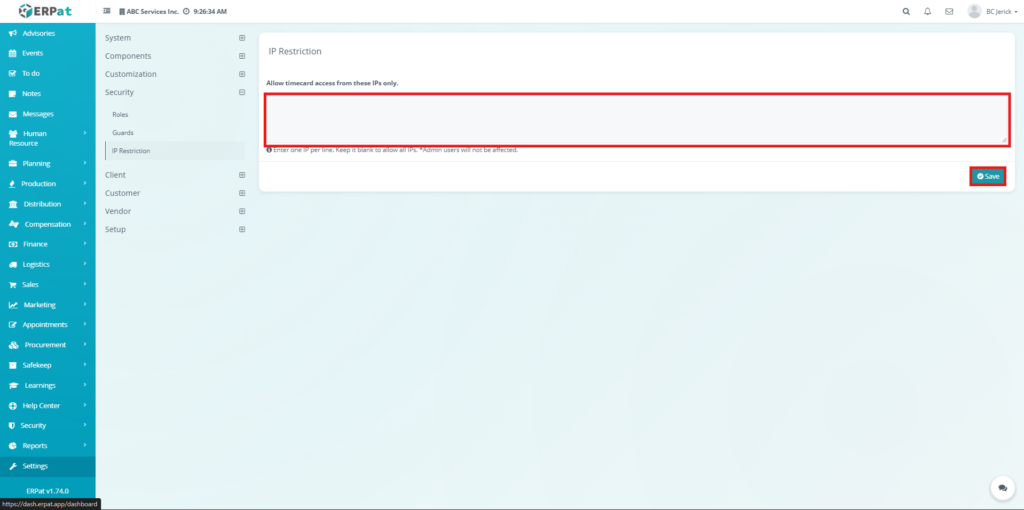
IP Restriction Configuration #
IP Address Field – Input area for allowed IP addresses (one per line)
Steps for Configuring IP Restriction #
STEPS #
- Enter the allowed IP addresses (one per line)
- Leave the field blank to allow all IPs
- Click Save
Result #
- Only the specified IP addresses will be allowed to access timecard features
Notes #
- Admin users are not affected by IP restrictions
- Invalid or unlisted IPs will be denied access
Search and Filtering #
Users can easily locate records within the Roles tab using available tools:
- Search bar – Find roles by name
- Pagination – Navigate through multiple records
- Rows per page selector – Adjust visible records
- Reload button – Refresh the listing
Permissions and Access Control #
Access to the Security Module depends on assigned user roles.
Typical permissions include:
- Users can view assigned roles and permissions
- Authorized users can create and modify roles
- Only administrators can configure permissions and security settings
- Administrative roles typically have full access to all security configurations
Best Practices #
- Assign roles based on user responsibilities
- Limit permissions to only necessary actions
- Regularly review and update role permissions
- Use inactivity lockouts to enhance account security
- Restrict IP access for sensitive operations like timekeeping
Audit & Logs #
All activities within the Security Module are recorded in the ERPat system logs to ensure traceability and accountability.
Logged activities include:
- Role creation, updates, and deletion
- Permission changes
- User-role assignments
- Guard configuration updates
- IP restriction updates
Last Updated: [March 25, 2026] Module Owner: Security Module – ERPat System


