The Settings – Client module is the administrative core for personalizing and configuring the ERPat system’s user interface and structural environment. It allows authorized users to tailor the workspace to specific business needs by managing dashboard layouts, sidebar visibility, and module access. Beyond aesthetics, this module serves as the primary hub for organizational security, facilitating the creation and management of Roles and Groups to ensure data integrity and controlled access across the platform.
Key Features
- UI/UX Personalization: Customize the look and feel of the system, including branding and color schemes.
- Dynamic Menu Management: Select and organize which modules appear in the left-hand navigation sidebar.
- Dashboard Configuration: Tailor the default landing page layout for improved data visibility.
- Role-Based Access Control (RBAC): Create and define specific permissions for different user levels.
- Team Grouping: Organize users into functional groups for easier project and permission management.
- Project System Defaults: Configure global settings and custom fields for project tracking.
Accessing the Client Settings #
- Log in to the ERPat System.
- Navigate to the Settings icon/menu in the main sidebar.
- Select Client.
Result:
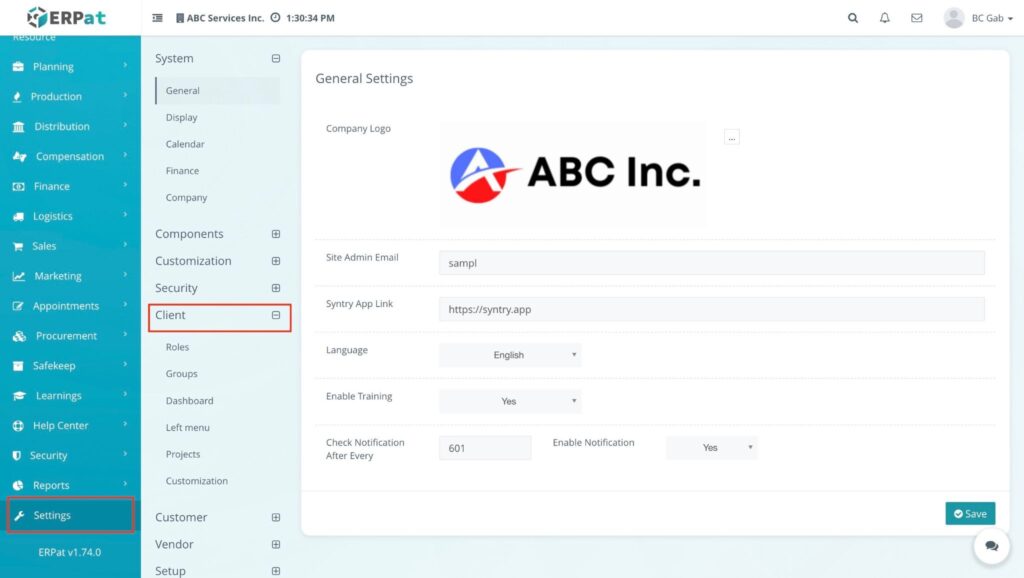
You will be directed to the Client Settings landing page, typically opening on the General or Appearance tab.
Steps to Add a New Role #
- Click the + Add Role button located at the top right of the Roles table.
- A text field will appear at the top of the list or in a modal. Type the Role Name (e.g., “Developer,” “Accountant,” or “QA”).
- Click the Save button (often represented by a checkmark or “Save” text) next to the input field.
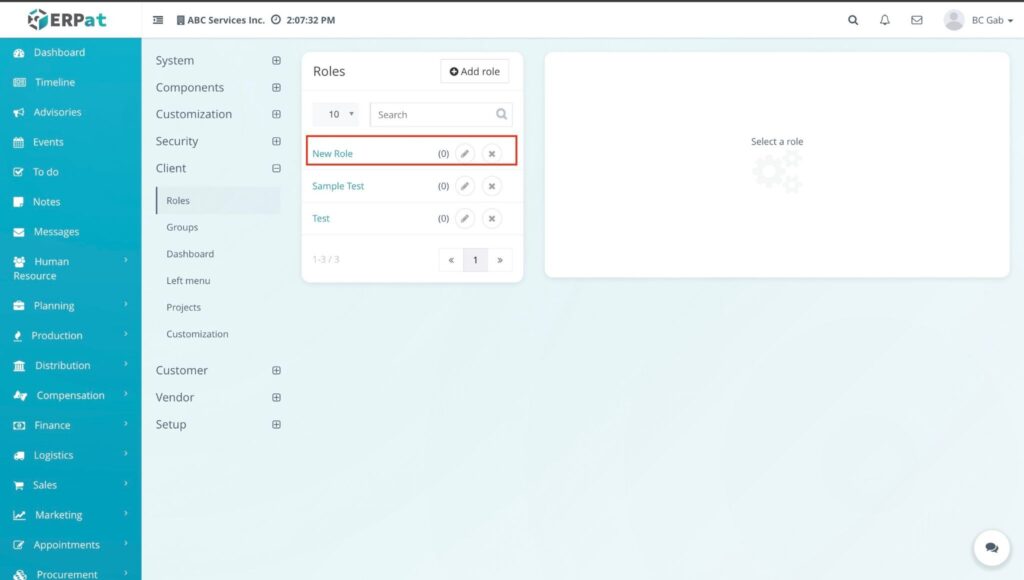
RESULT #
The system creates the new role and adds it to the list, allowing you to then proceed to the Permissions Matrix for configuration.
Step by Selecting a Role #
- Navigate to the Roles list on the left side of the screen.
- Click on the specific Role Name you wish to view or edit.

RESULT: #
The system automatically loads and displays the configuration details for that specific role on the right-side panel of the interface.
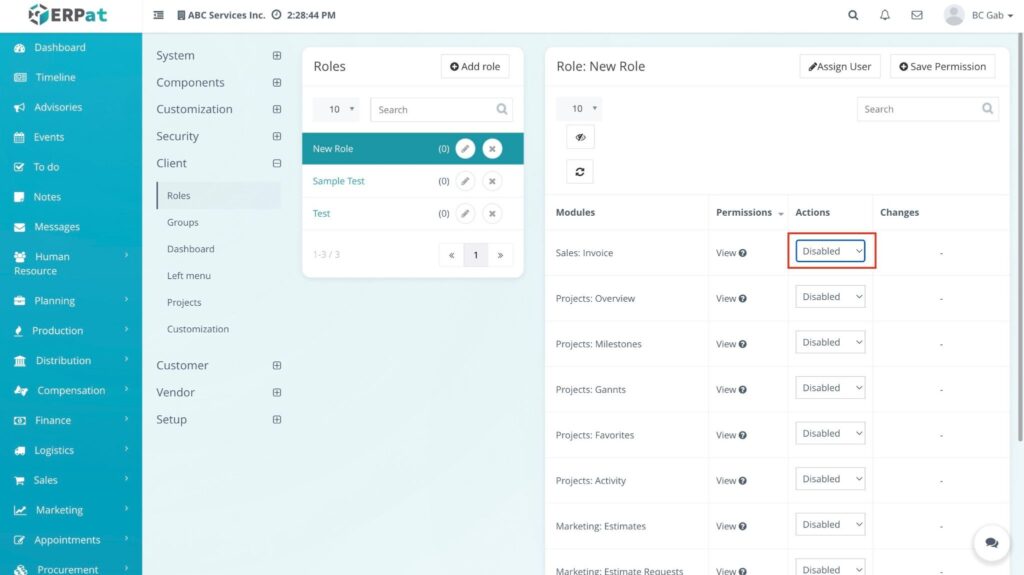
Result Configuration Fields & Functions #
Once a role is selected from the left-side list, the right-side panel automatically populates with the following columns:
- Module: Displays the name of the specific ERPat functional area.
- Permission: Displays the specific access rights assigned to the role for that module. This includes capabilities such as Can Comment, Create, Access, and other role-specific rights.
- Actions: This column contains the interactive controls to modify permissions.
- Enable/Disable: A master toggle switch to turn the entire module on or off for the role.
- Module-Specific Actions: Additional buttons or toggles to grant or revoke specific rights like commenting or creating.
Changes: Indicates any pending modifications that have been made but are not yet finalized.
Step to Assign Users to a Role #
Based on the Roles table interface, here are the steps to link specific employees to a functional role:
- Locate the target role in the Roles list on the left side of the screen.
- Click the Assign User icon) located in the Action column for that role.
- A modal or dropdown directory will appear. Search for the name of the user(s) you wish to assign.
- Select the user(s) from the list.
- Click Confirm or Assign.
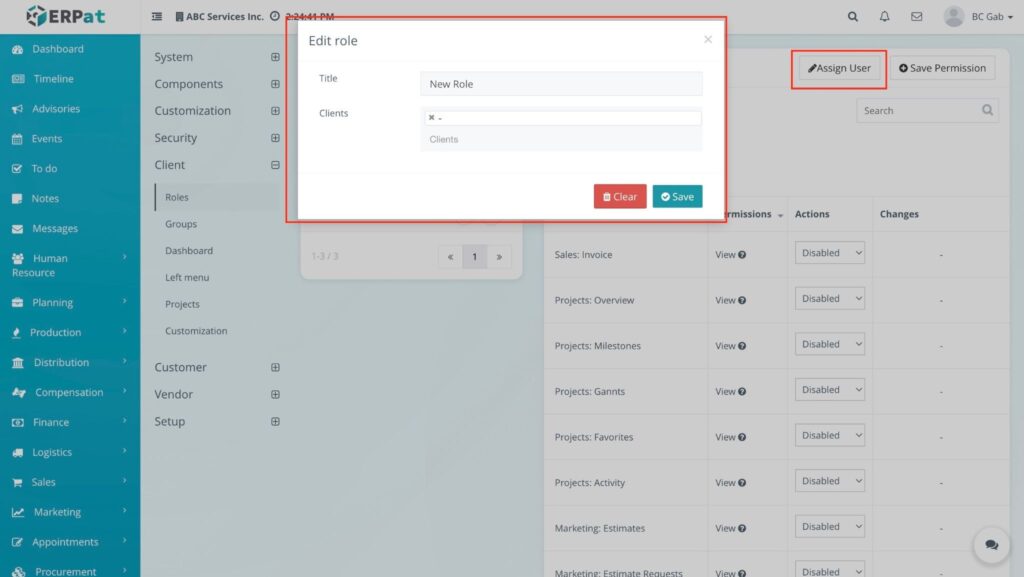
RESULT: #
The User Count column for that role will automatically update to reflect the number of assigned personnel. These users will now inherit the specific permissions (Access, Create, Comment, etc.) configured in the right-side panel.
Step to Save Permissions #
After configuring the specific rights (such as Access, Create, or Comment) in the right-side panel, you must manually commit these changes to the system database.
- Review Changes: Check the Changes column on the right-side panel. This column will indicate which modules have had their permissions modified during the current session.
- Locate Save Button: Find the Save Permissions button (highlighted in blue/purple) at the bottom right of the configuration panel.
- Click Save: Click the button to finalize the update.
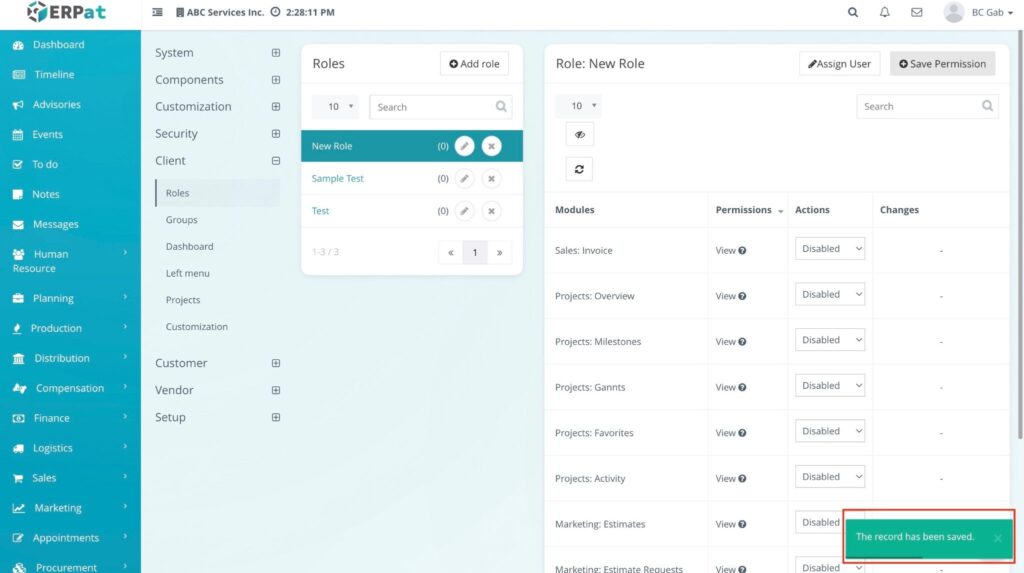
RESULT #
The “Pending” indicators are cleared, and the updated access levels are immediately applied to all users assigned to that specific role.
Step to Edit Actions #
In the ERPat system, editing the “Actions” within a role allows you to specify the exact behavior a user can perform within a module beyond just viewing it.
- Select the Role: Click on the target role from the list on the left to load its permissions on the right.
- Locate the Module: Find the specific module row you want to modify (e.g., Invoices, Banks, or Projects).
- Navigate to the Actions Column: Move to the Actions column on the far right of the module row.
- Modify Functional Rights: * Toggle Primary Access: Use the main switch to enable or disable the module entirely.
RESULT #
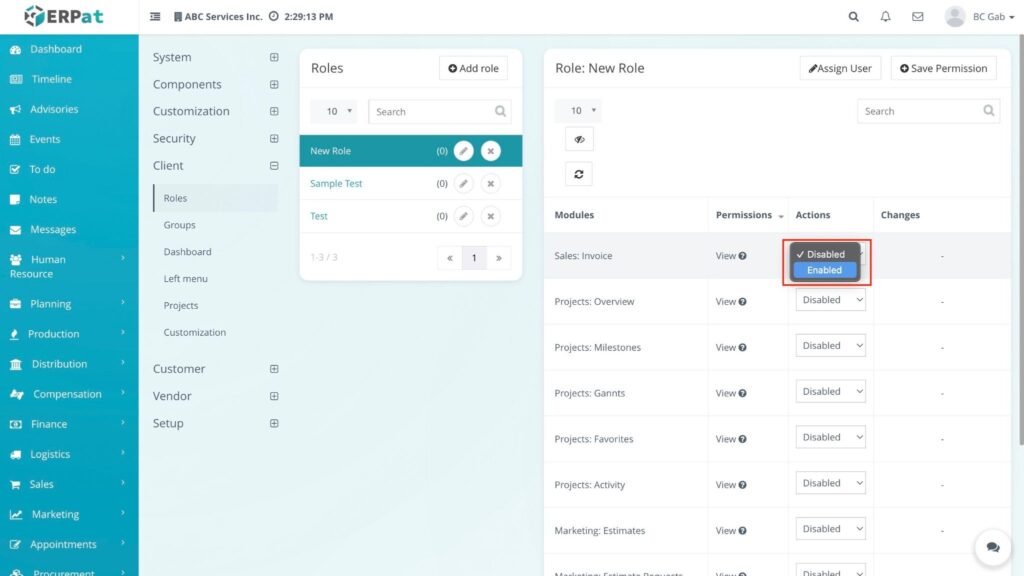
The Permission column updates to show new access levels.
Accessing Groups #
- Navigate to Settings > Client.
- Click on the Groups tab from the top navigation menu.
RESULT #
The system displays the Groups listing page with a table of all created teams and their current member counts.
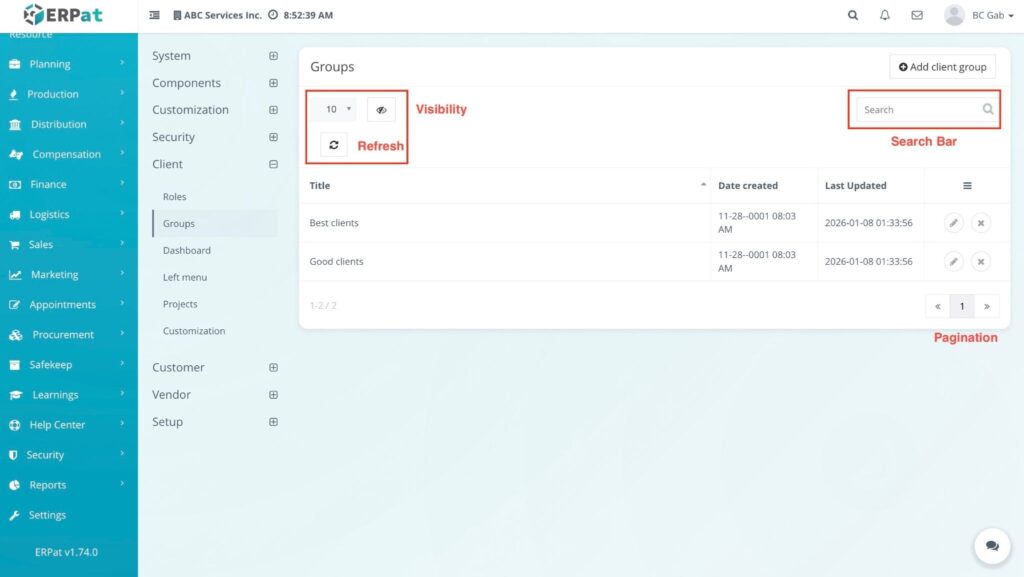
Groups Listing Page #
The listing page provides a centralized view of all organizational units with the following information:
- Title – The unique functional name of the team (e.g., Marketing, Sales, or HR).
- User Count – The total number of employees currently assigned to the group.
- Date Created – The automated timestamp indicating when the group was first registered in the system.
- Actions – Quick controls for managing group structure and access:
- Edit (Pencil icon) – Rename the group.
- Delete (X icon) – Permanently remove the group from the system.
Additional Controls #
- Search bar: Real-time lookup by Group Name to quickly find specific teams.
- Record Count Dropdown: Choose how many groups to display per page (e.g., 10, 20, 50).
- Pagination: Use the Next/Previous or page number controls at the bottom right to navigate the group database.
- Visibility (👁️ icon): Toggle specific columns to customize your table view based on your current needs.
- Refresh (🔄 icon): Reload the table to reflect the most recent data updates from the database.
Step to Add a New Client Group #
- Open the Add Group Modal: Click the + Add Group button at the top right of the Groups listing page.
- Enter Group Name: Type the desired name for the group in the Title field.
- Finalize the Entry: Click the Save button.
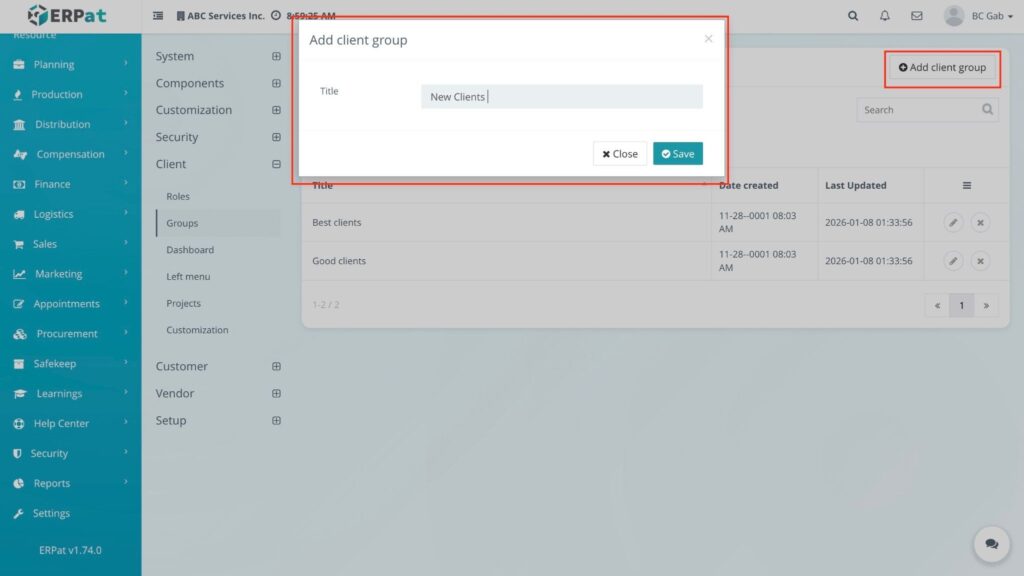
RESULT #
The system creates the new group and it immediately appears in the Groups list, ready for member assignment or permission settings.
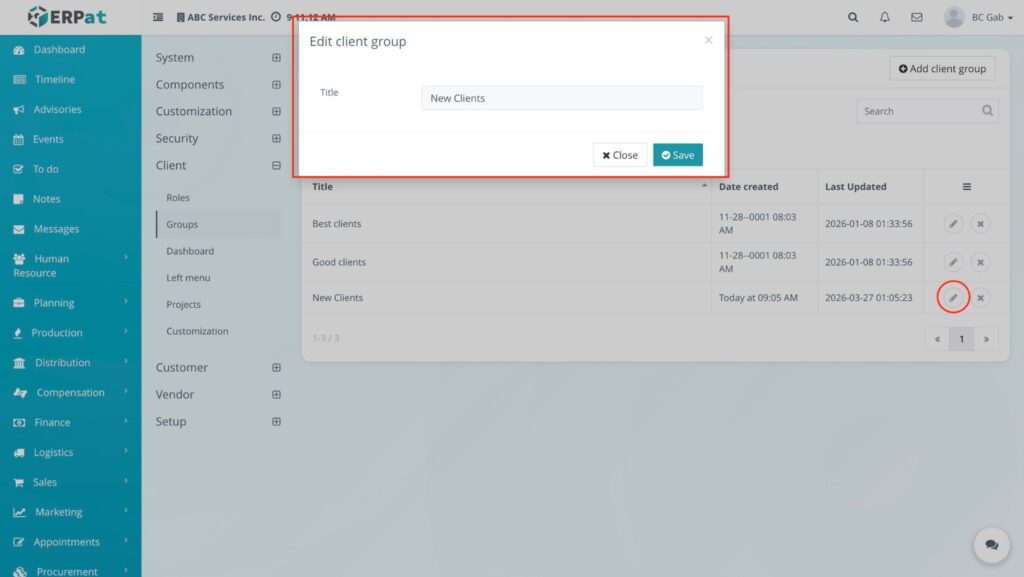
Step to Editing a Client Group #
To update the name of an existing group within the Groups sub-module, follow these steps:
- Locate the Group: Find the specific group you wish to modify in the Groups listing table.
- Open the Edit Modal: Click the Edit (Pencil icon) located in the Actions column for that group.
- Update Title: In the Edit client group modal, clear the existing text in the Title field and enter the new group name.
- Save Changes: Click the Save button to commit the update.
RESULT #
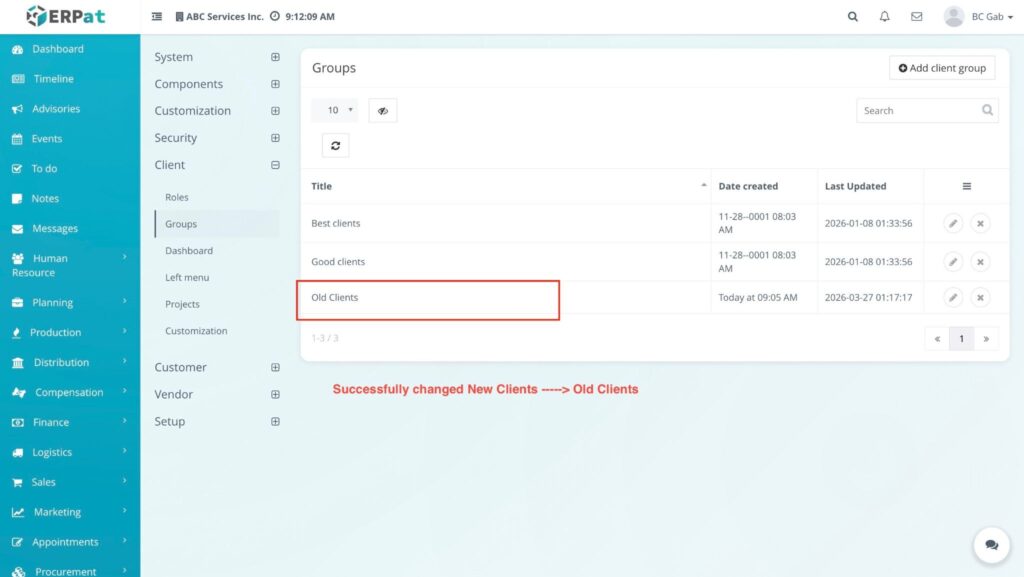
The system immediately updates the group’s name in the table and reflects the new title under the Title column.
Steps to Delete a Client Group #
- Locate the Group: Find the group you wish to remove from the Groups listing table.
- Trigger Deletion: Click the Delete (X icon) in the Actions column.

RESULT #
The system removes the group from the active listing; however, an Undo button will briefly appear, allowing you to instantly restore the group if it was removed by mistake.
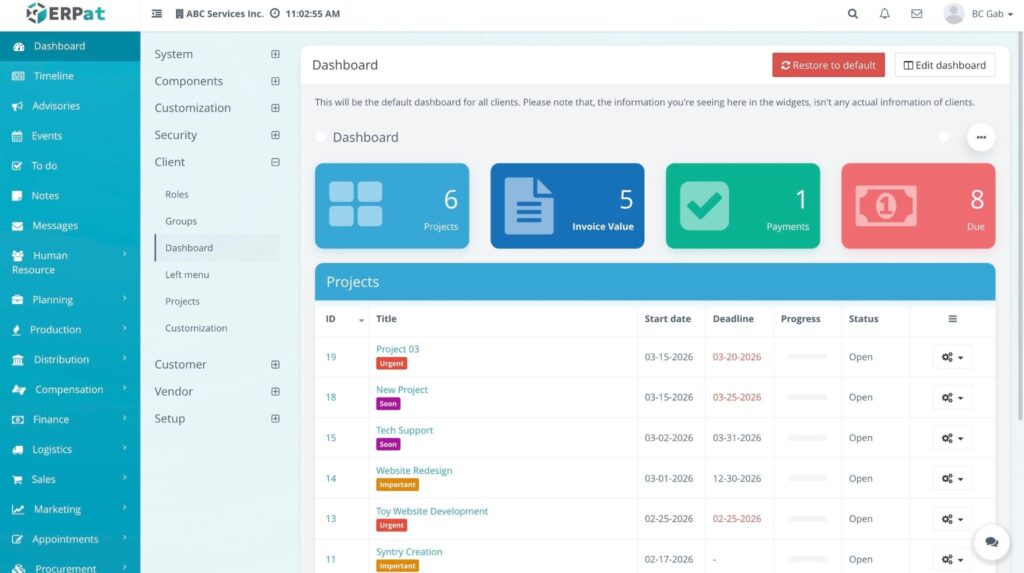
Accessing Dashboard Settings #
- Navigate to Settings > Client.
- Click on the Dashboard tab from the top navigation menu.
RESULT:
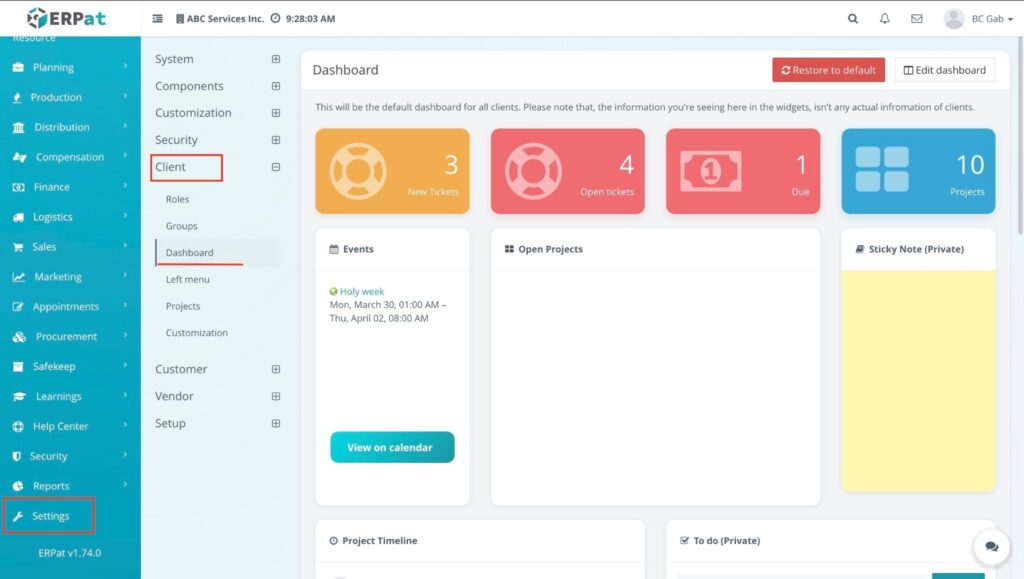
The main dashboard is dynamically updated based on your specific selections; only the modules you have toggled “ON” will appear as active widgets or data summaries. This allows you to personalize the interface so you only see the information you wish to monitor, creating a cleaner and more efficient workspace.
Step to Edit the Dashboard #
- Enter Edit Mode: Click the Edit dashboard button at the top right of the page.
- Select a Widget: Choose a widget from the available list on the left side (e.g., Total Invoices, Events Today, or Draft Invoices Value).
- Add to Workspace: Drag the chosen widget from the left panel and drop it into the desired row on the right-side workspace.
- Organize Layout:
- Move Widgets: Use the Cross (✥) icon on a widget to drag and reposition it within a row or move it to a different row.
- Move Rows: Use the Menu (≡) icon on the left of a row to drag and reorder the entire horizontal section.
- Add Rows: Click the + Add row button at the bottom to create a new section for more widgets.
- Set Visibility: Click the Eye (👁️) icon on any widget to toggle its visibility status for the final view.
- Apply Changes: Click the Save button at the top right to finalize your layout.

RESULT: #
The dashboard is updated to show exactly what you wish to see in your preferred arrangement. By dragging the cross icon, you have complete control over the positioning of each metric, and the eye icon ensures you are only viewing the data that matters most to your workflow.
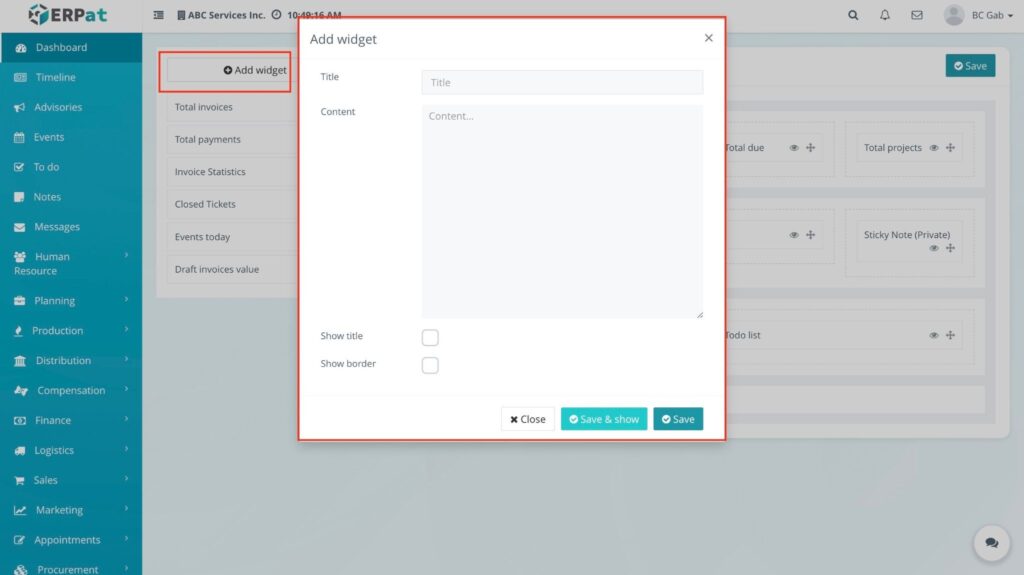
Step to Add a New Widget #
- Enter Edit Mode: Click the Edit dashboard button at the top right of the Dashboard page.
- Open Widget Creator: Click the + Add widget button located at the top left of the widget list.
- Configure Widget Details:
- Title: Enter the name for your widget.
- Content (Optional): Add the specific information or text you want to display.
- Show Title: Check this box if you want the title to be visible on the dashboard.
- Show Border: Check this box to add a visual frame around the widget.
- Confirm Entry: Click the Save button within the modal.
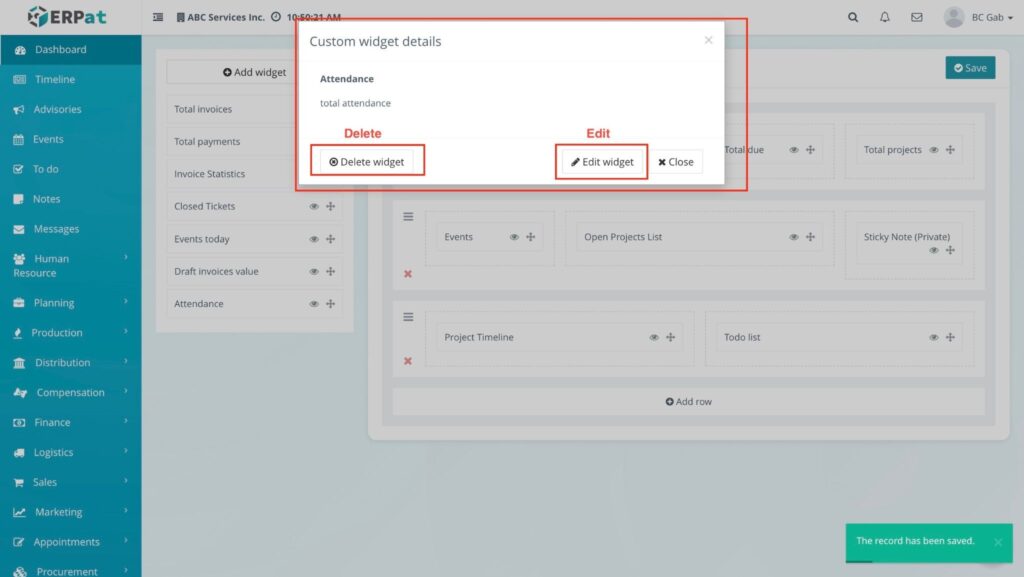
RESULT: #
The custom widget is added to your available list on the left side. From here, you have the option to Edit its details or Delete it if it is no longer needed.
Steps to save on Dashboard #
- Placement: Drag your newly created widget from the left-side list into a specific row in the right-side workspace.
- Commit Changes: Once you are satisfied with the placement and arrangement of all widgets, click the Save button at the top right of the dashboard editor.
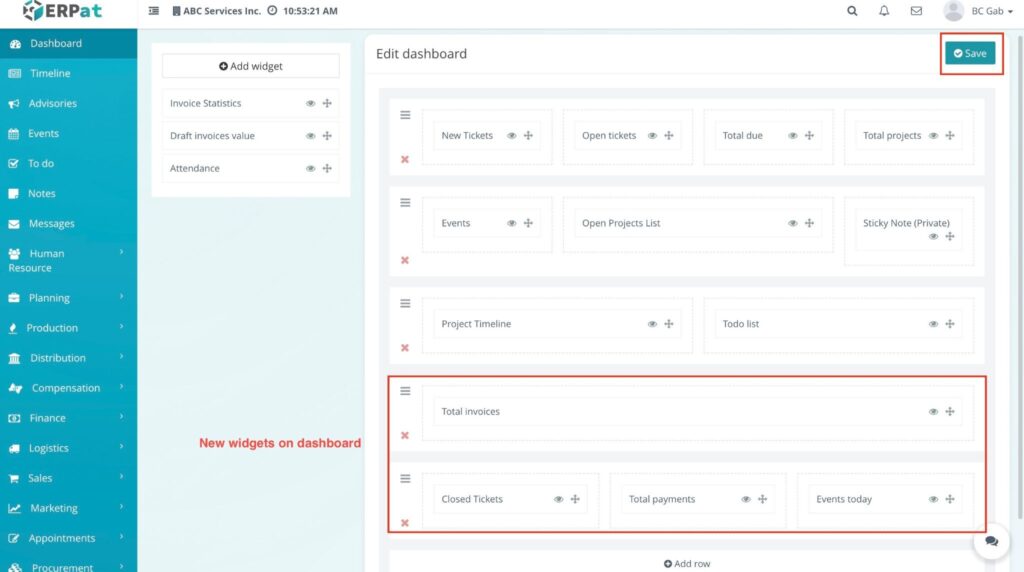
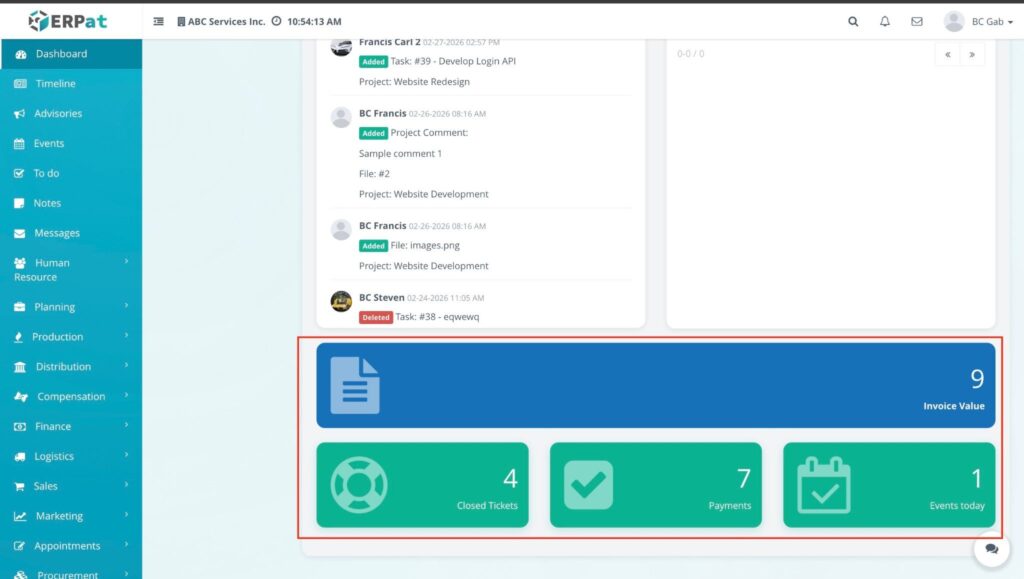
RESULT #
You will see the changes and the newly added widgets appear live on your primary dashboard.
Step to Add a New Widget #
- Enter Edit Mode: Click the Edit dashboard button at the top right of the Dashboard page.
- Open Widget Creator: Click the + Add widget button located at the top left of the widget list.
- Configure Widget Details:
- Title: Enter the name for your widget.
- Content (Optional): Add the specific information or text you want to display.
- Show Title: Check this box if you want the title to be visible on the dashboard.
- Show Border: Check this box to add a visual frame around the widget.
- Confirm Entry: Click the Save button within the modal.
RESULT #
The custom widget is added to your available list on the left side. From here, you have the option to Edit its details or Delete it if it is no longer needed.
Steps to save on Dashboard #
- Placement: Drag your newly created widget from the left-side list into a specific row in the right-side workspace.
- Commit Changes: Once you are satisfied with the placement and arrangement of all widgets, click the Save button at the top right of the dashboard editor.

RESULT #
You will see the changes and the newly added widgets appear live on your primary dashboard.
Step to Restore Dashboard to Default #
- Enter Edit Mode: Click the Edit dashboard button at the top right of the Dashboard page.
- Trigger Restore: Click the Restore to default button (located near the “Save” and “Add row” options).
- Confirm Action: Click Confirm on the pop-up notification to verify that you want to discard all custom layouts and widget placements.
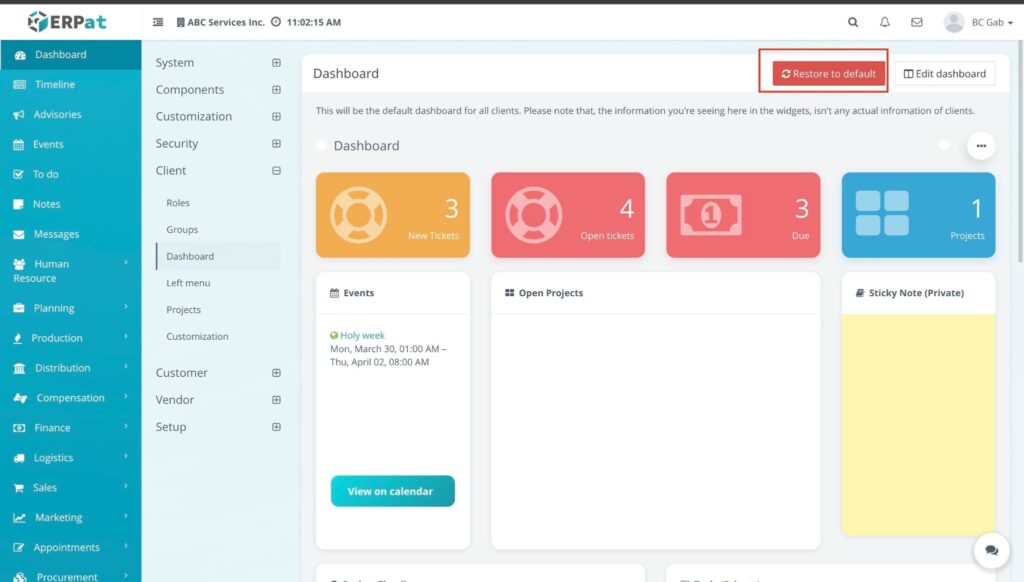
RESULT: #
The workspace immediately resets, and the system returns to its default dashboard configuration, removing all custom rows and manually added widgets.
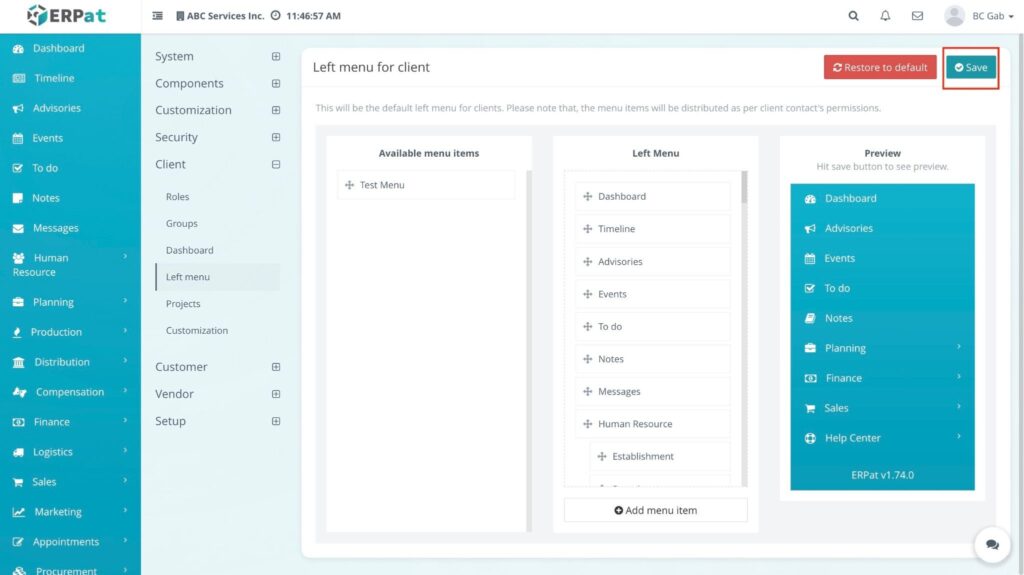
Accessing Left Menu Settings #
- Navigate to Settings > Client.
- Click on the Left Menu tab from the top navigation menu.
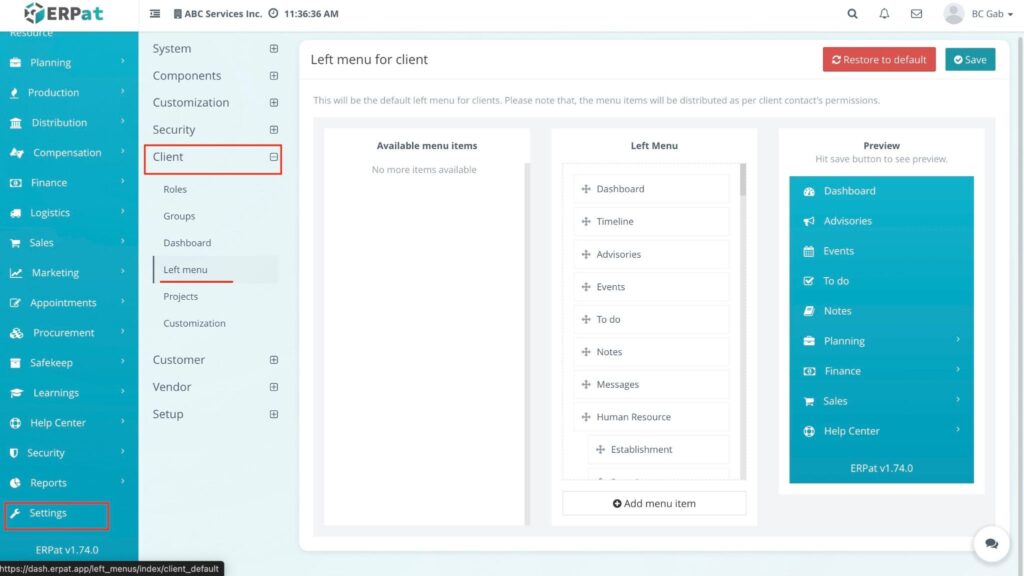
RESULT
The system displays the current navigation structure, showing all active menu items and their hierarchy.
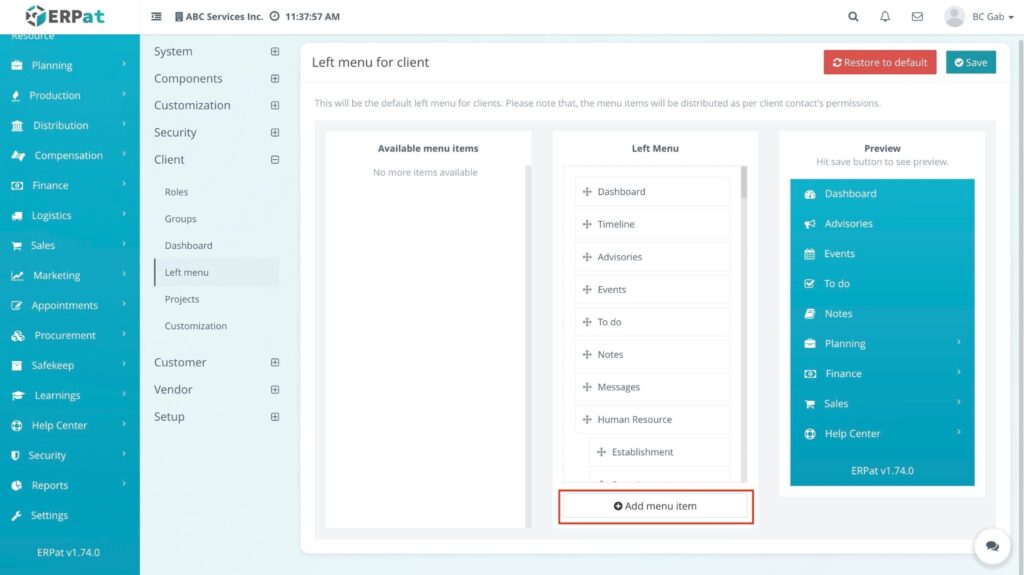
Step to Add a New Menu Item #
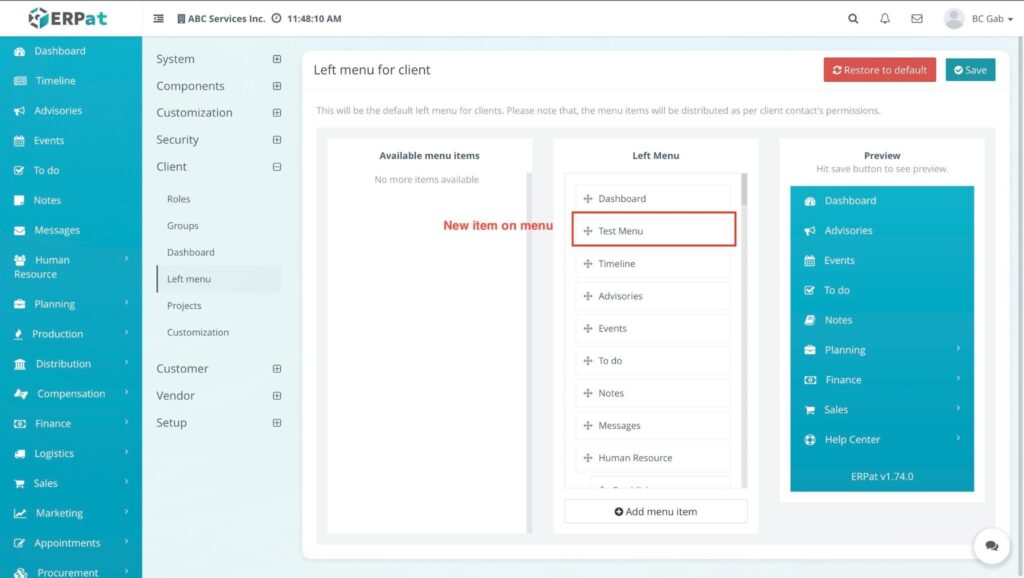
- Open the Add Menu Modal: Click the + Add menu button at the top right of the page.
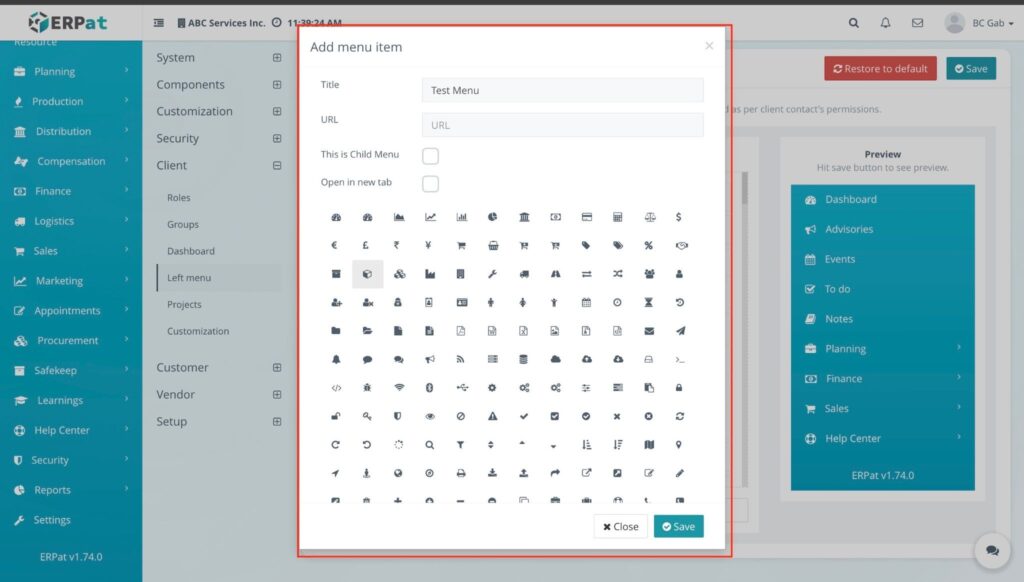
- Configure Menu Details:
- Title: Enter the name of the menu item as it should appear in the sidebar.
- Link: Provide the internal URL or module path that the menu item should redirect to.
- Icon: Choose a representative icon from the system library.
- Parent Menu (Optional): Select an existing menu if you want this new item to be a “Sub-menu.” If left blank, it will appear as a main-level category.
- Finalize the Entry: Click the Save button.
RESULT: #
The new menu item is added to the list. From here, you can use the drag-and-drop handles to change its position in the sidebar, or click the Edit/Delete icons to make further adjustments.
Step to Save Menu Changes #
- Arrange Menu Items: Use the Drag (✥) icon on the left of any menu item to reposition it or nest it under a parent category.
- Commit Changes: Once the sidebar structure is organized to your preference, click the Save button at the top right of the page.
RESULT #
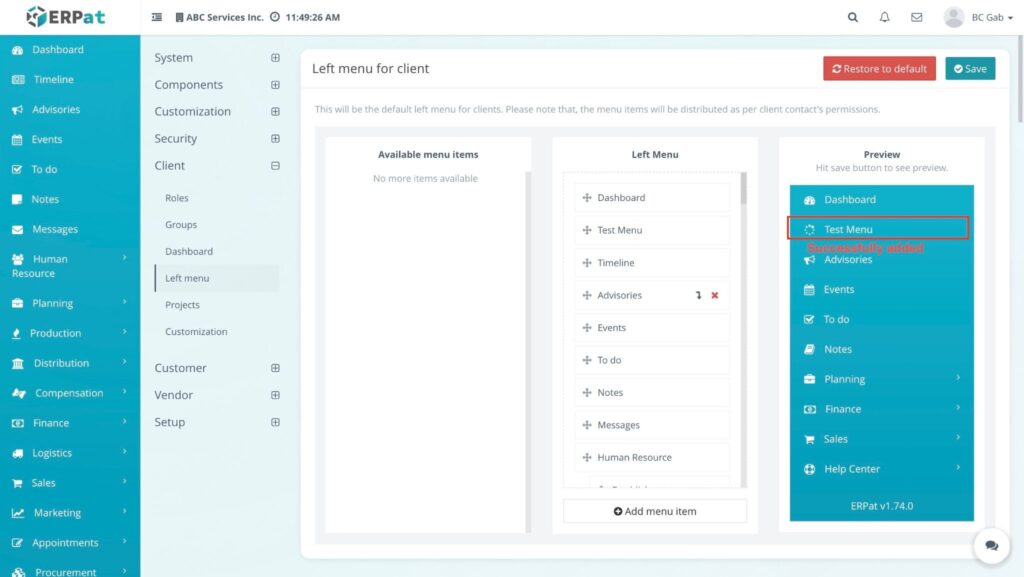
The system updates the sidebar navigation in real-time. All users within the client organization will now see the new menu order and any added links upon their next page refresh.
Step to Restore to Default Menu #
- Trigger Restore: Click the Restore to default button at the top right (next to the Save button).
- Confirm Action: A confirmation modal will appear asking if you are sure you want to restore the menu to its default settings. Click Confirm.
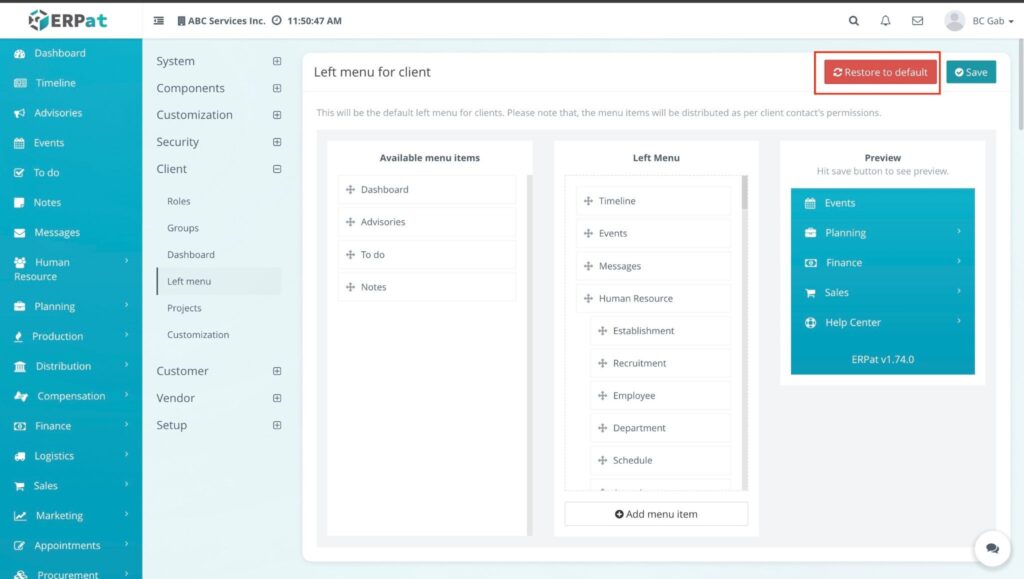
RESULT #

The system wipes all custom links, reordering, and nesting, returning the sidebar to the original factory configuration of the ERPat system.
Accessing Project Settings #
- Navigate to Settings > Client.
- Click on the Projects tab from the top navigation menu.
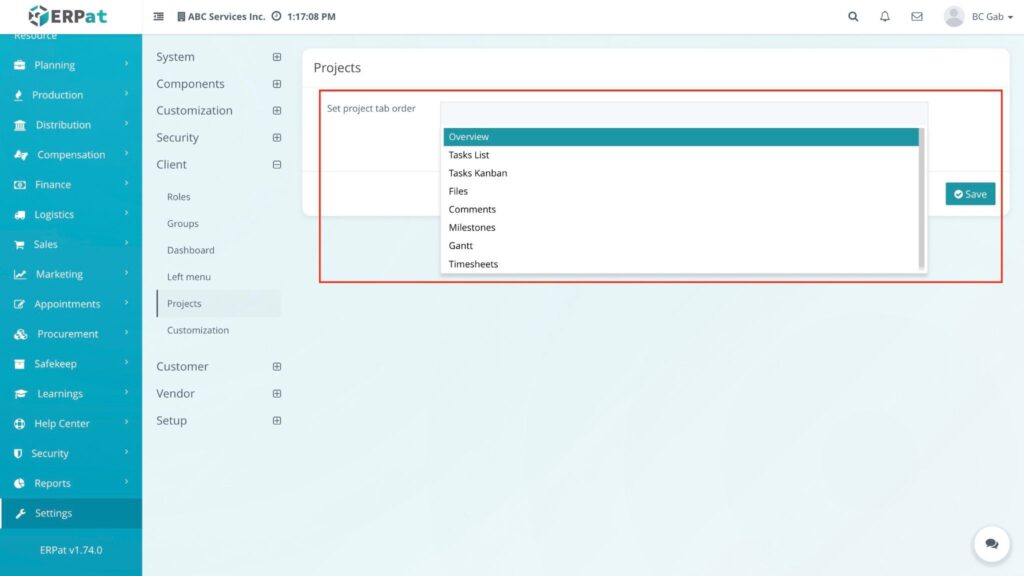
- Result: The system displays the Set Project Tab Order interface, listing all available project components and their current status.
#
Step-by-Step: Setting Project Tab Order #
- Select Project: Click the Project dropdown menu and select the specific project you want to modify.
- Assign Tab Order: For each tab click the dropdown in the Order column.
- Choose Position: Select the desired placement for that tab from the dropdown options.
- Save Changes: Click the Save button at the top right.
RESULT #
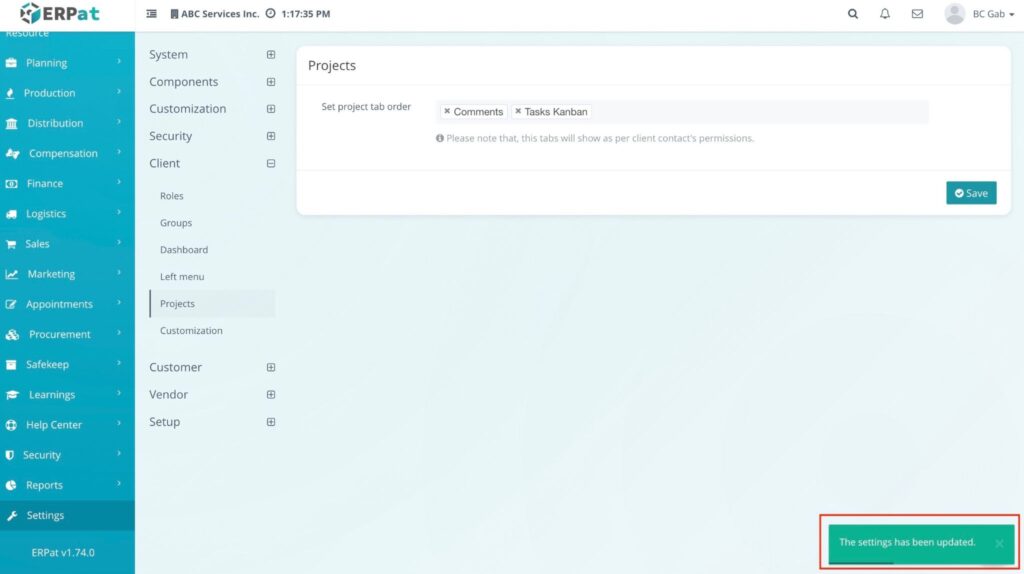
The project tabs will immediately reflect the specific layout you chose. The navigation within that project will update to match your selections, ensuring the most important tabs are exactly where you want them.
Accessing Customization Settings #
- Navigate to Settings > Client.
- Click on the Customization tab from the top navigation menu.
- Result: The system displays a list of available system rules and settings that can be toggled to customize the platform’s behavior.
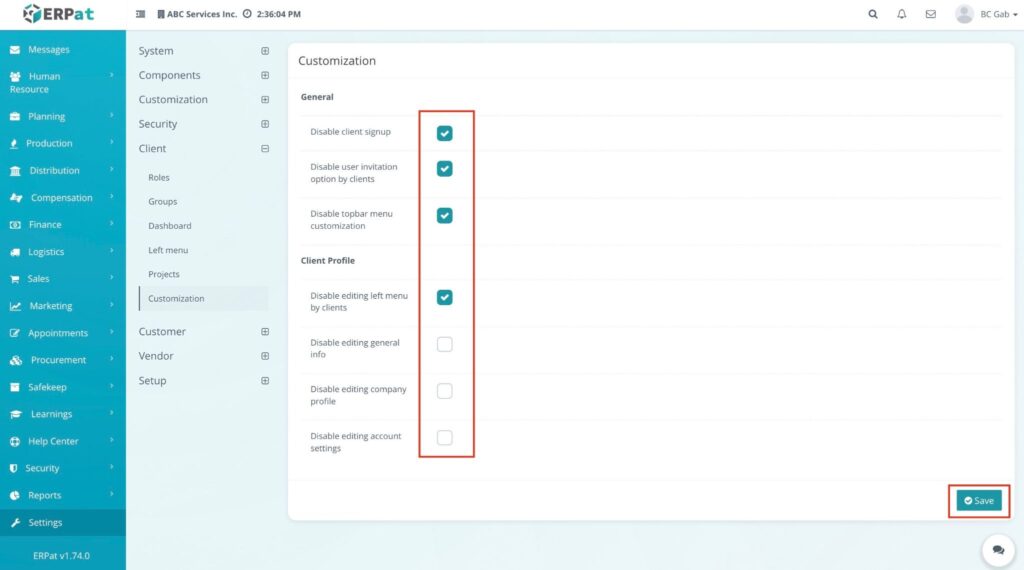
Steps to save Customization Rules #
- Identify the Rules: Review the list of available customization options (e.g., “Allow multiple login,” “Required billing address in invoice,” or “Check email if existing”).
- Set the Rules: Click the Checkbox next to the specific rule you want to activate or deactivate.
- Checked: The rule is active/required.
- Unchecked: The rule is inactive/optional.
- Finalize Changes: Click the Save button at the top right of the page.
RESULT #
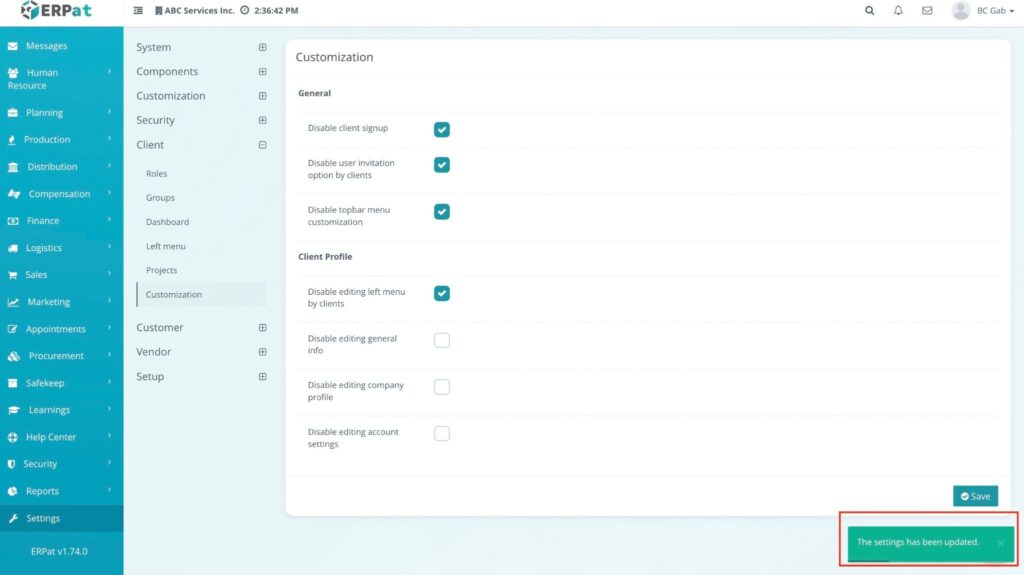
The system immediately applies the selected rules. Your specific choices will now govern how the system handles processes like logins, invoice requirements, and data validation across the entire client organization.
Permissions and Access Control #
- Admin or Developer Roles: Only authorized Admin or Developer roles can add, edit, delete, or reorder configurations within the Settings Client module, including Dashboard widgets, Left Menu items, and Project tab sequences.
- Management Roles: View-only access may be granted to management roles for monitoring system rules and configurations to ensure they align with organizational standards.
Best Practices #
- Visual Clarity: When creating custom Dashboard widgets, use clear titles and borders to keep the workspace organized and easily navigable for all users.
- Navigation Hierarchy: Use the Left Menu settings to logically group sub-modules under parent categories to prevent sidebar clutter and improve the user experience.
- Configuration Validation: Before saving new Customization rules, verify that they won’t conflict with existing workflows.
Audit & Logs #
All creation, update, and deletion actions within the Settings Client module including dashboard layouts, menu reordering, project tab adjustments, and global customization rules are logged for audit and compliance purposes within the ERPat System.
Last Updated: March 27, 2026 Module Owner: Settings – Clients – ERPat System


