Overview #
The Kiosk Module in the ERPat system is used to manage user authentication, attendance tracking, and identity verification through multiple methods such as QR codes, biometrics, tap cards, and facial data. It provides a centralized interface for configuring devices, enrolling users, and monitoring authentication records.
This module ensures secure and efficient workforce tracking by integrating multiple identification technologies into a single system. Administrators can manage enrollments, configure devices, and monitor user activity across different authentication methods.
Key Features #
- Centralized kiosk and device management
- Multi-method authentication (QR Code, Biometrics, Face Data, Tap Cards)
- User enrollment and identity tracking
- Device registration and configuration
- Secure authentication handling
- Real-time record monitoring
- Search and filtering tools
- Export and data management capabilities
- Audit logging and traceability
- Role-based access control
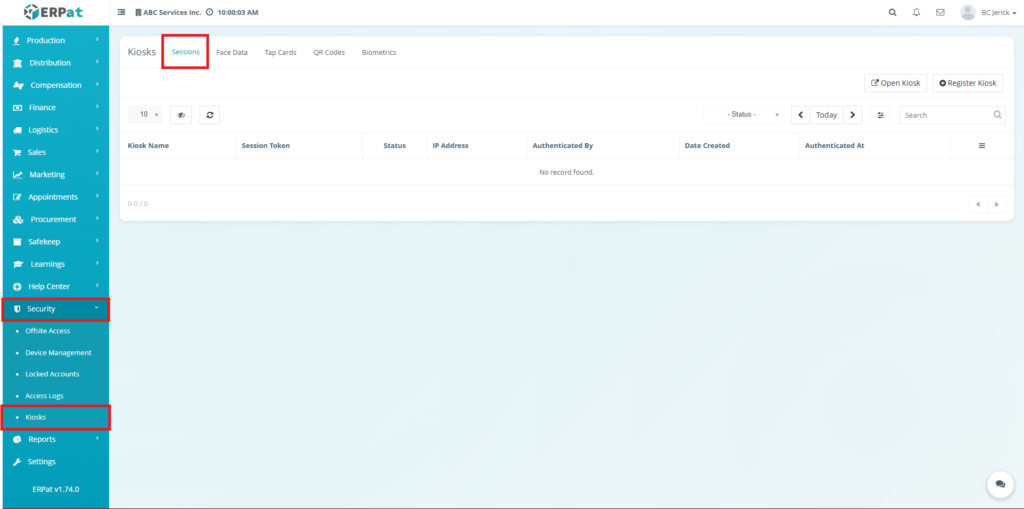
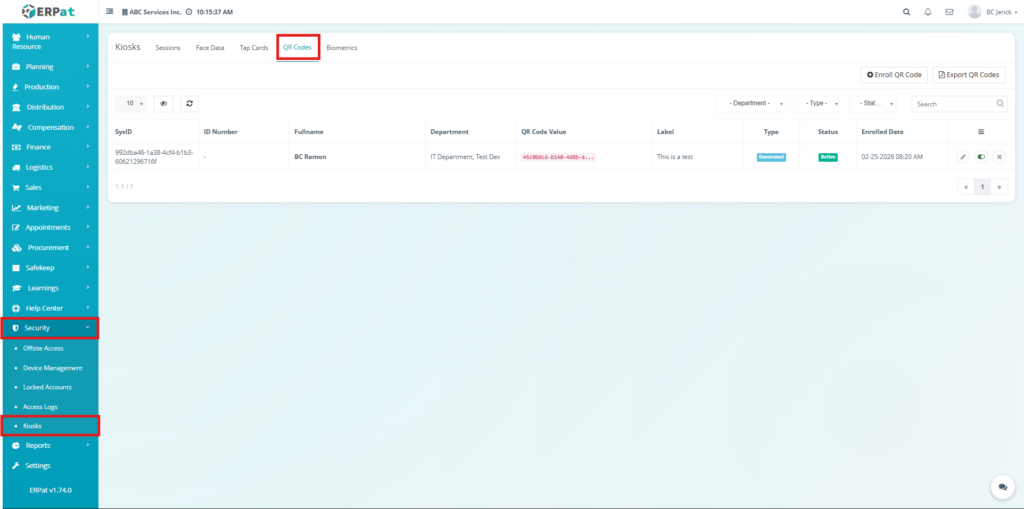
Accessing the Kiosk Module #
STEPS #
- Navigate to the left sidebar menu.
- Click Security.
- Select Kiosks.

You will be directed to the Kiosk Module containing multiple tabs:
Sessions, Face Data, Tap Cards, QR Codes, and Biometrics.
Sessions Tab #
The Sessions Tab tracks kiosk session activity, including user authentication attempts and device usage. It provides visibility into system interactions and login events.
Functions #
- Monitor active and past sessions
- Track authentication attempts
- View device usage logs
- Identify system activity patterns
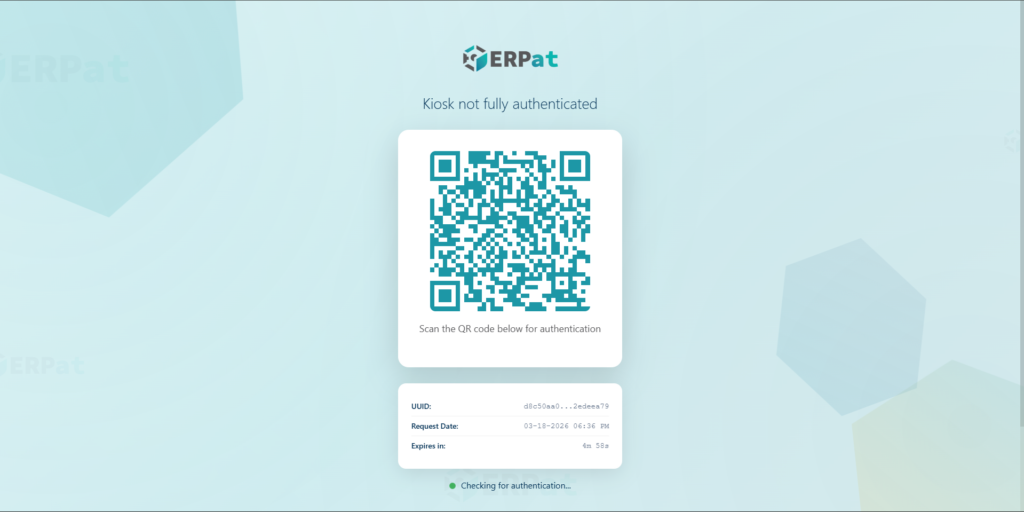
Steps to Open a Kiosk #
STEPS #
- Navigate to the left sidebar menu.
- Click Security.
- Select Kiosks.
- Click the Sessions tab.
- Click the Open Kiosk button.
- The system opens a kiosk interface in a new window.
- A QR code will be displayed on the screen.
- Use another authorized device to scan the QR code.
- Complete authentication to activate the kiosk.

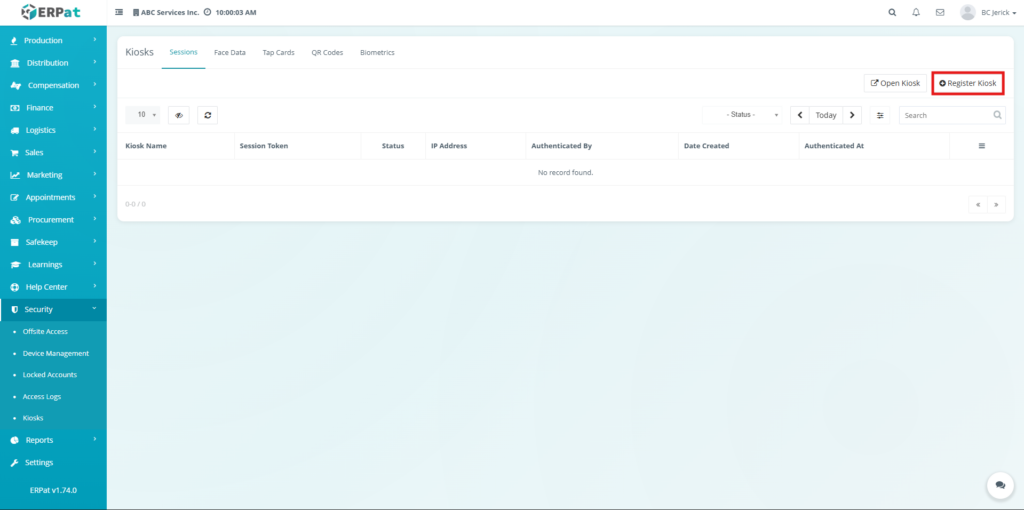
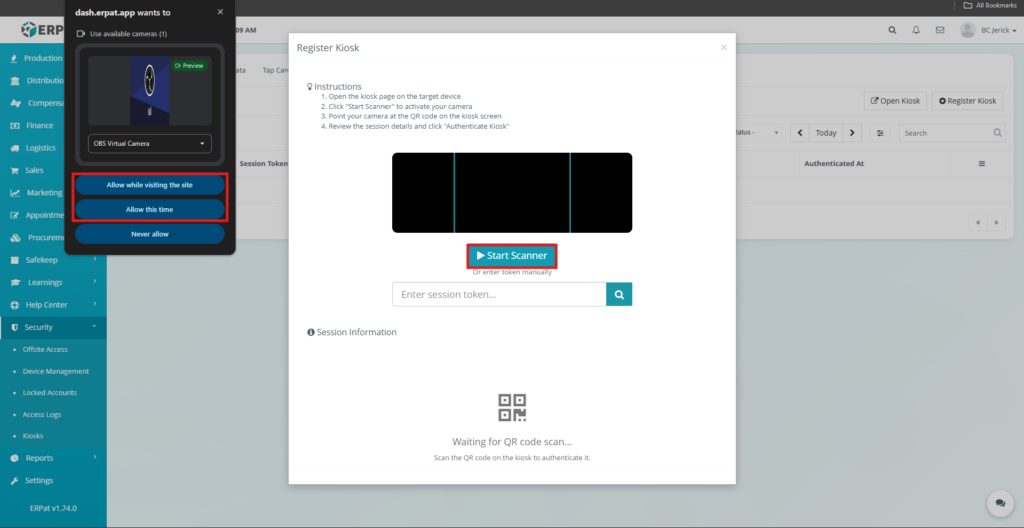
Steps to Register a Kiosk #
STEPS #
- Navigate to the Sessions tab.
- Click the Register Kiosk button.
- The Register Kiosk popup will appear.
- Click Start Scanner.
- Allow camera access when prompted by the browser.
- Scan the QR code displayed on the kiosk screen.
- The system retrieves the session details automatically.
- Review the session information.
- Click Authenticate Kiosk to complete registration.
Face Data Tab #
The Face Data Tab is used to manage facial recognition data for users. It allows uploading and assigning facial profiles for authentication.
Functions #
- Store facial recognition data
- Assign face profiles to users
- Enable face-based authentication
- Manage and update face records
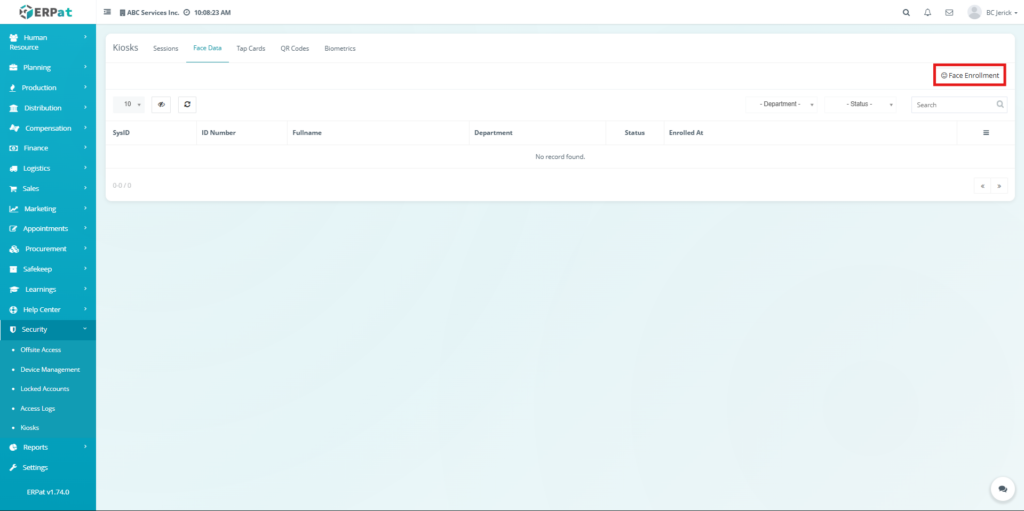
Steps to Enroll Face Data #
STEPS #
- Navigate to the left sidebar menu.
- Click Security.
- Select Kiosks.
- Click the Face Data tab.
- Click the Face Enrollment button.
- The Face Enrollment popup will appear.
- Select a User from the dropdown.
- Click Enroll or Enroll Now.
- Click Start Camera.
- Allow camera access when prompted.
- Position the user’s face within the frame.
- Capture the face when detected.
- Save the enrollment.
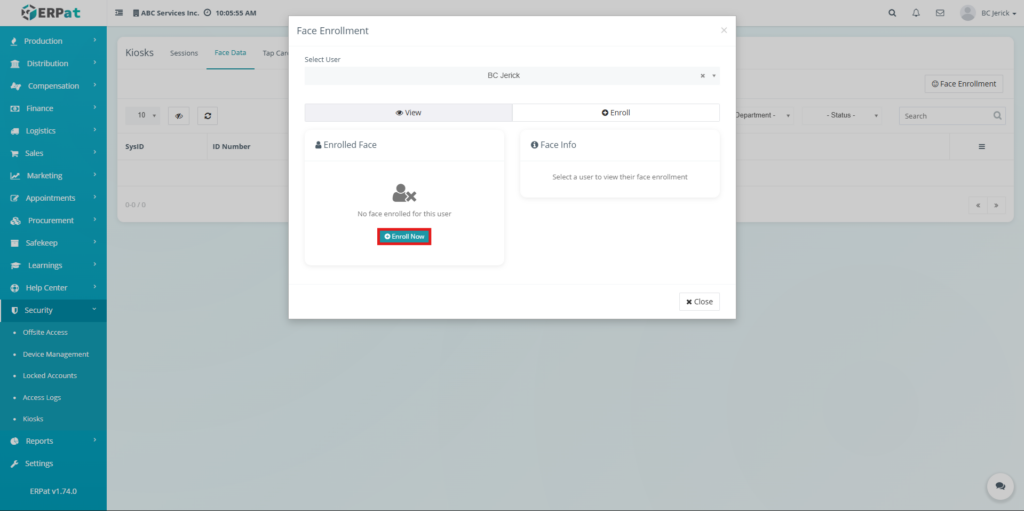

Steps to View Enrolled Face #
STEPS #
- Open the Face Enrollment popup.
- Select a User.
- Click View.
- The system displays the enrolled face data.
Tap Cards Tab #
The Tap Cards Tab manages RFID or card-based authentication. Users can be assigned tap cards for quick and secure access.
Functions #
- Assign tap cards to users
- Manage card identifiers
- Enable card-based authentication
- Track card usage
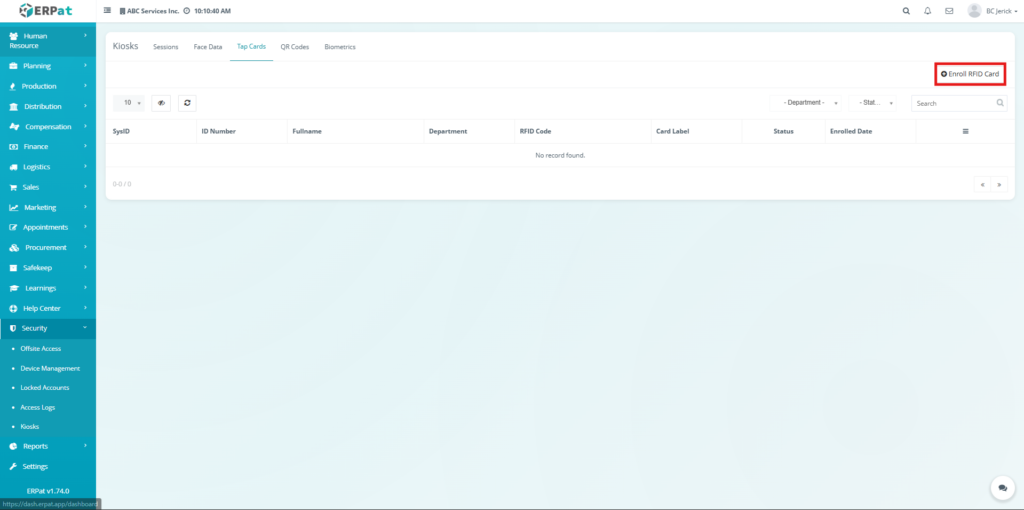
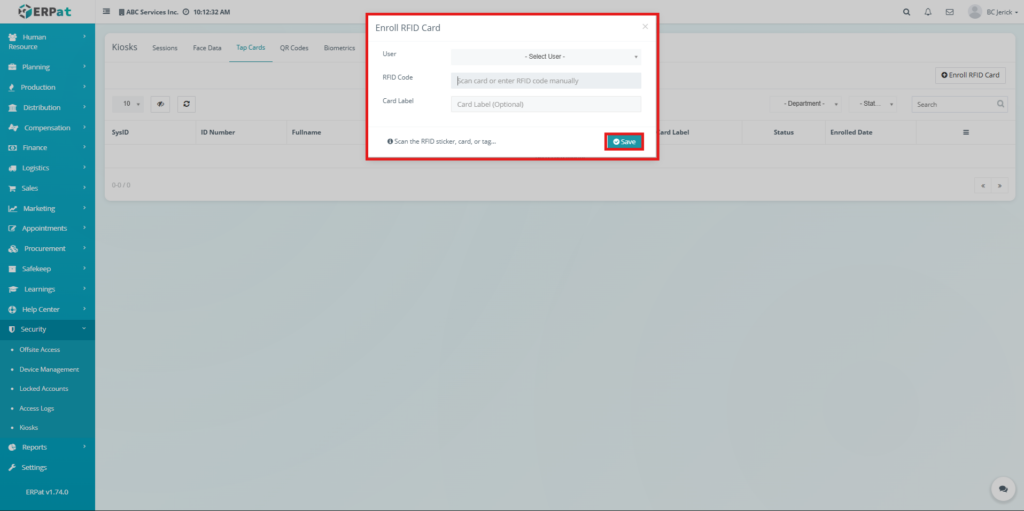
Steps to Enroll RFID Card #
STEPS #
- Navigate to the left sidebar menu.
- Click Security.
- Select Kiosks.
- Click the Tap Cards tab.
- Click the Enroll RFID Card button.
- The Enroll RFID Card popup will appear.
- Select a User from the dropdown.
- Scan the RFID card or manually enter the RFID code.
- Enter a Card Label.
- Click Save to enroll the RFID card.
QR Codes Tab #
The QR Codes Tab is used to generate, assign, manage, and export QR codes for users. These QR codes are used for authentication, attendance tracking, and kiosk-based identification.
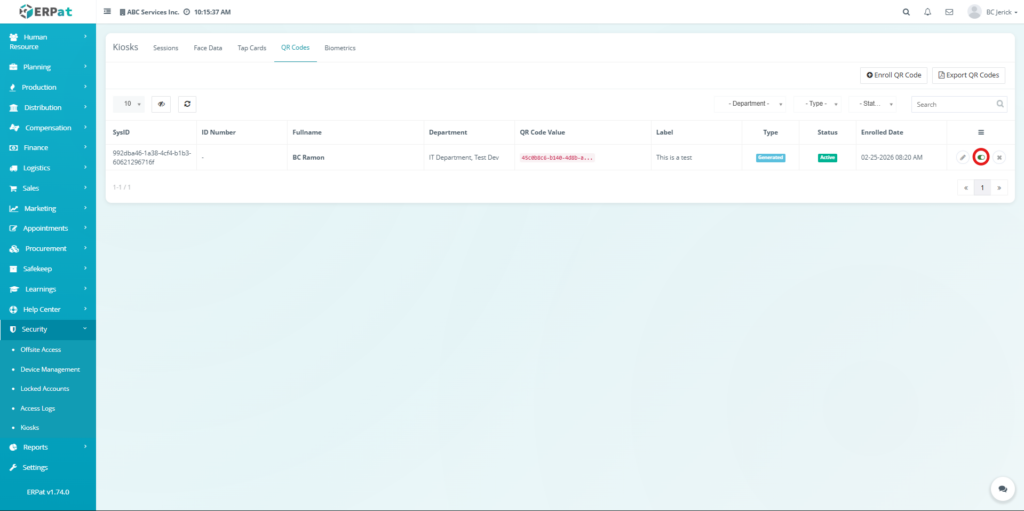
QR Codes Listing Page #
The listing page displays all QR code records with the following information:
- SysID – Unique system-generated identifier
- ID Number – Employee ID reference
- Fullname – Name of the user
- Department – Assigned department
- QR Code Value – Unique QR identifier
- Label – Description or purpose
- Type – QR generation type
- Status – Active or inactive state
- Enrolled Date – Date of QR assignment
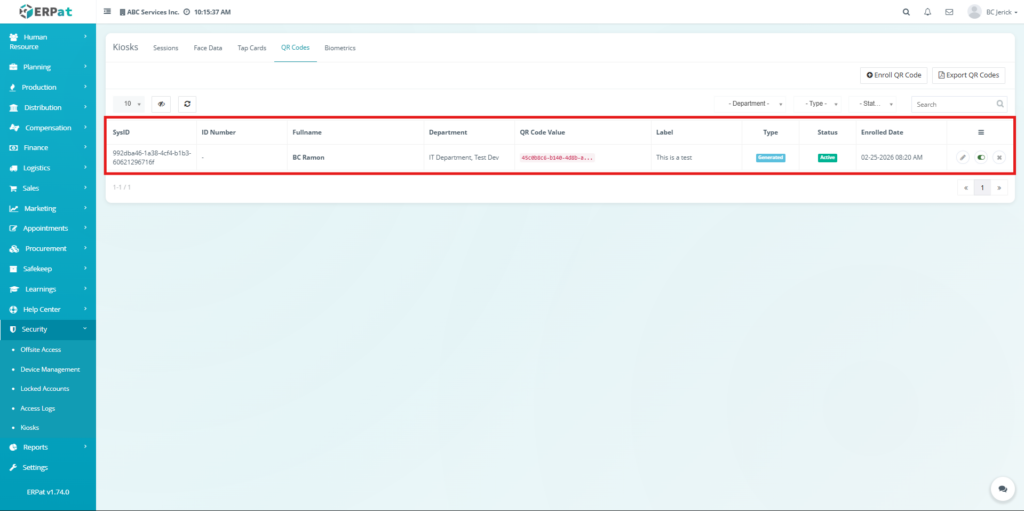
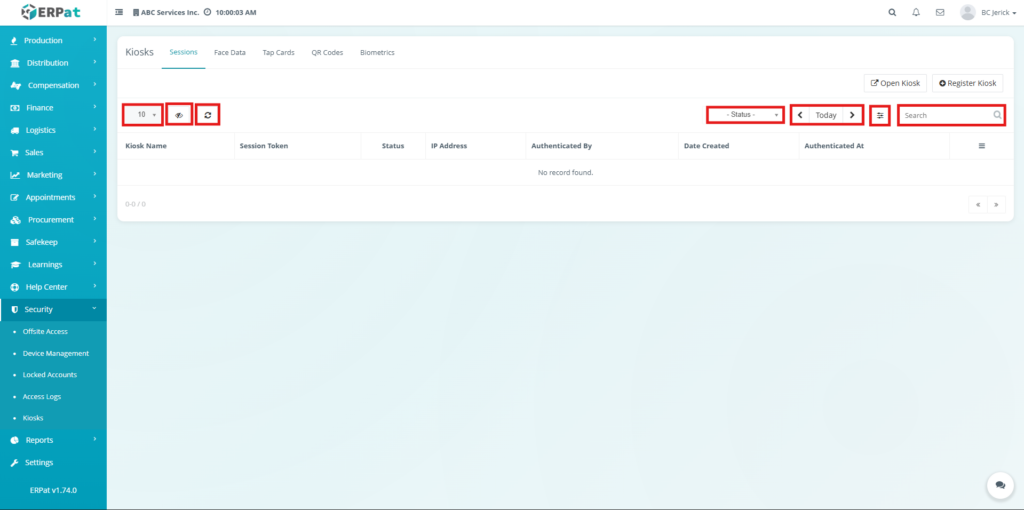
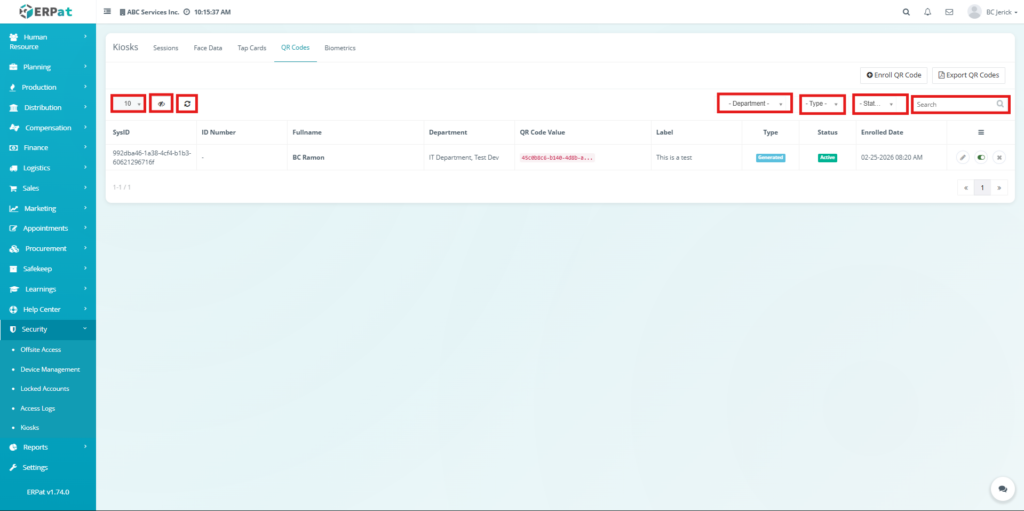
Table Controls #
Users can manage records using:
- Show Entries dropdown
- Refresh button
- Department filter
- Type filter
- Status filter
- Search bar
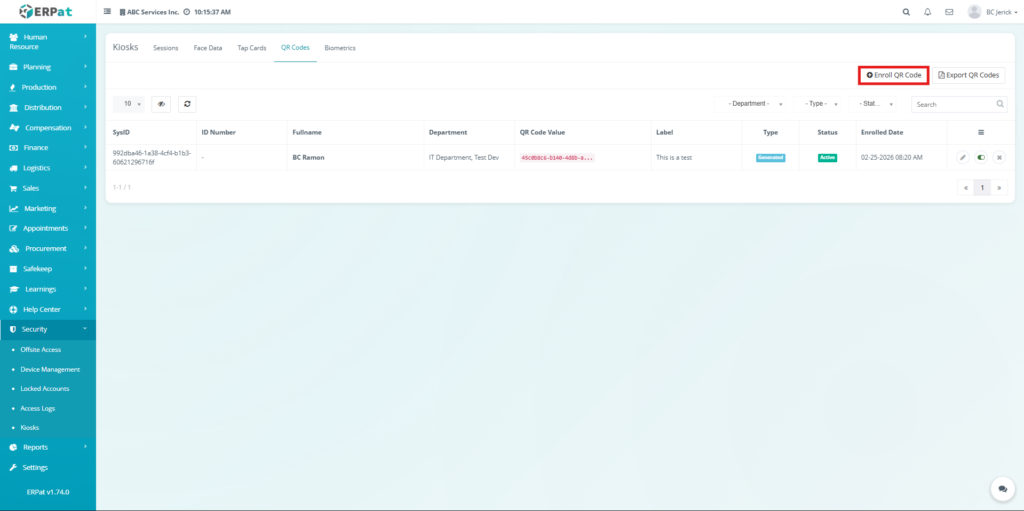
Steps to Enroll QR Code #
STEPS #
- Click the QR Codes tab.
- Click Enroll QR Code.
- Select a User from the dropdown.
- Choose the Type (Generate QR Code).
- Enter a Label if needed.
- Click Save to complete enrollment.

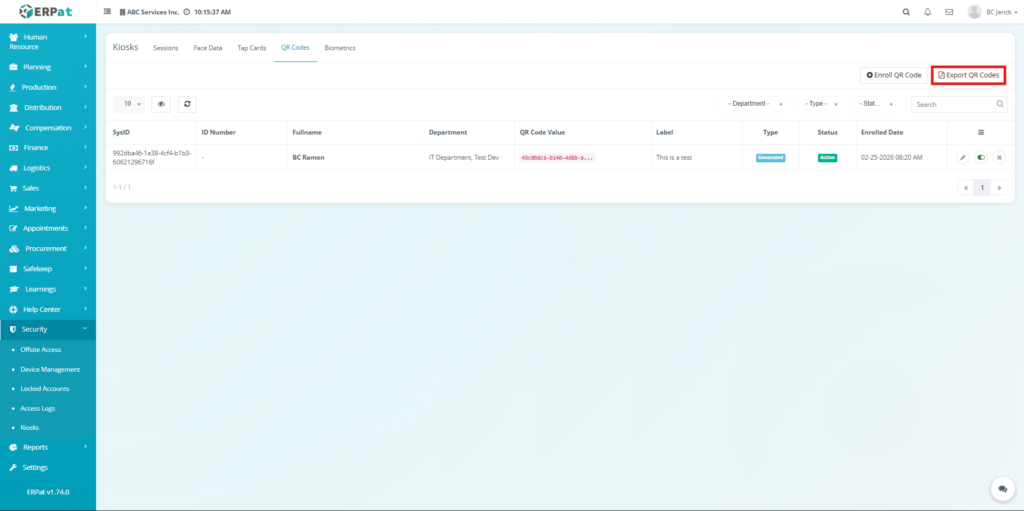
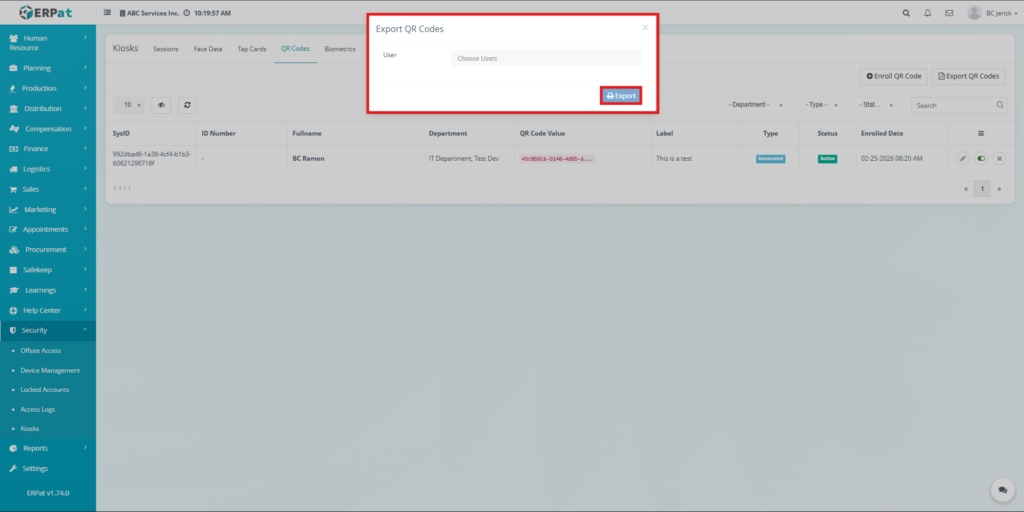
Steps to Export QR Codes #
STEPS #
- Click the QR Codes tab.
- Click Export QR Codes.
- Select one or multiple Users.
- Click Export to download the QR codes.
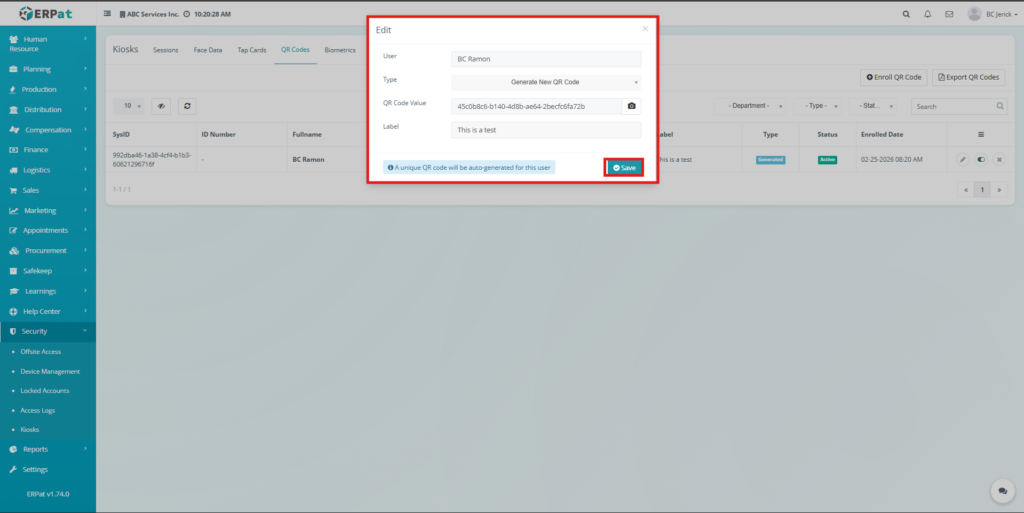
Steps to Edit QR Code #
STEPS #
- Locate the QR code record in the table.
- Click the Edit (pencil icon).
- Modify the necessary fields.
- Click Save to apply changes.

Steps to Toggle QR Code Status #
STEPS #
- Locate the QR code record.
- Click the Status toggle button.
- Confirm the action in the prompt.
The status will be updated accordingly.
Steps to Delete QR Code #
STEPS #
- Locate the QR code record.
- Click the Delete (X icon).
- Click Delete in the confirmation popup.


The record will be permanently removed.
Biometrics Tab #
The Biometrics Tab is used to manage biometric enrollments such as fingerprint or scan-based authentication. It connects users to devices for secure identity verification.

Biometrics Listing Page #
The listing page displays:
- SysID – Unique identifier
- ID Number – Employee reference
- Fullname – User name
- Department – Assigned department
- Biometric Code – Registered biometric data
- Device ID – Linked device
- Enrolled Date – Enrollment timestamp
- Created By – Record creator
- Last Updated – Last modification
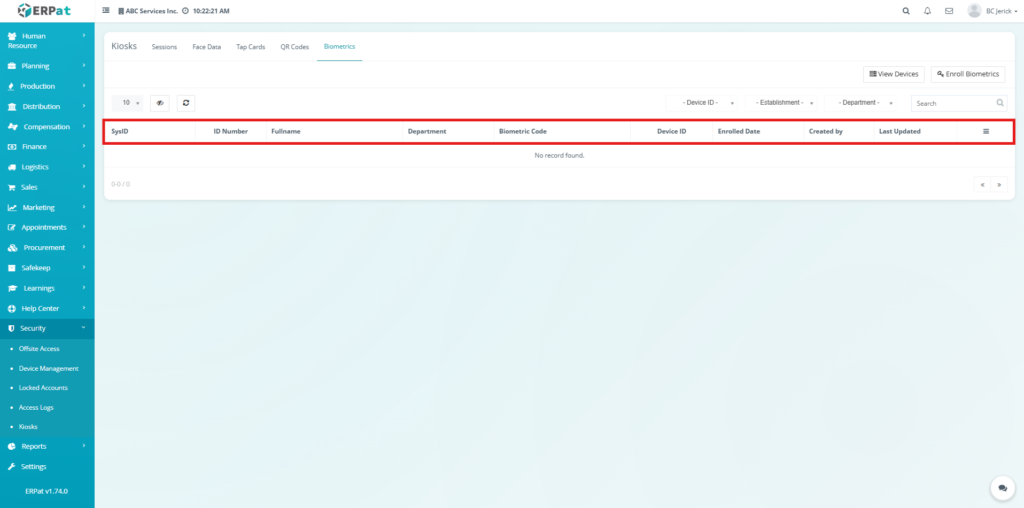
If no records exist, the system displays “No record found.”
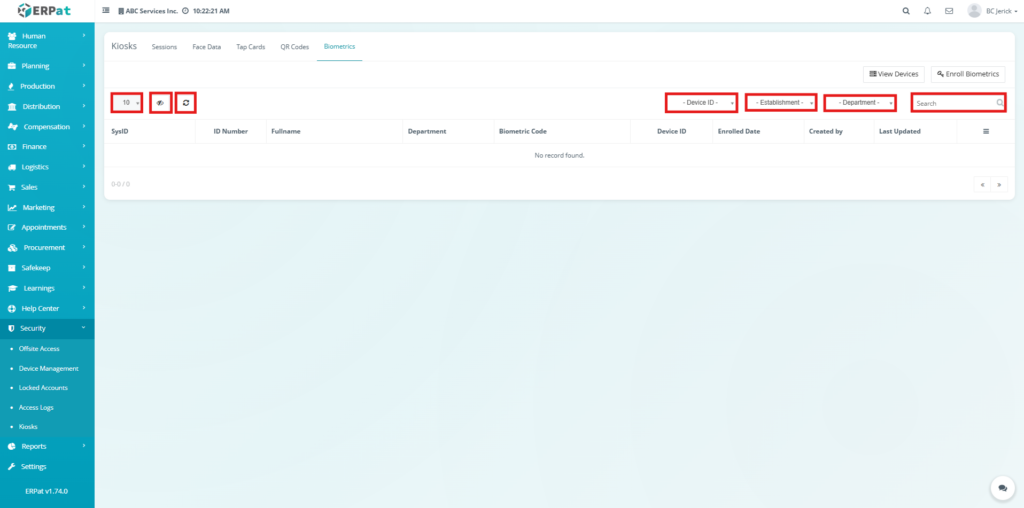
Table Controls #
Users can filter and manage records using:
- Show Entries dropdown
- Refresh button
- Device ID filter
- Establishment filter
- Department filter
- Search bar
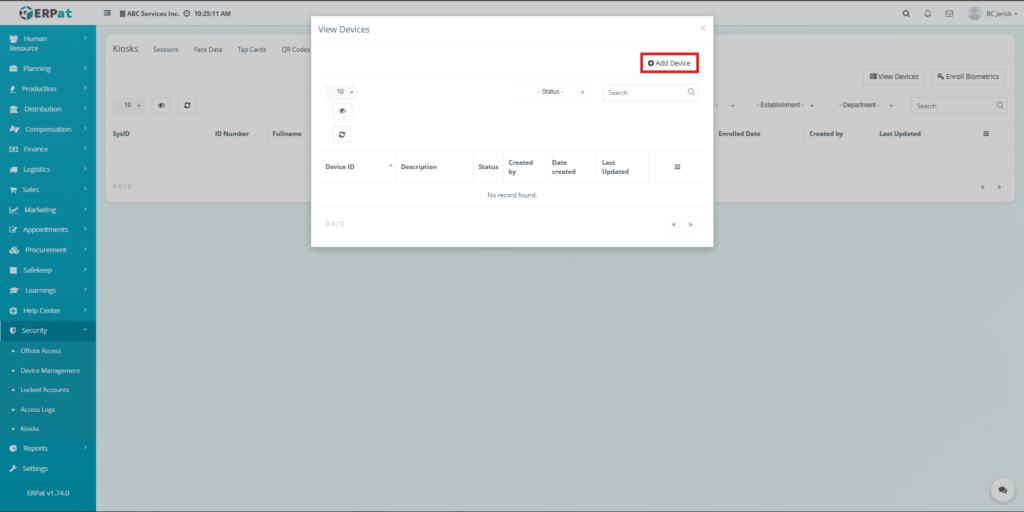
Steps to View Devices #
STEPS #
- Click the Biometrics tab.
- Click View Devices.

A popup will appear displaying all registered devices.
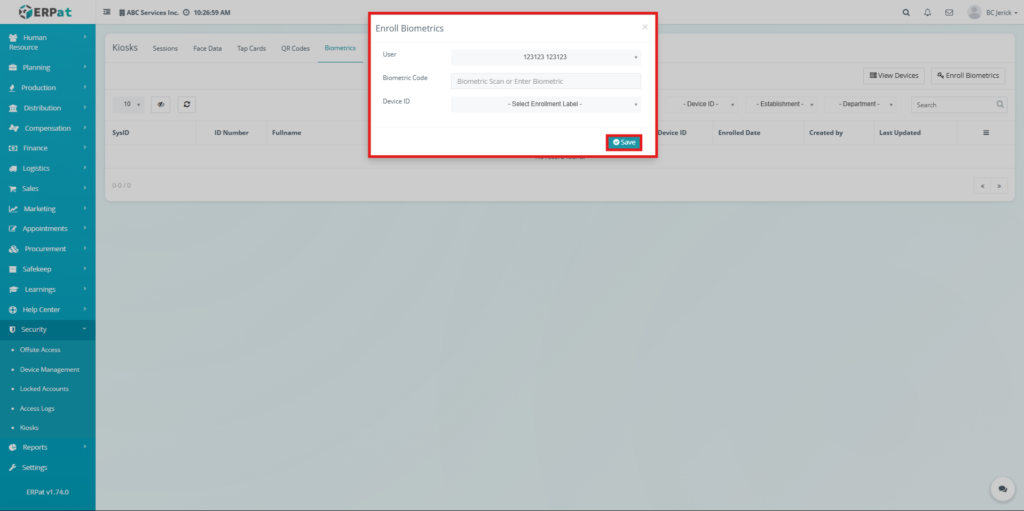
Steps to Enroll Biometrics #
STEPS #
- Click the Biometrics tab.
- Click Enroll Biometrics.
- Select a User.
- Enter or scan the Biometric Code.
- Select a Device ID.
- Click Save to complete enrollment.

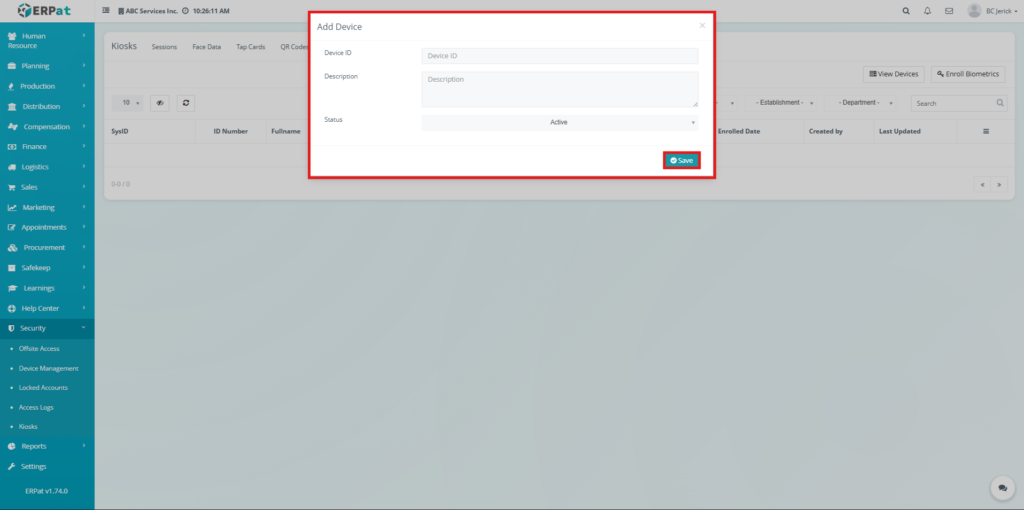
Steps to Add Device #
STEPS #
- Click the Biometrics tab.
- Click View Devices.
- Click Add Device.
- Enter the Device ID.
- Enter the Description.
- Set the Status.
- Click Save to register the device.
Permissions and Access Control #
Authorized users can manage kiosk records, enroll users, and configure devices.
Permissions depend on user roles.
- Administrators have full access
- Standard users may have limited visibility
- Sensitive actions (delete, status change) require authorization
Search and Filtering #
All tabs support search and filtering tools:
- Search fields for quick lookup
- Dropdown filters for categorization
- Pagination controls for large datasets
- Refresh options for real-time updates
Best Practices #
- Ensure accurate user assignment during enrollment
- Regularly verify device configurations
- Use clear labels for QR codes and devices
- Avoid deleting records needed for audits
- Keep biometric and authentication data updated
- Monitor system logs for inconsistencies
Audit & Logs #
All actions performed within the Kiosk Module are recorded, including:
- Record creation
- Updates and edits
- Deletions
- Status change
- Enrollment actions
This ensures full traceability and system accountability.
Last Updated: [March 23, 2026] Module Owner: Security Module – ERPat System


