Overview #
The Customer Settings Module is used to configure and customize the customer portal within the system. This module allows administrators to control how the customer interface appears and behaves when customers access the system. It includes features such as dashboard customization, menu configuration, and portal functionality settings.
Through this module, administrators can design the customer dashboard by adding rows and widgets, organize the navigation menu using the left menu configuration, and control system behaviors such as customer registration, login permissions, and available portal features. These settings ensure that the customer portal is user-friendly, organized, and aligned with business requirements.
Settings – Customer – Dashboard #
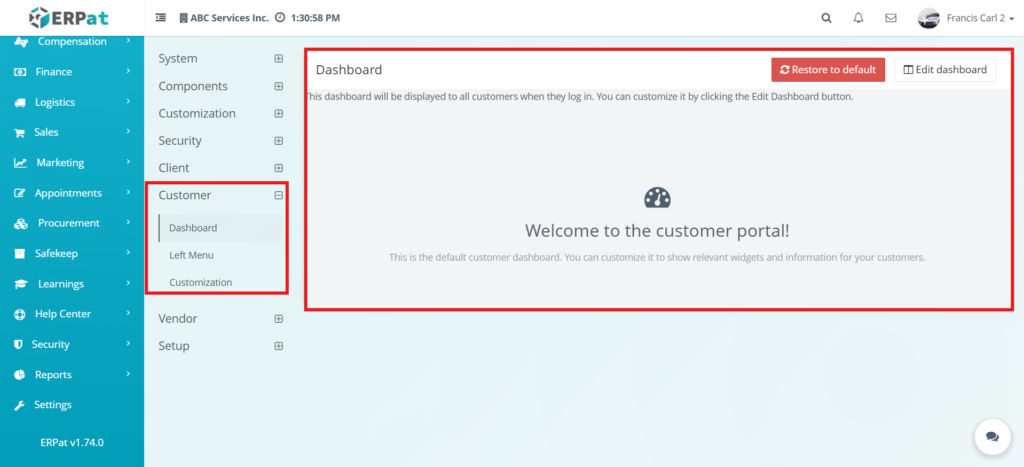
This section displays the default dashboard that customers will see when they log in to the system. It serves as the main interface of the customer portal and can be customized to show relevant information such as widgets and layout components. The dashboard provides a centralized view where customers can access important data and system features.
Settings – Customer – Dashboard – Restore to Default #
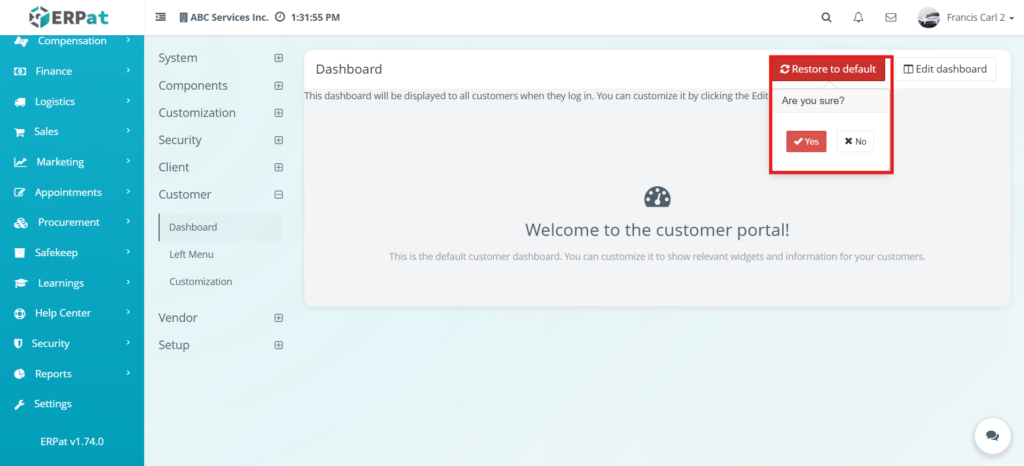
This function allows the administrator to reset the customer dashboard layout back to its original default state. When clicked, a confirmation prompt appears asking the user to confirm the action. This ensures that accidental resets are avoided.
Settings – Customer – Dashboard – Edit Dashboard #
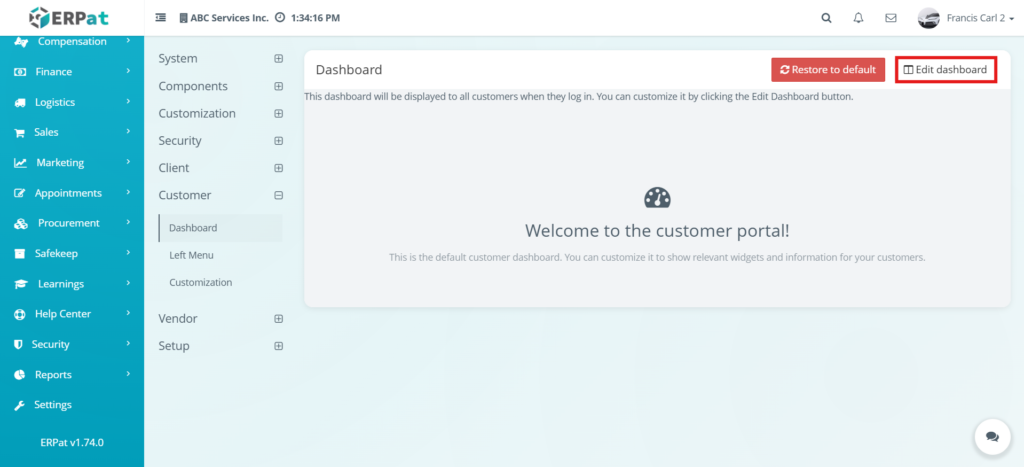
This section allows administrators to customize the layout of the customer dashboard. Users can modify how the dashboard is structured by adding rows and organizing content. This provides flexibility in designing how information is presented to customers.
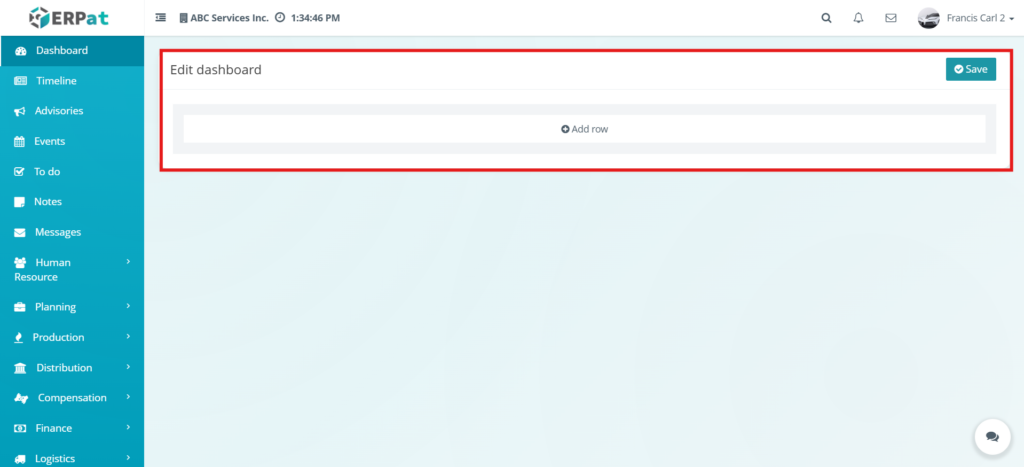
Settings – Customer – Dashboard – Add Row #
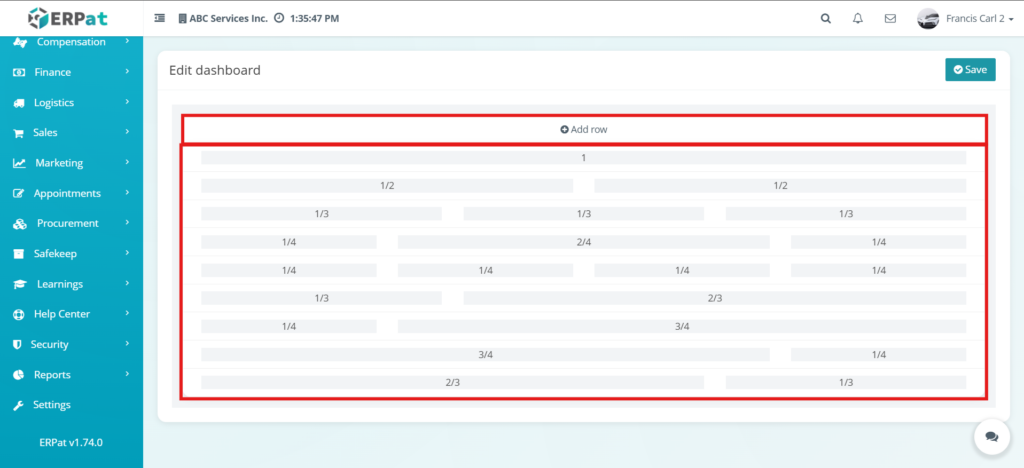
This function allows the user to add a new row to the dashboard layout. Each row can be divided into different column structures, enabling users to organize widgets in various formats. This helps in creating a structured and visually organized dashboard.
Settings – Customer – Dashboard – Clicking a Row #
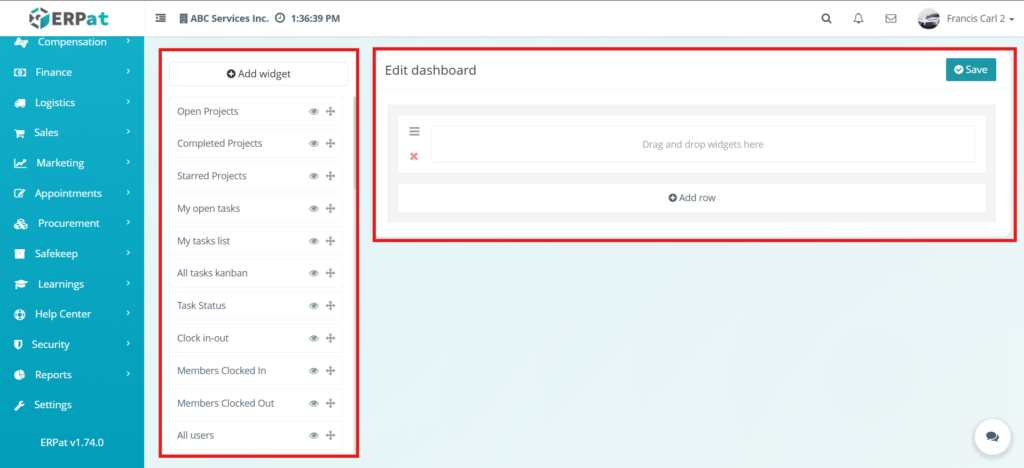
This section shows what happens when a user selects a row in the dashboard editor. Once a row is clicked, options for adding widgets become available. This allows users to insert content into specific sections of the dashboard.
Settings – Customer – Dashboard – Add Widget #
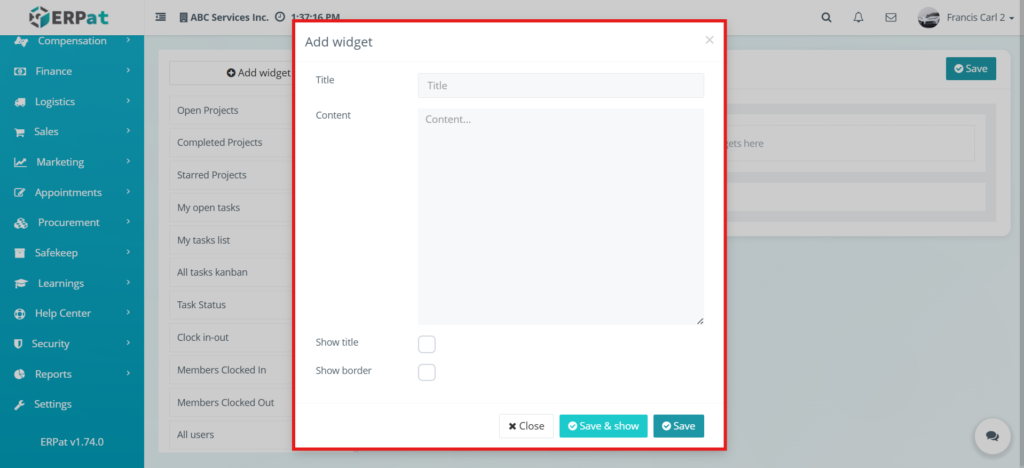
This form is used to add a widget to the selected dashboard row. The user can enter the widget title and content, and choose display options such as showing the title or border. Widgets allow administrators to display useful information on the customer dashboard.
Settings – Customer – Left Menu #
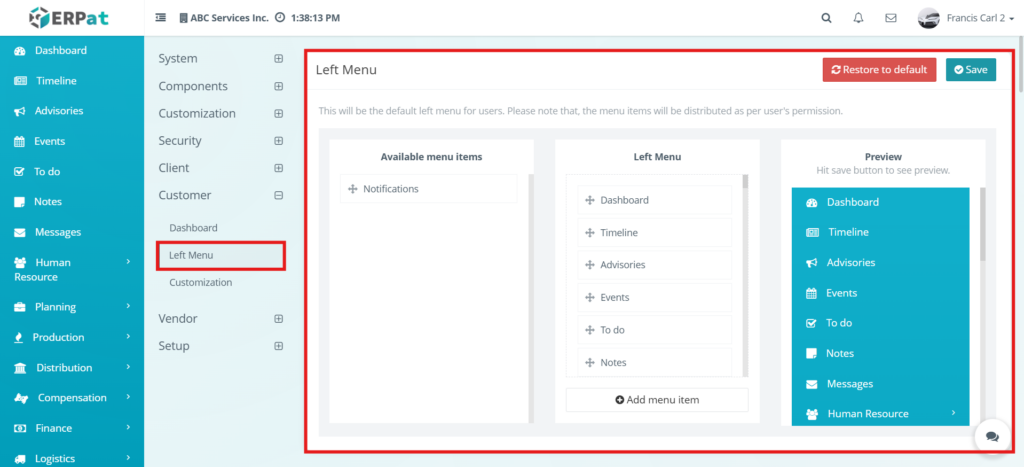
This section is used to configure the left-side navigation menu of the customer portal. It allows users to organize menu items that customers will see. Administrators can arrange, add, or remove menu items to improve navigation and usability.
Settings – Customer – Left Menu – Add Menu Item #

This function allows users to add a new menu item to the customer portal navigation. The added menu item will appear in the left menu and can be customized based on system needs.
Settings – Customer – Customization #
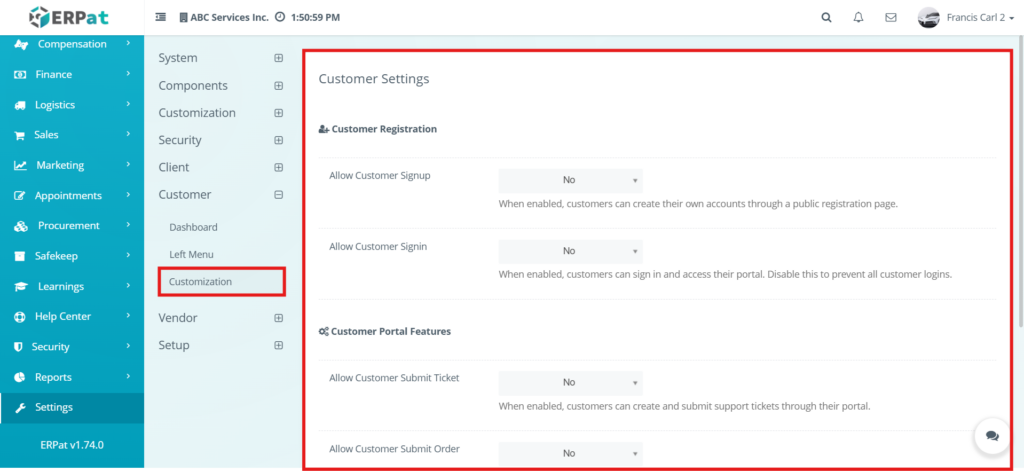
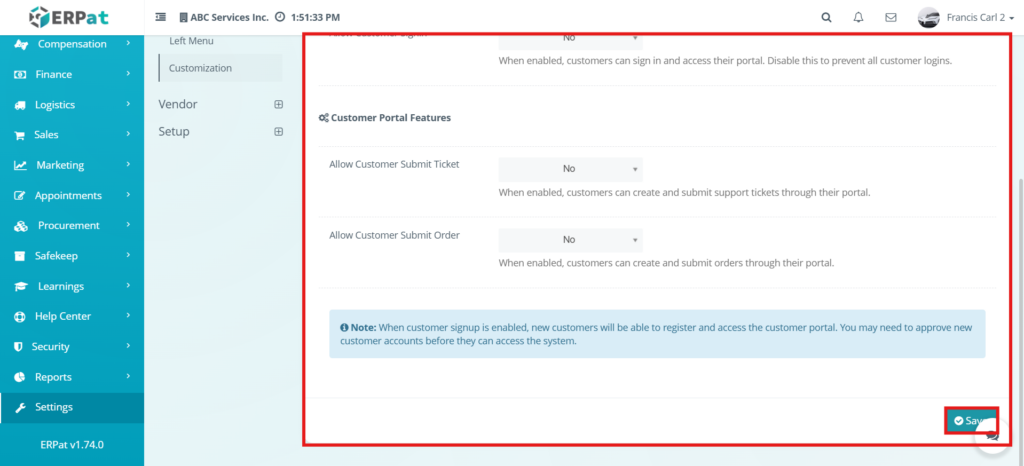
This section allows administrators to configure customer-related system settings. It includes options such as enabling or disabling customer signup, login access, ticket submission, and order submission. These settings control how customers interact with the system and what features are available to them.
Permissions and Access Control #
- This module is restricted to authorized users to ensure data security and proper system configuration
- Only system administrators or authorized users can access and modify customer settings
- Users without proper permissions are not allowed to change dashboard, menu, or customization settings
- Access to this module is controlled through system roles and permissions
Best Practices #
- Plan the dashboard layout before adding rows and widgets
- Use clear and meaningful titles when creating widgets
- Avoid overcrowding the dashboard with too many elements
- Organize menu items logically for better navigation
- Review all customization settings before saving
- Test the customer portal after making changes to ensure proper functionality
Audit & Logs #
- The system records all activities performed within the module, including dashboard edits, menu updates, and customization changes
- Each action is logged with details such as the user, date, and type of change
Last Updated: [March 25, 2025] Module Owner: Settings IS – ERPat System


